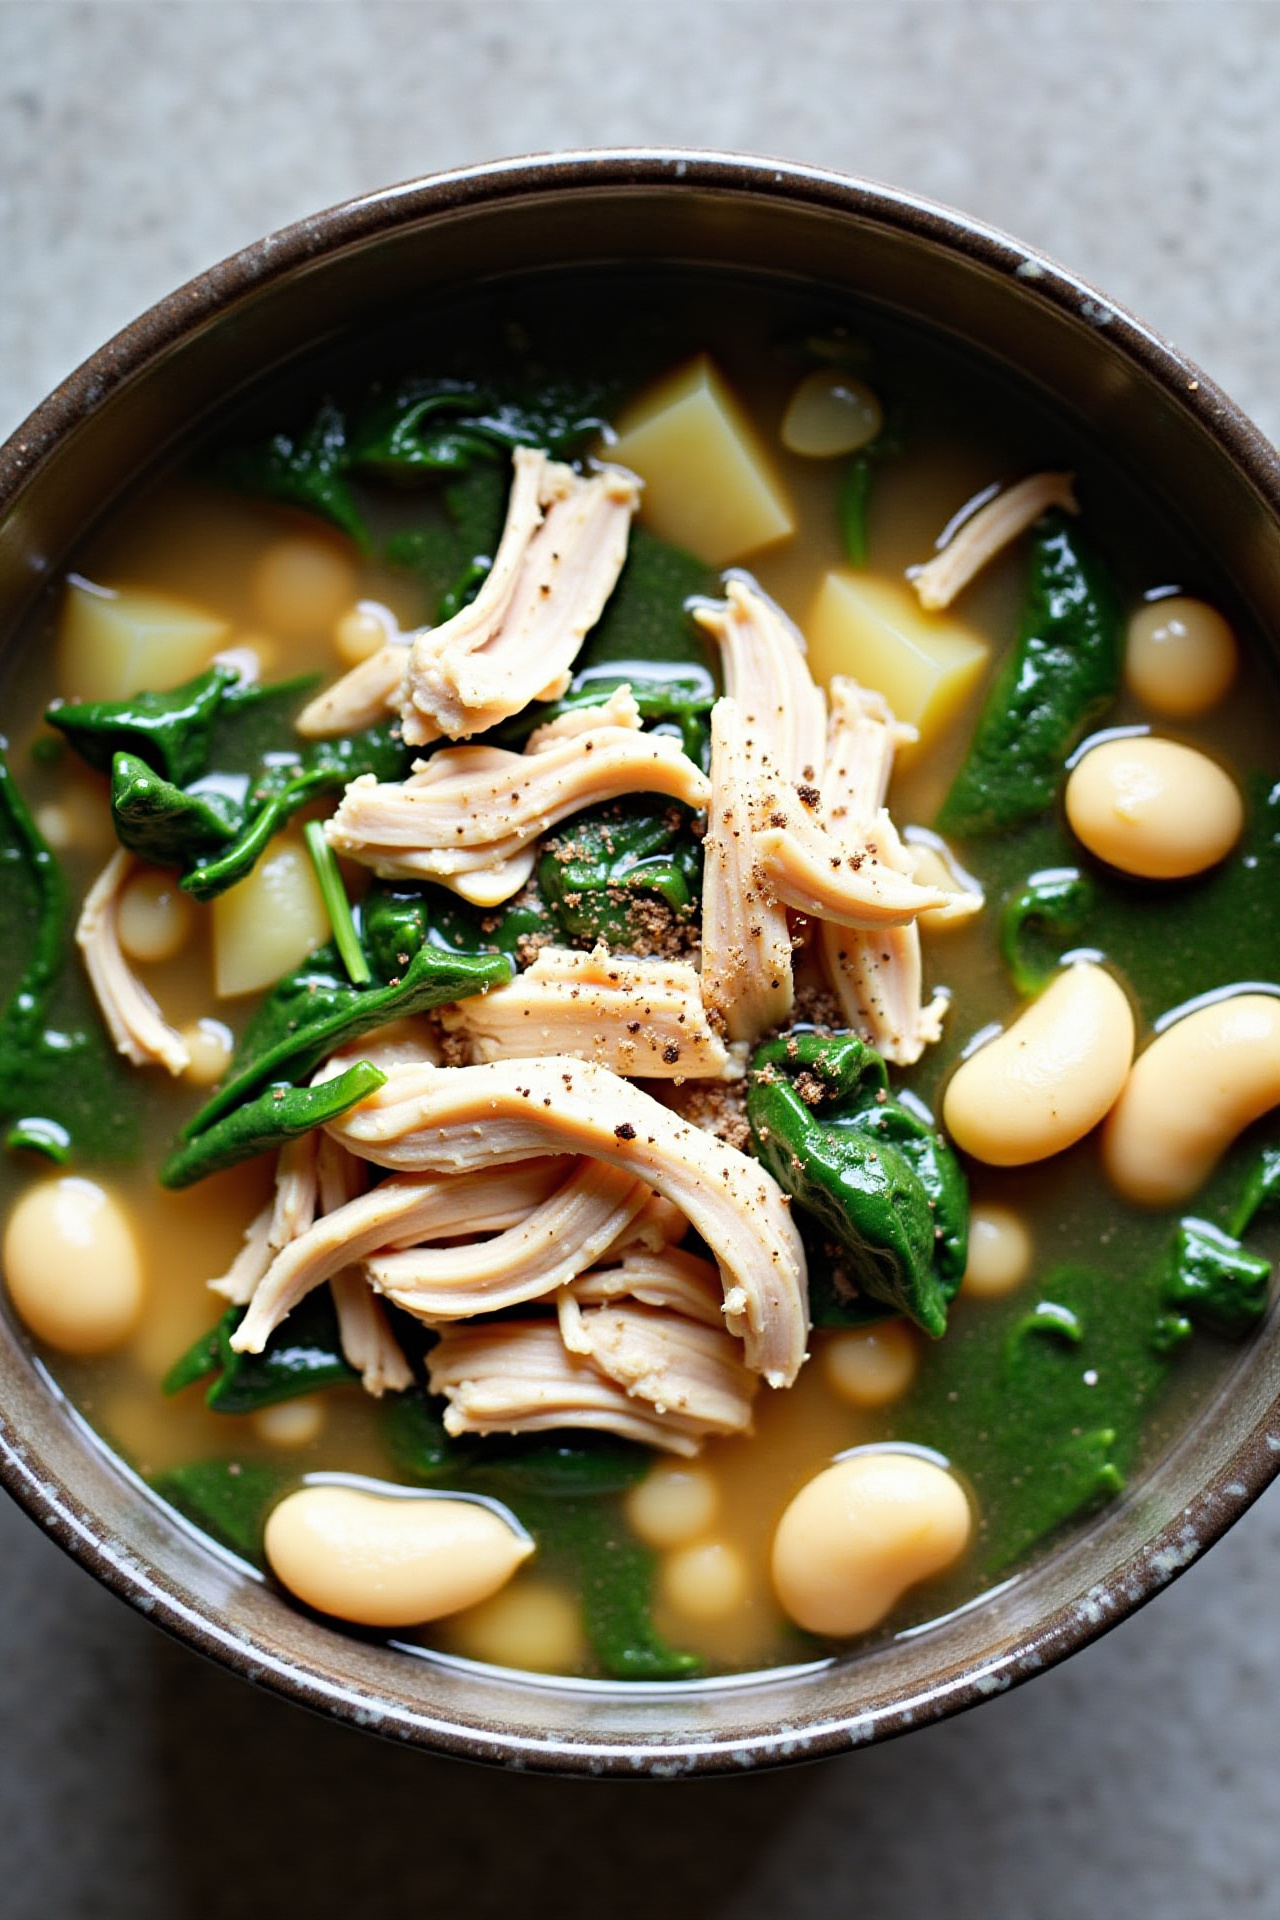
Souptember Soups: Embrace Fall with Hearty, Flavorful Recipes and Smart Meal Planning

Souptember Soups

Introduction

As the cool freshness of fall settles in, there’s no better way to embrace the season than with a hearty bowl of soup. “Souptember Soups” capture the essence of early autumn—warming, nourishing, and brimming with seasonal flavors. These recipes aren’t just about comfort; they’re about making weeknight dinners effortless and lunches memorable, serving up big flavor with minimal fuss.

Why Souptember Soups Should Be on Your Table

The beauty of Souptember Soups lies in their simplicity and adaptability. Whether it’s a rustic Chicken and Vegetable Soup, a creamy Butternut Squash Bisque, or a vibrant Lentil and Tomato Stew, these dishes are economical, packed with nutrients, and easily customizable to suit every palate. With flexible ingredients and forgiving cook times, they’re perfect for busy families or batch cooks looking to prep healthy meals in advance.

Creating the Ultimate Souptember Soup Base

A good soup starts with building flavor from the bottom up—sautéing aromatic vegetables like onions, garlic, and celery, layering with stocks or broths, and finishing with fresh herbs. From there, add your favorite proteins, beans, or seasonal produce. This approach not only draws out deep, comforting flavors but allows you to make the most of what’s already in your fridge or pantry.

Classic Souptember Soup Recipes

Here’s a base recipe for a versatile vegetable soup, along with suggestions to make it your own. Swap the vegetables or proteins based on what you have available or crave most as the month progresses.

[ingredients]
2 tablespoons olive oil
1 large onion, diced
2 carrots, peeled and sliced
2 celery stalks, diced
3 cloves garlic, minced
1 bell pepper, chopped
1 zucchini, diced
1 can (14.5 oz) diced tomatoes
6 cups low-sodium vegetable or chicken broth
1 bay leaf
1 teaspoon dried thyme
Salt and pepper, to taste
1 cup cooked beans or shredded rotisserie chicken (optional)
2 cups chopped leafy greens (spinach, kale, or Swiss chard)
Fresh herbs (parsley, basil, or dill) for garnish
Your favorite bread or crackers, for serving
[/ingredients]

💡Meal Planning Tip: Save this recipe to instantly generate a detailed, organized shopping list. Ingredients are sorted by grocery section, making your trips quicker and more efficient—and ensuring you never forget an item!

CookifyAI meal planning interface

Instructions

  1. Heat the olive oil in a large pot over medium heat. Sauté onions, carrots, and celery until softened, about 5 minutes.
  2. Add garlic and bell pepper, cooking until fragrant, about 2 minutes.
  3. Stir in zucchini, canned tomatoes (with juice), broth, bay leaf, and thyme. Bring to a gentle boil.
  4. Lower heat, cover, and simmer for 20 minutes, or until vegetables are tender.
  5. Add beans or chicken, and leafy greens, if using; simmer for 5 more minutes until greens are wilted and everything is heated through.
  6. Season with salt and pepper. Remove the bay leaf and sprinkle with fresh herbs before serving. Pair with your favorite bread or crunchy crackers.

Serving Suggestions for Souptember Soups

Elevate your soup with a swirl of pesto, a sprinkle of parmesan cheese, or a dollop of sour cream. Serve alongside crusty bread, cheesy toast, or a simple green salad for a complete, satisfying meal. Batch cooking your favorite soup flavors means you’ll always have a quick, wholesome meal on hand—perfect for busy autumn days.

Nutritional Information and Serving Size

This base recipe yields about six hearty servings. Each bowl (without optional protein additions) delivers around 150 calories, packed with fiber, vitamins, and antioxidants from the mix of vegetables. Adding beans or chicken increases protein content, making it even more filling.

Souptember Soups (Recap)

Souptember Soups are cozy, nutritious, and endlessly customizable—ideal for ushering in fall or batch-prepping for quick meals. Embrace the variety and flexibility, transforming simple pantry staples into something truly special.

Weekly Meal Planning

Make Souptember Soups a cornerstone of your weekly meal strategy. Save and schedule this recipe to automatically generate a combined shopping list with other planned meals—perfect for avoiding duplicate purchases and keeping your grocery trips efficient.

Planning Benefits:

  • Calculates total ingredient amounts for all recipes
  • Organizes shopping lists by grocery store section
  • Eliminates forgotten ingredients and duplicate buys
  • Simplifies weekly meal prep, maximizing your time and kitchen resources

Pro tip: When planning multiple Souptember Soups or pairing them with salads and sides, use the scheduling feature to see how pantry staples like onions, carrots, and broth overlap, saving money and reducing food waste all month long.

Cook and Prep Times

Prep Time: 15 minutes
Cook Time: 30 minutes
Total Time: 45 minutes

Warm up your autumn with these Souptember Soups—big comfort, endless variety, and smart meal planning made easy!

Cozy Holiday Bowls: 25 Festive Christmas Soups to Warm Your Celebration

25 Popular Christmas Soups for Cozy Gatherings

Introduction

Warm up your holiday season with festive soups that invite comfort and togetherness. Soups are the ultimate crowd-pleasers, perfect for serving a group or making ahead for easy entertaining. This collection of 25 popular Christmas soups brings a cozy sense of tradition while offering diverse flavors that will impress your guests and become a beloved part of your holiday memories.

Why Christmas Soups are a Crowd-Pleaser

Starting your Christmas gathering with soup sets a welcoming tone. A simmering pot fills the house with inviting aromas, while each bowl brings warmth and flavor to every table. Whether you’re seeking velvety purees, hearty stews, or lighter broths, these soups suit every palate, add variety to your spread, and are easily scaled up for larger gatherings.

How to Make Christmas Soup the Star

Soups offer endless versatility and can be tailored to highlight seasonal ingredients—think roasted root vegetables, fragrant herbs, or festive garnishes like cranberries and fresh parsley. You can make most ahead of time and simply reheat, which means more time enjoying your guests and less time in the kitchen.

Best Ways to Serve Christmas Soups

Whether you serve them in elegant cups as a first course or offer a steaming pot for self-serve buffets, Christmas soups are as flexible as they are delicious. Consider providing a selection of toppings—croutons, sour cream, or crispy bacon—to allow guests to customize their bowls and create a memorable, interactive experience.

25 Popular Christmas Soups for Cozy Gatherings

Below is a curated list of the most loved Christmas soups, complete with classic and inventive ideas:

1. Creamy Potato Leek Soup
2. Butternut Squash and Sage Soup
3. Roasted Chestnut Soup
4. Beef and Barley Stew
5. Wild Mushroom Soup
6. Classic French Onion Soup
7. Chicken and Wild Rice Soup
8. Italian Wedding Soup
9. Lobster Bisque
10. Ham and Split Pea Soup
11. Carrot Ginger Soup
12. Spiced Parsnip and Apple Soup
13. Creamy Tomato Basil Soup
14. White Bean and Kale Soup
15. Turkey and Vegetable Soup
16. Sausage, White Bean & Spinach Soup
17. Winter Vegetable Minestrone
18. Broccoli Cheddar Soup
19. Corn Chowder with Red Peppers
20. Oyster Stew
21. Cream of Celery Root Soup
22. Smoked Salmon Chowder
23. Curried Sweet Potato Soup
24. Lamb and Lentil Stew
25. Pumpkin and Parmesan Soup

[ingredients]
To make the most of these soups, you’ll need a range of fresh vegetables (like carrots, onions, leeks, and potatoes), stocks (chicken, beef, vegetable, or seafood), proteins (turkey, ham, sausage, seafood), grains (barley, rice, pasta), beans, fresh herbs, spices, and dairy (cream, milk, cheese).
Don’t forget toppings like croutons, nuts, sour cream, or grated cheese!
[/ingredients]

💡Meal Planning Tip: Save this soup collection or your favorite recipes to CookifyAI to generate a complete, organized shopping list. All ingredients are sorted by grocery department, making shopping fast, easy, and stress-free—perfect for busy holiday weeks!

CookifyAI meal planning interface

Sample Classic Christmas Soup Recipe: Creamy Potato Leek Soup

  1. In a large pot, sauté 2 chopped leeks and 2 cloves minced garlic in 2 tablespoons butter until soft.
  2. Add 3 large potatoes (peeled, diced), 4 cups chicken or vegetable broth, salt, and pepper.
  3. Simmer until potatoes are tender (about 15-20 minutes).
  4. Blend until smooth (using an immersion blender or regular blender in batches).
  5. Stir in 1/2 cup heavy cream, and adjust seasoning to taste.
  6. Serve topped with chopped chives and croutons.

Weekly Meal Planning

Soups are perfect for weekly meal prep and busy holiday schedules. Save and schedule your favorite soups on CookifyAI—plan which ones to make on which days and automatically generate a smart shopping list that consolidates everything you need.

Planning Benefits:

– Calculates total ingredient quantities for multiple soups
– Organizes your shopping list by store section
– Prevents duplicate purchases and forgotten items
– Streamlines holiday meal prep, so you spend less time shopping and more time celebrating

Pro tip: When planning soups alongside other holiday dishes, schedule everything in CookifyAI and let the smart shopping list do the math—helping you buy exactly what you need and reduce food waste.

Cooking Times at a Glance

Average Prep Time: 15 minutes per soup
Average Cook Time: 30 minutes per soup
Total Time: 45 minutes (times may vary by recipe)

With these 25 popular Christmas soups, your cozy gathering is sure to be delicious, memorable, and stress-free. Happy holidays and happy simmering!

27 Irresistible Christmas Soups: Cozy, Crowd-Pleasing Recipes for the Holiday Season

27 BEST Christmas Soups: Warm Cozy Meals You’ll All Love! 🎄🍲

Introduction

When the chill of the holidays sets in and festive lights twinkle outside, there’s nothing more comforting than a big bowl of homemade soup. Christmas soups bring family and friends together, offering warmth, heartiness, and rich seasonal flavors. Whether you’re looking for crowd-pleasing starters or hearty mains, these 27 best Christmas soups are perfect for setting a cozy, welcoming tone at your holiday table.

The Joy of Christmas Soups

Soups are a holiday hero—they simmer low and slow, filling the house with comforting aromas and making meal planning easy. From creamy classics to robust broths brimming with winter vegetables and savory proteins, holiday soups can be customized for any guest list or taste preference. They also make fantastic prep-ahead options, letting you focus on enjoying the festivities.

Why You’ll Love These 27 Cozy Christmas Soups

Flavorful, fuss-free, and easily scalable, Christmas soups are ideal for feeding a crowd or prepping ahead for relaxed family dinners. Many can be made vegetarian or gluten-free, and their warm, inviting aroma sets the perfect holiday mood. Each recipe here is chosen for its wintry ingredients, classic comfort, and ability to impress both guests and picky eaters alike.

Deliciously Cozy Christmas Soup Recipe Ideas

Here’s a taste of what you’ll find in this collection of the best Christmas soups:

  • Classic Creamy Potato Leek Soup
  • Luxurious Lobster Bisque
  • Festive Roasted Butternut Squash Soup
  • Italian Wedding Soup with Tiny Meatballs
  • Chunky Beef and Barley Stew
  • Spiced Pumpkin Soup with Ginger & Nutmeg
  • White Chicken Chili with a hint of Lime
  • Hearty Lentil and Vegetable Medley
  • Smoky Ham and Bean Soup
  • Carrot Ginger Soup with Orange Zest
  • Creamy Wild Mushroom Soup
  • French Onion Soup with Gruyère Toast
  • Homestyle Chicken Noodle Soup
  • Tuscan Sausage and Kale Soup
  • Peppery Parsnip & Apple Soup
  • Moroccan Chickpea Stew
  • Vegan Coconut Curry Soup
  • Instant Pot Cheesy Broccoli Soup
  • Creamed Corn Chowder with Bacon
  • Turkey Orzo Soup (Perfect for Leftovers!)
  • Nordic Salmon & Dill Soup
  • Pot Roast Soup
  • Gingered Sweet Potato Soup
  • Hungarian Goulash Soup
  • Spicy Red Lentil Christmas Soup
  • Creamy Tomato Basil Soup
  • Curried Parsnip & Pear Soup

[ingredients]
* This is a collection post with 27 unique soups, so you’ll need basic staples for soup-making. Here’s a generic pantry shopping list to cover a wide variety of the recipes above:

  • Onions (yellow, red, leeks, or scallions)
  • Garlic
  • Carrots, celery, and potatoes
  • Assorted fresh herbs: rosemary, thyme, sage, dill, parsley, basil
  • Winter squash (butternut, pumpkin, acorn)
  • Lentils, beans (white, kidney, chickpea, black, cannellini)
  • Meats: chicken, turkey, beef stew meat, ham, sausage, bacon, lobster or salmon (for specialty soups)
  • Stock or broth: chicken, beef, vegetable, seafood
  • Canned diced tomatoes
  • Pasta, barley, rice, or orzo
  • Cream, milk, or non-dairy alternatives
  • Cheeses: Parmesan, cheddar, Gruyère
  • Spices: nutmeg, ginger, curry powder, smoked paprika, black pepper, cayenne
  • Olive oil, butter
  • Other veggies: kale, spinach, mushrooms, corn, peppers, parsnips

[/ingredients]

💡Meal Planning Tip: Save these holiday soup recipes to automatically generate a shopping list organized by grocery store section—a huge time saver for busy holiday prep! Mix and match soups to suit your family’s tastes or to stretch leftovers into satisfying meals.

CookifyAI meal planning interface

Instructions (How to Plan and Prepare Your Christmas Soup Menu)

  1. Review your favorite soups from the list and consider your guest preferences and dietary needs.
  2. Pick 2-3 different soups to make a festive soup bar, or select one show-stopping soup to serve as a starter for your Christmas meal.
  3. Use fresh, seasonal, and quality ingredients for the best flavor. Prepare garnishes ahead (such as herb toasts, cheese crisps, or swirl of cream).
  4. Batch-cook the soups a day ahead—most soups taste even better after a night in the fridge! Simply reheat before serving.
  5. Offer toppings like croutons, chopped herbs, shredded cheese, crispy bacon, or artisan bread on the side for a special holiday touch.
  6. For easy serving at a party, keep soups warm in slow cookers or insulated pots.

Weekly Meal Planning

Ready to take the stress out of holiday meal prep? Schedule your favorite soups for the week, add sides like salads or breads, and generate one comprehensive grocery list.

Planning Benefits:

  • Consolidate all ingredients across your chosen recipes
  • Get quantities calculated for exactly the number of servings you’ll need
  • Avoid overflowing pantries with duplicate or forgotten items
  • Enjoy seamless meal prep, even during the busy holidays!

Pro tip: By planning ahead with CookifyAI, you can let the app handle the organization for you! From multiple soups to side dishes and desserts, your shopping and prepping will be streamlined—giving you more time for festive fun.

Cook and Prep Times

Prep Time: 15-30 minutes per soup (average)
Cook Time: 30-90 minutes per soup (depending on type)
Total Time: Plan 45 to 120 minutes per recipe; batch preparation and make-ahead options available

Cozy up this Christmas season with these 27 best Christmas soups. With options for every taste and plenty of make-ahead comfort, your holiday meals will be warm and worry-free!

21 Winter Soups: Cozy Comfort Recipes for Chilly Nights

21 Winter Soups

Introduction

There’s nothing quite as comforting during the cold months as a bowl of hearty soup. These 21 Winter Soups are carefully chosen to bring warmth, robust flavor, and nutrition to your table. Whether you crave something creamy, brothy, spicy, or packed with veggies, each soup on this list is simple to prepare and ideal for cozy family dinners or meal prep for the week ahead. Make your winter evenings unforgettable—one spoonful at a time.

Why These 21 Winter Soups Stand Out

This collection is packed with crowd-pleasing favorites and global classics, ranging from thick chowders to zesty broths and vegetarian options. You’ll find new ways to love ingredients like root vegetables, lentils, beans, and seasonal greens. What sets these recipes apart is their simplicity: most require minimal prep and use pantry staples, making weeknight cooking both easy and delicious.

Soup Starters: Layering Flavors for Depth

Begin by building flavors with sautéed aromatics—think onions, garlic, leeks, or celery. Use homemade or store-bought broths for a rich base. Add herbs and spices at the start to let them infuse every ladleful. For extra depth, finish with a splash of cream, sherry, or a sprinkle of fresh herbs just before serving.

Smart Soup Assembly Tips

For soups with pasta or rice, cook grains separately and add just before serving to avoid sogginess in leftovers. When using delicate greens or quick-cooking vegetables, stir them in at the end to retain color and texture. Bean-based soups benefit from a quick mash of some cooked beans for a naturally creamy texture—no blender required.

Serving Suggestions for Winter Comfort

Garnish with a drizzle of olive oil, shaved Parmesan, or toasted seeds to add extra flavor and flair. Serve your winter soup with artisan bread, warm baguette, or a fresh salad for a satisfying meal. Pair zesty soups with mild sides, and let richer soups shine alongside simple greens.

Nutritional Information and Serving Size

Most of these soups offer balanced nutrition, featuring plant-based protein, complex carbohydrates, and plenty of seasonal vegetables. Each soup serves 4–6, which makes them ideal for families or for batch-cooking to enjoy throughout the week.

21 Winter Soups List

1. Classic Chicken Noodle Soup
2. Creamy Tomato Basil Soup
3. Hearty Beef and Vegetable Stew
4. Tuscan White Bean and Kale Soup
5. Thai Coconut Curry Soup
6. Loaded Baked Potato Soup
7. Smoky Lentil and Spinach Soup
8. French Onion Soup
9. Split Pea and Ham Soup
10. Roasted Butternut Squash Soup
11. Minestrone with Farro
12. Creamy Mushroom and Wild Rice Soup
13. Moroccan Chickpea Soup
14. Spicy Black Bean Soup
15. Broccoli Cheddar Soup
16. Italian Wedding Soup
17. Sweet Potato and Carrot Ginger Soup
18. Cabbage Roll Soup
19. Shrimp and Corn Chowder
20. Indian Mulligatawny Soup
21. White Chicken Chili

[ingredients]
You’ll need:
– 2 pounds protein (chicken, beef, lentils, beans, shrimp—as needed per chosen soups)
– 2–3 onions
– 4–6 carrots
– 4–6 celery stalks
– 1–2 cups potatoes or sweet potatoes
– 2 cloves garlic (per soup)
– Leafy greens (kale, spinach, cabbage)
– 1–2 cans diced tomatoes
– 4–6 cups broth (chicken, veggie, or beef)
– Assorted herbs (thyme, parsley, basil, rosemary)
– Cream, cheese, or non-dairy alternatives (as desired)
– Whole grains or pasta (farro, rice, orzo)
– Olive oil, salt, and pepper

💡Meal Planning Tip: Save this entire soup collection to automatically generate a sorted shopping list. CookifyAI organizes your ingredients by supermarket department, making meal planning and grocery shopping easier than ever.

CookifyAI meal planning interface

Instructions

  1. Select your soup recipe from the list, gather the required ingredients, and prep your aromatics and vegetables.
  2. Sauté onions, garlic, and celery in olive oil until soft and fragrant.
  3. Add your base vegetables (carrots, potatoes, etc.) and protein.
  4. Pour in broth and bring to a simmer. Add beans, grains, or pasta as called for in the recipe.
  5. Season generously with salt, pepper, and herbs. Simmer until vegetables are fork-tender and proteins are cooked through.
  6. Stir in fresh greens or cream at the end of cooking, and adjust seasoning if needed.
  7. Serve hot with garnishes and fresh bread or salad, as desired.

Weekly Meal Planning

These 21 Winter Soups make planning cozy weeknight meals a breeze. Add multiple soups to your meal schedule and let CookifyAI build a smart shopping list, consolidating overlapping ingredients to streamline grocery trips.

Planning Benefits:

  • Smart ingredient calculation ensures no shortages or excess
  • All ingredients are organized by grocery section
  • Saves time, reduces food waste, and keeps meal planning stress-free

Pro tip: Trying two or three soups this week? Schedule your picks together and see how CookifyAI saves you time and money by optimizing your ingredient lists.

Cook and Prep Times

Prep Time per soup: 15–30 minutes
Cook Time per soup: 25–45 minutes
Total Time: 40–75 minutes per batch

Warm up your kitchen—and your week—with these 21 winter soups. Happy cooking!

Irresistible Low-Carb Chicken Casserole: Creamy, Cheesy Comfort in Every Bite

ADDICTIVE Low-Carb Chicken Casserole!

Introduction

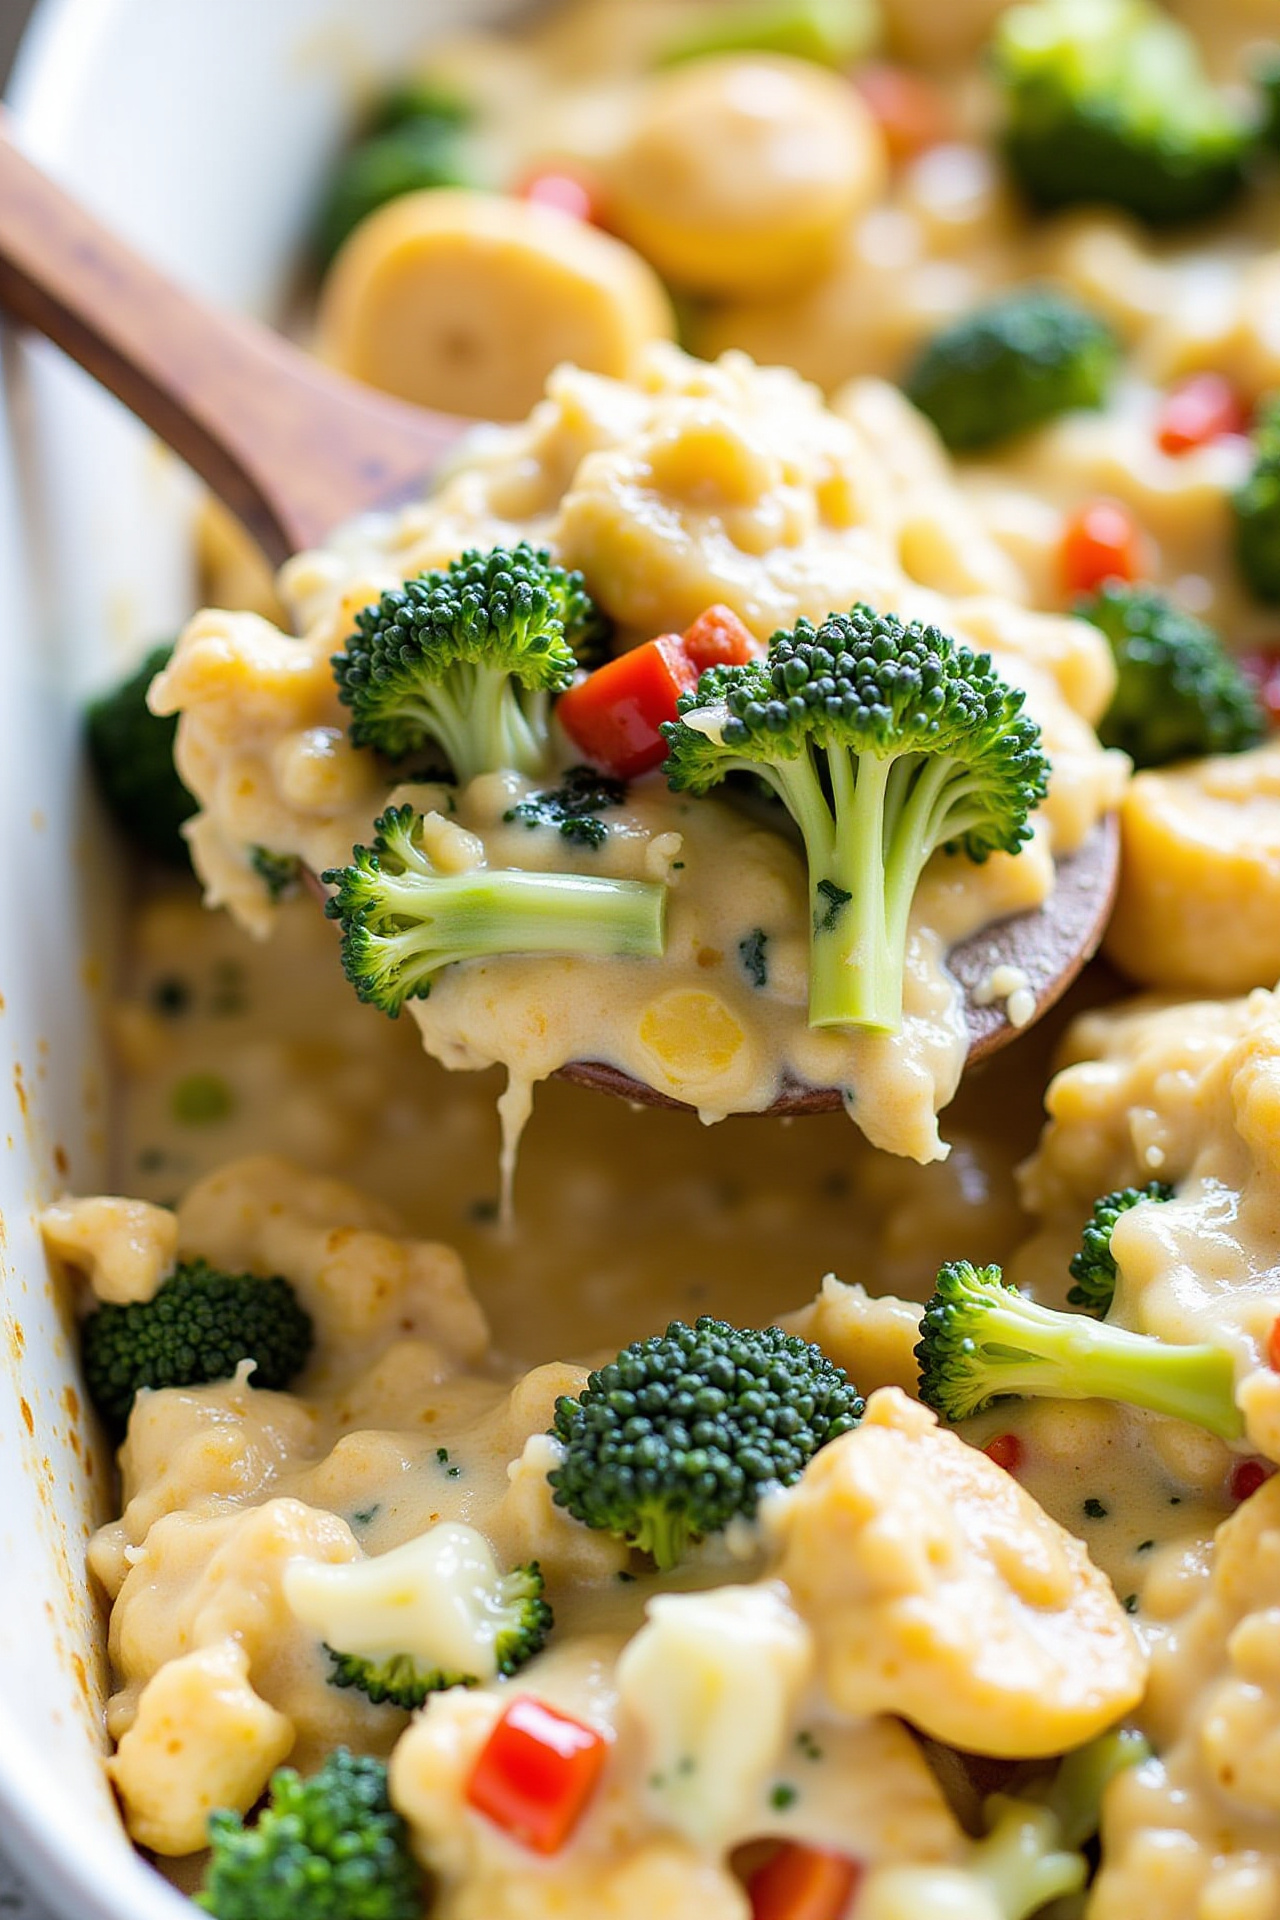
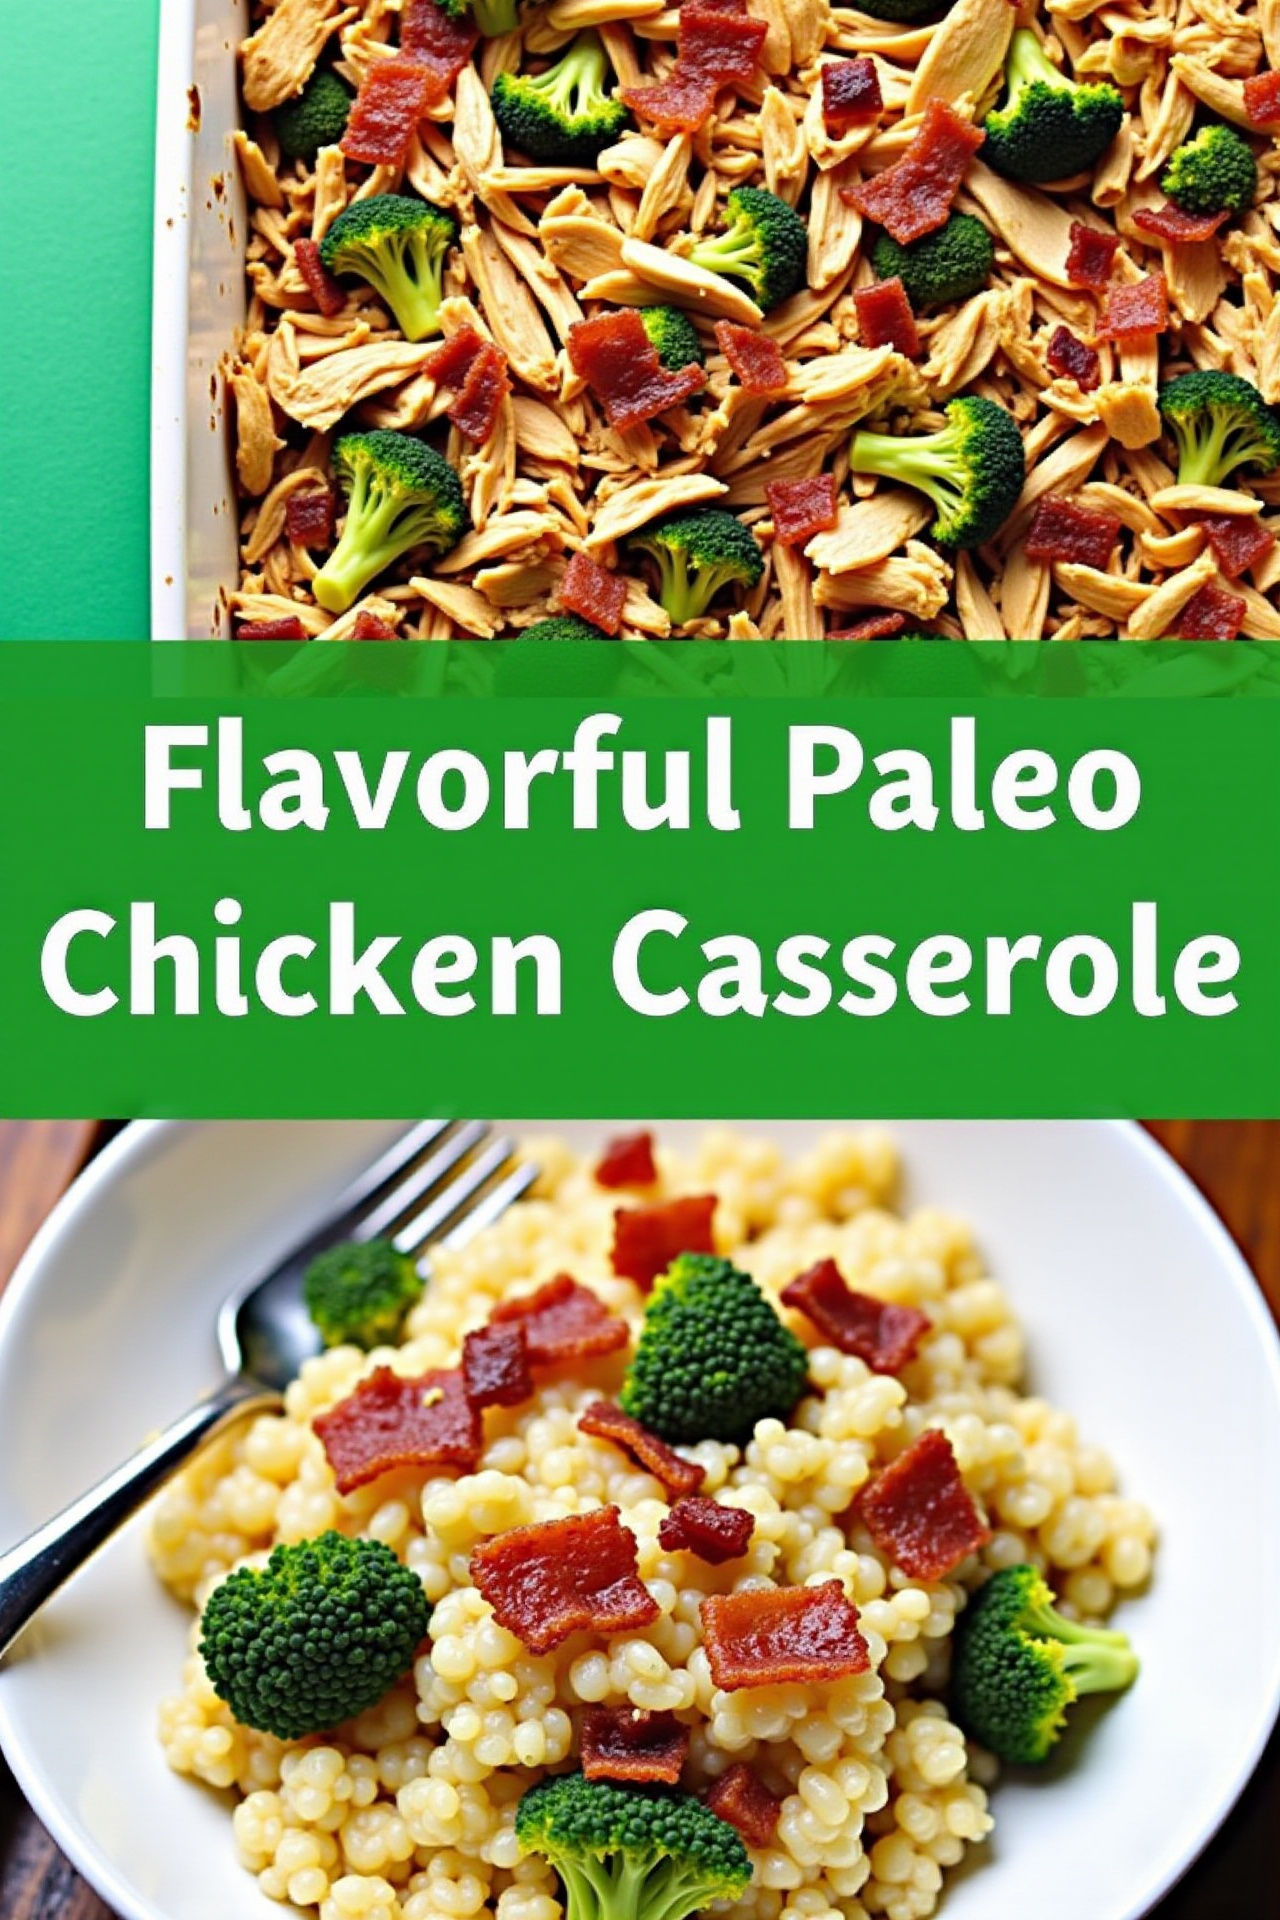
If you’re looking for a dinner option that’s bursting with flavor, filling, and incredibly easy to prepare, this Addictive Low-Carb Chicken Casserole is your answer! With juicy pieces of chicken, gooey melted cheese, and savory vegetables, all baked to golden bubbly perfection, this casserole is a foolproof crowd-pleaser. It’s perfect for weeknight family dinners or prepping ahead for effortless lunches—without derailing your low-carb goals.

Why This Low-Carb Chicken Casserole Will Be Your New Favorite

Packed with lean protein and loaded with delicious, low-carb ingredients, this casserole satisfies cravings without unnecessary carbs or calories. The creamy, cheesy texture pairs with the subtle snap of fresh broccoli, creating a satisfying contrast in every forkful. It’s easy to assemble using everyday ingredients, and clean-up is minimal thanks to its one-dish preparation.

Customize for Your Palate

This recipe is wonderfully versatile! Swap broccoli for spinach, or use pepper jack cheese for an extra kick. Like it smoky? Add a sprinkle of smoked paprika. Want more veggies? Toss in chopped bell peppers or zucchini. It’s the kind of meal you’ll want to make again and again—and you’ll never get bored of it!

Your Effortless Low-Carb Casserole Assembly

The secret to the addictive nature of this casserole lies in its creamy sauce, which coats every bite. Toss together cooked chicken, veggies, and a homemade (or shortcut!) cheesy cream sauce. Top with cheese and bake until irresistibly bubbly and golden brown. Minimal prep, maximum flavor!

Serving Suggestions for Maximum Satisfaction

Serve this casserole with a simple green salad or roasted cauliflower rice for a perfectly balanced, full meal. Leftovers reheat beautifully, so it’s also an excellent candidate for lunchboxes or make-ahead dinners.

Nutritional Information and Serving Size

This recipe yields 6 generous servings. Each serving contains roughly 360–400 calories, with high protein, low net carbs (about 6–8g per serving), and less than 10g total carbs—ideal for those following a ketogenic or low-carb lifestyle.

ADDICTIVE Low-Carb Chicken Casserole (Recap)

Cheesy, comforting, and endlessly customizable, this casserole strikes the perfect balance for healthy dinners that don’t skimp on taste—a staple for low-carb meal plans and family tables alike.

[ingredients]
3 cups cooked, diced chicken breast (rotisserie chicken works great)
2 cups broccoli florets, steamed
1 cup shredded cheddar cheese
1/2 cup mozzarella cheese, shredded
4 ounces cream cheese, softened
1/2 cup sour cream
1/4 cup mayonnaise
1 teaspoon garlic powder
1/2 teaspoon onion powder
1/2 teaspoon salt
1/4 teaspoon black pepper
Optional: Paprika, chopped green onions, or crumbled bacon for topping
[/ingredients]

💡Meal Planning Tip: Save this recipe to automatically generate an organized shopping list with all ingredients sorted by store section—making meal planning and grocery trips a breeze!

CookifyAI meal planning interface

Instructions

  1. Preheat your oven to 375°F (190°C). Lightly grease an 8×8-inch baking dish.
  2. In a large bowl, mix the cream cheese, sour cream, mayonnaise, garlic powder, onion powder, salt, and black pepper until smooth and creamy.
  3. Add the diced chicken, steamed broccoli, and half of both cheeses to the mixture. Stir until everything is well combined.
  4. Spread the mixture evenly into the prepared baking dish.
  5. Top with remaining cheddar and mozzarella cheeses. Sprinkle with paprika, green onions, or bacon if using.
  6. Bake for 22–25 minutes, or until the casserole is bubbly and cheese is golden.
  7. Let cool for a few minutes before serving—then dig into pure low-carb comfort!

Weekly Meal Planning

This Addictive Low-Carb Chicken Casserole is perfect for weekly meal prep! Save and schedule this recipe within your meal plan to create automatically organized shopping lists that consolidate all your weekly ingredients.

Planning Benefits:

– Calculates exact ingredient totals for all your planned recipes
– Sorts your shopping list by grocery store aisle
– Helps you avoid buying duplicate items, saving money and time
– Simplifies meal planning and reduces food waste

Pro tip: Scheduling this dish alongside other recipes lets you see—at a glance—how much chicken, cheese, or veggies you need for the whole week, streamlining every grocery trip!

Cook and Prep Times

Prep Time: 15 minutes
Cook Time: 25 minutes
Total Time: 40 minutes

Enjoy your new favorite low-carb comfort food—satisfying, simple, and always addictive!

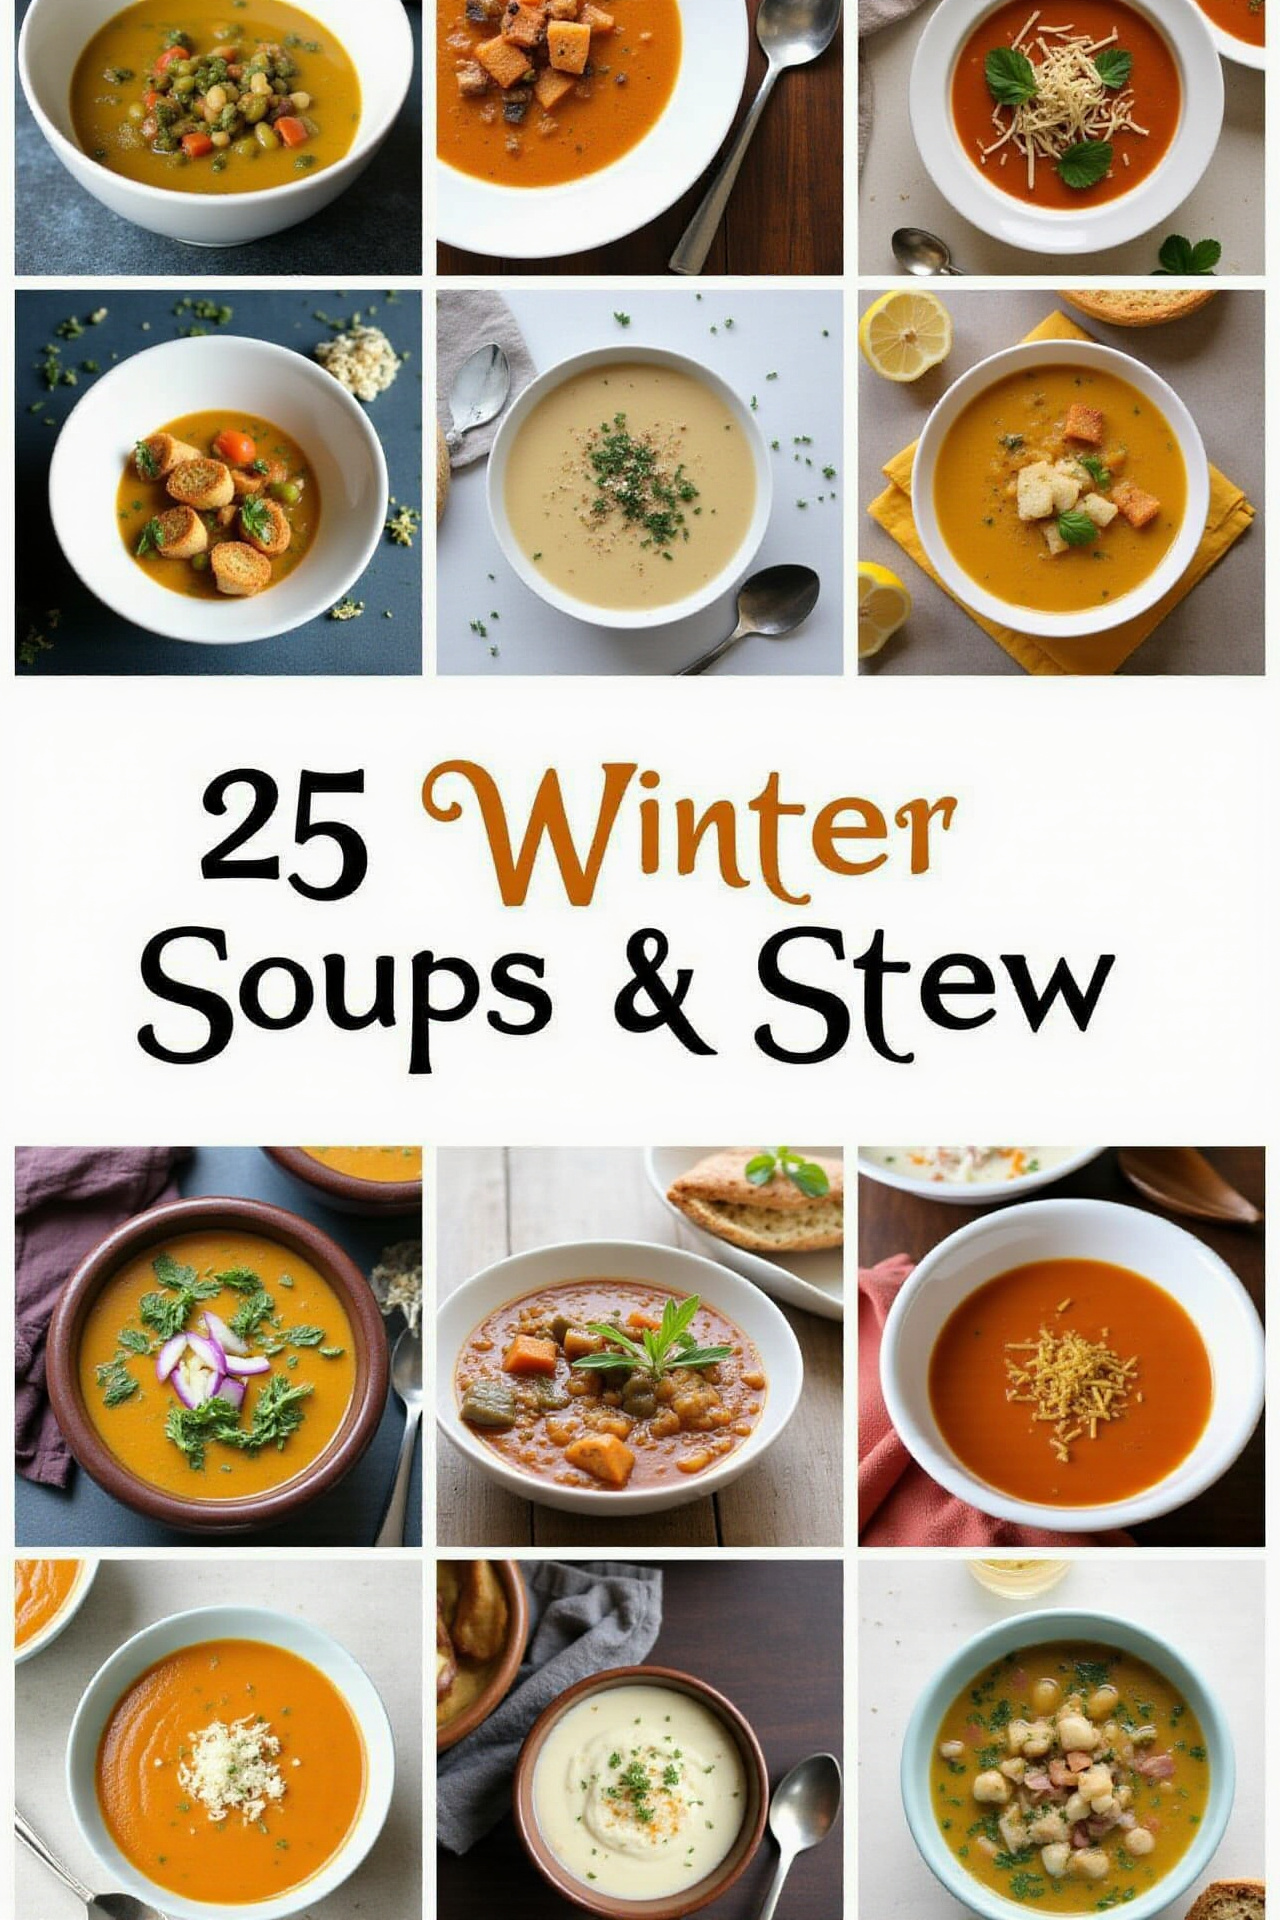
25 Healthy & Delicious Winter Soup Recipes: Your Ultimate Guide to Cozy, Nutritious Meals

25 Winter Soup Recipes: Healthy & Delicious

Introduction

Winter calls for meals that are comforting, nutritious, and easy to prepare—enter this curated list of 25 Winter Soup Recipes, each offering a unique blend of flavors, wholesome ingredients, and hearty appeal. Whether you’re feeding a family, embracing solo cozy nights, or hosting friends, there’s a soup here for every occasion and taste preference. Simplicity and healthfulness go hand in hand, delivering warmth and nourishment all season long.

Why Try These 25 Healthy & Delicious Winter Soups?

Soups are a wintertime superstar for good reason: they’re easy to batch-cook, versatile with simple pantry staples or market-fresh finds, and prime candidates for meal prep. These 25 recipes give you variety while helping you eat more vegetables and nutrient-rich ingredients. From robust stews to light broths and creamy purees, you’ll consume more fiber, vitamins, and minerals—all in a bowl packed with flavor.

Ultimate Soup Flavor, Minimum Effort

Each soup recipe on this list pairs nutritious components with bold flavor—all designed for real life. You’ll find globally inspired profiles (like Thai coconut curry or Italian minestrone), creamy classics reimagined with lighter twists, and filling stews ideal for lunch or dinner. Many recipes use inexpensive, readily available ingredients and are easy to adapt to vegetarian, vegan, or gluten-free needs.

Preparation Tips and Make-Ahead Tricks

– **Chop veggies over the weekend for quicker weeknight assembly.**
– **Double recipes and freeze in portioned containers for future meals.**
– **Use homemade or low-sodium broth for extra health benefits.**
– **Stir in fresh herbs, citrus, or a finishing drizzle of good olive oil before serving for a flavor boost.**

The 25 Winter Soup Recipes

1. Hearty Lentil and Vegetable Soup
2. Immune-Boosting Chicken and Rice Soup
3. Creamy Cauliflower & Garlic Soup
4. Classic Minestrone with Beans
5. Thai Coconut Curry Sweet Potato Soup
6. Butternut Squash and Apple Soup
7. Smoky Black Bean Soup
8. Roasted Tomato Basil Soup
9. White Bean & Kale Tuscan Soup
10. Curried Carrot and Ginger Soup
11. Creamy Broccoli Cheddar Soup (Lighter Version)
12. Spicy Moroccan Chickpea Stew
13. Italian Wedding Soup
14. Gingered Pumpkin Soup
15. French Onion Soup (with a Healthy Twist)
16. Lemon Orzo Spinach Soup
17. Mexican Tortilla Soup
18. Root Vegetable Barley Soup
19. Stuffed Pepper Soup
20. Coconut Lemongrass Chicken Soup
21. Split Pea & Ham Soup
22. Mediterranean Red Lentil Soup
23. Potato Leek Soup
24. Creamy Mushroom Wild Rice Soup
25. Turmeric Vegetable Detox Soup

[ingredients]
(Ingredient lists will vary by recipe, but here are common core ingredients:)
– Olive oil
– Onions
– Carrots
– Celery
– Garlic
– Fresh or canned tomatoes
– Low-sodium chicken or vegetable broth
– Dried herbs (oregano, thyme, bay leaf)
– Lentils, beans, or grains (barley, rice, orzo)
– Green leafy vegetables (kale, spinach, chard)
– Assorted vegetables (potatoes, squash, peppers, mushrooms)

💡 Meal Planning Tip: Save these soup recipes to automatically generate an organized shopping list split by grocery store sections—making winter meal planning and grocery runs simple and stress-free.

CookifyAI meal planning interface

Instructions

Each soup recipe will follow a similar basic process:

  1. Heat olive oil in a large pot over medium heat. Sauté onions, carrots, and celery until softened.
  2. Add garlic and other aromatics, cooking until fragrant.
  3. Pour in broth, tomatoes, and hearty vegetables. Bring to a simmer.
  4. Stir in beans, lentils, grains, or pasta if using. Simmer until all ingredients are tender.
  5. Add leafy greens and any quick-cook items at the end. Season with salt, pepper, and herbs to taste.
  6. Puree with an immersion blender for creamy soups, or leave chunky for stews. Serve hot.

Weekly Meal Planning

Soup is a meal-planner’s dream: many of these recipes freeze beautifully or get even tastier as leftovers. Schedule your week’s soups to create meal plans and consolidate shopping lists across all meals—cutting down on food waste, saving money, and ensuring you never forget a critical ingredient.

**Planning Benefits:**
– Calculates total quantities for ingredients shared across recipes
– Groups grocery list items by section for faster shopping trips
– Prevents duplicate purchases and overlooked staples
– Makes prepping multiple meals straightforward and organized

**Pro Tip:** When planning several soup nights, use CookifyAI to see overlapping ingredients (such as carrots, onions, or beans). The tool totals everything you’ll need, ensuring you buy just enough for all your healthy, delicious winter meals.

Cook and Prep Times (per recipe)

Prep Time: 10–20 minutes
Cook Time: 30–45 minutes
Total Time: 40–60 minutes

Enjoy a cozy, nourishing winter with these 25 healthy & delicious soup recipes—perfect for meal prepping, weeknight dinners, or anytime you need a warming pick-me-up!

Cheesy Comfort Meets Veggie Goodness: The Ultimate Cottage Cheese Bake for Every Family Table

Cottage Cheese and Veggie Bake – A Healthy, Cheesy Family Favorite! 🥦🧀

Introduction

The Cottage Cheese and Veggie Bake is your answer to a wholesome, flavorful meal that brings family members of all ages to the table. Bursting with colorful vegetables and layered with the creamy richness of cottage cheese, this dish strikes the perfect balance between feel-good nutrition and cheesy comfort. Best of all, it’s easy to prepare, making it an ideal staple for busy weeknights or weekend meal prepping.

Why You’ll Love This Healthy, Cheesy Bake

What makes this bake a standout is its versatility and crowd-pleasing profile. The combination of tender veggies and mild, protein-packed cottage cheese creates a satisfying casserole that’s light on calories but big on flavor. It’s a great way to sneak extra vegetables into your family’s diet without sacrificing the gooey, cheesy comfort that everyone craves. Plus, it reheats beautifully for next-day leftovers!

Building a Flavorful Veggie Layer

Start by picking a mix of your favorite fresh or frozen vegetables—think broccoli, bell peppers, carrots, spinach, or zucchini. Lightly sautéing the veggies before layering ensures they stay vibrant and flavorful. Mixing in a bit of garlic or Italian seasoning boosts the savory base and complements the mildness of cottage cheese.

The Cheesy Cottage Cheese Filling

Cottage cheese works as the creamy star, providing extra protein and a luscious texture without the heaviness of traditional cream sauces. Blend it with eggs for structure and flavor, and add a handful of shredded cheese like mozzarella or cheddar for gooey, golden-topped goodness. The result is a light, airy bake that holds together perfectly while staying moist.

Assembly and Baking Tips

Layer half of your sautéed veggies in a baking dish, pour the whipped cottage cheese mixture over, then top with the remaining vegetables and a final sprinkle of shredded cheese. Bake until golden and bubbling for the ultimate cheesy veggie comfort experience. Want extra color or crunch? Add sliced tomatoes or breadcrumbs before baking.

Serving Suggestions for a Family-Favorite Bake

Pair your Cottage Cheese and Veggie Bake with a crisp green salad or a slice of whole grain bread for a complete meal. It works just as well as a main course as it does a side alongside grilled chicken or fish. This dish is easily adaptable for brunches, potlucks, or prepping in advance for busy nights.

Nutritional Information and Serving Size

This recipe yields 6 hearty servings. Each serving comes in at around 200-250 calories, depending on your choice of cheese and vegetables. Packed with protein, fiber, and essential vitamins, this bake will keep your family nourished and satisfied.

Cottage Cheese and Veggie Bake – Recap

With cottage cheese for protein and a medley of vibrant vegetables, this bake is the ultimate marriage of health and comfort food. Its versatility, ease of preparation, and irresistible cheesy flavor make it a weeknight winner and a great addition to any meal rotation.

[ingredients]
2 cups cottage cheese
3 large eggs
1 cup shredded mozzarella or cheddar cheese (plus more for topping)
2 cups fresh or frozen mixed vegetables (e.g., broccoli florets, diced bell pepper, carrots, spinach, zucchini)
1 small onion, diced
2 cloves garlic, minced
1 tablespoon olive oil
1 teaspoon dried Italian herbs (basil, oregano, or thyme)
1/2 teaspoon salt
1/4 teaspoon black pepper
Optional: 1/4 cup grated Parmesan, sliced tomato, or breadcrumbs for topping
[/ingredients]

💡Meal Planning Tip: Save this recipe to instantly generate a smart shopping list with all the ingredients organized by store section. Perfect for streamlining grocery trips and ensuring you never forget a single item!

CookifyAI meal planning interface

Instructions

  1. Preheat your oven to 375°F (190°C). Lightly grease a 9×9-inch baking dish.
  2. In a large skillet, heat olive oil over medium heat. Add onion and garlic, sauté for 2–3 minutes until fragrant.
  3. Add your chopped vegetables. Cook for 5–7 minutes until slightly softened (if using frozen, cook off any excess liquid). Stir in herbs, salt, and pepper. Remove from heat.
  4. In a large mixing bowl, whisk together cottage cheese, eggs, and 1 cup shredded cheese until well combined.
  5. Layer half the sautéed vegetables in the prepared baking dish. Pour the cottage cheese mixture evenly over the veggies. Top with remaining vegetables.
  6. Sprinkle a little extra shredded cheese (and Parmesan or breadcrumbs, if using) over the top for a golden finish. Add sliced tomatoes if desired.
  7. Bake uncovered in the preheated oven for 35–40 minutes, until set and the top is bubbling and golden brown.
  8. Allow to cool slightly before slicing. Serve warm and enjoy the cheesy, veggie goodness!

Weekly Meal Planning

Cottage Cheese and Veggie Bake is an excellent option for prepping ahead or doubling for leftovers. Save and schedule this recipe to seamlessly add it to your weekly meal plan. CookifyAI helps you create smart shopping lists that automatically pull together ingredients from all planned meals, making meal planning effortless.

Planning Benefits:

Automatically calculates total ingredient quantities when planning multiple meals

Organizes your grocery list by store section, saving you time

Helps you avoid duplicate purchases and missing items

Reduces food waste with accurate, consolidated lists

Pro tip: Want to batch prep for the week? Schedule this recipe along with others—CookifyAI combines ingredient quantities, so you buy just what you need (e.g., eggs or cheese). Stress less at the store and keep your meals on track!

Cook and Prep Times

Prep Time: 20 minutes
Cook Time: 40 minutes
Total Time: 1 hour

Warm, Wholesome, and Seriously the Best: The Ultimate Vegetable Soup Recipe

Vegetable Soup Recipe (Seriously the Best!)

Introduction

When you need a meal that’s nourishing, easy to make, and bursting with flavor, this Vegetable Soup Recipe (Seriously the Best!) delivers every time. Loaded with vibrant vegetables and savory herbs, it’s the kind of comforting bowl that satisfies on chilly nights or when you want something light yet hearty. Its simple, wholesome ingredients make it a favorite among families and meal preppers alike.

Why This is Seriously the Best Vegetable Soup

What sets this soup apart is the balance of flavors: sweet carrots, earthy potatoes, juicy tomatoes, and a medley of crisp, fresh veggies come together with aromatic herbs for a depth you don’t expect from a humble vegetable soup. It’s delicious on its own and easily customizable to fit whatever ingredients you have on hand, making it a practical and crowd-pleasing choice for busy weeks and family gatherings.

Building the Ultimate Vegetable Soup

The key to making a standout vegetable soup is layering flavors. Start by sautéing onions, garlic, and celery for a deep, savory base. Slowly add chopped vegetables and simmer in a seasoned broth until perfectly tender. A splash of lemon juice at the end brightens every spoonful, and a sprinkle of fresh herbs offers a fragrant finish.

Serving Suggestions for Seriously the Best Vegetable Soup

Serve this wholesome soup with a slice of crusty whole-grain bread or a sprinkle of grated Parmesan for extra richness. It makes a satisfying lunch, a filling dinner starter, or even a warming thermos treat for an outdoor adventure. To turn it into a heartier meal, add a cup of cooked beans, quinoa, or whole-wheat pasta.

Nutritional Information and Serving Size

Made with only fresh vegetables and a light broth, each serving (about 2 cups) contains roughly 100-150 calories, depending on your ingredients. It’s naturally low in fat, high in fiber, and packed with nutrients, making it a healthful choice for anyone looking to eat more plants.

Vegetable Soup (Recap)

This Vegetable Soup Recipe (Seriously the Best!) is the ultimate crowd-pleaser: affordable, flavorful, adaptable, and endlessly nourishing. Whether you’re craving comfort or want to meal prep for the week, this soup checks every box.

[ingredients]
2 tablespoons olive oil
1 large onion, diced
2 cloves garlic, minced
2 celery stalks, sliced
3 carrots, sliced
1 zucchini, chopped
1 red bell pepper, chopped
2 medium potatoes, peeled and diced
1 cup green beans, trimmed and cut into 1-inch pieces
1 (14.5 oz) can diced tomatoes (with juices)
6 cups vegetable broth (low-sodium preferred)
1 teaspoon dried thyme
1 teaspoon dried basil
1 bay leaf
Salt and pepper, to taste
2 cups fresh spinach or kale, roughly chopped
Juice of 1 lemon (about 2 tablespoons)
Chopped fresh parsley (for serving)
Optional: 1 cup cooked beans or cooked pasta for added protein and texture
[/ingredients]

💡Meal Planning Tip: Save this recipe to automatically generate an organized shopping list with all ingredients sorted by store section—perfect for efficient grocery trips and organized meal planning.

CookifyAI meal planning interface

Instructions

  1. Heat the olive oil in a large soup pot or Dutch oven over medium heat. Add the onion and celery, and sweat until softened, about 4 minutes. Stir in the garlic and cook for 1 minute more.
  2. Add the carrots, potatoes, zucchini, red bell pepper, and green beans. Sauté for 5 minutes, stirring occasionally.
  3. Pour in the diced tomatoes (with juices) and vegetable broth. Add the thyme, basil, bay leaf, salt, and pepper. Bring to a boil, then reduce to a simmer.
  4. Cover and simmer for 20–25 minutes, or until the vegetables are tender.
  5. Stir in spinach or kale and cook until wilted, about 2 more minutes. Remove the bay leaf.
  6. Add the lemon juice, taste, and adjust seasonings as needed. Stir in beans or cooked pasta if using.
  7. Ladle into bowls and garnish with chopped fresh parsley. Serve warm.

Weekly Meal Planning

This Vegetable Soup is meal prep gold, as it stores beautifully and tastes even better the next day. Save and schedule this recipe to easily slot it into your week and generate shopping lists that consider all your planned meals (not just this soup!).

Planning Benefits:

– Get total ingredient quantities calculated for the entire week, preventing overbuying or missing essentials
– Enjoy shopping lists automatically organized by grocery store section
– Reduce food waste by seeing how ingredients overlap between different meals
– Streamline your weekly meal prep for stress-free, nutritious eating

Pro tip: Want to add another soup or a sandwich for lunch later in the week? Schedule all your recipes—CookifyAI will combine your lists and quantities so you never run low on fresh veggies or pantry staples.

Cook and Prep Times

Prep Time: 15 minutes
Cook Time: 30 minutes
Total Time: 45 minutes

Enjoy this warm, inviting Vegetable Soup Recipe (Seriously the Best!) for healthy, flavorful meal prep all week long!

The Ultimate Salad Recipe Collection: Your All-in-One Guide to Fresh, Flavorful Meals

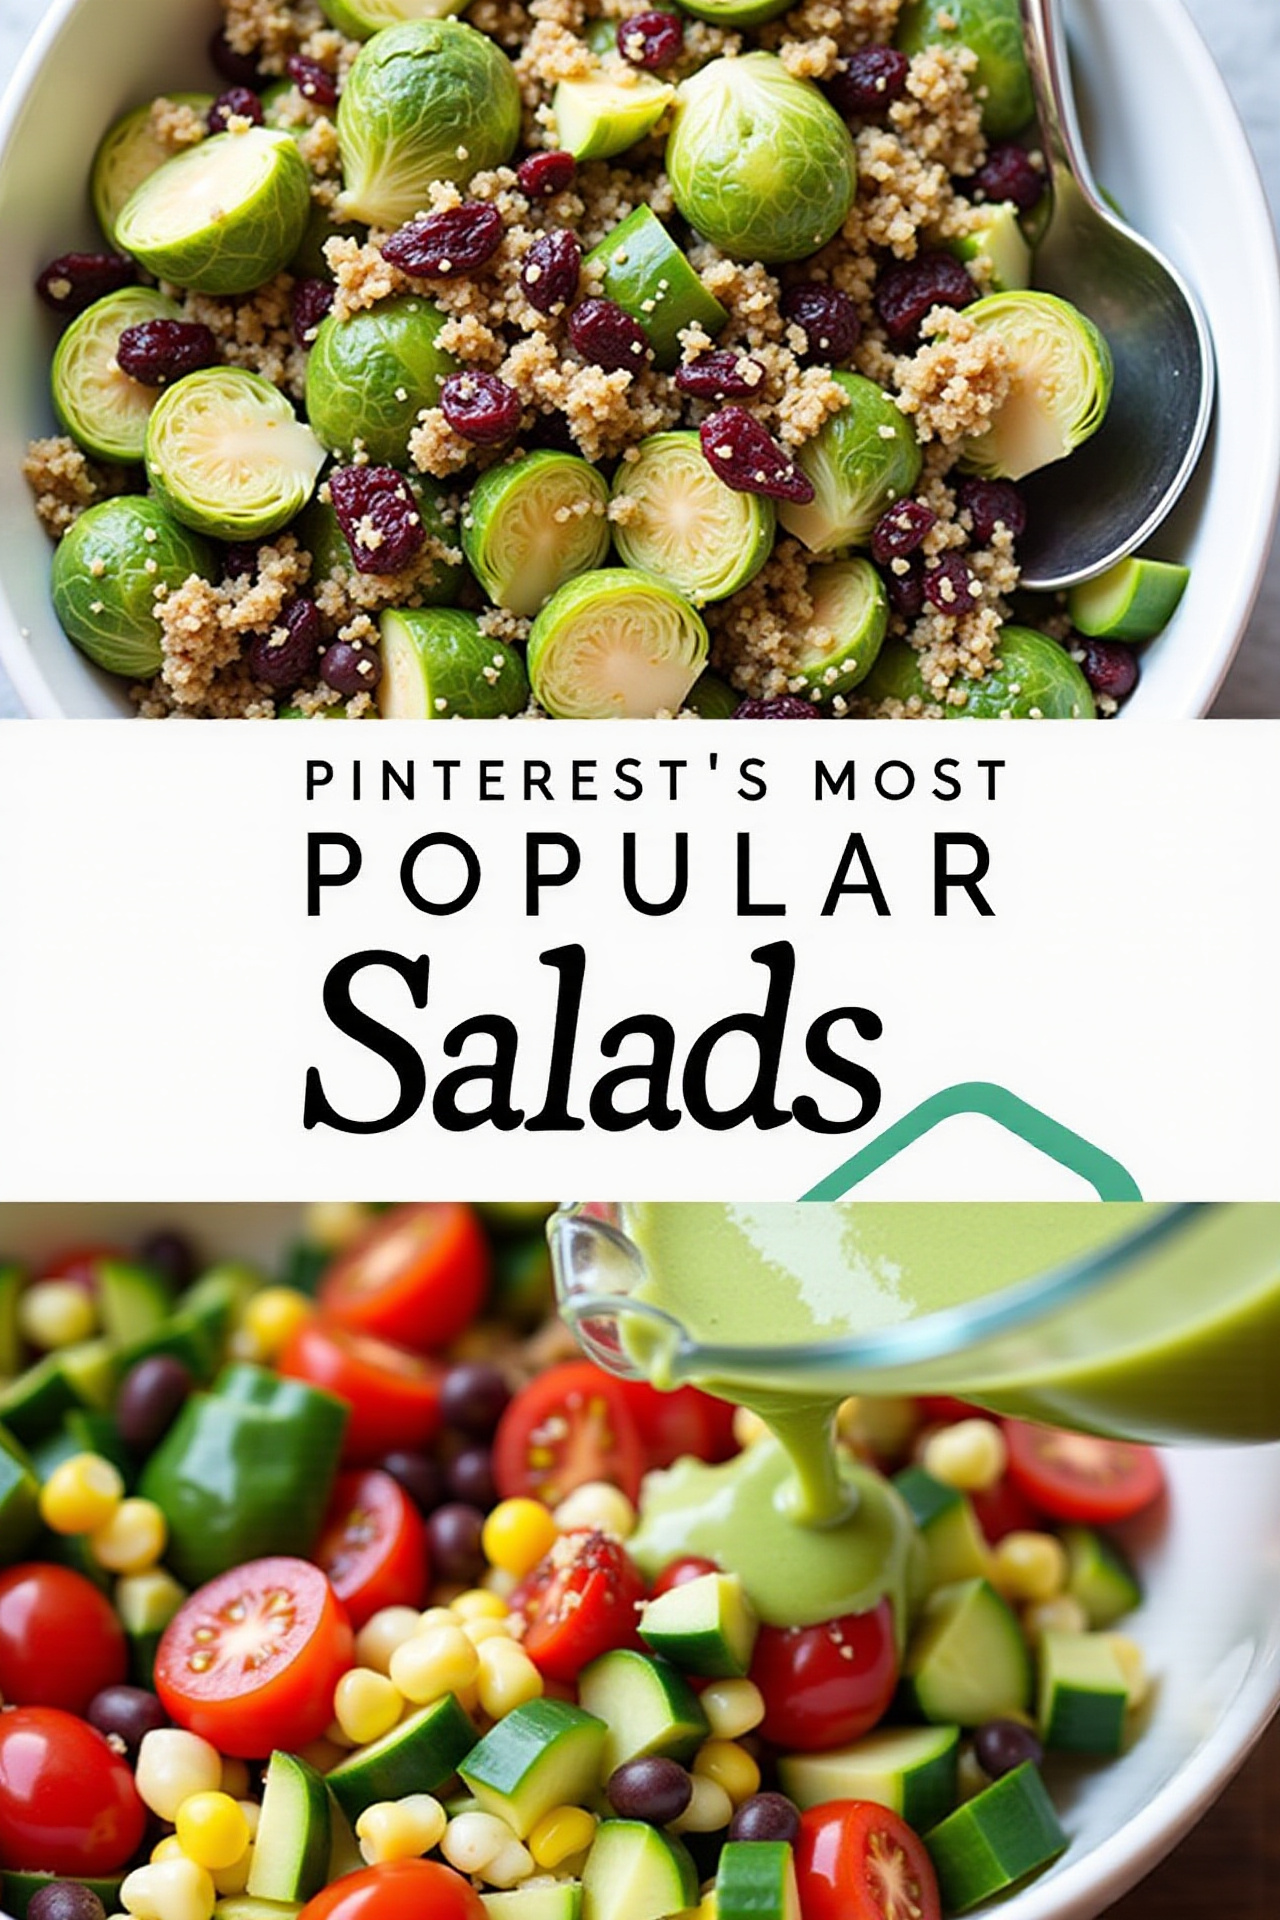
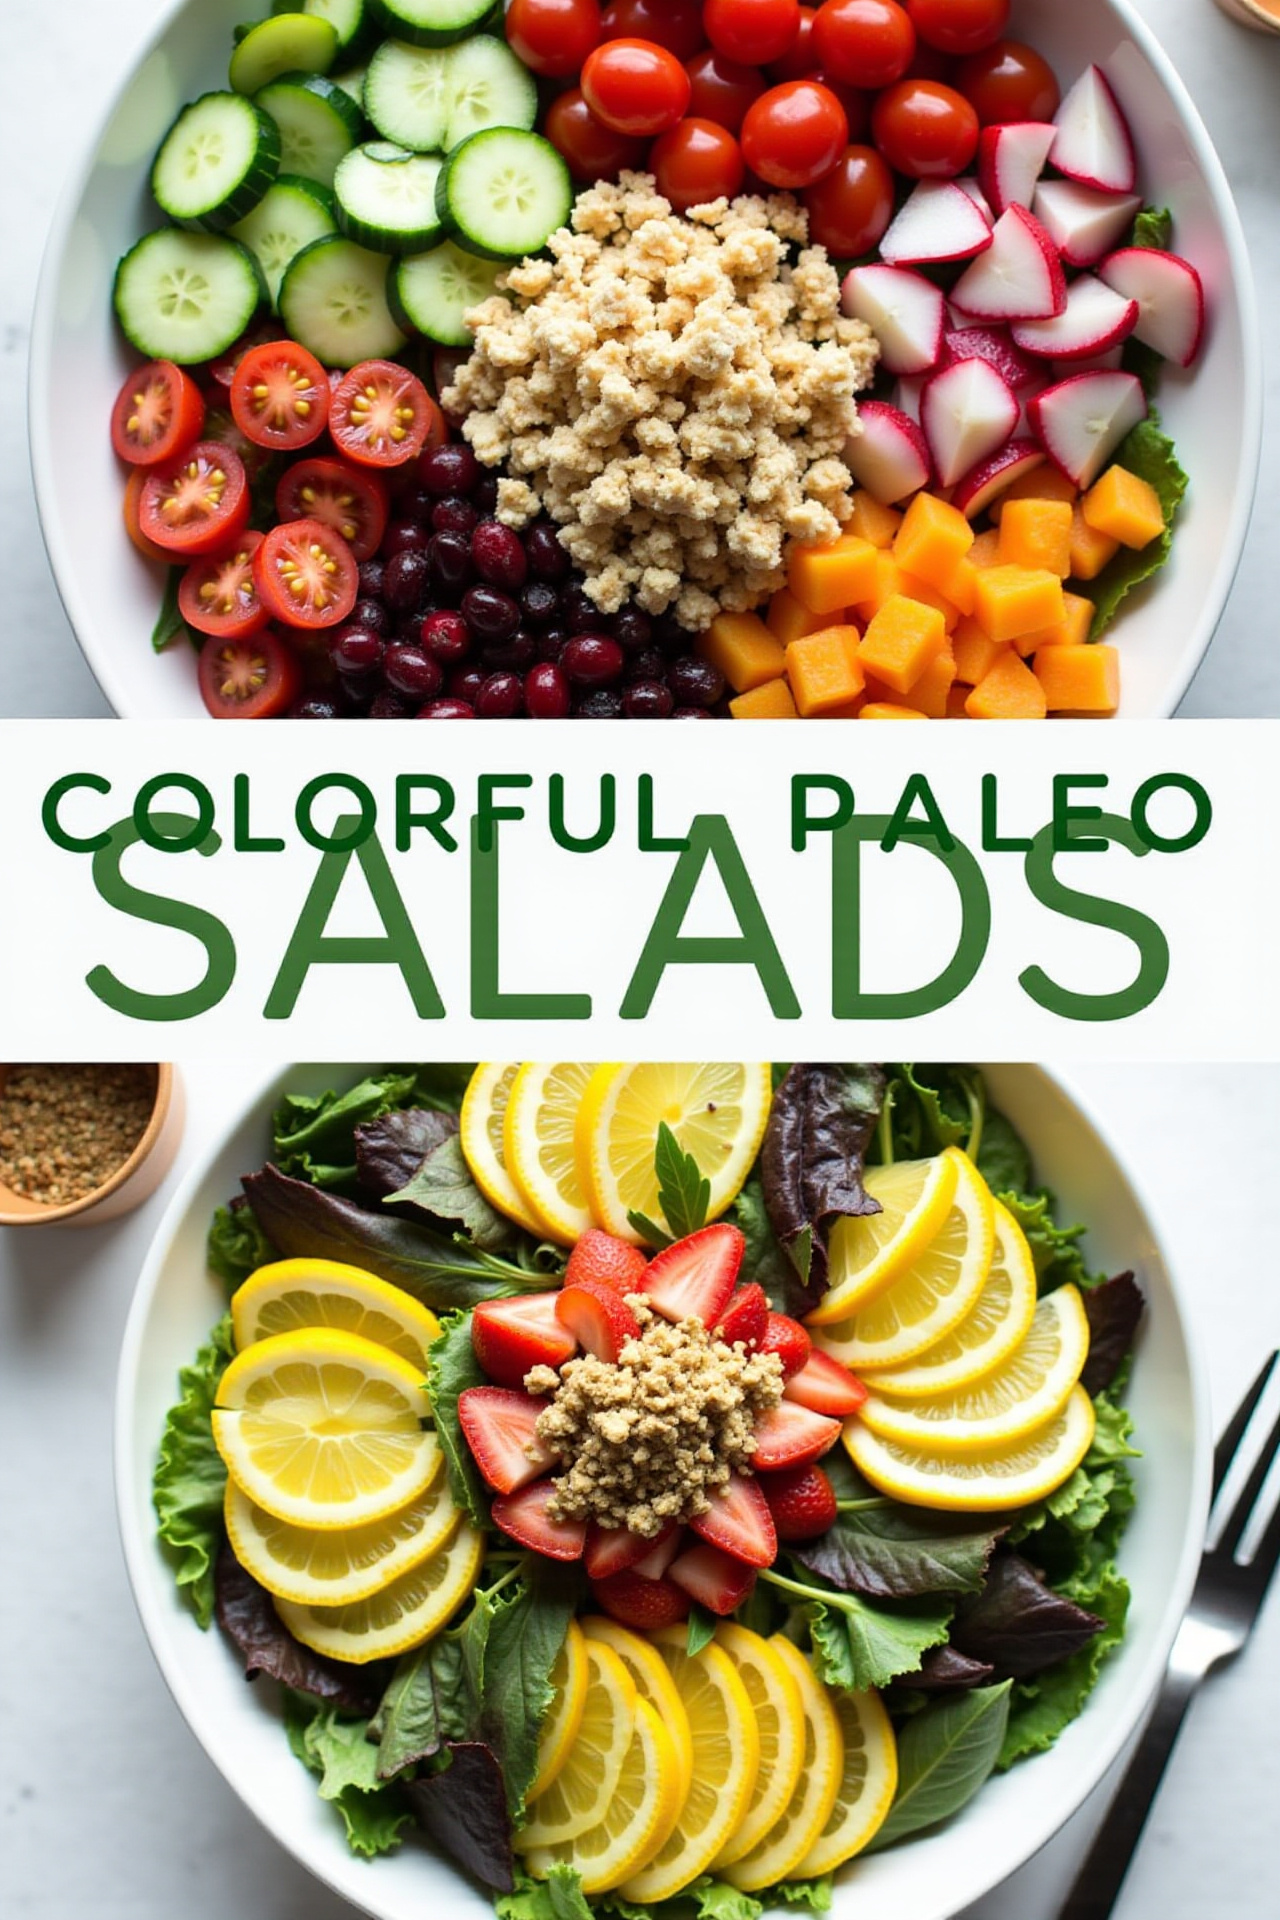
Every Single Salad Recipe You Could Ever Need

Introduction

Why stick to one salad when you can have recipes for every season, taste, and occasion? With these salad recipes, you’ll always have fresh ideas on hand—whether you crave something light and refreshing, hearty and filling, or boldly flavored. Discover endless combinations to elevate your meals, streamline your meal planning, and keep your menu vibrant all week long.

The Ultimate Guide to Every Single Salad Recipe You Could Ever Need

From crisp greens and vibrant veggies to protein-packed grains and satisfying beans, these recipes cover every craving. Enjoy classic garden salads, robust grain salads, Mediterranean favorites, Asian-inspired noodle salads, protein-rich main course salads, and low-carb creations. Each recipe pairs balanced flavors with nutritious ingredients—making them ideal for quick lunches, crowd-pleasing dinners, or make-ahead sides.

Building the Perfect Salad, Every Time

A great salad starts with a foundation—mix leafy greens (like romaine, spinach, or arugula), sturdy grains (like quinoa or farro), or crunchy veggies (cabbage, carrots). Add protein such as grilled chicken, tuna, beans, or eggs for heartiness. Fresh fruits, cheeses, nuts, and seeds add texture and extra taste. Bring it all together with a homemade dressing—think tangy vinaigrettes, creamy yogurts, or zesty citrus blends. Don’t be afraid to experiment: salads are endlessly customizable to match your cravings and the season’s best ingredients.

Salad Recipes for Every Mood

  • Classic Caesar Salad: Romaine, parmesan, croutons, and garlicky Caesar dressing.
  • Greek Village Salad: Tomato, cucumber, red onion, feta, olives, oregano, and olive oil.
  • Southwest Chicken Salad: Grilled chicken, black beans, corn, avocado, and chipotle ranch.
  • Asian Noodle Salad: Rice noodles, shredded veggies, herbs, and sesame-ginger dressing.
  • Lentil & Roasted Veggie Salad: French lentils, roasted carrots and sweet potatoes, goat cheese, lemon-tahini dressing.
  • Summer Berry Spinach Salad: Spinach, fresh berries, almonds, goat cheese, and honey-balsamic vinaigrette.
  • Caprese Salad: Tomatoes, mozzarella, basil, olive oil, and balsamic glaze.
  • Chopped Antipasto Salad: Romaine, salami, provolone, chickpeas, cherry peppers, red wine vinaigrette.
  • Kale & Quinoa Power Bowl: Massaged kale, quinoa, pumpkin seeds, avocado, lemon-tahini dressing.
  • Classic Cobb Salad: Romaine, grilled chicken, eggs, bacon, tomato, avocado, blue cheese, red wine vinaigrette.

Serving Suggestions and Customization Ideas

Serve as a main, fresh side, or bulk them up with grilled proteins and toasted bread. Batch prep ingredients for grab-and-go lunches all week. If entertaining, offer a build-your-own salad bar so guests can customize to their tastes. Rotate dressings and toppings for new weeknight flavors without extra effort.

Nutritional Information & Portion Guidance

Most salads yield 4 generous servings, packed with vitamins, minerals, fiber, and protein (depending on ingredients and toppings). Dress lightly for a lower-calorie meal, or add nuts, avocado, or rich cheeses for heartier variants.

All-In-One Salad Recipe Recap

With these recipes, you’ll never face salad fatigue again. Each brings a unique blend of taste, nutrition, and eye-catching color to your table, making meals both exciting and wholesome.

[ingredients]
Base greens: Romaine, spinach, arugula, kale, cabbage
Veggies: Tomatoes, cucumbers, carrots, bell peppers, onions, radishes
Proteins: Grilled chicken, tuna, chickpeas, beans, eggs, tofu
Add-Ins: Fresh berries, dried fruit, almonds, walnuts, sunflower seeds, feta, blue cheese, parmesan
Grains: Quinoa, brown rice, farro, barley, couscous
Dressings: Olive oil, balsamic vinegar, red wine vinegar, Greek yogurt, tahini, Dijon mustard, lemon/lime juice, honey
Herbs: Basil, parsley, cilantro, mint, dill
Optional: Croutons, pita chips, roasted chickpeas
[/ingredients]

💡Meal Planning Tip: Save these salad recipes to automatically generate an organized shopping list with all ingredients sorted by store section—making grocery trips quicker and meal planning seamless.

CookifyAI meal planning interface

Instructions

  1. Choose your salad base and place greens in a large bowl.
  2. Add vegetables, fruits, and any grains or beans of your choice.
  3. Top with protein (grilled, boiled, or plant-based).
  4. In a jar, combine your chosen dressing ingredients and shake well.
  5. Toss salad with dressing just before serving to keep greens crisp.
  6. Garnish with fresh herbs, nuts, cheese, or crunchy toppings.
  7. Serve immediately or refrigerate (undressed) for meal prep lunches.

Weekly Meal Planning

With such a versatile set of salad recipes, meal planning is a breeze. Save and schedule multiple salad recipes to diversify your weekly menu and auto-generate a master shopping list organized by category.

Planning Benefits:

  • Calculates total ingredient amounts—even if you’re making several salads.
  • Organizes your list by store area (produce, dairy, pantry, etc.), saving time.
  • Prevents ingredient overlap—no more duplicate buys or missed items.
  • Keeps your meal prep structured and efficient all week long.

Pro tip: When you schedule multiple salads in one week, CookifyAI intelligently tallies all the shared ingredients. For instance, if several salads call for spinach and eggs, your list adjusts so you know exactly how much to buy—streamlining your prep and minimizing waste.

Cook and Prep Times

Prep Time: 10-25 minutes (depending on recipe)
Cook Time: 0-20 minutes (for grains or proteins, as needed)
Total Time: 15-30 minutes per salad (includes prep and basic cook time for proteins/grains)

“Fall in Love with Dinner: The Marry Me White Bean & Spinach Skillet”

Easy Marry Me White Bean & Spinach Skillet – Quick & Healthy Weeknight Dinner

Introduction

The Easy Marry Me White Bean & Spinach Skillet is the kind of weeknight dinner that brings big flavors with minimal effort—a perfect blend of creamy white beans, tender spinach, and a luscious, garlicky tomato sauce, all made in one pan. Packed with plant-based protein and loaded with wholesome veggies, this skillet meal is designed for busy cooks who want something healthy and satisfying without spending hours in the kitchen.

Why This Skillet Recipe Stands Out

What makes this dish utterly crave-worthy is its simplicity and unexpected depth of flavor. The rich, silky sauce clings to every bean, while the fresh spinach adds a pop of color and nutrition. It’s hearty enough to satisfy but light enough to keep you energized—plus, it’s naturally vegetarian and easy to adapt for vegan diets. This skillet has all the ingredients of a “marry me” recipe: comfort, flavor, and universal appeal.

Key Elements for a Creamy, Flavor-Packed Skillet

White beans are the star of the show, offering creamy texture and plant-based protein. For the sauce, sautéed garlic and sun-dried tomatoes create a savory, fragrant base, while a splash of vegetable broth and a dollop of Greek yogurt (or a vegan alternative) add creaminess. Toss in baby spinach at the end for gentle wilting and vibrant color. A final sprinkle of parmesan or nutritional yeast finishes the dish with a hit of umami.

The Easiest Way to Bring Dinner Together

This recipe is weeknight-friendly by design: just sauté, simmer, and serve—no fancy steps or complicated cleanup. It’s versatile, so you can enjoy it as is, or spoon it over whole grain toast, pasta, or brown rice. Best of all, everything comes together in under 30 minutes, making it ideal for last-minute meal planning.

Serving Suggestions for Easy Marry Me White Bean & Spinach Skillet

Serve straight from the skillet with a rustic loaf of bread to soak up the saucy goodness. For a heartier meal, add a simple green salad on the side or top with a fried egg. This recipe also makes excellent leftovers—just reheat and enjoy for lunch or dinner the next day.

Nutritional Information and Serving Size

This recipe yields 4 hearty servings. Each serving delivers approximately 280-320 calories, 16g of protein, 10g of fiber, and a healthy dose of iron and potassium. For a dairy-free version, simply swap the Greek yogurt and cheese with vegan alternatives.

Easy Marry Me White Bean & Spinach Skillet (Recap)

If you’re looking for a dinner that’s fast, healthy, and crowd-pleasing, this skillet is your new weeknight hero. The melding of creamy beans, tangy tomatoes, and tender greens is irresistible—you’ll want to make it part of your regular rotation.

[ingredients]
2 tablespoons olive oil
1 small onion, finely chopped
3 garlic cloves, minced
1/3 cup sun-dried tomatoes (oil-packed), drained and chopped
2 (15-ounce) cans white beans, drained and rinsed
1 cup low-sodium vegetable broth
2 cups fresh baby spinach
1/4 cup Greek yogurt or dairy-free yogurt
1/4 cup grated parmesan cheese or nutritional yeast
1 tablespoon lemon juice
Salt and black pepper, to taste
Crushed red pepper flakes, optional
Fresh basil or parsley, for garnish
Crusty bread or cooked pasta, for serving
[/ingredients]

💡Meal Planning Tip: Save this recipe to automatically generate an organized shopping list with all ingredients sorted by store section—perfect for efficient grocery trips and meal planning.

CookifyAI meal planning interface

Instructions

  1. Heat the olive oil in a large skillet over medium heat. Add the onion and sauté for 3–4 minutes until softened.
  2. Add the garlic and sun-dried tomatoes, cooking for another 1–2 minutes until fragrant.
  3. Stir in the white beans and vegetable broth. Simmer for 5–6 minutes, letting the flavors meld and the sauce thicken slightly.
  4. Reduce the heat to low, then stir in the spinach and cook until just wilted, about 1–2 minutes.
  5. Turn off the heat and mix in the Greek yogurt (or vegan yogurt) and parmesan cheese (or nutritional yeast). Stir in the lemon juice and season with salt, black pepper, and red pepper flakes to taste.
  6. Spoon onto plates or bowls, garnish with fresh basil or parsley, and serve with crusty bread or cooked pasta. Enjoy immediately!

Weekly Meal Planning

This skillet recipe is a perfect fit for weekly meal prep and planning. Save and schedule this recipe in your meal plan to generate smart shopping lists that consolidate ingredients from all your planned meals.

Planning Benefits:

  • Automatically calculates total ingredient quantities for your week
  • Organizes grocery lists by store section for faster shopping
  • Prevents overbuying and missing crucial ingredients
  • Makes weeknight dinners stress-free and efficient

Pro tip: By using meal planning tools, you can identify recipe overlaps—for example, if two recipes both need spinach, CookifyAI will calculate the total for the week so you only need to buy once, keeping meal prep organized and reducing waste.

Cook and Prep Times

Prep Time: 10 minutes
Cook Time: 15 minutes
Total Time: 25 minutes

2-Ingredient Vegan Chicken: The Ultimate Plant-Based Hack for Flavorful Meals

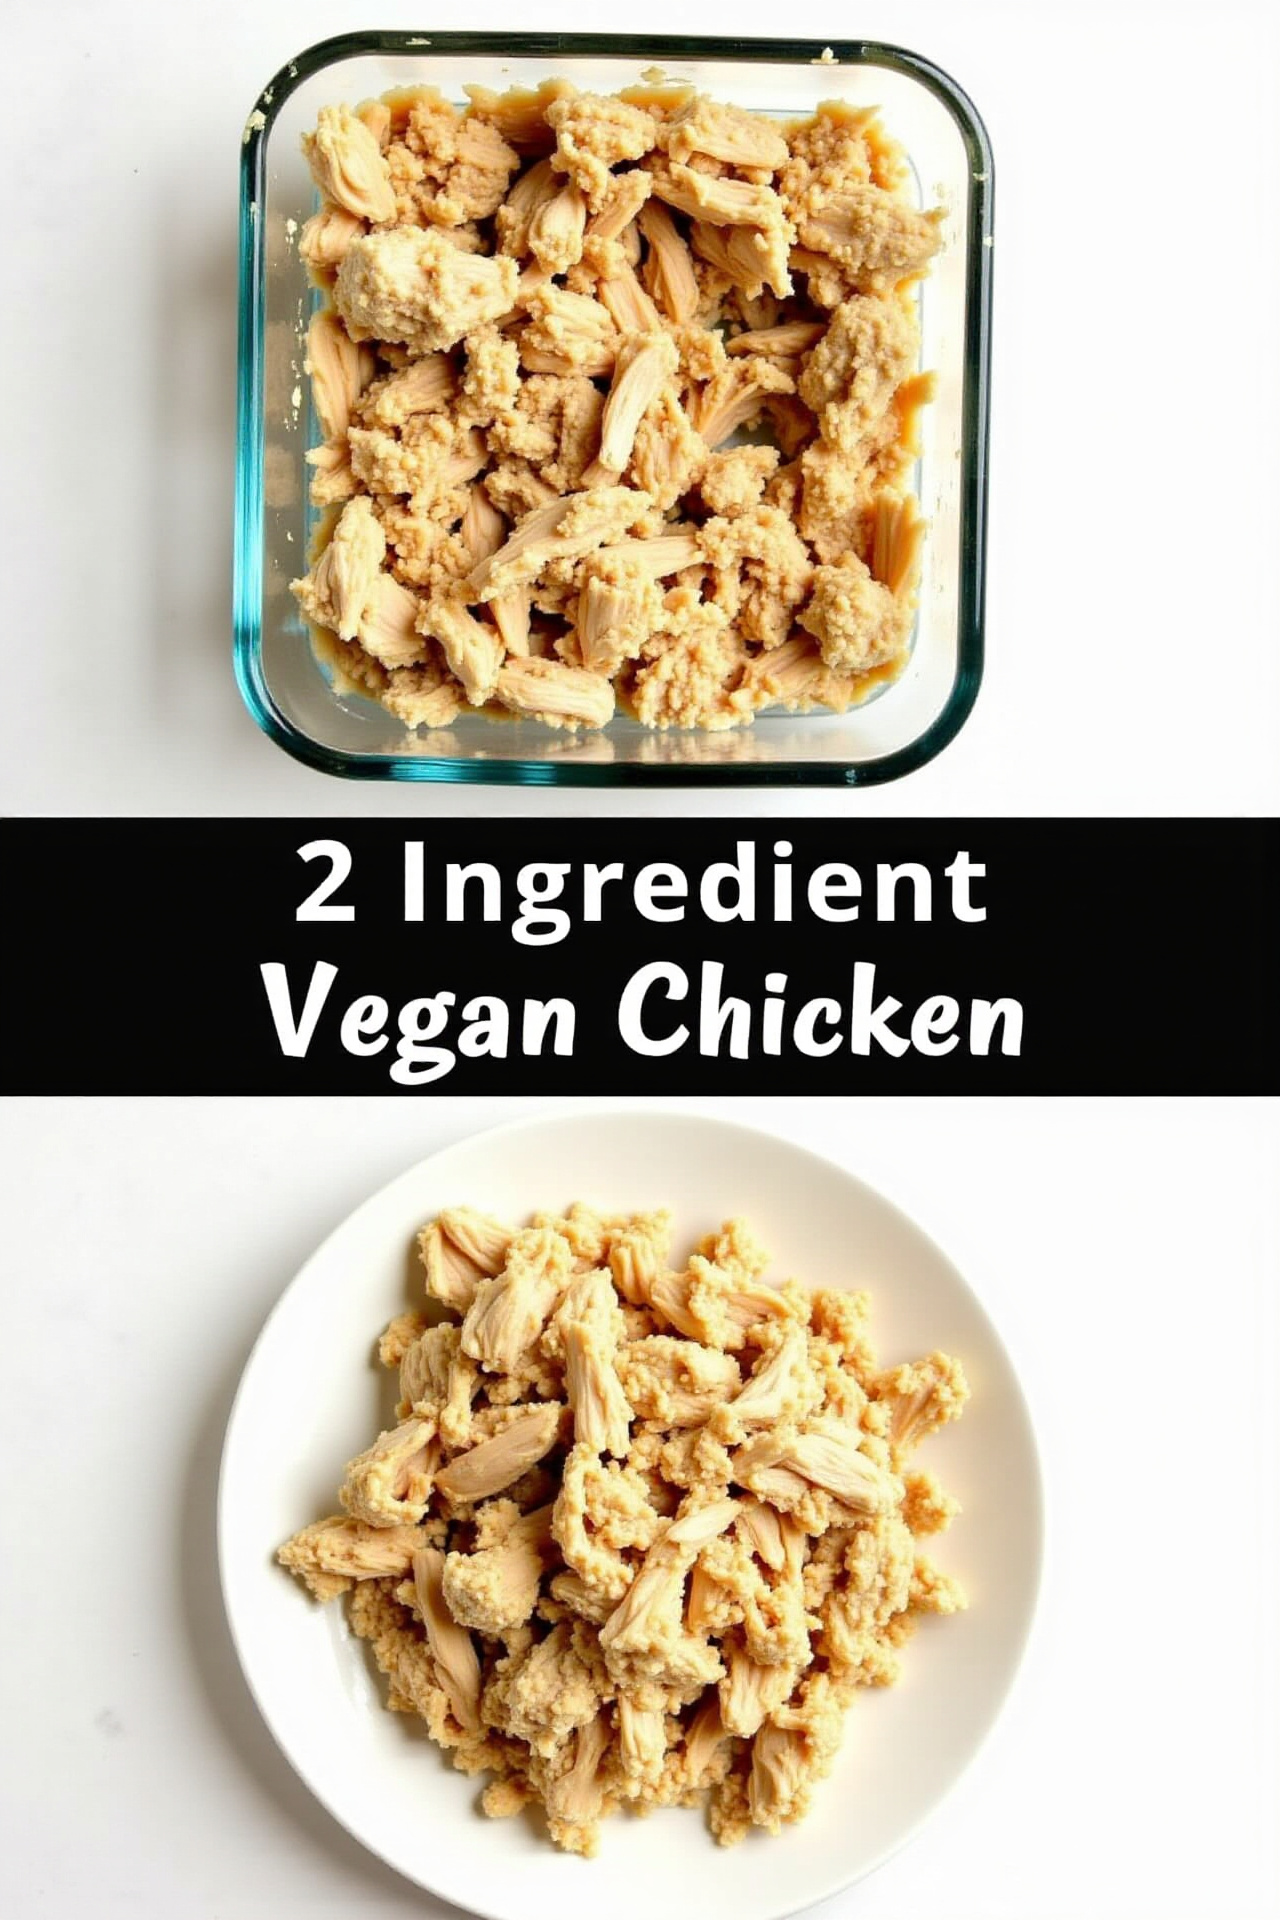
2 Ingredient Vegan Chicken Recipe

Introduction

Craving the texture and satisfaction of chicken without animal products or complicated prep? This 2 Ingredient Vegan Chicken Recipe is your ticket. It’s astonishingly simple, delivers savory flavor, and is crafted to mimic shredded chicken—perfect for tossing into wraps, stir fries, salads, or bowls. With only two widely available plant based ingredients, this recipe slashes prep time and keeps your kitchen mess to a minimum.

The Genius Simplicity of 2 Ingredient Vegan Chicken

What makes this vegan chicken so unique is its ease and meat like texture. The combination of vital wheat gluten and flavorful vegetable broth creates a fibrous, chewy, protein packed “chicken” you can use in countless recipes. No specialty vegan products needed—just common pantry staples, a bit of kneading, and a quick cook for satisfying, high protein results every time.

How the “Chicken” Dough Comes Together

The magic of this recipe is the reaction between vital wheat gluten (the main protein in wheat) and seasoned broth. By kneading them together, strands develop that mimic shredded chicken’s bite. Add more broth as needed to form a cohesive, stretchy dough—no fancy tools required.

Cooking and Shredding Perfect Vegan Chicken

After forming the dough, simply simmer it in more broth until it cooks through and firms up. Once cooled slightly, tear or slice it into strips or shreds. You’ll have satisfying, protein rich vegan chicken ready for marinades, grilling, or tossing into your favorite dishes.

Serving Suggestions for Show Stopping Vegan Chicken

Try this vegan chicken tossed in barbecue sauce for pulled sandwiches, pan seared with your go to seasonings, or mixed into curries and noodle bowls. Its versatility means you can enjoy “chicken” classics—just plant based! Serve with a fresh salad, roasted veggies, or whole grains for a nourishing meal.

Nutritional Information and Serving Size

This recipe yields about 2 cups of vegan chicken—enough for 4 servings. Each serving contains roughly 110 calories, 22g protein, and traces of fat or carbs, depending on your broth choice. It’s a low calorie, high protein plant based staple you’ll want on repeat.

2 Ingredient Vegan Chicken (Recap)

Savory, satisfying, and incredibly easy, this 2 Ingredient Vegan Chicken is the ultimate hack for plant based meal prep. With just wheat gluten and flavorful broth, you can satisfy cravings and build meals that please vegans and omnivores alike.

[ingredients]
1 cup vital wheat gluten
3/4 cup flavorful vegetable broth, plus more for simmering
[/ingredients]

💡Meal Planning Tip: Save this recipe to automatically generate an organized shopping list. All ingredients are grouped by store section for fast, efficient grocery runs—no more forgotten items or frantic searches!

CookifyAI meal planning interface

Instructions

  1. In a bowl, combine the vital wheat gluten and 3/4 cup vegetable broth. Mix, then knead by hand or with a spoon for 2-3 minutes, until you have a tough, stretchy dough. Add a splash more broth if needed for all flour to be incorporated.
  2. Divide into pieces or leave as a whole chunk for thicker “filets.” Flatten or shape as desired.
  3. Bring a pot of vegetable broth (enough to submerge your dough) to a low simmer—not a boil. Add your dough and simmer covered for 30-40 minutes, flipping if needed partway through.
  4. Remove and let cool slightly. Shred or slice into strips—your vegan chicken is ready to use in any recipe!

Weekly Meal Planning

This 2 Ingredient Vegan Chicken is a dream for plant based meal prep and batch cooking! Save and schedule this recipe in CookifyAI to generate a smart shopping list for your vegan chicken PLUS all your other weekly meals.

Planning Benefits:

– Instantly see total ingredient quantities needed across all recipes
– Ingredients are grouped by grocery section for an effortless, organized shop
– No missing items—shopping lists reflect your full weekly meal plan

Pro tip: Use CookifyAI to line up your weekday lunches with meal prepped vegan chicken—just schedule once, and your smart list will do the rest!

Cook and Prep Times

Prep Time: 10 minutes
Cook Time: 35 minutes
Total Time: 45 minutes

31 Wholesome Casserole Creations: Your Ultimate Guide to Healthy Meal Prep

31 Healthy Casserole Dishes

Introduction

When you’re searching for satisfying, filling meals that don’t compromise on nutrition, these 31 Healthy Casserole Dishes are a must-try. Each casserole delivers balanced flavors, abundant veggies, and protein, making weeknight dinners and meal prep a breeze. With minimal prep and easy cleanup, healthy casseroles are the secret weapon for busy families and anyone looking to eat better without sacrificing comfort.

Why Make Healthy Casserole Dishes?

Casseroles are a crowd pleaser for a reason—they’re incredibly versatile, can feed a crowd, and taste even better as leftovers. Switching to healthier ingredients like lean proteins, whole grains, and loads of vegetables means you get the same hearty satisfaction, with less guilt and more nutrition. Whether you’re meal prepping for the week, hosting family dinner, or simply craving comfort food, these healthy casseroles hit the mark every time.

Highlight Features of These Healthy Casseroles

What sets these casseroles apart? They’re loaded with fiber, minerals, and vitamins. You’ll find dishes featuring lean meats like turkey and chicken, flavor-packed vegetarian options, and whole food twists on classic favorites. They’re designed to be freezer-friendly, easy to portion, and great for storing—perfect for making ahead or enjoying over several days.

How to Create Nutritious and Flavorful Casseroles

The key to a healthy casserole is ingredient swaps that don’t compromise on taste or texture. Think quinoa instead of white rice, Greek yogurt in place of sour cream, or cauliflower for a portion of the cheese. Add a rainbow of vegetables and your favorite herbs for bold flavors and vibrant color. Each recipe in this collection keeps the method simple and the flavors big.

Top 31 Healthy Casserole Recipes to Try

Here are just a few highlights from the list:

– Spinach & Quinoa Breakfast Casserole
– Chicken Broccoli Rice Bake with Brown Rice
– Sweet Potato and Black Bean Enchilada Casserole
– Veggie-Packed Turkey Lasagna
– Cauliflower “Mac” and Cheese Casserole
– Zucchini, Tomato, and Eggplant Gratin
– Mushroom and Wild Rice Pilaf Casserole
– Greek-Inspired Chickpea Bake
– Butternut Squash and Chicken Sausage Bake
– Lentil and Veggie Shepherd’s Pie

[ingredients]
For each casserole, you’ll typically need:
– 2 cups cooked whole grains (quinoa, brown rice, farro, or barley)
– 2–3 cups chopped veggies (broccoli, bell peppers, spinach, sweet potato, or zucchini)
– 1 pound lean protein (chicken breast, turkey, tofu, or beans)
– 1 cup low-fat cheese or creamy substitute (Greek yogurt, cottage cheese, or light cream cheese)
– Spices (garlic powder, Italian seasoning, cumin, chili powder)
– Salt and pepper, to taste
– 1 (14 oz) can low-sodium diced tomatoes or tomato sauce (optional for saucy casseroles)
– Fresh herbs for topping
– Olive oil for sautéing

💡Meal Planning Tip: Save this recipe collection on CookifyAI to auto-generate shopping lists sorted by grocery store aisle—making your food shopping faster and helping you stay organized for healthy meal planning.

CookifyAI meal planning interface

Instructions for Healthy Casserole Preparation

  1. Preheat your oven to 375°F. Lightly grease a casserole dish with olive oil or nonstick spray.
  2. Prepare your base: Layer cooked whole grains at the bottom of the dish.
  3. Sauté your protein (if using meat) with desired spices until fully cooked.
  4. Add chopped vegetables and sauté until just tender. For beans or lentils, simply rinse and drain.
  5. Mix protein and veggies with a creamy element (e.g., Greek yogurt or cottage cheese) and half the cheese.
  6. Combine the mixture with the grains in the casserole dish. Pour in tomato sauce or a splash of broth for moisture if desired.
  7. Top with remaining cheese or a sprinkle of breadcrumbs for crunch.
  8. Bake uncovered for 25–30 minutes, or until cheese is bubbly and the casserole is heated through.
  9. Let cool slightly before serving. Garnish with fresh herbs as desired.

Serving Suggestions for Healthy Casserole Dishes

Pair your casserole with a crisp side salad, steamed green beans, or a cup of soup for a complete, balanced meal. These casseroles also pack well for lunches, making them a go-to for healthy meal prep all week long.

Nutritional Information and Serving Size

Most casseroles yield 6–8 servings, depending on the recipe. Average nutrition (per serving): 250–400 calories, 20–30g protein, 6–10g fiber, and less than 10g fat (when using low-fat cheeses and lean proteins).

31 Healthy Casserole Dishes (Recap)

From hearty vegetarian bakes to high-protein classics reimagined, these healthy casserole dishes take the guesswork out of nutritious meal planning. Comforting, easy to prep, and perfect for any day of the week, they’ll quickly become staples in your kitchen.

Weekly Meal Planning

Casseroles are ideal for weekly meal prep—just make a big batch on Sunday and portion out for several days. Schedule your favorite casseroles on CookifyAI to generate smart, consolidated lists.

Planning Benefits:

– Calculates how much of each ingredient you need for all your scheduled casseroles
– Sorts items by grocery aisle for a faster, effort-free store visit
– Avoids buying duplicates and helps cut down on food waste
– Makes weekly healthy eating more achievable and stress-free

Pro tip: Plan casseroles with shared main ingredients (like beans or chicken) to buy in bulk and save even more.

Cook and Prep Times

Prep Time: 15–20 minutes
Cook Time: 25–40 minutes (depending on recipe)
Total Time: 40–60 minutes

These 31 healthy casserole dishes will bring comfort, nutrition, and organization to your weekly meals—making both dinner and grocery shopping smoother than ever!

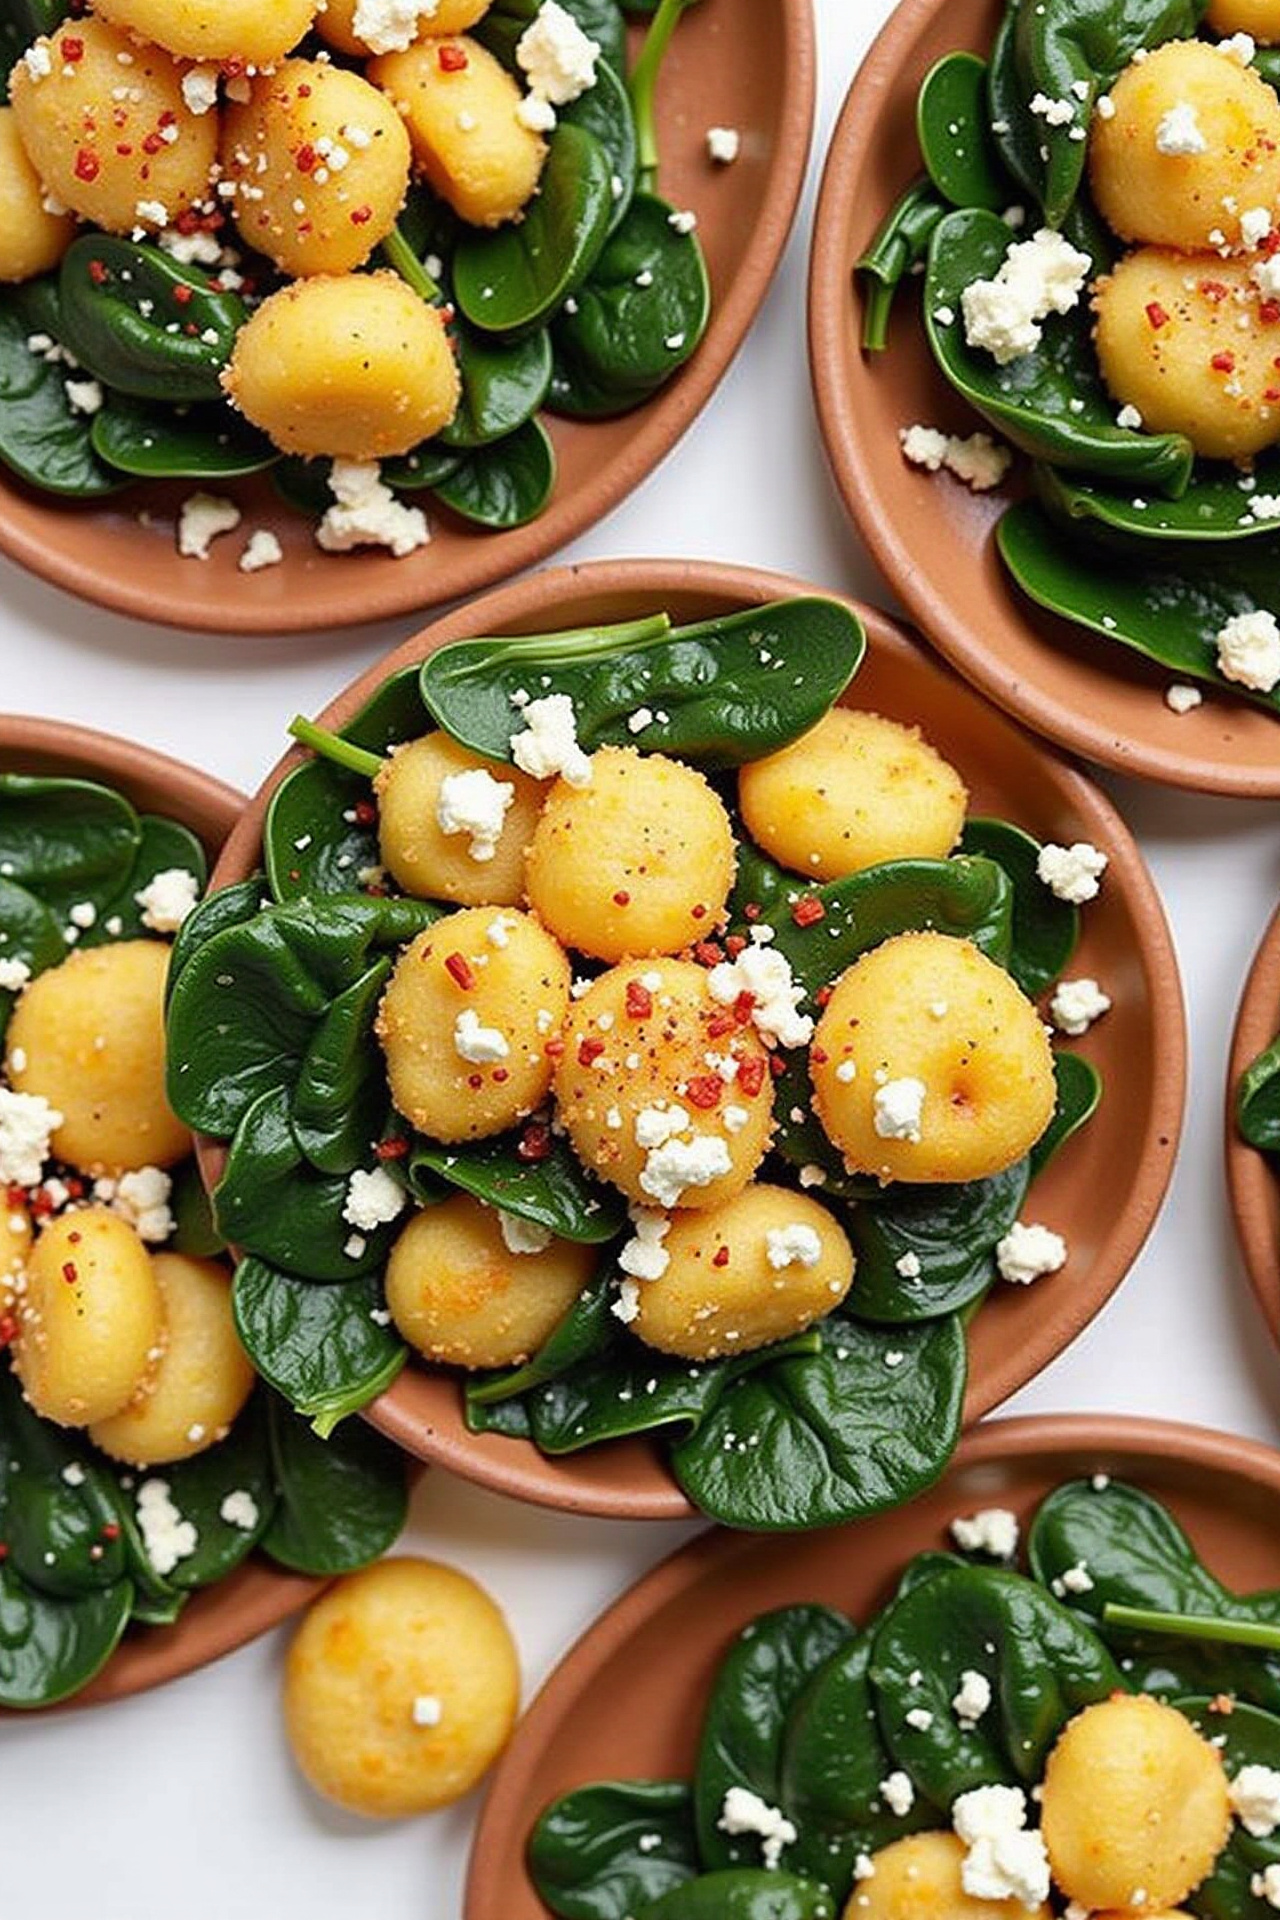
Quick & Creamy: Gnocchi with Spinach and Feta for a Wholesome Dinner Delight

Creamy Gnocchi with Spinach and Feta Recipe | Healthy Dinner Inspiration

Introduction

Looking for a cozy, restaurant-quality meal that’s ready in under 30 minutes? This Creamy Gnocchi with Spinach and Feta recipe is a surefire winner. Its pillowy gnocchi, fresh spinach, and tangy feta come together in a luscious, creamy sauce—making it a weeknight dinner that strikes the perfect balance between indulgence and nutrition. Whether you’re cooking for family or hosting friends, this dish will have everyone asking for seconds!

Deliciously Unique Creamy Gnocchi with Spinach and Feta

This recipe stands out for its vibrant flavors and satisfying texture. Gnocchi provides a tender, chewy base while fresh spinach brings color, nutrients, and a delicate earthiness. The star, though, is the feta: its creamy, salty punch heightens the dish without overwhelming it. The sauce, made lighter with milk or a splash of broth, coats each bite in velvety goodness without being heavy. It’s a comforting classic—reimagined with wholesome, flavorful twists.

Preparing a Silky Cream Sauce

Start your sauce by sautéing garlic and onions in olive oil until fragrant. Add a little flour for thickening, then gradually whisk in milk for a creamy, smooth texture. Stir in the spinach, allowing it to wilt, and toss your cooked gnocchi into the pan. Crumbled feta and lemon zest finish things off, creating depth and brightness that bring the whole dish together.

Bringing It All Together

The magic of this recipe is how easily it comes together—gnocchi cooks in minutes, and the sauce is a simple, one-pan affair. Once the spinach has wilted and the sauce reaches the perfect consistency, fold in the gnocchi and add generous crumbles of feta. The heat gently melts the cheese, creating irresistible pockets of tangy indulgence.

Serving Suggestions for a Show-Stopping Creamy Gnocchi with Spinach and Feta

Serve your creamy gnocchi with cracked black pepper and a sprinkle of fresh herbs like basil or parsley. Pair it with a crisp green salad or roasted vegetables for extra color and nutrition. For a heartier meal, some grilled chicken or chickpeas can be added. And don’t forget a slice of crusty bread to soak up every drop of that dreamy sauce!

Nutritional Information and Serving Size

This recipe makes 4 generous servings. Each plate offers around 420 calories (depending on the type of milk and amount of cheese you use), with a good balance of protein, fiber, and healthy fats. It’s a filling dinner that will leave you nourished and satisfied—no heavy feeling required.

Creamy Gnocchi with Spinach and Feta (Recap)

Creamy Gnocchi with Spinach and Feta is a quick, tasty, and health-conscious dinner option. It’s perfect for anyone craving comfort food with a fresh, Mediterranean twist and is sure to become a regular in your meal rotation.

[ingredients]
1 pound (450g) potato gnocchi (shelf-stable or fresh)
1 tablespoon olive oil
3 cloves garlic, minced
1 small yellow onion, finely chopped
2 tablespoons all-purpose flour
2 cups low-fat milk (or unsweetened plant-based milk)
6 cups fresh baby spinach
1/2 teaspoon salt
1/4 teaspoon black pepper
1/2 teaspoon dried oregano (optional)
1/4 cup crumbled feta cheese (plus more for serving)
1 teaspoon lemon zest
Fresh herbs for garnish (parsley or basil)
[/ingredients]

💡Meal Planning Tip: Save this recipe to automatically generate an organized shopping list with all ingredients sorted by store section—perfect for efficient grocery trips and streamlined weekly meal planning.

CookifyAI meal planning interface

Instructions

  1. In a large pot, cook the gnocchi according to the package directions. Drain and set aside.
  2. Meanwhile, in a large skillet over medium heat, warm the olive oil. Add the garlic and onion and sauté for 2-3 minutes until fragrant and translucent.
  3. Sprinkle in the flour, stirring constantly to form a paste, and cook for 1 minute. Slowly pour in the milk, whisking to avoid lumps.
  4. Add salt, pepper, and oregano. Simmer, stirring occasionally, until the sauce thickens slightly—about 3-4 minutes.
  5. Add the spinach and let it wilt for 1-2 minutes.
  6. Stir in cooked gnocchi, feta cheese, and lemon zest. Gently fold until well combined and the feta is slightly melted.
  7. Taste and season with additional salt or pepper if needed. Serve hot, topped with extra feta and fresh herbs.

Weekly Meal Planning

This Creamy Gnocchi with Spinach and Feta recipe is ideal for meal planning—prep it ahead and reheat for quick lunches or easy dinners. Save and schedule this recipe to automatically add all ingredients to your weekly meal plan and generate a smart shopping list.

Planning Benefits:

  • Calculates exact ingredient amounts for multiple recipes based on your servings
  • Organizes your shopping by grocery category for faster store trips
  • Helps you avoid duplicated or forgotten ingredients—saving time, money, and reducing food waste
  • Makes it easy to prep larger batches in advance for healthy dinners all week

Pro tip: Plan your week with multiple CookifyAI recipes—ingredient overlaps (like spinach or onions) are tallied so you only buy what you’ll actually use.

Cook and Prep Times

Prep Time: 10 minutes
Cook Time: 15 minutes
Total Time: 25 minutes

Enjoy a dinner that’s simple to make, deliciously wholesome, and smart for your weekly meal plan!

Mediterranean Meals Made Easy: 3-Step Dinners for Effortless Weeknight Cooking

Easy Mediterranean Diet Dinners in Three Steps or Less

Introduction

Healthy, delicious, and incredibly simple—the Mediterranean diet is renowned for its vibrant flavors and heart-healthy ingredients. If you’re looking for a way to make dinner both effortless and satisfying, these Easy Mediterranean Diet Dinners in Three Steps or Less will be your new weeknight staples. These recipes feature nourishing staples like olive oil, fresh vegetables, lean proteins, and fragrant herbs, all prepared in minimal steps for truly fuss-free dining.

Why Try Three-Step Mediterranean Dinners?

Streamline your evenings without sacrificing flavor! Super-simple preparations mean you’ll spend less time in the kitchen, but still deliver a meal bursting with sun-soaked Mediterranean taste. From juicy grilled fish to robust salads and satisfying grain bowls, these recipes are timeless crowd-pleasers that fit effortlessly into your busy schedule.

Essential Guide to Three-Step Mediterranean Main Dishes

Each recipe is designed to highlight wholesome ingredients and classic Mediterranean seasonings, using shortcuts and smart techniques to minimize effort while maximizing taste. With just three steps or less, this approach delivers nourishment and flavor with zero culinary stress.

Three Delicious Mediterranean Dinners in Under 30 Minutes

  • Grilled Lemon Herb Chicken
  • Mediterranean Chickpea Salad
  • Easy Sheet Pan Salmon with Veggies

1. Grilled Lemon Herb Chicken

Soak chicken breasts in a zesty lemon-garlic marinade, grill until juicy, and serve with fresh herbs—it’s the epitome of flavor and simplicity.

2. Mediterranean Chickpea Salad

Toss canned chickpeas with diced cucumber, cherry tomatoes, Kalamata olives, and a drizzle of olive oil and red wine vinegar for a nutritious, protein-packed salad.

3. Easy Sheet Pan Salmon with Veggies

Arrange salmon fillets and seasonal vegetables on a baking sheet, drizzle with olive oil and sprinkle with Italian herbs, then roast for a healthy, hands-off dinner.

Ingredients

Grilled Lemon Herb Chicken:

  • 2 boneless, skinless chicken breasts
  • Juice and zest of 1 lemon
  • 2 tbsp olive oil
  • 2 cloves garlic, minced
  • 1 tsp dried oregano
  • Salt and pepper
  • Fresh parsley, for garnish

Mediterranean Chickpea Salad:

  • 1 (15 oz) can chickpeas, rinsed and drained
  • 1 cup cherry tomatoes, halved
  • 1 cup cucumber, diced
  • ¼ cup Kalamata olives, pitted and sliced
  • 2 tbsp red wine vinegar
  • 2 tbsp extra virgin olive oil
  • Salt and pepper

Easy Sheet Pan Salmon with Veggies:

  • 2 salmon fillets (4-6 oz each)
  • 1 zucchini, sliced
  • 1 bell pepper, sliced
  • ½ red onion, thickly sliced
  • 2 tbsp olive oil
  • 1 tsp Italian seasoning
  • Salt and pepper
  • Lemon wedges, for serving

💡Meal Planning Tip: Save these recipes to instantly generate an organized shopping list with all your Mediterranean ingredients, grouped by aisle for streamlined grocery shopping and easy meal planning.

CookifyAI meal planning interface

Instructions

Grilled Lemon Herb Chicken:

  1. Mix lemon juice, zest, olive oil, garlic, oregano, salt, and pepper in a bowl; marinate chicken for at least 10 minutes.
  2. Grill chicken over medium-high heat for 5-6 minutes per side, or until cooked through.
  3. Garnish with fresh parsley and serve.

Mediterranean Chickpea Salad:

  1. Combine chickpeas, tomatoes, cucumber, and olives in a large bowl.
  2. Drizzle with olive oil and red wine vinegar; season with salt and pepper and toss.
  3. Serve chilled or at room temperature.

Easy Sheet Pan Salmon with Veggies:

  1. Preheat oven to 400°F. Line a baking sheet with parchment paper.
  2. Arrange salmon, zucchini, bell pepper, and red onion on the sheet. Drizzle with olive oil, sprinkle with Italian seasoning, salt, and pepper.
  3. Roast for 15 minutes, until salmon flakes easily with a fork. Squeeze lemon over before serving.

Weekly Meal Planning

These Mediterranean dinners are perfect for effortless, healthy meal prepping. Save and schedule these recipes to automatically plan your week, consolidate ingredient lists, and make efficient grocery trips.

Planning Benefits:

  • Automatically sums ingredients across your planned dinners
  • Organizes grocery lists by store section
  • Prevents missing or over-buying ingredients
  • Simplifies your weekly menu planning routine

Pro tip: By scheduling all your Mediterranean meals for the week, CookifyAI computes the total amount of each item you’ll need—making shopping and cooking more efficient and reducing food waste.

Cook and Prep Times

Prep Time: 10-15 minutes per recipe
Cook Time: 10-15 minutes per recipe
Total Time: 20-25 minutes per recipe

Bring the robust flavors of the Mediterranean to your table with minimal effort and maximum satisfaction. Enjoy healthier, happier dinners all week long—with the power of smart meal planning!

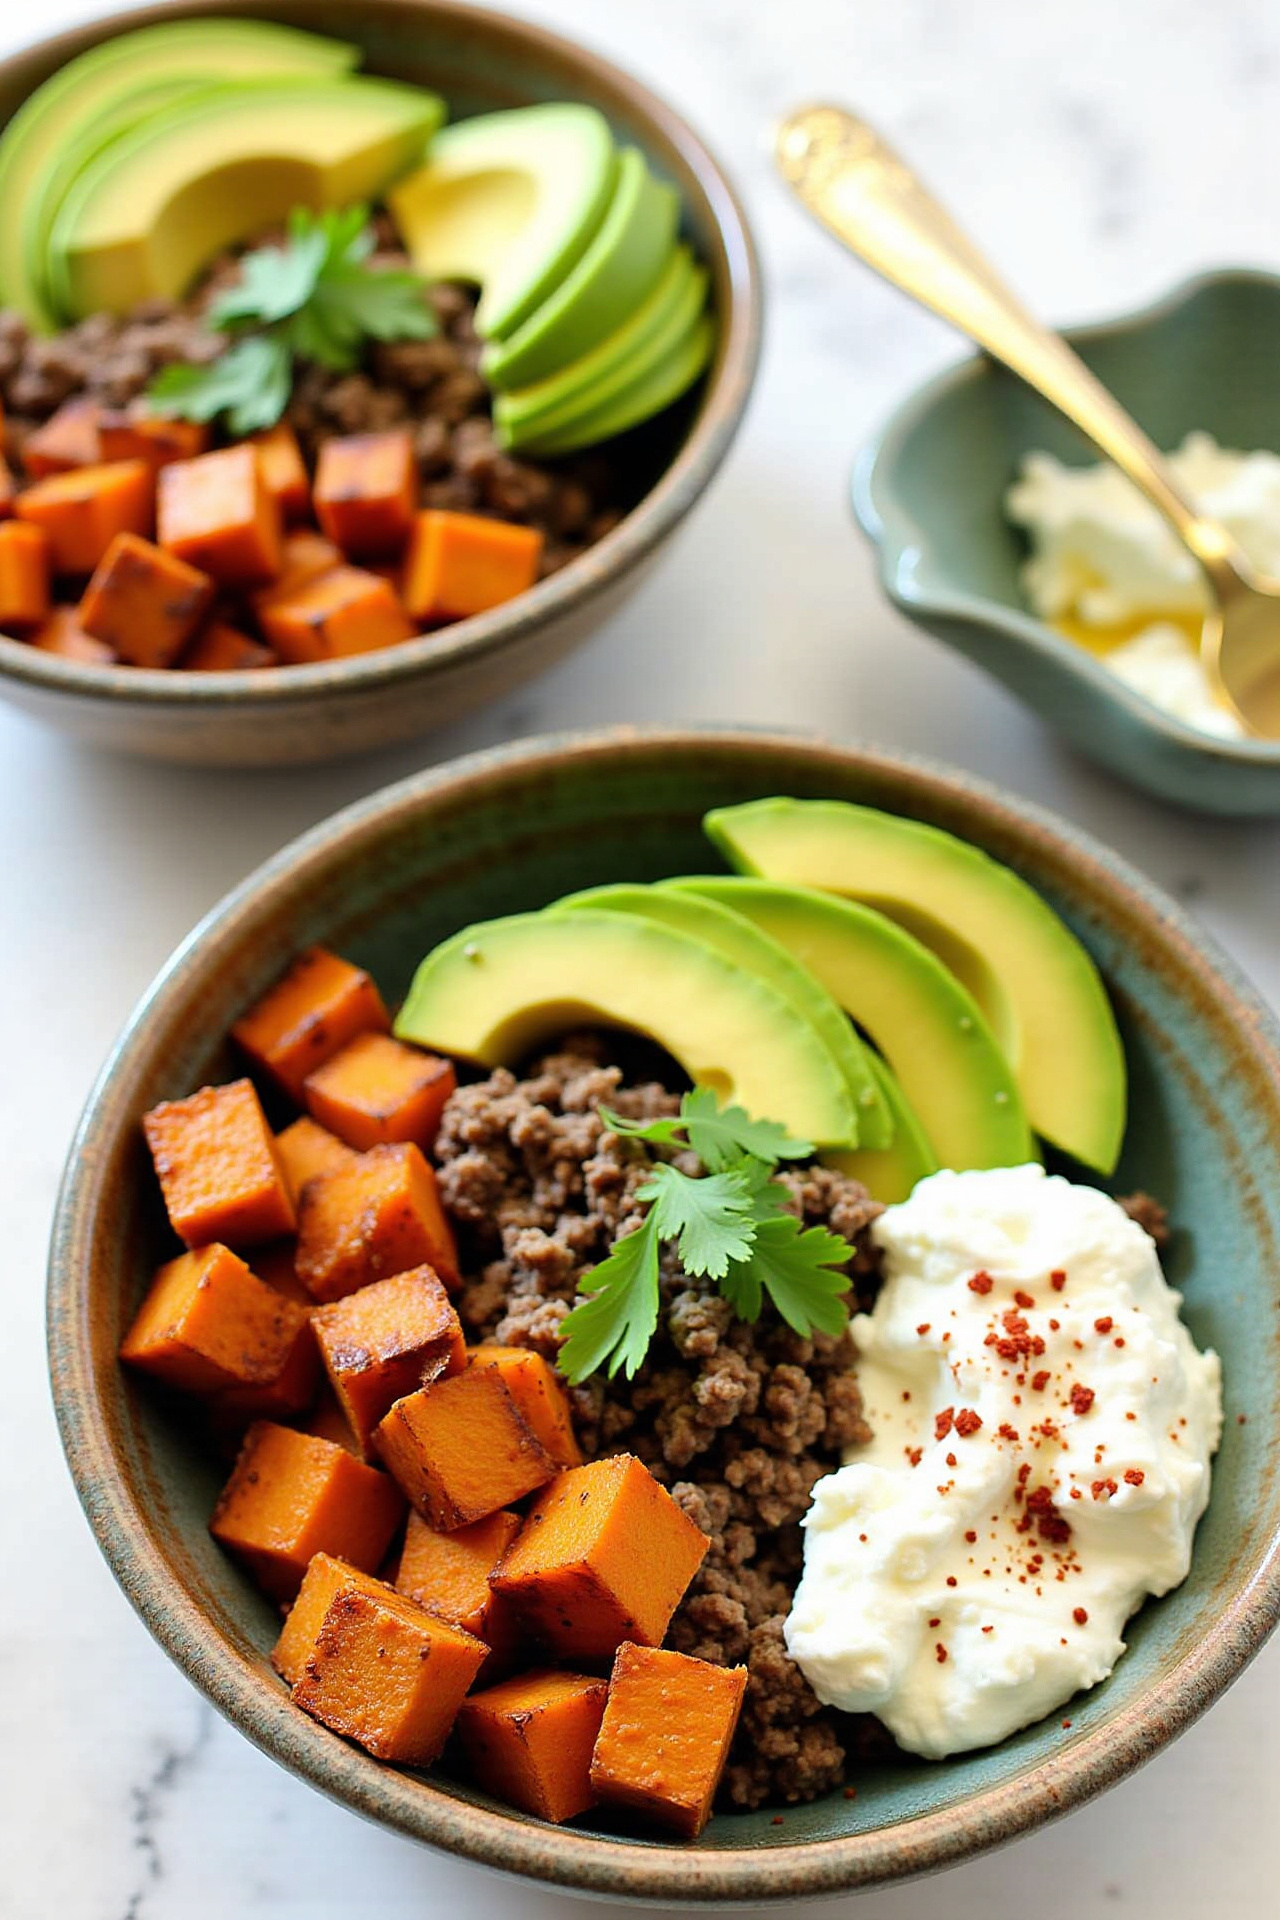
Wholesome Sweet Potato Taco Bowls: A Vibrant, Healthy Twist on Taco Night

Sweet Potato Taco Bowls | Easy, Healthy Weeknight Dinner!

Introduction

Sweet Potato Taco Bowls deliver bold, satisfying Mexican-inspired flavors with a nutritious twist—perfect for any busy evening. Roasted sweet potatoes offer a naturally sweet base, while hearty beans, fresh toppings, and zesty seasonings create a balanced meal that’s as vibrant as it is filling. This recipe is perfect for easy weeknight dinners, providing both comfort and nutrition in every bite.

Why Sweet Potato Taco Bowls Stand Out

If you’re looking for a crowd-pleaser that’s both easy and healthy, these Sweet Potato Taco Bowls are the answer. Roasting sweet potatoes brings out their natural sweetness and depth, pairing beautifully with seasoned black beans and crunchy garnish. It’s a fun, customizable meal that family and guests can personalize with their favorite toppings—think creamy avocado, tangy salsa, and crisp lettuce.

Building the Perfect Sweet Potato Taco Bowl

Start with cubes of sweet potato tossed with chili powder, cumin, and olive oil, then roast until caramelized and tender. Layer these over fluffy rice or crunchy lettuce, then add seasoned black beans for protein and fiber. Top with a rainbow of fixings: tomatoes, avocado, red onion, cheese, cilantro, and a squeeze of fresh lime juice.

Serving and Customization Tips

For meal prep or family-style dinners, serve all ingredients separately buffet-style so everyone can assemble their own bowls. Offer a range of toppings such as diced jalapeños, pickled onions, Greek yogurt, salsa, or hot sauce. This not only adds excitement but also caters to different dietary preferences, making the Sweet Potato Taco Bowl your new weeknight staple.

Nutritional Information and Serving Size

Each bowl is packed with fiber, vitamins, and plant-based protein from sweet potatoes and beans. The recipe yields approximately 4 servings, with each bowl providing roughly 350–400 calories (without cheese or sour cream toppings). It’s a wholesome dinner that supports your healthy eating goals.

Easy, Healthy Sweet Potato Taco Bowls (Recap)

This meal brings together roasted sweet potatoes, protein-rich beans, and customizable toppings for a fresh, wholesome dinner that’s easy to prepare. With bold flavors and bright colors, these bowls will quickly become a weeknight favorite for all ages.

[ingredients]
2 large sweet potatoes, peeled and cubed
1 tablespoon olive oil
1 teaspoon chili powder
1/2 teaspoon ground cumin
Salt and black pepper, to taste
1 can (15 oz) black beans, drained and rinsed
2 cups cooked brown rice or shredded lettuce (for base)
1 cup cherry tomatoes, halved
1 ripe avocado, diced
1/2 small red onion, sliced
1/2 cup shredded cheese (optional)
1/4 cup fresh cilantro, chopped
1–2 limes, cut into wedges
Optional toppings: salsa, Greek yogurt, jalapeños, hot sauce
[/ingredients]

💡Meal Planning Tip: Save this recipe to instantly generate a sorted shopping list. CookifyAI’s smart lists make it simple to gather everything you need—by grocery section—for efficient shopping and stress-free weeknight dinners.

CookifyAI meal planning interface

Instructions

  1. Preheat the oven to 425°F (220°C) and line a baking sheet with parchment paper for easy cleanup.
  2. Toss the sweet potato cubes with olive oil, chili powder, cumin, salt, and black pepper. Spread evenly on the baking sheet and roast for 25–30 minutes, flipping halfway through, until golden and tender.
  3. Meanwhile, in a small saucepan, warm the black beans over medium heat until hot. Season with a pinch of salt and, if desired, a bit more cumin or chili powder.
  4. Prepare your bowl base: scoop cooked brown rice or shredded lettuce into the bottom of each serving bowl.
  5. Layer on the roasted sweet potatoes and black beans. Garnish with your favorite toppings, such as cherry tomatoes, avocado, red onion, cheese, cilantro, and lime wedges. Add salsa, yogurt, or hot sauce as desired.
  6. Serve immediately, or store components separately in airtight containers for easy meal prep and assembly during the week.

Weekly Meal Planning

Sweet Potato Taco Bowls are ideal for weekly meal prep—they’re easy to batch-cook, store well, and can be assembled to order. Save and schedule this recipe with CookifyAI to automatically create a consolidated shopping list and organize your weekly menu.

Planning Benefits:

  • See exact ingredient totals for all your planned recipes
  • Get shopping lists organized by grocery store department
  • Avoid overbuying or missing key ingredients
  • Simplify meal prep with smart scheduling tools

Pro tip: Scheduling your meals with CookifyAI helps you optimize ingredient use—shared items like rice, beans, or produce are automatically combined for easier, cost-effective shopping and less waste.

Cook and Prep Times

Prep Time: 10 minutes
Cook Time: 30 minutes
Total Time: 40 minutes

Chickpea Feta Avocado Salad: A Zesty, Protein-Packed Mediterranean Delight

Chickpea Feta Avocado Salad

Introduction

Looking for a lunch or side dish that’s hearty, refreshing, and packed with flavor? Chickpea Feta Avocado Salad delivers a perfect balance—creamy avocado, salty feta, and the satisfying bite of chickpeas, all tossed with vibrant veggies and a bright lemon dressing. It’s effortless to prepare, exceptionally nutritious, and guaranteed to impress at any gathering or weeknight meal.

Why This Chickpea Feta Avocado Salad Is a Standout

This salad isn’t your average side—it’s a deliciously protein-rich, Mediterranean-inspired dish that doubles as a quick meal or a show-stopping addition to any table. The variety of textures, from creamy avocado to crunchy cucumbers and crumbly feta, ensures every forkful is both satisfying and full of tang, freshness, and substance.

Flavorful Salad Components

Canned or cooked chickpeas provide the hearty base, delivering both texture and plant-based protein. Fresh, ripe avocados add creaminess and healthy fats. Crumbled feta cheese brings briny flavor, while crisp cucumber and juicy cherry tomatoes lighten every bite. A squeeze of fresh lemon juice, combined with olive oil, salt, pepper, and chopped herbs, ties all the elements together in a lively, nutrient-dense meal.

How to Bring It All Together

Assembly is as simple as tossing the ingredients gently to avoid mashing the avocado. Dress the salad just before serving for peak freshness, ensuring the lemon juice and olive oil evenly coat every ingredient without making the salad soggy. The combination of crunchy vegetables and creamy avocado makes each bite deliciously balanced.

Serving Suggestions for Chickpea Feta Avocado Salad

Serve this salad as a light lunch, spoon it into pita bread for an easy sandwich, or pair alongside grilled chicken or fish for a filling dinner. It’s also a great option for picnics or potlucks, as the hearty ingredients hold well, especially if you add the avocado just before serving.

Nutritional Information and Serving Size

This recipe yields about 4 generous servings. Each serving provides ample protein and healthy fats, making it suitable for vegetarians and those seeking a nutrient-rich meal. Calorie count typically ranges from 350 to 400 per serving, depending on the feta and avocado portions used.

Chickpea Feta Avocado Salad (Recap)

Simple to make and incredibly versatile, Chickpea Feta Avocado Salad is a crowd-pleaser with a harmonious combination of bold and fresh flavors. Its blend of textures and healthy ingredients offers a dish that’s as nourishing as it is delicious.

[ingredients]
1 can (15 oz) chickpeas, rinsed and drained
1 large ripe avocado, diced
3/4 cup feta cheese, crumbled
1 cup cherry tomatoes, halved
1 cup cucumber, diced
1/4 cup red onion, finely chopped
3 tablespoons olive oil
1 lemon, juiced
Salt and fresh ground black pepper, to taste
2 tablespoons fresh parsley or dill, chopped
Optional: 1/2 teaspoon dried oregano or a pinch of chili flakes
[/ingredients]

💡Meal Planning Tip: Save this recipe to automatically generate an organized shopping list with all ingredients sorted by store section—perfect for efficient grocery trips and weekly meal planning.

CookifyAI meal planning interface

Instructions

  1. In a large bowl, combine chickpeas, cherry tomatoes, cucumber, feta, and red onion.
  2. In a small bowl or jar, whisk together olive oil, lemon juice, salt, black pepper, and optional dried oregano or chili flakes.
  3. Pour the dressing over the salad ingredients, tossing gently to coat. Taste and adjust seasoning as needed.
  4. Add the diced avocado and chopped parsley or dill just before serving. Toss gently to combine, taking care not to mash the avocado.
  5. Serve immediately, or chill for up to 1 hour before serving to allow flavors to meld.

Weekly Meal Planning

This salad is ideal for make-ahead lunches, potlucks, or as part of a weekly meal prep. Save and schedule this recipe in your meal planning tool to plan out your week and generate a comprehensive, organized shopping list at the same time.

Planning Benefits:

  • Auto-calculates total ingredient quantities across all planned recipes
  • Sorts your shopping list by grocery store sections for easy navigation
  • Minimizes food waste by consolidating overlapping ingredients (like feta or lemon)
  • Streamlines meal prep and helps you stay organized all week long

Pro tip: When meal planning, schedule your recipes together to optimize your shopping—no more guessing how many avocados you need!

Cook and Prep Times

Prep Time: 15 minutes
Cook Time: 0 minutes
Total Time: 15 minutes

30 Days to Clean Eating: Your Flavorful Blueprint for a Healthier Life

30 Days of Clean Eating Recipes

Introduction

Embracing 30 Days of Clean Eating Recipes is a powerful way to reinvigorate your kitchen routine and fuel your body with wholesome, nutrient-dense meals. Whether you’re seeking to reset your habits, boost your energy, or simplify your daily meal prep, this curated plan provides an easy roadmap to healthy, flavorful home cooking that will keep you satisfied and motivated all month long.

Why Commit to 30 Days of Clean Eating?

A month-long commitment to clean eating makes healthy habits second nature. With thoughtfully planned meals made from real, whole ingredients, you’ll enjoy vibrant flavors, better focus, and steady energy. This approach takes the guesswork out of daily food choices, streamlining your routine while helping you develop a lasting appreciation for nourishing foods.

What Makes These Clean Eating Recipes Stand Out?

These recipes aren’t just healthy—they’re genuinely delicious, easy to prepare, and never boring. Featuring seasonal produce, lean proteins, whole grains, and plant-based meals, each recipe is balanced for taste and nutrition. Some recipes can be prepped in 30 minutes or less, perfect for busy weeknights, while others are ideal for leisurely weekend cooking and batch prep.

A Sample Week of Clean Eating Dishes

Here is a week’s worth of clean eating recipes to kick off your 30-day journey:

  • Breakfasts: Greek yogurt parfait with berries & nuts, overnight oats with chia seeds, spinach and tomato omelet
  • Lunches: Quinoa salad with chickpeas and roasted veggies, turkey and avocado lettuce wraps, mason jar salads with homemade vinaigrette
  • Dinners: Lemon-garlic baked salmon with asparagus, chicken and veggie stir fry, sweet potato and black bean chili, zucchini noodles with marinara and turkey meatballs
  • Snacks: Sliced veggies with hummus, apple slices with almond butter, homemade trail mix

Nutritional Information and Meal Structure

Each recipe emphasizes lean proteins, healthy fats, complex carbohydrates, and plenty of fiber to keep you full and energized. Portion sizes are designed to meet most adults’ daily needs, offering a satisfying and nutritionally balanced approach to clean eating.

[ingredients]
Steel-cut oats
Fresh berries and nuts
Plain Greek yogurt
Organic eggs
Baby spinach
Cherry tomatoes
Boneless, skinless chicken breast
Quinoa
Chickpeas (canned or cooked)
Seasonal mixed vegetables (broccoli, bell pepper, zucchini, carrots)
Wild-caught salmon fillets
Avocado
Sweet potatoes
Black beans
Zucchini
Homemade marinara sauce (or no sugar added store-bought)
Mixed leafy greens
Olive oil
Lemon, garlic, and assorted herbs
Sea salt and black pepper
Almond butter
Hummus
[/ingredients]

💡Meal Planning Tip: Save this clean eating meal plan with CookifyAI to get a complete, organized shopping list for the week. Ingredients are sorted by grocery store section and ready for quick reference during your shop, making healthy meal prep effortless.

CookifyAI meal planning interface

Instructions

  1. Plan Your Week: Pick your favorite breakfast, lunch, dinner, and snack options from the list above.
  2. Prep in Batches: On Sunday or your chosen prep day, cook large batches of quinoa, grilled chicken, and roasted veggies for quick assembly throughout the week.
  3. Mix and Match: Use CookifyAI to organize your recipes and create shopping lists with ingredient quantities tailored to your servings.
  4. Portion Snacks: Prepare snacks like sliced veggies and trail mix in advance for grab-and-go convenience.
  5. Stay Flexible: Alternate recipes or swap in new favorites as you go to keep your palate excited and prevent culinary burnout.

Weekly Meal Planning

Setting up your 30 Days of Clean Eating is simple with modern meal planning tools. Save and schedule all your recipes in CookifyAI to sync your entire month of clean meals, consolidate shopping lists, and streamline the cooking process.

Planning Benefits:

  • Automatically calculates total ingredient quantities for the month, reducing waste
  • Organizes ingredients by grocery section for efficient shopping
  • Prevents duplicate purchases and forgotten essentials
  • Makes clean eating sustainable and easy with less time spent planning and shopping

Pro tip: Schedule repeating meals—like overnight oats or salad—throughout the month to maximize leftover ingredients and streamline your meal prep routine!

Cook and Prep Times

Prep Time: 2-4 hours weekly (for batch ingredient prep)
Daily Cook Time: 10-30 minutes, depending on recipe
Total Time: Minimal daily hands-on time thanks to batch prep and planned meals

30 Days of Clean Eating (Recap)

A month of clean eating brings both structure and inspiration to your kitchen, introducing you to new flavors and efficient cooking routines. With thoughtful meal prep, smart planning, and an easy shopping system, you’ll discover that healthy eating can truly be simple and delicious—every day of the month!

Heartwarming Homemade Chicken Soup: The Ultimate Comfort Recipe

Best Homemade Chicken Soup Recipe

Introduction

Nothing comforts quite like a steaming bowl of homemade chicken soup. Packed with nourishing vegetables and tender chicken, this soup delivers deep, savory flavor that warms you from the inside out. Whether you’re looking for a family dinner classic or a remedy for a chilly evening, this recipe stands out for its simplicity, heartiness, and universal crowd-pleasing appeal.

Why This is the Best Homemade Chicken Soup

The secret to this soup’s rich flavor lies in simmering bone-in chicken pieces along with aromatic vegetables and fresh herbs. The result is a broth full of depth, naturally infused with nutrients and comforting tastes. Unlike store-bought versions, this homemade soup lets you control the freshness and quality of every ingredient, making each spoonful uniquely satisfying.

Building Flavor: The Perfect Broth

Start by sautéing onions, carrots, and celery—this classic mirepoix provides the foundation for a rounded, aromatic profile. Use bone-in chicken (whole or cut into parts) for a robust, nutrient-rich broth. Simmering gently allows all the flavors to meld without becoming cloudy or greasy. Skim away foam as it forms for a clear, appetizing result.

How to Assemble Homemade Chicken Soup

After creating your broth, remove the chicken, shred the meat, and discard the bones. Return the chicken to the pot with chopped vegetables and your favorite noodles or rice for classic heartiness. Adjust seasoning with a splash of lemon and fresh herbs, then serve piping hot for maximum comfort and satisfaction.

Serving Suggestions

Sprinkle freshly chopped dill or parsley over each bowl for an extra burst of freshness. Pair your chicken soup with a crusty piece of bread or a side salad for a balanced meal. This soup is ideal for meal prepping and can be frozen in portions for later use—making hectic weeknights and lazy weekends equally delicious.

Nutritional Information and Serving Size

This recipe yields approximately 8 hearty servings. Each one is packed with protein and vitamins, averaging around 250-300 calories per bowl depending on added noodles or rice. This wholesome soup is filling, hydrating, and free from unnecessary additives.

Best Homemade Chicken Soup Recipe (Recap)

By simmering chicken with a medley of vegetables and careful seasoning, this homemade chicken soup is guaranteed to please. It’s fresh, familiar, and full of the classic flavors that everyone craves, making it the go-to recipe for comfort and nutrition.

[ingredients]
1 whole chicken (about 3-4 pounds), or 3 lbs bone-in chicken parts
10 cups water
2 large carrots, peeled and sliced
2 celery stalks, sliced
1 yellow onion, chopped
4 garlic cloves, smashed
1-2 bay leaves
1 teaspoon dried thyme (or 2 sprigs fresh thyme)
Salt and pepper to taste
1 cup egg noodles or cooked rice (optional)
2 tablespoons chopped fresh parsley or dill
1 tablespoon lemon juice
(Optional: 1 parsnip, peeled and sliced)
[/ingredients]

💡Meal Planning Tip: Save this recipe to automatically generate an organized shopping list with all the ingredients sorted by store section—perfect for efficient grocery trips and simplifying your meal planning process.

CookifyAI meal planning interface

Instructions

  1. In a large stockpot, combine chicken, water, onion, garlic, bay leaf, and thyme. Bring to a gentle boil, then reduce to a simmer. Skim off any foam during the first 10 minutes of cooking.
  2. Simmer uncovered for 45–60 minutes, or until chicken is cooked through and broth is flavorful.
  3. Remove chicken from the pot. Discard bay leaves and (if used) fresh thyme stems.
  4. Add carrots, celery, and parsnip (if using) to broth. Simmer for 10–15 minutes until vegetables are tender.
  5. While vegetables cook, let chicken cool slightly before removing skin and bones. Shred or dice the meat.
  6. Return shredded chicken to the pot. Add egg noodles or rice (if desired) and simmer until noodles are tender, about 5–7 minutes.
  7. Stir in fresh parsley or dill and lemon juice. Taste, then season with salt and pepper as needed. Serve piping hot.

Weekly Meal Planning

Homemade chicken soup is exceptionally freezer-friendly, making it a smart addition to your regular meal rotation. Save and schedule this recipe to your digital meal planner to optimize shopping and ensure you always have comfort food on hand.

Planning Benefits:

  • Effortlessly calculates total ingredient quantities when planning multiple meals each week
  • Consolidates items from all recipes into one easy grocery list, organized by store section
  • Helps avoid duplicate purchases and reduces food waste
  • Makes it simple to double or halve portions for batch cooking or smaller households

Pro tip: Schedule this soup with your other planned dinners to see how overlapping ingredients (like onions, carrots, or fresh herbs) are consolidated—saving time, money, and pantry space.

Cook and Prep Times

Prep Time: 15 minutes
Cook Time: 1 hour 15 minutes
Total Time: 1 hour 30 minutes

Zesty Lemon Chicken Piccata: A Paleo, Whole30, & Keto Delight

Lemon Chicken Piccata {Paleo, Whole30, Keto}

Introduction

Lemon Chicken Piccata delivers a vibrant combination of zesty citrus and savory flavor in a dish that’s both elegant and easy to make. This {Paleo, Whole30, Keto} version maintains the signature tangy sauce and tender chicken—without dairy, grains, or added sugars—making it a smart favorite for health-conscious home cooks. The result is a restaurant-worthy meal that’s quick enough for busy weeknights and sure to dazzle anyone at your table.

Deliciously Unique Lemon Chicken Piccata

What sets this Lemon Chicken Piccata apart is its classic Italian-inspired flavors, brightened with fresh lemon and capers, and made completely grain-free. The silky, tangy sauce clings perfectly to golden-brown chicken cutlets, giving you the comforting taste you love, but perfectly suited for paleo, Whole30, or keto lifestyles.

Preparing the Perfect Piccata Sauce

For a rich, creamy consistency without the dairy, this recipe uses a combination of chicken broth and coconut cream—or compliant ghee or oil. Fresh lemon juice, capers, and a little zest provide bold acidity and fragrance. For best results, make the sauce in the same skillet used for browning the chicken, so every bit of flavor melds beautifully.

Assembling and Serving Your Lemon Chicken Piccata

After lightly dredging the chicken in almond or coconut flour for a crisp crust, sear it until golden. Simmer everything in the luscious lemon-caper sauce so the chicken stays juicy and soaks up maximum flavor. Serve your piccata over zucchini noodles, cauliflower rice, or sautéed greens for a truly satisfying (and completely compliant) meal.

Serving Suggestions for a Show-Stopping Lemon Chicken Piccata

Garnish your finished dish with sliced lemons, fresh parsley, and a dash of cracked black pepper. Pair it alongside roasted asparagus or a simple arugula salad for a complete, restaurant-quality meal—no matter your eating plan.

Nutritional Information and Serving Size

This recipe serves 4. Each serving contains approximately 280–320 calories, 32g protein, 7g fat, and just 2–4g net carbs (depending on flour choice and sauce adjustments), making it a well-balanced, low-carb main course.

Lemon Chicken Piccata {Paleo, Whole30, Keto} (Recap)

This dish brings together lively citrus flavor with tender, crisped chicken in a naturally grain- and dairy-free format. It offers a gourmet touch while remaining easy, healthy, and compliant for multiple meal plans—sure to become a dinner regular!

[ingredients]
– 4 boneless, skinless chicken breasts (pounded to 1/2-inch thickness)
– 1/3 cup almond flour or coconut flour
– 1/2 teaspoon sea salt
– 1/4 teaspoon black pepper
– 2 tablespoons avocado oil (or compliant olive oil/ghee for Whole30)
– 1 cup chicken broth (low sodium)
– 1/3 cup fresh lemon juice (about 2 lemons)
– 2 tablespoons capers, drained
– 2 tablespoons coconut cream or ghee (for creaminess)
– Fresh parsley and lemon slices, for garnish
[/ingredients]

💡Meal Planning Tip: Save this recipe to automatically generate an organized shopping list with all ingredients sorted by store section—perfect for efficient grocery trips and meal planning.

CookifyAI meal planning interface

Instructions

  1. Pound the chicken breasts to even 1/2-inch thickness. Season both sides with sea salt and black pepper.
  2. In a shallow dish, dredge each chicken breast in almond or coconut flour, shaking off excess.
  3. In a large skillet, heat avocado oil over medium-high heat. Add the chicken and cook for 3-4 minutes per side, until golden and just cooked through. Transfer to a plate and cover loosely with foil.
  4. In the same skillet, add chicken broth, lemon juice, and capers. Scrape up any browned bits from the bottom of the pan.
  5. Simmer for about 3 minutes, reducing slightly. Stir in coconut cream or ghee and whisk to combine into a silky sauce.
  6. Return chicken to the skillet and simmer for another 2–3 minutes, spooning sauce over the top until heated through.
  7. Serve hot, garnished with parsley and lemon slices. Enjoy with spiralized zucchini or cauliflower rice to keep it low-carb and compliant!

Weekly Meal Planning

This Lemon Chicken Piccata is ideal for batch cooking and weekly meal prep—simply double the recipe, and serve leftovers for lunches or another dinner. Save and schedule this recipe to plan meal days and generate smart shopping lists that consolidate ingredients from all your planned meals.

Planning Benefits:

– Automatically calculates ingredient quantities for multiple recipes
– Organizes shopping lists by grocery store section
– Prevents duplicate purchases and forgotten ingredients
– Makes meal prep and compliance a breeze, regardless of eating plan

Pro tip: When scheduling your meals for the week, let CookifyAI show overlapping ingredient needs. For example, eggs or fresh herbs used in this and other meals will be tallied for you—helping streamline shopping and minimize food waste.

Cook and Prep Times

Prep Time: 15 minutes
Cook Time: 20 minutes
Total Time: 35 minutes

Harvest Your Glow: A Dietitian-Approved Anti-Inflammatory Bowl for Nourishing, Plant-Powered Dinners

DELICIOUS Anti-Inflammatory Harvest Glow Bowl (Dietitian Recipe for a Healthy Dinner)

Introduction

A DELICIOUS Anti-Inflammatory Harvest Glow Bowl is the answer when you want a vibrant, nourishing dinner that’s as beautiful as it is wholesome. By using anti-inflammatory ingredients and keeping the meal plant-based and gluten-free (GF), this dietitian-approved recipe delivers both flavor and wellness in a single, satisfying bowl. It’s a smart choice for helping to fuel your week with plenty of veggies, fiber, and feel-good nutrients.

Why You’ll Love This Anti-Inflammatory Glow Bowl

What makes this meal a true standout is its clever combination of hearty, colorful vegetables, satiating whole grains, and a delicious, zesty turmeric tahini dressing. It doesn’t just taste incredible—every ingredient works together to fight inflammation and promote optimal health. Plus, this bowl is naturally gluten-free, making it a perfect addition to a wide range of dietary preferences.

Building Blocks of a Nourishing Glow Bowl

Each component plays a vital role in making this bowl memorable. Roasted sweet potatoes add satisfying sweetness, while Brussels sprouts bring in crispy texture and nutrient density. Quinoa provides complete plant protein and fiber. Chickpeas, tossed in warming spices, supply added plant-based protein and crunch. The tangy turmeric tahini dressing ties it all together with healthy fats and inflammation-fighting antioxidants.

How to Assemble Your Harvest Glow Bowl

With some simple prep, you’ll have an impressive dinner in no time. Simply roast your veggies and chickpeas, cook the quinoa, and blend together the quick homemade dressing. Layer it all into a bowl for a dinner that’s as nourishing as it is Insta-worthy.

Serving Suggestions for a Showpiece Glow Bowl

Serve your Anti-Inflammatory Harvest Glow Bowl topped with a sprinkling of toasted pumpkin seeds, a handful of pomegranate arils for a burst of color and antioxidants, and a wedge of lemon on the side. For extra freshness, add a small handful of leafy greens or microgreens just before serving.

Nutritional Information and Serving Size

This recipe yields 2 hearty bowls. Each serving boasts about 420-470 calories, packed with fiber, plant protein, Vitamin C, magnesium, and healthy fats with zero gluten or animal products. It’s designed for anyone looking to eat more plants and reduce inflammation.

Anti-Inflammatory Harvest Glow Bowl (Recap)

This dietitian-created Glow Bowl combines colorful, seasonal vegetables, protein-packed chickpeas, and a flavor-packed turmeric tahini dressing into an unforgettable, plant-based, gluten-free meal—one that tastes just as good as it looks (and makes for stellar leftovers).

[ingredients]
For the bowl:
1 medium sweet potato, cubed
1 cup Brussels sprouts, halved
1 (14 oz) can chickpeas, drained & rinsed
1 tablespoon olive oil
1 teaspoon smoked paprika
1/2 teaspoon ground cumin
Salt & black pepper, to taste
1 cup cooked quinoa (about 1/3 cup dry)
2 large handfuls baby spinach or kale

For the turmeric tahini dressing:
3 tablespoons tahini
2 tablespoons lemon juice
1 teaspoon maple syrup
1 teaspoon ground turmeric
1 clove garlic, smashed
2 to 4 tablespoons water (to thin)
Salt & black pepper, to taste

Toppings:
2 tablespoons toasted pumpkin seeds
2 tablespoons pomegranate seeds
Lemon wedges, for serving
[/ingredients]

💡Meal Planning Tip: Save this recipe to instantly generate an organized shopping list with each ingredient sorted by grocery store section—making plant-based meal planning and healthy grocery runs a breeze!

CookifyAI meal planning interface

Instructions

  1. Preheat your oven to 425°F (220°C) and line a baking sheet with parchment paper.
  2. In a large bowl, toss cubed sweet potato and halved Brussels sprouts with 1/2 tablespoon olive oil and a pinch of salt and pepper.
  3. On the other side of the baking sheet, toss the rinsed chickpeas with remaining olive oil, smoked paprika, cumin, and a bit more salt.
  4. Spread sweet potatoes, Brussels sprouts, and chickpeas on the prepared baking sheet in a single layer. Roast for 25-27 minutes, stirring halfway through, until golden and crispy.
  5. While veggies roast, prepare quinoa or use pre-cooked quinoa to save time. Warm the baby spinach or kale in a skillet until just wilted, if desired.
  6. For the dressing, whisk together tahini, lemon juice, maple syrup, turmeric, smashed garlic, and 2 tablespoons water. Add more water, a little at a time, until the dressing is pourable. Taste and adjust seasoning with salt and pepper.
  7. To build the bowls, start with a base of greens and quinoa. Top with roasted sweet potato, Brussels sprouts, and spiced chickpeas. Drizzle generously with turmeric tahini dressing.
  8. Finish with pumpkin seeds, pomegranate seeds, and a fresh lemon wedge. Enjoy warm or at room temperature!

Weekly Meal Planning

This Anti-Inflammatory Harvest Glow Bowl is excellent for meal prep—double or triple the recipe to fuel lunches or dinners all week. Save and schedule this recipe to automatically plan which days to enjoy it, calculate total ingredient quantities, and generate a single, coordinated shopping list for plant-based, gluten-free meals.

Planning Benefits:

  • Automatically sums ingredients across all week’s meals
  • Sorts shopping lists by store section—no more wandering the aisles
  • Helps avoid duplicate purchases and forgotten items
  • Keeps healthy eating on track and meal prep stress-free

Pro tip: When planning several plant-based meals, schedule them together to optimize your fresh produce purchases, minimize waste, and keep your anti-inflammatory meals varied and exciting.

Cook and Prep Times

Prep Time: 15 minutes
Cook Time: 27 minutes
Total Time: 42 minutes

Enjoy this DELICIOUS Anti-Inflammatory Harvest Glow Bowl—your vibrant, dietitian-approved path to healthy, colorful, plant-powered dinners!

Family-Friendly Paleo Delights: A Week of Nutritious, Flavor-Packed Dinner Recipes

Family-Friendly Paleo Dinners for Every Night

Introduction

Creating delicious, family-friendly Paleo dinners doesn’t have to be a time-consuming or daunting task. This collection of dinner ideas is packed with flavor and designed to satisfy both adults and kids, all while staying grain-free, dairy-free, and refined sugar-free. Whether you’re new to the Paleo lifestyle or looking to diversify your weekly meals, these recipes are easy to prepare and perfect for busy weeknights.

Flavorful Meals the Whole Family Will Love

Paleo meals can be both nourishing and exciting with the right combinations. Think juicy baked chicken nuggets, savory taco bowls loaded with toppings, and comforting shepherd’s pie made with cauliflower mash—each bursting with flavor, naturally gluten-free, and approved by picky eaters. These dinners not only support healthy eating but also make it easy to gather around the table with dishes everyone enjoys.

Smart Ingredient Swaps for Paleo Cooking

Paleo recipes often replace grains with veggies, swap dairy for coconut or almond-based options, and use natural sweeteners like honey. Zoodles, cauliflower rice, and nut flours are clever techniques that let you enjoy a variety of textures while sticking to your wellness goals. Prepping these components ahead of time makes assembling dinner speedy and stress-free, especially on hectic evenings.

Family-Friendly Paleo Dinner Ideas

Each dish is designed to be customizable to individual preferences—a true win for household diversity! Here’s a sample week of Paleo dinners:

  • Monday: Baked Paleo Chicken Tenders with roasted sweet potatoes and broccoli
  • Tuesday: Beef Taco Bowls with cauliflower rice, salsa, and avocado
  • Wednesday: Lemon Garlic Salmon with asparagus and crispy smashed potatoes
  • Thursday: Stuffed Bell Peppers with turkey, veggies, and herbs
  • Friday: Zucchini Noodles (“zoodles”) with cashew alfredo and grilled shrimp
  • Saturday: Paleo Shepherd’s Pie with cauliflower mash topping
  • Sunday: Crockpot Pulled Pork Lettuce Wraps with slaw

[ingredients]
For the week’s dinner plan:
– 2 lbs boneless, skinless chicken breasts
– 1 dozen large eggs
– 1 cup almond flour
– 1.5 lbs ground beef or turkey
– 1.5 lbs salmon fillets
– 2 heads cauliflower
– 3 sweet potatoes
– 5 zucchinis
– 4 bell peppers
– 1 head garlic
– 2 avocados
– 1 jar salsa (sugar-free)
– 1 bunch asparagus
– 2 lbs potatoes (for crispy potatoes and shepherd’s pie)
– 2 lbs pork shoulder (for pulled pork)
– 1 bag shredded cabbage or coleslaw mix
– Fresh herbs (parsley, cilantro)
– Olive oil or coconut oil
– Sea salt, black pepper, cumin, paprika, garlic powder, Italian seasoning, lemon
[/ingredients]

💡Meal Planning Tip: Save this recipe to automatically generate a sorted shopping list—so every Paleo ingredient you need is organized by store section for quick, easy grocery trips.

CookifyAI meal planning interface

Instructions

  1. Prep Proteins: Bake chicken tenders coated in almond flour and spices; brown ground meat for taco bowls; pre-cook pork shoulder in a crockpot with spices for pulled pork.
  2. Veggies: Roast sweet potatoes, prepare zoodles with a spiralizer, steam or roast asparagus and broccoli, and make cauliflower mash by boiling and blending with olive oil and garlic.
  3. Assembly: Build taco bowls with cauliflower rice, salsa, avocado, and seasoned beef. Stuff peppers with sautéed ground turkey and vegetables. Layer shepherd’s pie filling with veggies and top with creamy cauliflower mash.
  4. Sides: Serve each meal with raw or lightly cooked vegetables, fresh herbs, and lemon wedges. Assemble lettuce wraps for easy, mess-free pulled pork servings.

Weekly Meal Planning

Consistent meal planning helps you avoid nightly decision fatigue and reduces food waste. Save and schedule this recipe collection with CookifyAI to automatically plan your Paleo dinners for the week, consolidate ingredients into one smart shopping list, and simplify your meal prep routine.

Planning Benefits:

  • Combines ingredients from all planned meals, so you shop only for what you actually need
  • Groups your groceries by category for maximum efficiency at the store
  • Tracks overlapping ingredients—perfect for multi-use items like eggs, cauliflower, and fresh herbs
  • Keeps weekly dinners varied, healthy, and stress-free

Pro tip: The CookifyAI planner makes it simple to batch similar prep tasks for even speedier cooking—like chopping extra cauliflower or pre-mixing spice blends for multiple meals.

Cook and Prep Times

Prep Time: 20-30 minutes per meal (batch-cook proteins and sides to save more time)
Cook Time: 25-40 minutes per meal
Total Time: 45-60 minutes (for most recipes; less with batch prep and planning)

Flavorful, Family-Friendly Paleo Dinners Reimagined

With the right meal planning tools and easy-to-follow recipes, making Paleo dinners the whole family loves is simpler than ever. Enjoy a week of satisfying, nutrient-dense meals—no compromise on taste or nutrition required!

One-Skillet Paleo Chicken Pot Pie: A Wholesome Comfort Classic Reinvented

One Skillet Chicken Pot Pie {Paleo}

Introduction

If you’re searching for a dinner that’s both comforting and nourishing, this One Skillet Chicken Pot Pie {Paleo} delivers classic pot pie flavor without the gluten, dairy, or processed ingredients. Its savory filling and golden, flaky topping come together in one pan—making cleanup easy and weeknights a breeze.

Deliciously Unique One Skillet Chicken Pot Pie {Paleo}

What makes this recipe stand out is its paleo-friendly, grain-free crust and creamy dairy-free sauce. Sautéed veggies and juicy chicken are enveloped in a luscious sauce, then crowned with a crisp, almond flour biscuit topping—all in a single skillet. The result? All the warmth and nostalgia of a traditional chicken pot pie, but lighter and packed with nutrients.

Preparing a Creamy Paleo-Friendly Filling

Crafting a rich sauce without flour or cream is easy with the right ingredients: coconut milk brings silky texture, while a sprinkle of arrowroot starch thickens everything beautifully. Add a mix of carrots, celery, onions, and tender chicken, and you have the heart of a classic made paleo.

Effortless One-Pan Assembly and Baking

No separate pie dish required! Once your filling is ready, simply dollop the easy almond flour biscuit dough on top, then bake until golden and bubbling. The skillet goes straight from stovetop to oven—so the flavors meld and cleanup is minimal.

Serving Suggestions for a Show Stopping One Skillet Chicken Pot Pie {Paleo}

Serve your pot pie hot from the skillet, garnished with extra fresh herbs. Pair with a crisp green salad or steamed broccoli for a balanced meal. Leftovers reheat beautifully for lunch or another dinner, making this a meal prep hero.

Nutritional Information and Serving Size

This recipe yields about 4 generous servings. Each serving is rich in protein and healthy fats, with approximately 460 calories, 29g fat, 14g carbs, and 35g protein (estimates may vary depending on your specific ingredients).

One Skillet Chicken Pot Pie {Paleo} (Recap)

Enjoy the cozy taste of classic chicken pot pie—with a wholesome, paleo twist. This recipe offers satisfying comfort without compromise, making it a weeknight staple you’ll return to again and again.

[ingredients]
For the Filling:
2 tbsp olive oil or ghee
1 lb boneless, skinless chicken breast or thighs, cut into bite-size pieces
1 small onion, diced
2 carrots, peeled and sliced
2 celery stalks, diced
2 cloves garlic, minced
1 1/2 cups frozen peas (omit for strict paleo)
1 1/2 cups diced potatoes or sweet potatoes
1 tsp sea salt
1/2 tsp black pepper
1 tsp dried thyme
1/2 tsp dried sage
1 cup chicken broth
3/4 cup full-fat coconut milk
2 tbsp arrowroot starch (or tapioca starch), mixed with 2 tbsp water

For the Biscuit Topping:
1 1/2 cups blanched almond flour
1/4 cup tapioca flour (or arrowroot starch)
1/2 tsp baking soda
1/2 tsp sea salt
2 eggs
3 tbsp coconut oil, melted
1 tsp apple cider vinegar
Chopped fresh herbs (optional, for topping)
[/ingredients]

💡Meal Planning Tip: Save this recipe to automatically generate an organized shopping list with all ingredients sorted by store section—perfect for efficient grocery trips and meal planning.

CookifyAI meal planning interface

Instructions

  1. Heat olive oil or ghee in a large oven-safe skillet over medium-high heat. Add chicken pieces, season with a pinch of salt and pepper, and cook until just cooked through, about 5-6 minutes. Remove to a plate and set aside.
  2. Add onion, carrots, celery, and potatoes to the same skillet. Sauté 5-7 minutes or until starting to soften. Stir in garlic and cook 1 minute more.
  3. Return chicken to the skillet. Add thyme, sage, chicken broth, and coconut milk. Bring to a gentle simmer. Stir in peas if using.
  4. Mix arrowroot starch and water. Gradually stir slurry into the skillet. Cook until the sauce thickens, about 2-3 minutes. Season to taste.
  5. While the filling simmers, preheat your oven to 400°F. In a bowl, whisk together almond flour, tapioca flour, baking soda, and salt. Add eggs, melted coconut oil, and apple cider vinegar. Mix until a dough forms.
  6. Turn off heat under the skillet. Drop spoonfuls of biscuit dough evenly over the chicken filling. (Don’t worry if it doesn’t cover completely—it will spread as it bakes.)
  7. Transfer skillet to the oven. Bake 18-22 minutes, until biscuits are golden and filling is bubbling. Cool 5 minutes, garnish with fresh herbs, and serve hot.

Weekly Meal Planning

This One Skillet Chicken Pot Pie {Paleo} is ideal for batch cooking and meal prep. Save and schedule this recipe to plan your dinner rotation—and generate a smart shopping list that consolidates ingredients for all your planned meals.

Planning Benefits:

Automatically calculates total ingredient quantities across all scheduled recipes

Organizes your shopping list by grocery store section

Eliminates double purchases and forgotten items

Makes weekly meal prep more efficient and reduces food waste

Pro tip: If you’re prepping multiple meals this week, schedule your recipes to see overlapping ingredients. For example, chicken or eggs used here will be counted with other meals, making shopping a breeze and helping you stick to your plan.

Cook and Prep Times

Prep Time: 20 minutes
Cook Time: 30 minutes
Total Time: 50 minutes

Enjoy a paleo spin on a beloved classic—made simple and smart for busy cooks!

Paleo Harvest Casserole: A Hearty Fall Feast for Effortless Meal Prep

Paleo Harvest Casserole Recipe

Introduction

The Paleo Harvest Casserole is a comforting one-pan meal that captures the rich flavors of fall using wholesome, paleo-friendly ingredients. Loaded with sweet potato, lean ground turkey or chicken, and vibrant seasonal produce, this casserole delivers robust flavor and fulfilling nutrition. It’s a simple way to feed a hungry crowd or plan nourishing, ready-to-reheat meals throughout the week.

Why the Paleo Harvest Casserole is a Meal Prep Superstar

Packed with flavor from sweet root vegetables, hearty protein, and a blend of warming spices, this casserole proves that healthy eating can satisfy and delight. Its make-ahead potential and ability to freeze well make it a top choice for meal planners, busy families, or anyone looking for a fuss-free dinner solution bursting with autumnal charm.

Nutritious Layers for a Paleo-Friendly Meal

The magic of this recipe lies in its thoughtful layering. Cubed sweet potato forms a naturally sweet base, followed by sautéed ground turkey or chicken, crisp bell peppers, and leafy kale. The casserole is tied together with a sprinkle of savory herbs and a touch of fresh apple—bringing both brightness and warmth to each bite.

Tips for Perfectly Roasted Flavor

For best results, roast the sweet potato cubes ahead of time to bring out their inherent caramelization. Add vegetables that will complement, not overpower, such as zucchini, onions, or Brussels sprouts. Using fresh herbs like sage and thyme gives the casserole an unmistakable harvest flavor that’s both nostalgic and inviting.

Assembly and Serving Suggestions

After layering everything in the baking dish, drizzle with a touch of olive oil and bake until bubbly and golden on top. This casserole is delicious straight from the oven and even better the next day—the flavors meld beautifully overnight. Serve on its own or alongside a simple green salad for a complete paleo meal.

Nutritional Information and Serving Size

Each batch serves about 6 generous portions. This casserole provides a satisfying mix of protein, fiber, and complex carbohydrates—all within paleo guidelines and without dairy or grains. Calorie content may vary based on add-ins, but a typical serving is balanced for a hearty meal.

Paleo Harvest Casserole Recipe (Recap)

Balance, color, and robust fall flavors make this casserole a go-to for gatherings and everyday meals alike. It’s a one-dish wonder that offers convenience, nutrition, and serious comfort—all in one hearty pan.

[ingredients]
2 large sweet potatoes, peeled and cubed
1 lb ground turkey or chicken
2 tbsp olive oil (plus extra for roasting)
1 red onion, diced
1 bell pepper (any color), diced
2 cups chopped kale, stems removed
1 apple, peeled and diced
1 tsp garlic powder
1 tsp dried thyme
1 tsp dried sage
1/2 tsp sea salt
1/2 tsp black pepper
Optional: 1/4 cup chopped walnuts or pecans for topping
[/ingredients]

💡Meal Planning Tip: Save this recipe to automatically generate an organized shopping list with all ingredients sorted by store section—perfect for efficient grocery trips and weekly meal planning.

CookifyAI meal planning interface

Instructions

  1. Preheat oven to 400°F. Line a baking sheet with parchment paper.
  2. Toss sweet potato cubes with a drizzle of olive oil, salt, and pepper. Spread on the baking sheet and roast for 20 minutes until tender and golden, stirring halfway through.
  3. While sweet potatoes roast, heat 2 tablespoons olive oil in a large skillet over medium heat. Add ground turkey or chicken and cook, breaking up with a spatula, until browned, about 7 minutes.
  4. Add diced onion and bell pepper. Sauté until softened, about 5 minutes.
  5. Stir in apples, garlic powder, thyme, sage, and kale. Cook until kale is wilted and apples begin to soften, around 2 minutes.
  6. Combine roasted sweet potatoes with the turkey mixture. Stir well to distribute ingredients evenly.
  7. Transfer mixture to a lightly greased 9×13-inch baking dish. Top with chopped walnuts or pecans if using.
  8. Bake at 400°F for 15–20 minutes, or until the top is golden and the casserole is heated through.
  9. Let rest for 5 minutes before serving. Enjoy warm!

Weekly Meal Planning

This Paleo Harvest Casserole is ideal for meal prepping nutritious lunches or dinners. Save and schedule this recipe to build out a week’s worth of healthy meals, create consolidated shopping lists, and ensure you have the right portions for your household.

Planning Benefits:

  • Automatically sums ingredients across all planned recipes
  • Organizes lists by grocery store section for fast shopping
  • Prevents overbuying and ensures every ingredient makes it into your cart
  • Streamlines batch cooking and storage for effortless weekday meals

Pro tip: Combine this recipe with others for the week in CookifyAI for advanced ingredient management. If you’re using olive oil in multiple dishes, the shopping list will aggregate your total needed—no more guesswork or waste!

Cook and Prep Times

Prep Time: 20 minutes
Cook Time: 35 minutes
Total Time: 55 minutes

Transform your weekly dinners with the vibrant, nourishing flavors of this Paleo Harvest Casserole—you’ll love the simplicity, meal prep ease, and the way it brings the tastes of fall to your table!

Golden Oven-Roasted Potatoes and Carrots: A Vibrant, Healthy Side Dish

Roasted Potatoes and Carrots Recipe | Easy Healthy Side

Introduction

Roasted Potatoes and Carrots are an unbeatable combination—simple to prepare, full of color, and bursting with natural sweetness. This easy, healthy side dish transforms basic vegetables into a caramelized, flavorful treat that pairs perfectly with almost any main course. Whether you’re serving a holiday feast or a weeknight dinner, these oven-roasted veggies are sure to delight everyone at the table.

Why You’ll Love This Roasted Potatoes and Carrots Recipe

A handful of fresh ingredients and a hot oven are all you need for this crowd-pleasing side. Roasting brings out a crispy exterior and a creamy interior in the potatoes, while carrots become tender and slightly sweet. The mix of textures and savory-sweet flavor makes this dish incredibly satisfying—wonderful for feeding a group or elevating your meal prep routine.

Choosing the Best Vegetables & Seasonings

For the best results, use a mix of Yukon Gold or red potatoes for their buttery texture, and young carrots for natural sweetness. Season with classic herbs like rosemary or thyme, and remember—a little olive oil, salt, and pepper go a long way to bring out the vegetables’ flavors. You can also add garlic cloves or toss in a sprinkle of smoked paprika for a subtle depth.

Crispy, Golden Perfection: Roasting Tips

Cut your potatoes and carrots to similar sizes so they cook evenly. Preheat your oven to a high temperature (425°F) to guarantee crisp edges. Spreading the vegetables out in a single layer helps with caramelization. Give the veggies a gentle toss halfway through roasting for uniform browning.

Serving Suggestions: The Ultimate Versatile Side

This Roasted Potatoes and Carrots Recipe is ideal alongside roasted chicken, grilled fish, or hearty plant-based mains. Sprinkle with chopped parsley or chives right before serving for an extra burst of freshness. Leftovers can be tossed into salads, grain bowls, or enjoyed as a warmed snack.

Nutritional Information and Serving Size

This easy healthy side yields about 4 servings. Each serving is approximately 170 calories, rich in vitamins A and C from the carrots, and packed with potassium from the potatoes. A nourishing dish with no added sugars or dairy—just real, wholesome ingredients.

[ingredients]
4 medium Yukon Gold or red potatoes, cut into 1-inch cubes
3 large carrots, peeled and sliced into 1/2-inch rounds
2 tablespoons olive oil
1 teaspoon kosher salt
1/2 teaspoon black pepper
1/2 teaspoon dried rosemary or thyme (or a mix)
2 cloves garlic, minced (optional)
Fresh parsley or chives, for garnish (optional)
[/ingredients]

💡Meal Planning Tip: Save this recipe to automatically generate an organized shopping list with all ingredients sorted by store section—perfect for efficient grocery trips and streamlined meal planning!

CookifyAI meal planning interface

Instructions

  1. Preheat your oven to 425°F (220°C). Line a large baking sheet with parchment paper for easy cleanup.
  2. In a large bowl, toss potatoes and carrots with olive oil, salt, pepper, dried herbs, and garlic (if using) until evenly coated.
  3. Spread the vegetables in a single layer on the prepared baking sheet. Avoid overcrowding so they can roast, not steam.
  4. Roast for 30–35 minutes, tossing halfway through, until vegetables are golden brown and tender when pierced with a fork.
  5. Transfer to a serving platter and garnish with fresh parsley or chives, if desired. Serve warm.

Weekly Meal Planning

This Roasted Potatoes and Carrots Recipe is excellent for batch cooking and meal prep. Save and schedule this recipe to plan your sides for the week and generate smart shopping lists consolidated with ingredients from all your planned meals.

Planning Benefits:

  • Automatically tallies total ingredient amounts across multiple recipes
  • Sorts shopping lists by grocery aisle or section
  • Helps avoid duplicate buys and missing items
  • Simplifies weekly meal prep with organized, efficient lists

Pro tip: When planning several meals, schedule your recipes to see overlapping ingredients in one place—like potatoes or herbs—reducing waste and saving money.

Cook and Prep Times

Prep Time: 10 minutes
Cook Time: 30–35 minutes
Total Time: 40–45 minutes

Golden Baked Feta Potatoes: Crispy, Cheesy, and Irresistibly Flavorful

Baked Feta Potatoes

Introduction

Baked Feta Potatoes promise irresistibly creamy, cheesy satisfaction in every bite. Oven-roasting transforms simple potatoes into golden, crispy perfection, while the feta melts into savory, tangy puddles you won’t soon forget. This recipe brings together minimal ingredients for maximum flavor, making it a showstopping side dish or vegetarian main that’s both easy and impressive—ideal for potlucks, holiday dinners, or cozy weeknight meals.

Why Baked Feta Potatoes Stand Out

What sets these Baked Feta Potatoes apart is the balance of comfort and sophistication. Roasted potato chunks soak up the briny, creamy notes from the feta, while a sprinkle of fresh herbs brightens the dish. The result: a crowd-pleasing pan of earthy, cheesy goodness that pairs beautifully with countless main courses or stands proudly on its own.

Building Layers of Flavor

Start by tossing Yukon gold or baby potatoes with olive oil, garlic, and a pinch of dried oregano. As they roast, their edges become wonderfully crisp. Midway through baking, scatter crumbled feta over the potatoes, letting its creamy texture and tanginess infuse every bite. Finish with a squeeze of lemon juice and chopped parsley for a fresh Mediterranean flourish.

Serving Suggestions for Baked Feta Potatoes

Serve these Baked Feta Potatoes straight from the oven, garnished with a handful of fresh basil or dill. They’re fantastic alongside roasted chicken, grilled fish, or a crisp green salad, and equally delicious as an appetizer or tapas dish. For extra flair, offer a side of Greek yogurt or tzatziki for dipping.

Nutritional Information and Serving Size

This recipe yields about 4 servings. Each portion contains roughly 250-300 calories, largely depending on potato size and the amount of feta used. It’s a hearty, wholesome dish you can feel good about enjoying any night of the week!

Baked Feta Potatoes (Recap)

Easy to prepare and packed with flavor, these Baked Feta Potatoes blend creamy, crispy, and tangy elements to create a side dish destined for repeat appearances at your table.

[ingredients]
2 pounds Yukon gold or baby potatoes, quartered
3 tablespoons olive oil
3 cloves garlic, finely minced
3/4 teaspoon dried oregano
1/2 teaspoon salt
1/4 teaspoon fresh black pepper
1 cup crumbled feta cheese
Juice of 1/2 lemon
2 tablespoons chopped fresh parsley (or basil/dill)
Optional: Greek yogurt or tzatziki, for serving
[/ingredients]

💡Meal Planning Tip: Save this recipe to automatically generate an organized shopping list with all ingredients sorted by store section—perfect for efficient grocery trips and stress-free meal planning.

CookifyAI meal planning interface

Instructions

  1. Preheat your oven to 425°F (220°C). Line a large baking sheet with parchment paper or lightly grease it.
  2. In a large bowl, toss the potato quarters with olive oil, minced garlic, dried oregano, salt, and black pepper until well coated.
  3. Spread the potatoes in an even layer on the baking sheet. Roast for 20–25 minutes, or until potatoes are just tender and starting to brown.
  4. Scatter the crumbled feta over the potatoes. Return to the oven and bake for an additional 10 minutes, or until the feta is warm and slightly golden.
  5. Remove from the oven. Immediately squeeze lemon juice over the top and sprinkle with chopped parsley, basil, or dill.
  6. Serve hot, with a side of Greek yogurt or tzatziki if desired.

Weekly Meal Planning

This dish is a dream for meal prepping and advance planning. Save and schedule this recipe in your weekly meal plan, and CookifyAI will consolidate all your recipes—so you get a smart shopping list with no duplicated ingredients and everything organized by store aisle.

Planning Benefits:

  • Calculates total ingredient quantities across every meal for the week
  • Sorts your grocery list by produce, dairy, and pantry sections
  • Prevents missing or duplicate items, saving time and money
  • Makes batch cooking, prep, and serving hassle-free

Pro tip: Planning another potato dish this week? Schedule your recipes together and stay confident you’re buying the right amount—no more guessing at the store, and no waste at home!

Cook and Prep Times

Prep Time: 10 minutes
Cook Time: 35 minutes
Total Time: 45 minutes

Hearty Weeknight Delights: Vegetarian Black Bean Enchiladas Unleashed

Delicious & Easy Vegetarian Black Bean Enchiladas

Introduction

If you’re looking for a quick, hearty, and nutritious meal that satisfies everyone at the table, these Delicious & Easy Vegetarian Black Bean Enchiladas are the answer. With rich, zesty flavors and a melt-in-your-mouth cheesy topping, this recipe transforms basic pantry staples into a stunning weeknight dinner. Even the most dedicated meat-eaters will be coming back for seconds!

Why Vegetarian Black Bean Enchiladas Are a Standout Dinner Choice

This enchilada recipe stands apart by focusing on black beans—a powerhouse ingredient—for plant-based protein, fiber, and flavor. Paired with aromatic spices, tangy enchilada sauce, and fresh toppings, you get a dish that feels both comforting and vibrant. Plus, it’s endlessly customizable with your favorite add-ins or garnishes.

Perfecting the Black Bean Filling

The filling combines tender black beans with sautéed onions, peppers, corn, and spice for a satisfying bite every time. Mashing about a third of the beans creates a creamy texture that helps the enchiladas stay together. The result is a robust, flavor-packed center that stands up beautifully to the sauce and cheese.

Assembling and Baking Your Enchiladas

Assembling these enchiladas is as simple as rolling the tasty bean filling in soft corn tortillas, lining them snugly in a baking dish, and smothering them in your favorite enchilada sauce. A generous layer of cheese on top guarantees that signature golden crust when baked. In under 30 minutes, you’ll have piping hot enchiladas ready for dinner.

Serving Suggestions for Show-Stopping Vegetarian Enchiladas

Top your enchiladas with fresh cilantro, diced avocado, sliced jalapeños, or a dollop of sour cream. They pair perfectly with a simple side salad, Spanish rice, or chips and salsa. These enchiladas are ideal for meal prep, potlucks, or even weeknight dinners where you want maximum flavor with minimal fuss.

Nutritional Information and Serving Size

This recipe yields about 8 enchiladas, serving 4. Each serving offers a balance of protein, fiber, and moderate calories, making it a wholesome, filling meatless main course. If you’re counting calories, keeping cheese portions moderate or choosing a reduced-fat option will help lighten it up further.

Delicious & Easy Vegetarian Black Bean Enchiladas (Recap)

These enchiladas are proof that vegetarian cooking can be both effortless and deeply satisfying. Their bold flavors and irresistible gooey topping make them a hit with kids and adults alike, perfect for busy weeknights or festive gatherings.

[ingredients]
1 tablespoon olive oil
1 medium onion, diced
1 red bell pepper, diced
2 garlic cloves, minced
1 teaspoon ground cumin
1 teaspoon chili powder
1/2 teaspoon dried oregano
2 (15-ounce) cans black beans, drained and rinsed
1 cup canned or frozen corn (thawed if frozen)
2 cups shredded cheese (cheddar, Monterey Jack, or a blend), divided
8 corn or flour tortillas
2 cups enchilada sauce (store-bought or homemade)
Salt and pepper, to taste
Optional toppings: avocado, cilantro, sour cream, jalapeños
[/ingredients]

💡Meal Planning Tip: Save this recipe to automatically generate an organized shopping list with all ingredients sorted by store section—perfect for efficient grocery trips and meal planning.

CookifyAI meal planning interface

Instructions

  1. Preheat your oven to 375°F (190°C). Lightly grease a 9×13 inch baking dish.
  2. Heat olive oil in a large skillet over medium heat. Add onion and bell pepper, sautéing until soft—about 5 minutes.
  3. Add the garlic, cumin, chili powder, and oregano; stir and cook for 1 minute until fragrant.
  4. Stir in the black beans and corn. Lightly mash about 1/3 of the mixture with a spoon or potato masher. Season with salt and pepper. Remove from heat and let it cool slightly. Stir in 1 cup of shredded cheese.
  5. Spread 1/2 cup of enchilada sauce evenly over the bottom of the prepared baking dish.
  6. Fill each tortilla with a generous amount of the black bean mixture, roll up tightly, and place seam-side down in the dish.
  7. Pour remaining enchilada sauce over the top of the tortillas. Sprinkle with the remaining 1 cup of cheese.
  8. Bake for 20–25 minutes, or until the cheese is bubbly and golden. Let cool for a few minutes before adding your favorite toppings and serving.

Weekly Meal Planning

This recipe is a champion for meal prep—make a full batch, and enjoy leftovers for lunch or dinner throughout the week! Save and schedule this recipe to seamlessly add it to your weekly plan and generate smart shopping lists.

Planning Benefits:

– Calculates total ingredient needs across your planned recipes
– Organizes groceries by store section for the fastest trip
– Reduces duplicate purchases and food waste
– Makes it easy to see which ingredients overlap across meals

Pro tip: When planning vegetarian meals for the week, schedule your recipes with CookifyAI to combine like ingredients—streamlining your shopping and reducing excess!

Cook and Prep Times

Prep Time: 15 minutes
Cook Time: 25 minutes
Total Time: 40 minutes

Bold Thai Fusion: Paleo, AIP, and Keto Beef Drunken Noodles Delight

Paleo AIP Thai Beef Drunken Noodles (Keto, Gluten-free)

Introduction

Paleo AIP Thai Beef Drunken Noodles (Keto, Gluten-free) deliver classic Thai takeout flavor in a wholesome, allergen-friendly package. This satisfying dish swaps out traditional noodles for veggie-based alternatives, removes common allergens, and features a robust sauce—all while keeping each bite deeply savory and satisfying. It’s the ideal choice when you want a bold, exotic meal that fits seamlessly into strict dietary needs.

Deliciously Unique Thai Beef Drunken Noodles

What makes this recipe a must-try? The bold umami flavors of Thai cuisine come alive with ingredients like coconut aminos, garlic, and fresh basil, while a medley of spiralized vegetables stands in for noodles. Thinly sliced beef soaks up the aromatic sauce, delivering juicy, savory bites with a gentle heat—no soy, grains, or nightshades required. The result? A comfort food favorite everyone at the table will love, regardless of dietary restrictions.

Building the Perfect Paleo AIP and Keto-Friendly Sauce

This sauce is free of soy, refined sugars, and nightshade spices. Coconut aminos provide depth and a hint of sweetness, while fresh ginger, garlic, and lemon juice mimic the zing of traditional Thai sauces. For a gentle AIP-approved kick, we use ground ginger and fresh herbs instead of spicy peppers. If you tolerate black pepper, a pinch can add a bit more heat.

Choosing Your Noodle Base

Classic drunken noodles use rice noodles, but for a paleo and keto-adapted version, spiralized zucchini (“zoodles”), sweet potato glass noodles, or thinly sliced cabbage work beautifully. These veggie bases are delicious, easy to prep, and absorb sauce just like their grain-based counterparts—plus, they keep the dish light, fresh, and energizing.

Serving Suggestions for a Show-Stopping Paleo Thai Beef Drunken Noodles

Serve your noodles straight from the wok, garnished with a shower of fresh basil and a squeeze of fresh lemon. If you want extra greens or crunch, add sliced bok choy or snow peas (if tolerated). Pair with cucumber salad or a side of steamed broccoli for a fiber-rich, complete meal.

Nutritional Information and Serving Size

This recipe serves 2 hearty portions. Each serving is low in carbohydrates, high in protein, and rich in micronutrients from the vegetables—perfect for keto, paleo, and AIP meal plans. Calories per serving typically range from 350–400, depending on your vegetable and beef cut choices.

Paleo AIP Thai Beef Drunken Noodles (Recap)

Combining aromatic herbs, a flavorful sauce, and satisfying beef, this dish re-imagines a Thai classic for keto, Paleo, and AIP lifestyles—delivering maximum flavor and a nourishing meal everyone can enjoy.

[ingredients]
8 oz grass-fed beef steak (flank or sirloin), thinly sliced
2–3 medium zucchinis, spiralized (or use sweet potato glass noodles/cabbage for AIP)
2 tbsp coconut aminos
1 tbsp avocado oil (or coconut oil)
2 large cloves garlic, minced
1 inch fresh ginger, minced or 1 tsp ground ginger
1 tbsp fish sauce (ensure AIP compliant, or substitute more coconut aminos if needed)
Juice of ½ lemon
1/2 cup fresh basil leaves, roughly chopped
2 green onions, sliced (green parts only for AIP)
Sea salt, to taste
Pinch of black pepper (omit for strict AIP)
Optional: sliced bok choy or snow peas (omit for strict AIP)
[/ingredients]

💡Meal Planning Tip: Save this recipe to automatically generate an organized shopping list with all ingredients sorted by store section. Perfect for streamlined grocery trips—never miss an item or double-buy essentials again!

CookifyAI meal planning interface

Instructions

  1. Prep your vegetables: Spiralize the zucchini or slice your preferred noodles/veggies. Set aside on a towel to absorb excess moisture.
  2. Mix the sauce: In a small bowl, combine coconut aminos, fish sauce, lemon juice, fresh ginger, and garlic. Set aside.
  3. Heat avocado oil in a large skillet or wok over medium-high heat. Add the thinly sliced beef with a pinch of salt. Sear 1–2 minutes each side until nearly cooked through. Transfer beef to a plate.
  4. Add more oil to the skillet if needed and sauté noodles/veggies for 2–3 minutes until just tender, stirring frequently.
  5. Return beef to the pan with the noodles and pour in the sauce. Toss everything together and cook for another 1–2 minutes, allowing flavors to meld and sauce to reduce slightly.
  6. Turn off the heat. Stir in fresh basil and green onions. Adjust seasoning with more salt or pepper if desired.
  7. Serve immediately, garnished with extra basil and a lemon wedge. Enjoy!

Weekly Meal Planning

Paleo AIP Thai Beef Drunken Noodles is a stellar addition to your weekly meal plan. Save and schedule this recipe to generate smart shopping lists and keep your meal prep stress-free.

Planning Benefits:

  • Automatically calculates ingredient totals across your planned recipes
  • Sorts shopping lists by grocery store section for efficiency
  • Prevents forgotten items by consolidating all meals
  • Simplifies weekly planning with automatic adjustments—no math or spreadsheets!

Pro tip: When prepping several recipes, use CookifyAI to schedule your meals and watch overlapping ingredients merge, so you only buy what you need—good for your wallet and the environment.

Cook and Prep Times

Prep Time: 15 minutes
Cook Time: 10 minutes
Total Time: 25 minutes

This dish is the perfect fusion of bold Thai flavors and mindful nutrition—perfect for busy weeknights and careful meal planners alike.

Paleo Perfection: Crispy Sesame Chicken with Cauli Rice Takeout Twist

Paleo Crispy Sesame Chicken with Cauli Rice

Introduction

Few dishes achieve the crave-worthy combination of crispy, flavorful, and healthy quite like Paleo Crispy Sesame Chicken with Cauli Rice. This recipe captures the excitement of your favorite takeout, swapping traditional breading and rice for wholesome, paleo-friendly alternatives. Bursting with umami flavor and delivering the satisfying crunch you love, this dish is sure to impress anyone seeking a delicious, crowd-pleasing weeknight dinner that fits your clean-eating goals.

Flavorful Crunch in Every Bite

This recipe stands out because it masterfully creates a restaurant-style crispy texture using grain-free coatings that are golden brown and delightfully crunchy. Combined with a sticky sesame-infused sauce and fluffy, nutty cauliflower rice, the meal delivers all the joy of classic sesame chicken—without the guilt, grains, or added sugars.

Crafting Crispy Paleo Chicken

To achieve that iconic crispy exterior, chicken is tossed in arrowroot or tapioca flour and quickly pan-fried in avocado oil. This coating crisps up beautifully and locks in juices, ensuring every bite is tender and satisfying. A savory-sweet paleo sesame sauce ties it all together with honey, coconut aminos, and aromatic garlic and ginger.

Quick & Easy Cauliflower Rice

Cauli rice is the ultimate healthy swap for your traditional stir-fried rice. A quick sauté brings out its natural nuttiness, making it the perfect base for soaking up the sesame sauce and crispy chicken. Plus, it comes together in just minutes, making this a fantastic option for busy evenings.

Serving Suggestions for the Perfect Paleo Crispy Sesame Chicken

Serve your crispy sesame chicken over a bed of hot cauli rice and garnish with toasted sesame seeds, sliced green onions, and a sprinkle of cilantro if desired. Pair with steamed broccoli or snap peas for added crunch and color. This presentation is sure to wow at the dinner table—no takeout menu needed!

Nutritional Information and Serving Size

This recipe yields about 4 servings of hearty paleo crispy sesame chicken with cauli rice. Each serving contains approximately 350–400 calories, with balanced protein, healthy fats, and plenty of naturally sourced fiber. Thanks to whole-food ingredients, this meal is filling without feeling heavy.

Unbeatable Paleo Crispy Sesame Chicken with Cauli Rice (Recap)

You get the iconic flavors and textures of a takeout favorite transformed into an easy, nourishing meal that’s gluten-free, grain-free, and low in carbs. The crispy chicken and savory-sweet sauce make this crowd-pleaser a go-to recipe for both weeknights and special occasions.

[ingredients]
For the Chicken:
1 lb boneless, skinless chicken breasts (or thighs), cut into bite-size pieces
1/3 cup arrowroot flour (or tapioca starch)
1/2 tsp sea salt
1/4 tsp black pepper
1/2 tsp garlic powder
2–3 tbsp avocado oil

For the Sesame Sauce:
3 tbsp coconut aminos (or tamari for non-paleo)
1.5 tbsp honey
1.5 tbsp toasted sesame oil
2 cloves garlic, minced
1 inch fresh ginger, grated
1 tbsp rice vinegar (or apple cider vinegar)
1 tsp arrowroot starch (for thickening)

For the Cauli Rice:
1 medium head cauliflower, riced (about 4 cups)
1 tbsp avocado oil or coconut oil
1/4 tsp sea salt

Optional Garnishes:
Toasted sesame seeds
Sliced green onions
Fresh cilantro
[/ingredients]

💡Meal Planning Tip: Save this recipe on CookifyAI to instantly create a smart, categorized grocery list—making your weekly shopping and meal prep so much easier!

CookifyAI meal planning interface

Instructions

  1. Rice the Cauliflower: Pulse cauliflower florets in a food processor until rice-sized. Set aside.
  2. Prepare the Chicken: In a bowl, toss chicken pieces with arrowroot flour, salt, pepper, and garlic powder until well coated.
  3. Crisp the Chicken: Heat avocado oil in a large skillet over medium-high. In batches, fry chicken pieces until golden and cooked through (about 3–4 minutes per side). Remove and set aside on a plate lined with paper towels.
  4. Make the Sauce: In a small bowl, whisk together coconut aminos, honey, sesame oil, garlic, ginger, vinegar, and arrowroot starch. Pour sauce into the skillet, simmer for 1–2 minutes until thickened, then return chicken to the pan, tossing to coat in the sauce.
  5. Prepare Cauli Rice: In a clean skillet, heat avocado oil over medium. Add riced cauliflower and salt. Cook, stirring for 4–5 minutes until tender but not mushy.
  6. Assemble & Serve: Divide cauli rice among plates. Top generously with crispy sesame chicken. Sprinkle with sesame seeds, green onions, and cilantro if desired. Enjoy hot!

Weekly Meal Planning

This Paleo Crispy Sesame Chicken with Cauli Rice is an excellent addition to your weekly meal prep schedule. Save and schedule this recipe with CookifyAI to consolidate all your ingredients for the week, ensuring nothing gets missed on your grocery run.

Planning Benefits:

  • Automatically adds total ingredient needs from all your recipes
  • Sorts shopping list by grocery section—no more zig-zagging the aisles
  • Eliminates double buying and forgotten staples
  • Keeps the whole week’s meals organized and stress-free

Pro tip: When scheduling meals, CookifyAI shows ingredient overlaps—helping you buy just enough and cut down on waste.

Cook and Prep Times

Prep Time: 20 minutes
Cook Time: 20 minutes
Total Time: 40 minutes

Whole30 Thai Chicken Cauliflower Rice: A Bold, Clean-Eating Thai Delight

Whole30 Thai Chicken Cauliflower Rice (Paleo, Gluten Free)

Introduction

Whole30 Thai Chicken Cauliflower Rice offers vibrant Southeast Asian flavor in a nutritious and completely grain-free package. With juicy chicken, crisp vegetables, and a fragrant, savory sauce—all tossed atop tender, riced cauliflower—this dish proves that healthy eating doesn’t have to mean sacrificing excitement at the dinner table. Perfect for those on Whole30, Paleo, or gluten-free diets, it’s a satisfying one-pan meal ready to become a family favorite.

Why Make Whole30 Thai Chicken Cauliflower Rice?

This recipe transforms weeknight dinners with its bold spices and effortless prep. By swapping traditional rice with cauliflower, you get all the satisfying texture with fewer carbs and added nutrients. The ginger-lime sauce ties everything together, making the whole dish both light and filling, and it’s easily adaptable to your favorite vegetables or available pantry items.

Building Major Thai Flavors with Clean Ingredients

Thanks to coconut aminos, fresh aromatics, and a squeeze of lime, you can recreate those classic sweet, salty, and savory Thai flavors—without any added sugar, grains, or soy. The chicken soaks up the sauce while broccoli, bell pepper, and snow peas keep things vibrant and crunchy. Garnish with fresh cilantro and chopped cashews for an extra touch!

How to Cook Perfect Cauliflower Rice

To make cauliflower rice, pulse large florets in a food processor until they reach a rice-like consistency (or use store-bought for speed). Sauté in a hot pan with a splash of oil until just tender, about 4–5 minutes. Avoid overcooking so the “rice” holds a pleasant bite and doesn’t become mushy—key to keeping this dish crave-worthy.

Serving This Dish for Maximum Enjoyment

Serve your Thai chicken cauliflower rice in bowls, finished with lime wedges and fresh herbs for an aromatic lift. Sprinkle with chopped cashews for crunch, and offer extra coconut aminos or hot sauce on the side for deeper flavor and customizable heat.

Nutritional Information and Serving Size

This recipe serves 4 generous portions. Each serving is approximately 280–320 calories, packed with lean protein and a variety of fresh vegetables. It’s dairy free, gluten free, grain free, and Whole30 and Paleo compliant—providing a balanced dinner you can feel good about.

Whole30 Thai Chicken Cauliflower Rice (Recap)

Bright, bold Thai flavors shine in this quick, healthy recipe. It’s perfect for meal prep, family dinners, or anyone craving a takeout-style meal that’s both clean and comforting.

[ingredients]
1 pound boneless, skinless chicken breast or thighs, thinly sliced
1 medium head cauliflower (or 4 cups pre-riced cauliflower)
1 tablespoon avocado oil or olive oil
1 red bell pepper, thinly sliced
1 cup broccoli florets
1/2 cup snow peas, halved
2 green onions, chopped
2 cloves garlic, minced
1 tablespoon fresh ginger, minced
1/4 cup coconut aminos
1 tablespoon fish sauce (Whole30 compliant)
1 tablespoon lime juice
1 teaspoon sesame oil (omit if strict Paleo)
Salt and pepper, to taste
Optional: 1/4 teaspoon red pepper flakes
For garnish: Chopped fresh cilantro, lime wedges, chopped cashews
[/ingredients]

💡Meal Planning Tip: Save this recipe to instantly generate an organized shopping list. All ingredients are automatically sorted by store section so your Whole30 or Paleo shopping trip is faster and smoother!

CookifyAI meal planning interface

Instructions

  1. Make the cauliflower rice: Pulse cauliflower florets in a food processor until they resemble rice. Set aside.
  2. Heat half the oil in a large skillet over medium-high. Add the chicken, season with salt and pepper, and sauté until browned and cooked through, 5–7 minutes. Remove from the pan and set aside.
  3. Add remaining oil to the skillet. Sauté garlic, ginger, and green onions for 1 minute. Add bell pepper, broccoli, and snow peas. Cook, stirring, until just tender, about 3–4 minutes.
  4. Add the riced cauliflower to the pan. Stir to combine, cooking for 4–5 minutes until cauliflower is just tender.
  5. Return chicken to the skillet. Pour in coconut aminos, fish sauce, lime juice, and sesame oil (if using). Toss everything together, letting flavors meld and sauce reduce slightly, about 2 minutes. Add red pepper flakes if desired.
  6. Remove from heat. Taste and adjust salt, pepper, or lime as needed.
  7. Serve in bowls with cilantro, cashews, and lime wedges. Enjoy hot!

Weekly Meal Planning

This Whole30 Thai Chicken Cauliflower Rice is ideal for meal prep—make a batch, portion it into containers, and enjoy a healthy, flavorful lunch or dinner throughout the week. Save and schedule this recipe with CookifyAI to seamlessly plan your week and build smart shopping lists that summarize what you actually need.

Planning Benefits:

  • Automatically totals up ingredients needed across all your scheduled recipes
  • Organizes grocery lists by store section (produce, meat, pantry)
  • Helps avoid duplicate purchases and forgotten items
  • Makes shopping and weekly prep easy—especially for special diets like Whole30, Paleo, or gluten free

Pro tip: When you add this recipe to your meal plan along with other meals, CookifyAI will calculate your total chicken and veggie needs, ensuring you buy just the right quantity. Perfect for efficient, waste-free Whole30 meal prep!

Cook and Prep Times

Prep Time: 15 minutes
Cook Time: 20 minutes
Total Time: 35 minutes

Enjoy your healthy, flavorful Whole30 Thai Chicken Cauliflower Rice, and make meal planning a breeze with CookifyAI!

Whole30 Paleo Sesame Chicken: A Wholesome Takeout Classic Reimagined

Paleo Sesame Chicken {Whole30}

Introduction

Paleo Sesame Chicken {Whole30} is a wholesome and flavorful spin on a classic takeout favorite. With its savory, lightly sweet sauce and satisfying crunch, this recipe delivers restaurant-quality results without any grains, dairy, soy, or added sugars. It’s ideal for busy weeknights, feeding a family, or anyone looking to stick to healthy eating plans without sacrificing taste.

Why Make Paleo Sesame Chicken?

What makes this sesame chicken a standout is its rich depth of flavor achieved through simple, natural ingredients—think umami-packed coconut aminos, nutty toasted sesame oil, a hint of ginger, and oven-crisped chicken bites. This version is guaranteed crowd-pleaser that fits perfectly into paleo or Whole30 lifestyles, offering comfort food satisfaction minus the guilt.

How to Create a Flavorful, Whole30 Sesame Sauce

The sauce is the hero here: coconut aminos bring a soy-free umami punch, while apple cider vinegar adds bright tanginess. Sesame oil infuses distinctive aroma, complemented by fresh garlic and ginger for warmth. Balanced with a touch of date paste or pineapple juice (for a Whole30-compliant sweet note), you get all the sticky-sweet richness you expect, naturally.

Building Crunchy, Juicy Paleo Sesame Chicken

Toss bite-sized chicken pieces in a dusting of arrowroot or tapioca starch (for that light, crispy crust), then sear them in avocado oil until golden brown. This healthier breading keeps the chicken juicy inside while getting irresistibly crisp on the outside—no deep frying required.

Serving Suggestions for a Complete Paleo Sesame Chicken Meal

Serve over a bed of cauliflower rice and garnish with sliced green onions, sesame seeds, and a sprinkle of cilantro for a vibrant, satisfying meal. Add steamed broccoli or snap peas on the side for color and nutrients—a surefire way to impress guests or make weeknight dinner a breeze!

Nutritional Information and Serving Size

This recipe serves 4, with each serving containing around 325 calories, 27g protein, 15g healthy fats, and less than 10g net carbs. It’s an excellent choice for those tracking macros or staying within Whole30 or paleo guidelines.

Paleo Sesame Chicken at Its Best (Recap)

You get all the craveable, sticky-rich flavor of sesame chicken, minus grains, soy, refined sugar, and processed oils. This easy recipe is the ultimate healthy takeout fake-out—family-friendly and meal-prep approved.

[ingredients]
1½ lbs boneless, skinless chicken breasts or thighs, cut into 1-inch pieces
1/3 cup arrowroot flour (or tapioca starch)
¾ tsp sea salt
½ tsp black pepper
3 tbsp avocado oil (divided)

For the Sauce:
1/3 cup coconut aminos
2 tbsp toasted sesame oil
2 tbsp apple cider vinegar
1 tbsp date paste or pure pineapple juice (Whole30: ensure compliant)
2 cloves garlic, minced
1-inch fresh ginger, grated
1 tbsp sesame seeds (plus more for garnish)
2 green onions, sliced (for serving)

To Serve:
Cauliflower rice, steamed broccoli, or snap peas
Fresh cilantro (optional)
[/ingredients]

💡Meal Planning Tip: Save this recipe to automatically generate an organized shopping list with all ingredients sorted by store section, streamlining grocery trips and making it easier to stick to Whole30 or paleo meal plans.

CookifyAI meal planning interface

Instructions

  1. Pat chicken pieces dry. In a large bowl, toss chicken with arrowroot flour, salt, and pepper until evenly coated.
  2. Heat 2 tablespoons of avocado oil in a large skillet over medium-high. Add chicken in batches, spreading pieces out so they aren’t crowded. Sear 3–4 minutes per side, until golden and cooked through. Remove to a plate and repeat if needed, adding more oil as necessary.
  3. Meanwhile, whisk together all sauce ingredients: coconut aminos, sesame oil, apple cider vinegar, date paste (or pineapple juice), minced garlic, grated ginger, and sesame seeds.
  4. Return cooked chicken to skillet and lower heat to medium. Pour in the sauce and toss to coat. Stir continuously for 2–3 minutes, until sauce thickens and becomes glossy, coating the chicken evenly.
  5. Serve hot over cauliflower rice with a garnish of green onions, sesame seeds, and optional cilantro. Add a side of broccoli or snap peas for a hearty meal.

Weekly Meal Planning

This Paleo Sesame Chicken recipe is a fantastic candidate for weekly meal prep and planning. Save and schedule this recipe to your meal plan and generate a smart shopping list that combines ingredients for all your planned meals.

Planning Benefits:

– Quickly calculate total quantities for all meals throughout the week
– Stay organized with shopping lists grouped by grocery aisle
– Avoid double-buying and reduce food waste
– Easily adjust servings for single or family-sized meal preps
– Perfect for Whole30, paleo, and other special diet plans

Pro tip: Planning several meals that use common ingredients (like chicken, garlic, or cauliflower rice) means CookifyAI will consolidate these items, ensuring you buy just what you need—no forgotten ingredients, no overbuying.

Cook and Prep Times

Prep Time: 15 minutes
Cook Time: 15 minutes
Total Time: 30 minutes

Enjoy this healthy, satisfying, and flavor-filled Paleo Sesame Chicken {Whole30}—made even easier with smart meal planning and organized shopping lists from CookifyAI!

Sizzling Mongolian Beef Stir Fry: Your Ultimate Whole30, Paleo, & AIP Weeknight Delight

Mongolian Beef Stir Fry (Whole30, Paleo, AIP) – Unbound Wellness

Introduction

If you’re searching for a flavorful, protein-rich dinner that comes together fast and fits a range of dietary needs, Mongolian Beef Stir Fry (Whole30, Paleo, AIP) is your go-to recipe. This dish features tender slices of beef quickly seared and coated in a glossy, savory-sweet sauce all cooked in a single pan. With crisp, colorful veggies, it makes a nutrient-dense meal that’s deeply satisfying yet entirely free from gluten, grains, dairy, and processed sugars.

Why Mongolian Beef Stir Fry is a Weeknight Winner

Mongolian Beef Stir Fry shines because it combines rich, bold flavors with a quick cook time—meaning you can enjoy takeout-style satisfaction at home with minimal effort. The Whole30, Paleo, and AIP adaptations ensure you get all the umami goodness without ingredients that might disrupt your health goals. It’s a crowd-pleaser for family meals and meal prepping alike, making both clean eating and dinner planning genuinely enjoyable.

The Secret to Saucy Stir Fry Success

Crafting a delectable Mongolian-style sauce without soy, refined sugar, or cornstarch is easier than you might think. Coconut aminos offers the salty, umami backbone, while a touch of honey or date paste (for AIP), and arrowroot starch creates that signature, glossy finish. With a bit of garlic, ginger, and green onion, you’ll create an aromatic sauce that soaks perfectly into the seared beef and veggies.

How to Sear Beef for Perfect Texture

For this recipe, thinly slice flank steak or sirloin against the grain—this ensures every bite is tender. Tossing the beef lightly in arrowroot starch not only keeps it compliant with Whole30, Paleo, and AIP diets but also produces a crisp exterior that will stand up to the rich sauce. Sear quickly over medium-high heat for delicious browning without overcooking; you want the inside juicy!

Veggies that Complete Your Stir Fry

Vibrant, quick-cooking vegetables like broccoli florets, bell peppers, carrots, and snap peas add crunch, color, and nutrients. Feel free to tailor the veggies based on your preferences and what fits your dietary template—bok choy and zucchini are also wonderful AIP options.

Nutritional Information and Serving Size

This Mongolian Beef Stir Fry yields about 4 hearty servings. Each portion is rich in protein and fiber, with healthy fats to sustain you. Since this recipe skips added sugars and highly processed ingredients, you can enjoy a meal that helps maintain steady energy and supports a whole foods approach.

[ingredients]
1 lb flank steak (or sirloin), thinly sliced against the grain
2 tbsp arrowroot starch (divided)
2 tbsp avocado oil (or coconut oil)
1/3 cup coconut aminos
2 tbsp water
1–2 tbsp honey or 1–2 tsp date paste (omit for Whole30)
2 cloves garlic, minced
1 inch fresh ginger, grated
4 green onions, sliced (separate white and green parts)
2 cups broccoli florets
1 red bell pepper, thinly sliced (omit for strict AIP)
1 cup carrots, julienned or thinly sliced
Sea salt and black pepper (omit pepper for AIP)
Sesame seeds for garnish (omit for AIP)
Optional: 2 tbsp fresh cilantro, chopped

💡Meal Planning Tip: Save this recipe to instantly generate a streamlined shopping list. CookifyAI sorts everything by store section, making healthy meal planning and prepping for specialized diets easier than ever.

CookifyAI meal planning interface

Instructions

  1. In a medium bowl, toss the thinly sliced beef with 1 tablespoon of arrowroot starch and a pinch of sea salt (skip pepper for AIP). Set aside.
  2. In a small bowl, whisk together coconut aminos, water, honey or date paste (if using), the remaining 1 tablespoon arrowroot starch, minced garlic, and grated ginger. Stir in the white part of the green onions.
  3. Heat 1 tablespoon avocado oil in a large skillet or wok over medium-high heat. Add the beef in a single layer; sear 1–2 minutes per side until browned but not overcooked. Work in batches if necessary. Remove to a plate and set aside.
  4. Add the remaining oil to the pan. Toss in the broccoli, bell peppers, and carrots. Stir fry 3–4 minutes until just tender but still crisp.
  5. Return the seared beef to the pan. Pour in the prepared sauce and stir well, allowing the sauce to bubble and thicken (about 2–3 minutes).
  6. Remove from heat. Top with green parts of the green onions and a sprinkle of sesame seeds and cilantro if using. Serve hot and enjoy!

Weekly Meal Planning

The Mongolian Beef Stir Fry is tailor-made for batch meal prep or inclusion in a weeknight dinner rotation. Save and schedule this recipe with CookifyAI to easily plan your week, build an integrated shopping list, and avoid redundant prep steps.

Planning Benefits:

  • Automates your shopping lists—no more forgotten coconut aminos or running low on fresh veggies.
  • Groups shared ingredients across multiple meals for organized shopping and prepping.
  • Keeps track of dietary requirements (like Whole30, Paleo, or AIP) so your week’s meals always align with your goals.
  • Saves time by making it easy to prep sauces, chop veggies, or marinate beef in advance for several recipes at once.

Pro tip: Plan double batches and use leftovers for lunch the next day—just schedule your recipes in CookifyAI and see how your ingredient list recalculates on the fly!

Cook and Prep Times

Prep Time: 15 minutes
Cook Time: 15 minutes
Total Time: 30 minutes

With its aromatic sauce, perfectly seared beef, and crisp vegetables, Mongolian Beef Stir Fry (Whole30, Paleo, AIP) delivers the takeout experience you crave—made even better at home and tailored to your health needs. Enjoy the confidence and convenience of planning, shopping, and savoring nourishing meals all week long!

Whole30 Healthy Bulgogi: Quick & Bold Korean BBQ for Wholesome Weeknight Dinners

Healthy Bulgogi (Korean Beef BBQ) – The Ultimate Whole30 Dinner Recipe

Introduction

If you’re searching for a delicious, healthy way to spice up your weeknight dinners, look no further than this Healthy Bulgogi (Korean Beef BBQ). This recipe is a standout among Asian-inspired dishes for busy nights: it’s quick, packed with authentic flavors, and is Whole30-compliant, meaning you can enjoy all the depth of traditional bulgogi without worrying about added sugars or gluten. It’s a crowd-pleaser, perfect for families or anyone who loves bold tastes with minimal prep time.

The Flavorful Simplicity of Healthy Bulgogi

What sets this bulgogi recipe apart is its ability to deliver savory, slightly sweet, and garlicky notes using only wholesome, nutrient-rich ingredients. By swapping out the usual soy sauce and sugar for coconut aminos and fruit, you maintain the iconic taste while staying committed to Whole30 guidelines. Serve it over cauliflower rice, lettuce wraps, or alongside a crunchy Asian slaw for a complete meal that’s as satisfying as it is nourishing.

Building a Wholesome Bulgogi Marinade

The key to irresistible bulgogi is in the marinade. This Whole30 adaptation uses coconut aminos for umami, fresh pear or apple for natural sweetness, and a robust blend of garlic, ginger, and sesame oil. Marinating the beef—even just for 30 minutes—tenderizes the meat and infuses it with flavor. For best results, slice your beef thinly against the grain for optimal tenderness and quick cooking.

Cooking & Serving Your Healthy Bulgogi

Once marinated, the beef cooks quickly—just a few minutes in a hot skillet yields perfectly caramelized pieces. Pair with steamed veggies, a bowl of cauliflower rice, or wrap in lettuce leaves for a vibrant, low-carb meal. Garnish with fresh green onions and sesame seeds for that extra burst of color and crunch.

Meal Prep & Storage Tips

This bulgogi is perfect for meal prepping: the cooked beef can be stored in the fridge for up to 4 days, making on-the-go lunches or repeat weeknight dinners a breeze. The marinade also works well with chicken, pork, or tofu—giving you flexibility for future meal plans.

Nutritional Information and Serving Size

This recipe serves four and each serving is approximately 300 calories (without rice/lettuce), rich in protein and healthy fats, and completely free of gluten, dairy, and added sugars—a smart option for anyone following Whole30 or seeking a lighter Asian BBQ.

[ingredients]
1 pound flank steak or sirloin, thinly sliced against the grain
1/4 cup coconut aminos
1 tablespoon toasted sesame oil
2 tablespoons apple or Asian pear, grated
2 teaspoons freshly grated ginger
3 cloves garlic, minced
1/2 small onion, finely sliced
1 tablespoon rice vinegar (optional for brightness, Whole30-compliant)
1/4 teaspoon black pepper
2 green onions, chopped (for garnish)
Sesame seeds (for garnish)
Optional: Bibb lettuce leaves or cauliflower rice, for serving
[/ingredients]

💡Meal Planning Tip: Save this recipe to CookifyAI and instantly generate a categorized shopping list to make grocery trips faster and more organized. Never forget an ingredient again—especially useful for planning Whole30 dinners and keeping your shopping on track!

CookifyAI meal planning interface

Instructions

  1. In a medium bowl, combine coconut aminos, sesame oil, grated pear or apple, ginger, garlic, onion, rice vinegar (if using), and black pepper. Mix well.
  2. Add thinly sliced steak to the marinade, tossing to fully coat. Cover and refrigerate for at least 30 minutes (or up to 2 hours for deeper flavor).
  3. Heat a large skillet or grill pan over high heat. Working in batches, add marinated beef in a single layer. Cook for 1–2 minutes per side until browned and just cooked through.
  4. Serve bulgogi hot, garnished with green onions and sesame seeds. Enjoy with cauliflower rice or wrapped in lettuce leaves.

Weekly Meal Planning

This Healthy Bulgogi recipe is a dream for weekly meal planning, especially if you’re following Whole30 or looking to prep nourishing dinners in advance. Save and schedule this recipe using CookifyAI: the app will automatically compile your entire week’s ingredient needs, sorted by grocery section for streamlined shopping.

Planning Benefits:

  • No more forgotten ingredients—all listed in one place!
  • Save time and money by avoiding duplicates and impulse buys.
  • Easily see which proteins and veggies overlap across recipes, helping reduce waste and stretch your grocery budget.
  • Adjust servings and ingredient amounts for families, meal prep, or leftovers—CookifyAI does the math for you.

Pro tip: Plan several Whole30 recipes in one week and consolidate shopping—CookifyAI will calculate total quantities for staples like coconut aminos, eggs, or fresh produce across all your meals, minimizing food waste and optimizing your shopping efficiency.

Cook and Prep Times

Prep Time: 15 minutes (+30 min marinating)
Cook Time: 10 minutes
Total Time: 25 minutes (plus marinating)

Healthy & Hearty: 8 Casserole Recipes That Satisfy Your Comfort Food Cravings

8 Healthy Casserole Recipes That Taste Like Comfort Food

Introduction

There’s something undeniably satisfying about digging into a bubbling, golden casserole—especially when you know it’s as good for your body as it is for your soul. Casseroles are the ultimate comfort food, delivering hearty flavors and creamy textures that make them perennial family favorites. This collection of 8 Healthy Casserole Recipes proves you can enjoy all the coziness and nostalgia of classic casseroles—without overloading on heavy creams, extra cheese, or refined carbs.

Why These Casseroles Are Comforting Yet Guilt-Free

Each recipe on this list packs in nutritious vegetables, lean proteins, and smart swaps (think: Greek yogurt for sour cream and whole grains instead of white pasta) without sacrificing any of the classic, craveable tastes. From creamy chicken and broccoli bake to a hearty vegetarian enchilada casserole, you’ll find both new favorites and healthy takes on time-honored classics. These casseroles are perfect for anyone looking to boost their weeknight meal routine while still getting that “just like mom used to make” feeling.

8 Healthy Casserole Recipes That Taste Like Comfort Food

  • 1. Chicken and Broccoli Quinoa Bake
    Swaps white rice with protein-rich quinoa and uses low-fat cheese and Greek yogurt for creaminess. Packed with fiber and flavor, it’s a lighter spin on the beloved chicken-broccoli classic.
  • 2. Loaded Sweet Potato and Black Bean Casserole
    This meatless marvel features roasted sweet potatoes, smoky black beans, bell peppers, and a touch of melted cheese—giving you that “chili cheese fries” vibe but with nourishing ingredients.
  • 3. Lightened-Up Tuna Noodle Casserole
    A comfort food mainstay, this version opts for whole-wheat noodles, peas, and a lighter homemade cream sauce using Greek yogurt instead of dense cream soup.
  • 4. Turkey and Veggie Shepherd’s Pie
    Lean ground turkey and loads of vegetables get topped with a pillowy layer of mashed cauliflower-potato blend instead of straight mashed potatoes for a cut in carbs and calories.
  • 5. Creamy Spinach Artichoke Pasta Bake
    Inspired by everyone’s favorite dip, this casserole includes whole-grain pasta and a lighter ricotta-Parmesan sauce blended with spinach and artichokes.
  • 6. Eggplant Parmesan Casserole
    Layers of roasted eggplant replace breaded/fried slices, and low-sugar marinara keeps this version lighter while still delivering tons of Italian comfort.
  • 7. Mexican Zucchini Enchilada Casserole
    Zucchini ribbons stand in for tortillas, while lean ground chicken, beans, and a splash of enchilada sauce keep this casserole moist and mouthwatering.
  • 8. Cheesy Cauliflower and Chickpea Bake
    Cauliflower, chickpeas, and a sprinkle of sharp cheddar come together for a low-carb, high-protein side or main—perfect for cheese lovers watching their macros.

[ingredients]
For a week of healthy casseroles, here’s a consolidated list of foundational ingredients you’ll use:
2 lbs boneless, skinless chicken breast or ground turkey
1.5 cups cooked quinoa
2 cans black beans, rinsed and drained
2 large sweet potatoes
2 cups broccoli florets
1 large eggplant
2 zucchinis
1 cup frozen peas
2 cups cauliflower florets
1 can artichoke hearts, drained and chopped
10 oz fresh spinach
1 cup Greek yogurt
8 oz whole-wheat or chickpea pasta
1 can low-sodium tuna in water
2 cups low-sugar marinara sauce
1 cup part-skim ricotta cheese
1 cup shredded low-fat mozzarella
3/4 cup grated sharp cheddar
1/2 cup grated Parmesan
2 cups enchilada sauce
Assorted spices (garlic, cumin, chili powder, Italian seasoning, salt, pepper)
Olive oil spray
[/ingredients]

💡 Meal Planning Tip: Save this recipe collection to automatically create a smart, categorized shopping list for all your casserole needs—making your next grocery trip quick and efficient.

CookifyAI meal planning interface

How to Prep and Bake Your Casseroles

  1. Preheat & Prepare: Most casseroles bake at 350°F. Lightly coat your casserole dish with olive oil spray to prevent sticking.
  2. Cook Components: Roast, steam, or sauté veggies and proteins according to each recipe’s instructions. Cook grains like quinoa or pasta ahead of time and set aside.
  3. Mix Sauces & Spices: Whip up lighter sauces with Greek yogurt, ricotta, or pureed veggies. Mix in spices before combining all ingredients in your dish.
  4. Assemble: Layer your ingredients—start with grains/veggies, then protein, then creamy sauce/cheese.
  5. Bake: Cover with foil and bake for 20–30 minutes. Uncover for the last 10 minutes so the top becomes golden.
  6. Serve Hot: Let casseroles rest for 5 to 10 minutes before slicing for best texture and flavor.

Weekly Meal Planning

These 8 healthy casseroles make the ideal backbone for weekly meal prep. Schedule these recipes to your personal meal plan to get a perfectly organized shopping list, batch cooking instructions, and exactly how much of each ingredient you’ll need for a streamlined week.

Planning Benefits:

  • Effortlessly create a variety-packed week of healthy, protein-rich meals.
  • Instantly build a master grocery list sorted by produce, dairy, canned goods, and more.
  • Reduce ingredient waste by seeing where your recipe ingredients overlap.
  • Save time on busy nights by prepping casseroles in advance—just reheat and enjoy!

Pro tip: Batch-cook and freeze extra portions from any casserole on this list for quick comfort food on future busy days.

Cook and Prep Times

Prep Time: 15–20 minutes per casserole
Cook Time: 25–40 minutes per casserole
Total Time: 40–60 minutes per casserole (varies by recipe; batch prep for a week can take 2 hours)

Enjoy the cozy flavors of comfort food while nourishing your body with these delicious, healthy casserole choices!

Quick & Flavorful: Your Ultimate Guide to Healthy Sautéed Vegetables

Healthy Sautéed Vegetables – Quick, Flavorful & Nutritious Side

Introduction

Healthy Sautéed Vegetables offer the ultimate combination of convenience and nutrition—a medley of crisp, colorful veggies cooked rapidly over high heat to lock in flavor, texture, and nutrients. Whether you’re aiming to add more vegetables to your meals or need an effortless, crowd-pleasing side for any entrée, this recipe delivers on all fronts with vibrant color, robust taste, and a fresh finish that everyone will love.

Why Sautéed Vegetables Make the Perfect Side

Few sides rival sautéed vegetables when it comes to pairing with just about any main dish. Their quick cooking time preserves both hearty textures and bright flavors, ensuring your veggies remain as close to garden-fresh as possible. A simple blend of olive oil, garlic, and fresh herbs elevates everyday vegetables into something truly special—perfect for busy weeknights or last-minute dinner parties.

Building Layers of Flavor

For this recipe, combining a variety of vegetables such as bell peppers, zucchini, broccoli, and carrots creates a mix of tastes and textures in every bite. Sautéing over medium-high heat allows caramelization and slight browning—releasing natural sweetness without becoming mushy. A quick toss with garlic, lemon juice, and your favorite herbs at the end adds a zesty, aromatic finish.

Serving Suggestions for Healthy Sautéed Vegetables

Serve these vegetables alongside grilled chicken, seared steak, or baked fish for a balanced, wholesome meal. They also shine when added to grain bowls, mixed into pasta, or served as topping for baked potatoes. If you’re meal prepping, pack leftovers for a quick lunch addition or a convenient snack.

Nutritional Information and Serving Size

This recipe makes about 4 generous side servings. Each serving contains approximately 90-120 calories, depending on your vegetable and oil choices. It’s naturally gluten-free, plant-based, and loaded with fiber, vitamins, and minerals—an ideal way to round out your meal.

Healthy Sautéed Vegetables Recap

Vibrant, crisp, and quickly prepared, Healthy Sautéed Vegetables check every box for a versatile, nutritious side. Their adaptability and universal appeal make them perfect for any menu.

[ingredients]
2 cups broccoli florets
1 red bell pepper, sliced
1 zucchini, sliced
1 large carrot, peeled and sliced
1 small red onion, sliced
2 cloves garlic, minced
2 tablespoons olive oil (or avocado oil)
Salt and black pepper to taste
1/2 teaspoon dried Italian herbs or fresh chopped parsley
Juice of 1/2 lemon
Optional: 1/4 teaspoon crushed red pepper flakes for heat
[/ingredients]

💡Meal Planning Tip: Save this recipe to generate a smart, organized shopping list that sorts all your ingredients by store section—making your meal prep and grocery trips faster and more efficient.

CookifyAI meal planning interface

Instructions

  1. Warm the olive oil in a large skillet over medium-high heat.
  2. Add the onion and carrot; sauté for 2-3 minutes until they start to soften.
  3. Add the broccoli, bell pepper, and zucchini. Stir frequently and cook for 5-7 minutes—vegetables should be crisp-tender and start to brown slightly.
  4. Add the minced garlic, Italian herbs, salt, pepper, and (if using) red pepper flakes. Sauté for another minute, just until fragrant.
  5. Remove skillet from heat. Drizzle lemon juice over the veggies and toss to combine.
  6. Sprinkle with fresh parsley if desired and serve immediately. Enjoy warm!

Weekly Meal Planning

Healthy Sautéed Vegetables are ideal for weekly meal prep—their adaptability allows you to tailor the vegetable mix to whatever is in season or on hand. Schedule this recipe in your meal plan to automatically create consolidated shopping lists, organized by store aisle, with quantities adjusted for the number of servings you need.

Planning Benefits:

  • Aggregates ingredient amounts across all your planned recipes for less waste
  • Categorizes groceries by store section for swift shopping
  • Prevents duplicate or missed ingredients, so your meal prep goes smoothly
  • Saves time and helps you stick to your healthy eating goals

Pro tip: When you schedule recipes together, overlapping ingredients like garlic or onions are automatically accounted for—helping you streamline your meals, reduce waste, and stay organized all week long.

Cook and Prep Times

Prep Time: 10 minutes
Cook Time: 10 minutes
Total Time: 20 minutes

20 Quick & Delicious Paleo, Whole30, and Low Carb Dinners: Healthy Weeknight Meals in 30 Minutes or Less

20 Quick and Easy Paleo, Whole30, and Low Carb Dinners

Introduction

Deciding what to make for dinner can be the most challenging part of eating healthy—especially when you’re committed to Paleo, Whole30, or low carb lifestyles. That’s why you’ll love this collection of 20 quick and easy dinners, each ready in 30 minutes or less. These versatile recipes help you stick to your goals without sacrificing flavor, variety, or precious weeknight time.

Why These 20 Dinners Stand Out

You don’t need to be a kitchen pro to enjoy nourishing, satisfying meals every night. These dishes are intentionally simple, focusing on whole ingredients, bold flavors, and easy prep. By choosing recipes that work for Paleo, Whole30, and low carb diets, you keep your meal planning flexible and, most importantly, family-friendly.

Tips for Fast, Flavorful Dinners Every Night

A successful dinner rotation depends on recipes you can count on for speed and taste. Look for techniques like sheet pan roasting, quick skillet sautés, or simple grilled proteins. Keep pantry staples—like coconut aminos, ghee, fresh herbs, and cauli-rice—on hand for last-minute inspiration.

Dinner Highlights From the List

1. Garlic Butter Shrimp & Zoodles
2. Sheet Pan Lemon Herb Chicken & Veggies
3. Taco-Stuffed Avocados
4. Cilantro Lime Salmon with Asparagus
5. Beef and Broccoli Stir Fry (No Soy)
6. Crispy Chicken Thighs with Brussels
7. Buffalo Ranch Cauliflower Bowls
8. Skillet Pork Chops with Apple Slaw
9. Greek Chicken Lettuce Wraps
10. Thai Basil Beef (Larb)
11. Chimichurri Steak & Roasted Veggies
12. Mexican Cauliflower Rice Bowls
13. Sausage & Peppers Skillet
14. 5-Ingredient Tuna Cakes
15. Sweet Potato Bun Sliders
16. Mustard Roasted Salmon with Green Beans
17. Ginger-Garlic Chicken Stir Fry
18. BLT Chicken Salad Bowls
19. Spaghetti Squash Pad Thai
20. One-Pan Egg Roll in a Bowl

[ingredients]
For each recipe, you’ll need a mix of the following:
– Lean proteins (chicken breast, shrimp, steak, pork chops, ground beef, salmon, tuna)
– Assorted low carb vegetables (zucchini, cauliflower, bell peppers, asparagus, Brussels sprouts, green beans, sweet potatoes)
– Healthy fats (avocado oil, ghee, extra virgin olive oil)
– Pantry basics (herbs, spices, coconut aminos, garlic, lemons/limes, mustard, salsa)
– Fresh herbs and toppings (cilantro, basil, chives, lettuce leaves, avocado)
[/ingredients]

💡Meal Planning Tip: Save this collection to instantly generate a comprehensive, categorized shopping list with all necessary ingredients—organized by produce, meat, pantry, and more. CookifyAI makes weekly meal planning and grocery shopping seamless and effortless.

CookifyAI meal planning interface

Instructions

These dinners are designed for quick assembly and cooking—here are basic steps that apply to most recipes in the collection:

  1. Gather and prep all ingredients before starting (wash, chop, and measure).
  2. Sauté, roast, or grill your protein using healthy fats and your choice of herbs and spices.
  3. Cook vegetables either in the same pan or on a sheet pan to save time and reduce cleanup.
  4. Assemble bowls, wraps, or plates with your protein, vegetables, and fresh toppings.
  5. Drizzle with simple sauces or dressings (such as lemon juice, mustard vinaigrette, or coconut aminos) before serving.

Weekly Meal Planning

If you’re meal-prepping for the week or planning a healthy dinner roster, this list is your ultimate resource. Save these recipes and build your meal schedule to create an intelligent shopping list that groups ingredients from all selected dinners, giving you a precise count and ensuring nothing gets left out.

Planning Benefits:

– CookifyAI calculates total quantities for recurring ingredients (like chicken breast or cauliflower) across all meals.
– Supplies you with a digital shopping list sorted by section—no more wandering store aisles.
– Helps minimize food waste by aligning quantities with your planned serving sizes.
– Makes healthy eating easy, organized, and stress-free all week long.

Pro tip: Set up your meal plan on Sunday using CookifyAI’s schedule feature—see how ingredients overlap and save time and money by batch-prepping staples like roasted veggies or chopped greens.

Cook and Prep Times

Prep Time (per recipe): 10-15 minutes
Cook Time (per recipe): 10-20 minutes
Total Time (per recipe): 20-30 minutes

With these 20 quick and easy Paleo, Whole30, and low carb dinners, healthy eating is within easy reach—no stress, no guesswork, just delicious dinners and happy, nourishing weeks!

20 Quick & Delicious Paleo, Whole30, and Low Carb Dinners: Healthy Weeknight Meals in 30 Minutes or Less

20 Quick and Easy Paleo, Whole30, and Low Carb Dinners

Introduction

Deciding what to make for dinner can be the most challenging part of eating healthy—especially when you’re committed to Paleo, Whole30, or low carb lifestyles. That’s why you’ll love this collection of 20 quick and easy dinners, each ready in 30 minutes or less. These versatile recipes help you stick to your goals without sacrificing flavor, variety, or precious weeknight time.

Why These 20 Dinners Stand Out

You don’t need to be a kitchen pro to enjoy nourishing, satisfying meals every night. These dishes are intentionally simple, focusing on whole ingredients, bold flavors, and easy prep. By choosing recipes that work for Paleo, Whole30, and low carb diets, you keep your meal planning flexible and, most importantly, family-friendly.

Tips for Fast, Flavorful Dinners Every Night

A successful dinner rotation depends on recipes you can count on for speed and taste. Look for techniques like sheet pan roasting, quick skillet sautés, or simple grilled proteins. Keep pantry staples—like coconut aminos, ghee, fresh herbs, and cauli-rice—on hand for last-minute inspiration.

Dinner Highlights From the List

1. Garlic Butter Shrimp & Zoodles
2. Sheet Pan Lemon Herb Chicken & Veggies
3. Taco-Stuffed Avocados
4. Cilantro Lime Salmon with Asparagus
5. Beef and Broccoli Stir Fry (No Soy)
6. Crispy Chicken Thighs with Brussels
7. Buffalo Ranch Cauliflower Bowls
8. Skillet Pork Chops with Apple Slaw
9. Greek Chicken Lettuce Wraps
10. Thai Basil Beef (Larb)
11. Chimichurri Steak & Roasted Veggies
12. Mexican Cauliflower Rice Bowls
13. Sausage & Peppers Skillet
14. 5-Ingredient Tuna Cakes
15. Sweet Potato Bun Sliders
16. Mustard Roasted Salmon with Green Beans
17. Ginger-Garlic Chicken Stir Fry
18. BLT Chicken Salad Bowls
19. Spaghetti Squash Pad Thai
20. One-Pan Egg Roll in a Bowl

[ingredients]
For each recipe, you’ll need a mix of the following:
– Lean proteins (chicken breast, shrimp, steak, pork chops, ground beef, salmon, tuna)
– Assorted low carb vegetables (zucchini, cauliflower, bell peppers, asparagus, Brussels sprouts, green beans, sweet potatoes)
– Healthy fats (avocado oil, ghee, extra virgin olive oil)
– Pantry basics (herbs, spices, coconut aminos, garlic, lemons/limes, mustard, salsa)
– Fresh herbs and toppings (cilantro, basil, chives, lettuce leaves, avocado)
[/ingredients]

💡Meal Planning Tip: Save this collection to instantly generate a comprehensive, categorized shopping list with all necessary ingredients—organized by produce, meat, pantry, and more. CookifyAI makes weekly meal planning and grocery shopping seamless and effortless.

CookifyAI meal planning interface

Instructions

These dinners are designed for quick assembly and cooking—here are basic steps that apply to most recipes in the collection:

  1. Gather and prep all ingredients before starting (wash, chop, and measure).
  2. Sauté, roast, or grill your protein using healthy fats and your choice of herbs and spices.
  3. Cook vegetables either in the same pan or on a sheet pan to save time and reduce cleanup.
  4. Assemble bowls, wraps, or plates with your protein, vegetables, and fresh toppings.
  5. Drizzle with simple sauces or dressings (such as lemon juice, mustard vinaigrette, or coconut aminos) before serving.

Weekly Meal Planning

If you’re meal-prepping for the week or planning a healthy dinner roster, this list is your ultimate resource. Save these recipes and build your meal schedule to create an intelligent shopping list that groups ingredients from all selected dinners, giving you a precise count and ensuring nothing gets left out.

Planning Benefits:

– CookifyAI calculates total quantities for recurring ingredients (like chicken breast or cauliflower) across all meals.
– Supplies you with a digital shopping list sorted by section—no more wandering store aisles.
– Helps minimize food waste by aligning quantities with your planned serving sizes.
– Makes healthy eating easy, organized, and stress-free all week long.

Pro tip: Set up your meal plan on Sunday using CookifyAI’s schedule feature—see how ingredients overlap and save time and money by batch-prepping staples like roasted veggies or chopped greens.

Cook and Prep Times

Prep Time (per recipe): 10-15 minutes
Cook Time (per recipe): 10-20 minutes
Total Time (per recipe): 20-30 minutes

With these 20 quick and easy Paleo, Whole30, and low carb dinners, healthy eating is within easy reach—no stress, no guesswork, just delicious dinners and happy, nourishing weeks!

25-Minute Paleo Chicken Teriyaki: Savor Restaurant-Style Flavors in a Healthy One-Pan Dish

25-Minute Paleo Chicken Teriyaki That Tastes Like Takeout

Introduction

Craving the bold, savory-sweet flavors of restaurant-style teriyaki chicken but want to stick to a paleo routine? This 25-Minute Paleo Chicken Teriyaki delivers all the mouthwatering, sticky-sauced goodness—without the processed sugars, soy, or grains found in your usual takeout. It’s a speedy, one-pan dinner that’s perfect for busy weeknights or when you want maximum flavor with minimal effort.

Deliciously Unique Paleo Chicken Teriyaki

What sets this dish apart is its clean ingredient list and irresistible taste. Thanks to a glossy homemade teriyaki sauce made from coconut aminos, honey, and fresh ginger, you get that authentic takeout flavor—entirely paleo-friendly. Juicy chicken thighs soak up the sauce while still being tender, making every bite addictive. Beats waiting for delivery!

Preparing the Perfect Paleo Teriyaki Sauce

The star of this recipe is the homemade teriyaki sauce. Combine coconut aminos for soy-free umami, honey for subtle sweetness, fresh ginger and garlic for a punch of flavor, and a little arrowroot starch for the perfect sticky finish. Simmer for a few minutes and the sauce quickly becomes thick, shiny, and ready to coat your chicken.

Assembling Your 25-Minute Paleo Chicken Teriyaki

Once the chicken pieces are browned in your skillet, pour the luscious teriyaki sauce over the top and toss to coat. The arrowroot quickly thickens the sauce, enveloping each bite. Finish with a sprinkle of sliced green onions and sesame seeds (omit if strict paleo) for extra crunch and restaurant-style presentation.

Serving Suggestions for a Show-Stopping Paleo Chicken Teriyaki

Serve this quick chicken teriyaki over a bed of steamed cauliflower rice or sautéed broccoli for a complete, nutrient-packed meal. A side of pickled veggies or a simple cucumber salad adds balance and freshness. Double the recipe for leftovers—they taste even better the next day!

Nutritional Information and Serving Size

This recipe serves 4 and comes in around 270-300 calories per serving, with high protein and all the health benefits of clean, whole-food ingredients—no refined sugars, grains, or dairy.

25-Minute Paleo Chicken Teriyaki That Tastes Like Takeout (Recap)

With its fast cook time, easy clean-up, and incredible flavor, this is a paleo dinner you’ll add to your regular rotation. All the convenience and satisfaction of takeout—made healthier and faster in your own kitchen.

[ingredients]
1 1/2 pounds boneless, skinless chicken thighs (cut into bite-sized pieces)
3 tablespoons coconut aminos
1 1/2 tablespoons honey
2 teaspoons arrowroot starch
2 tablespoons water (for slurry)
2 tablespoons avocado oil (or olive oil)
2 garlic cloves, minced
1 tablespoon finely grated fresh ginger
1/2 teaspoon sea salt
1/4 teaspoon black pepper
2 green onions, thinly sliced (optional, for garnish)
Sesame seeds (optional, omit for strict paleo)
Steamed cauliflower rice or broccoli, for serving
[/ingredients]

💡Meal Planning Tip: Save this recipe to instantly create an organized shopping list with all ingredients sorted by grocery section—making both meal planning and store trips a breeze.

CookifyAI meal planning interface

Instructions

  1. In a small bowl, whisk together coconut aminos, honey, and arrowroot starch mixed with water (to form a slurry). Set aside.
  2. Season chicken pieces with sea salt and black pepper.
  3. Heat avocado oil in a large skillet over medium-high heat. Add the chicken in a single layer and cook for 4-5 minutes, flipping as needed, until browned and nearly cooked through.
  4. Add minced garlic and grated ginger to the skillet. Sauté for 1 minute until fragrant.
  5. Pour the prepared teriyaki sauce over the chicken. Toss to coat and cook 2-4 minutes until the sauce thickens and chicken is fully cooked.
  6. Serve immediately, garnished with green onions and sesame seeds if desired, over cauliflower rice or steamed veggies.

Weekly Meal Planning

This quick paleo chicken teriyaki is a weekly meal prep superstar. Save and schedule this recipe in your meal planner to efficiently manage your week, see which nights you’ll make it, and auto-generate a smart shopping list that combines overlapping ingredients from multiple recipes.

Planning Benefits:

  • Auto-calculates how much of each ingredient you need for all scheduled meals
  • Sorts groceries by store aisle for a streamlined shopping experience
  • Reduces duplicate purchases, cuts food waste, and saves budget
  • Keeps weeknight dinners stress-free and organized

Pro tip: Schedule your meals so you always know what’s for dinner and never double-buy pantry staples like avocado oil or honey.

Cook and Prep Times

Prep Time: 10 minutes
Cook Time: 15 minutes
Total Time: 25 minutes

With this 25-Minute Paleo Chicken Teriyaki, you get speedy, healthy, and crave-worthy results—no takeout menu or guessing at ingredients required!

Paleo Power Snacks: 13 Delicious, On-the-Go Ideas for a Healthy, Flavorful Boost

13 Best Paleo Snack Ideas

Introduction

Finding snacks that are both delicious and fit within the Paleo diet can feel like a challenge, but it doesn’t have to be. The 13 Best Paleo Snack Ideas below are flavorful, easy to make, and designed to keep you satisfied between meals—without straying from your Paleo principles. Whether you’re prepping for a busy week or simply looking for healthy alternatives, these snacks will quickly become favorites in your routine.

Why You’ll Love These Paleo Snack Ideas

What sets these snacks apart is their focus on real ingredients and bold flavors, all while being grain free, dairy free, and refined-sugar free. They’re handpicked to satisfy varying cravings—crunchy, savory, sweet, and even portable—making sure there’s a Paleo snack for every occasion and every taste preference.

13 Best Paleo Snack Ideas

1. **Homemade Trail Mix**
Combine raw nuts (like almonds, cashews, and walnuts), unsweetened coconut flakes, and dried fruit without added sugar for a naturally sweet and crunchy snack.

2. **Apple Slices with Almond Butter**
Crisp apple slices paired with creamy almond butter offer a balance of sweetness and healthy fats—simple yet always satisfying.

3. **Beef or Turkey Jerky**
Choose jerky made from grass-fed meat and free of preservatives or added sugars for a protein-packed, on-the-go snack.

4. **Guacamole with Veggie Sticks**
Fresh guacamole served with carrot, cucumber, and bell pepper sticks delivers healthy fats and satisfying crunch.

5. **Coconut Yogurt Parfait**
Layer unsweetened coconut yogurt with fresh berries and chia seeds for a dairy-free snack that doubles as a mini-meal.

6. **Baked Sweet Potato Chips**
Thinly slice sweet potatoes, lightly toss with olive oil and sea salt, then bake until crisp for a naturally sweet and savory snack.

7. **Hard-Boiled Eggs**
An easy, protein-rich option perfect for meal prepping—sprinkle with a dash of paprika for bonus flavor.

8. **Frozen Banana Bites**
Dip banana slices in melted dark chocolate (at least 70% cacao, no dairy or refined sugar) and freeze for a satisfying sweet treat.

9. **Paleo Energy Balls**
Blend dates, nuts, nut butter, and unsweetened cocoa powder, then roll into balls for a portable, energy-boosting snack.

10. **Roasted Chickpeas**
For those who include legumes in their Paleo approach, simply toss with olive oil and spices before roasting.

11. **Stuffed Dates**
Fill Medjool dates with almond butter and a sprinkle of sea salt for a chewy, caramel-like delight.

12. **Cucumber Avocado Rolls**
Thinly slice cucumber, spread with mashed avocado, and roll up for a refreshing finger food.

13. **Homemade Kale Chips**
Toss kale leaves with olive oil and your favorite seasonings, then bake until crispy for a guilt-free crunch.

[ingredients]
Raw nuts (almonds, cashews, walnuts)
Unsweetened coconut flakes
Dried fruit (no added sugar)
Apples
Almond butter
Grass-fed beef or turkey jerky (sugar-free)
Avocado
Carrot, cucumber, and bell pepper sticks
Unsweetened coconut yogurt
Fresh berries
Chia seeds
Sweet potatoes
Olive oil
Sea salt
Eggs
Bananas
Dark chocolate (minimum 70% cacao, no dairy)
Dates (preferably Medjool)
Nut butter of choice (almond, cashew, sunflower seed)
Unsweetened cocoa powder
Paprika (optional)
Cucumber
Kale
Favorite spices (smoked paprika, garlic powder, onion powder, chili flakes, etc.)
[/ingredients]

💡Meal Planning Tip: Save this list of snacks to create an organized shopping list, automatically sorted by store section so you can purchase all your Paleo snack ingredients efficiently for the week.

CookifyAI meal planning interface

Instructions

  1. Homemade Trail Mix: Mix desired amounts of raw nuts, coconut flakes, and dried fruit.
  2. Apple Slices with Almond Butter: Core and slice apples; serve with almond butter for dipping.
  3. Beef or Turkey Jerky: Enjoy as packaged, ensuring no added sugars or preservatives.
  4. Guacamole with Veggie Sticks: Mash avocados with lime juice, salt, and chopped tomatoes; serve with veggie sticks.
  5. Coconut Yogurt Parfait: Layer coconut yogurt, berries, and chia seeds in small jars or cups.
  6. Baked Sweet Potato Chips: Preheat oven to 400°F. Slice sweet potatoes thin, toss with olive oil and salt, and bake in a single layer for 20-25 minutes, flipping halfway.
  7. Hard-Boiled Eggs: Cover eggs with water in a pot; bring to a boil, then simmer for 10 minutes. Cool, peel, and sprinkle with paprika if desired.
  8. Frozen Banana Bites: Dip banana slices in melted dark chocolate; freeze on parchment until firm.
  9. Paleo Energy Balls: Blend 1 cup dates, 1 cup nuts, 2 tbsp nut butter, and 2 tbsp cocoa powder in a food processor; roll into balls and refrigerate.
  10. Roasted Chickpeas: (If using) Toss with oil and spices; roast at 400°F for 20-30 minutes, until crisp.
  11. Stuffed Dates: Pit dates and fill with nut butter; sprinkle with sea salt.
  12. Cucumber Avocado Rolls: Slice cucumber thin; spread with mashed avocado; roll and secure with a toothpick if needed.
  13. Homemade Kale Chips: Preheat oven to 300°F. Toss kale leaves with oil and spices, bake 15-20 minutes until crispy.

Weekly Meal Planning

Snacking smart is easier (and tastier) with weekly planning! Save and schedule these snacks into your meal plan to generate a single, streamlined shopping list—no forgotten ingredients and no extra trips.

Benefits include:

– Fast, accurate shopping lists that automatically aggregate all snack and meal ingredients
– Items organized by grocery section for smoother store visits
– Easy adjustment for portion sizes, making it simple to prep snacks for your entire household
– Reduces food waste by preventing duplicate and unnecessary purchases

Pro tip: Schedule your snacks and meals together in CookifyAI to see where ingredients like eggs, nuts, or fresh produce overlap—maximizing what you buy and minimizing waste.

Prep and Cook Times

Prep time: Most snacks require 5-20 minutes (excluding chill/bake time for chips and energy balls)
Cook time: 10-25 minutes for baked and roasted snacks
Total time: Varies by recipe; most can be prepped and portioned for the entire week in under 1 hour

Wrap-Up: The Best Paleo Snacks for Flavor and Simplicity

These 13 Paleo snack ideas prove you don’t need grains, dairy, or refined sugars to enjoy flavorful, convenient options throughout your week. With a little planning and the right ingredients, sticking to Paleo is easier—and tastier—than ever.

Korean Steak Bites for Every Diet: Bold, Paleo, Whole30 & AIP-Friendly BBQ Delights

Paleo & Whole30 Korean Steak Bites – Stovetop or Air Fryer (AIP Option)

Introduction

If you’re searching for a way to enjoy big, bold flavors in a healthy, Whole30-compliant meal, these Paleo & Whole30 Korean Steak Bites are your answer. Packed with savory, slightly sweet, and umami-rich goodness, these bite-sized pieces of steak are perfect for busy weeknights or meal-prepped lunches. With both stovetop and air fryer instructions (and an AIP modification), this recipe fits a variety of dietary needs—without sacrificing an ounce of flavor.

Why These Korean Steak Bites Are a Weeknight Hero

Korean steak bites are a crowd-pleaser thanks to their caramelized, crisply-seared exterior and succulent tenderness inside. The quick marinade infuses every piece with classic Korean flavors—garlic, ginger, coconut aminos, and a touch of pear or apple for subtle sweetness—while keeping the recipe 100% paleo and Whole30-friendly. Serve these alongside roasted veggies, over cauliflower rice, or as a protein-rich snack everyone will love.

Ingredients for Paleo & Whole30 Korean Steak Bites

[ingredients]
– 1½ pounds sirloin or flat iron steak, cut into 1-inch cubes
– 1/4 cup coconut aminos
– 2 tablespoons olive oil or avocado oil, plus extra for cooking
– 2 tablespoons grated Asian pear (or apple, for AIP)
– 1 tablespoon rice vinegar (substitute apple cider vinegar for strict AIP)
– 2 cloves garlic, minced (omit for AIP elimination)
– 1 teaspoon grated fresh ginger
– 1/2 teaspoon salt
– 1/2 teaspoon ground black pepper (omit for AIP)
– 1 green onion, thinly sliced (for garnish)
– 1 teaspoon toasted sesame oil (optional, omit for AIP)

AIP Option:
– Omit black pepper and sesame oil
– Substitute apple for pear
– Omit garlic if in elimination phase

💡Meal Planning Tip: Save this recipe to automatically create a categorized shopping list, keeping you on track with Whole30, Paleo, or AIP plans and making grocery runs a breeze!

CookifyAI meal planning interface

Instructions

  1. Marinate the Steak: In a medium bowl, whisk together coconut aminos, olive/avocado oil, grated pear or apple, vinegar, garlic, ginger, salt, and black pepper (if using). Add the steak cubes and toss to coat. Let marinate for at least 15 minutes, or up to 1 hour for deeper flavor.
  2. Stovetop Method: Heat a large skillet over medium-high heat. Add a drizzle of oil. When hot, add steak cubes in a single layer (work in batches to avoid overcrowding). Sear for 2–3 minutes per side until browned and cooked to desired doneness. Remove and set aside. Repeat with remaining steak.
  3. Air Fryer Method: Preheat your air fryer to 400°F. Arrange marinated steak cubes in the basket in a single layer. Air fry for 7–9 minutes, shaking the basket halfway through, until browned and cooked through.
  4. Finish and Serve: Transfer steak bites to a serving dish. If using, drizzle with a teaspoon of sesame oil for extra flavor. Garnish with sliced green onions. Serve hot!

Serving Suggestions for Maximum Flavor

Pair these steak bites with stir-fried veggies, a bowl of cauliflower rice, or a fresh cucumber salad. For a mealtime upgrade, top with a sprinkle of sesame seeds (skip for AIP) or serve with lettuce wraps for a crunchy, refreshing bite.

Nutritional Information and Serving Size

This recipe yields approximately 4 servings of Korean steak bites, with each serving containing around 300–350 calories (depending on cut of steak and oil used). They’re rich in protein, low in carbs, and compliant with Paleo, Whole30, and AIP diets.

Paleo & Whole30 Korean Steak Bites (Recap)

These steak bites deliver all the fire-roasted, caramelized flavors of traditional Korean BBQ without any sugars, grains, or soy. They’re meal-prep friendly, big on taste, and excellent for anyone seeking Whole30 or AIP meal solutions.

Weekly Meal Planning

Korean Steak Bites are perfect for batch cooking and work beautifully in meal prep containers, staying juicy and flavorful for lunches or dinners throughout the week. Save and schedule this recipe on CookifyAI to plan which days you’ll serve them and to sync ingredient needs with the rest of your weekly menu.

Planning Benefits:

  • Automatically tallies ingredient needs for your entire week of meals
  • Organizes your shopping list by grocery store section—no more forgotten items!
  • Cross-references ingredients to help reduce waste and avoid duplicates
  • Smooths meal prep routines so you’re always prepared for tasty, compliant meals

Pro tip: When prepping for multiple dietary preferences, use CookifyAI’s scheduling tool to see how shared ingredients (like ginger or coconut aminos) aggregate across recipes—saving you money and time.

Cook and Prep Times

Prep Time: 20 minutes (includes marinating)
Cook Time: 10 minutes
Total Time: 30 minutes

Ready for a quick dinner, protein-packed lunch, or party-ready appetizer, these Paleo & Whole30 Korean Steak Bites pack flavor and simplicity into every bite!

Whole30 Chicken Lo Mein: A Guilt-Free Twist on Your Favorite Takeout Classic

Whole30 Chicken Lo Mein

Introduction

Craving the savory, comforting flavors of your favorite Chinese takeout, but want to keep it healthy? This Whole30 Chicken Lo Mein offers all the delicious flavor and satisfying texture of the classic dish, without any of the grains, gluten, or processed sauces. It’s a weeknight-friendly recipe that satisfies your takeout cravings while keeping your meals fresh, clean, and nutrient-dense.

Why This Whole30 Chicken Lo Mein Works

This recipe brilliantly swaps out traditional noodles for spiralized zucchini or sweet potato, retaining the slurpy, “noodly” texture at a fraction of the carbs. The homemade stir fry sauce is bursting with umami and depth, thanks to coconut aminos and fresh ginger. Every bite is loaded with crisp veggies and juicy chicken, making it a Whole30-compliant crowd pleaser even picky eaters will love.

Perfecting the Whole30 Stir Fry Sauce

A key to great lo mein is a balanced sauce that’s both flavorful and Whole30-friendly. Whisk together coconut aminos, toasted sesame oil, fresh-grated ginger, garlic, and a splash of rice vinegar. For extra richness, add a pinch of red pepper flakes and a drizzle of compliant fish sauce. Letting the sauce meld while you prep the rest of the ingredients allows the flavors to deepen, imitating the complexity of classic takeout.

How to Make Whole30 Chicken Lo Mein

Start by thinly slicing boneless, skinless chicken breast and lightly tossing it with arrowroot powder—this helps deliver that slick, restaurant-style coating. Cook the chicken quickly in a hot skillet, then toss in your spiralized veggies and quick-cook stir fry vegetables such as shredded carrots, bell pepper, snap peas, and green onions. Pour the sauce over everything and toss just until everything’s perfectly coated and tender-crisp.

Serving Suggestions for a Takeout-Style Meal

Dish up generous mounds of chicken lo mein into bowls, garnishing with extra sliced green onions, sesame seeds, and a dash of chili oil if desired. Serve with a refreshing cucumber salad or quick-pickled radishes for a colorful, flavor-packed meal. This dish is delicious hot or cold, making it ideal for leftovers or meal prep.

Nutritional Information and Servings

This recipe makes about 4 servings. Each serving provides a balanced mix of lean protein, plenty of fiber-rich veggies, and healthy fats, with roughly 320 calories per serving (exact macros may vary based on your ingredients).

[ingredients]
2 medium chicken breasts, thinly sliced
2 tbsp arrowroot powder
2 tbsp olive oil or avocado oil
4 cups spiralized zucchini or sweet potato noodles
1 red bell pepper, thinly sliced
1 cup snap peas, halved
1 carrot, julienned or shaved
3 green onions, sliced
2 tbsp sesame seeds, for garnish

Whole30 Stir Fry Sauce:
1/3 cup coconut aminos
1 tbsp toasted sesame oil
1 tbsp rice vinegar (Whole30-compliant)
1-inch knob fresh ginger, grated
2 garlic cloves, minced
1 tsp compliant fish sauce (optional)
1/4 tsp red pepper flakes (optional)
[/ingredients]

💡Meal Planning Tip: Save this recipe to automatically generate an organized shopping list with all ingredients sorted by store section—perfect for efficient grocery trips and meal planning.

CookifyAI meal planning interface

Instructions

  1. In a small bowl, whisk together all sauce ingredients. Set aside to let flavors meld.
  2. Toss sliced chicken with arrowroot powder until evenly coated.
  3. Heat 1 tablespoon oil in a large skillet or wok over medium-high heat. Add chicken in a single layer and cook for 4–5 minutes, turning once, until golden brown and cooked through. Remove from the pan and set aside.
  4. Add remaining oil to the skillet. Stir in bell pepper, snap peas, and carrot. Sauté for 2–3 minutes until just tender.
  5. Add spiralized noodles and green onions. Stir fry for another 1–2 minutes until noodles are tender but still have a bite.
  6. Return chicken to the pan. Pour sauce over all ingredients and toss to coat. Cook for 1–2 minutes until heated through and sauce thickens slightly.
  7. Transfer to bowls, garnish with sesame seeds and extra green onions, and serve immediately.

Weekly Meal Planning

This recipe is a meal prep superstar—it retains flavor and texture beautifully for lunch or dinner all week. Save and schedule this recipe with CookifyAI to plan your weekly meals and get a smart shopping list that combines all your recipes and organizes groceries by category.

Planning Benefits:

– Calculates total ingredient needs across your planned meals
– Reduces grocery trips by consolidating your shopping list
– Minimizes waste by preventing duplicate and forgotten items
– Simplifies weeknight meal prep and cooking

Pro tip: When you schedule multiple Whole30 meals for the week, CookifyAI combines all the produce, meats, and pantry items you’ll need—making your meal planning seamless and efficient.

Cook and Prep Times

Prep Time: 20 minutes
Cook Time: 15 minutes
Total Time: 35 minutes

Whole30 Egg Roll in a Bowl with Creamy Chili Sauce: A Wholesome Twist on a Classic Favorite

Whole30 Egg Roll in a Bowl with Creamy Chili Sauce

Introduction

This Whole30 Egg Roll in a Bowl with Creamy Chili Sauce brings all the crave-worthy flavors of classic egg rolls—think ginger, garlic, and sesame—without the fuss of frying or the carbs of a wrapper. Bursting with colorful veggies and succulent ground pork (or turkey), this satisfying one-pan meal is a fast favorite for busy weeknights, meal prep, or anyone looking for truly delicious Asian dinner recipes that align with Whole30 guidelines.

Why You’ll Love This Whole30 Egg Roll in a Bowl

This dish stands out because it delivers all the bold flavors of a traditional egg roll in a lighter, simplified format—no deep frying required! The rich, savory filling is finished with a zesty, creamy chili sauce that keeps every bite exciting. With minimal chopping and quick cooking, it’s perfect for healthy, whole food recipes you can rely on any night of the week.

Making the Creamy Chili Sauce

The creamy chili sauce is the secret star of this bowl. It mixes Whole30-compliant mayo with sriracha (or hot sauce), a splash of rice vinegar, and a touch of garlic. Stir well to combine and adjust to your preferred spice level—the sauce ties the dish together and adds a luscious, spicy kick.

Building Your Egg Roll in a Bowl

Start by browning the ground pork (or turkey) in a skillet, seasoned with ginger, garlic, and coconut aminos instead of soy sauce. Add shredded cabbage and carrots, cooking just until crisp-tender—this keeps the veggies vibrant and full of nutrients. Finish with a drizzle of toasted sesame oil and sliced green onions for that authentic egg roll flavor profile.

Serving Suggestions for a Showstopping Whole30 Egg Roll Bowl

Serve your Whole30 Egg Roll in a Bowl topped with the creamy chili sauce and extra green onions. Garnish with sesame seeds and serve with a side of cauliflower rice for a more filling meal. This recipe is versatile enough for dinner, lunch meal prep, or as a fun addition to your rotation of Asian dinner recipes.

Nutritional Information and Serving Size

This recipe yields 4 generous servings. Each bowl contains approximately 370 calories, with healthy fats and plenty of fiber from veggies. It’s a perfectly satisfying, nutrient-dense meal for anyone searching for Whole 30 recipes or balanced whole food recipes.

[ingredients]
1 lb ground pork or ground turkey
1 tablespoon avocado oil
1 small yellow onion, diced
3 cloves garlic, minced
1 tablespoon fresh ginger, grated
14 oz bag shredded coleslaw mix (or 4 cups shredded cabbage + 1 cup shredded carrots)
3 tablespoons coconut aminos
1 tablespoon toasted sesame oil
1/2 teaspoon salt
1/4 teaspoon black pepper
3 green onions, thinly sliced
Sesame seeds, for garnish

For the Creamy Chili Sauce:
1/2 cup Whole30-compliant mayonnaise
1 tablespoon sriracha or hot sauce (Whole30 approved)
1 teaspoon rice vinegar
1/2 teaspoon garlic powder
[/ingredients]

💡Meal Planning Tip: Save this recipe to automatically generate an organized shopping list with all ingredients sorted by store section—perfect for efficient grocery trips and easy meal planning.

CookifyAI meal planning interface

Instructions

  1. In a large skillet over medium heat, add avocado oil. Once hot, add the diced onion; cook for 2-3 minutes until translucent.
  2. Add ground pork or ground turkey, breaking it up with a spoon. Cook until no longer pink, about 5-7 minutes. Drain excess fat if needed.
  3. Stir in the garlic and ginger; cook for 1 minute until fragrant.
  4. Add the shredded coleslaw mix (or cabbage and carrots) and toss to combine. Pour in coconut aminos, sesame oil, salt, and pepper. Cook for 3-5 minutes until veggies are tender but still crisp.
  5. While the bowl cooks, whisk together all creamy chili sauce ingredients in a small bowl. Adjust sriracha to taste for desired heat.
  6. Remove skillet from heat. Stir in sliced green onions. Divide the mixture among four bowls.
  7. Drizzle each bowl with creamy chili sauce and garnish with sesame seeds. Serve warm!

Weekly Meal Planning

This recipe is a star for weekly meal prep and planning. Save and schedule this recipe to effortlessly create meal plans and generate smart shopping lists that consolidate all the ingredients you’ll need for the week.

Planning Benefits:

– Instantly calculates ingredient totals across multiple recipes
– Categorizes your shopping list by store section for streamlined shopping
– Prevents duplicate purchases and missing items
– Keeps your Whole 30 recipes and Asian dinner inspirations organized in one place

Pro tip: When planning multiple meals, schedule your recipes together to automatically see how much of each ingredient you’ll need—reducing food waste and ensuring you always have what you need!

Cook and Prep Times

Prep Time: 10 minutes
Cook Time: 15 minutes
Total Time: 25 minutes

This Whole30 Egg Roll in a Bowl with Creamy Chili Sauce is the perfect combination of flavor, speed, and whole food goodness—ideal for anyone looking to broaden their collection of quick Asian dinner recipes, Whole 30 recipes, and whole food recipes.

Paleo Perfection: A One-Pan Chicken & Vegetable Stir Fry for Quick, Wholesome Dinners

Best Paleo Chicken And Vegetable Stir Fry

Introduction

This Best Paleo Chicken And Vegetable Stir Fry is your go-to recipe for a quick, nutritious, and flavor-packed dinner. Brimming with vibrant vegetables and juicy chicken, all tossed in a savory paleo-friendly sauce, this stir fry comes together in just one pan—making it ideal for busy weeknights or healthy meal prep. It’s a satisfying dish that will please eaters of all ages while fitting perfectly into a Paleo lifestyle.

Flavorful & Wholesome Paleo Chicken And Vegetable Stir Fry

What makes this recipe a standout is its balance of bold, umami flavors with crisp vegetables and tender chicken. It’s grain-free, dairy-free, and refined sugar-free, yet never lacking in flavor, thanks to fresh garlic, ginger, coconut aminos, and just a touch of honey. Prepare to impress your family or guests with a wholesome meal that’s as nourishing as it is delicious.

Getting the Perfect Stir Fry Sauce

For an authentic Paleo stir fry sauce, coconut aminos serve as a great alternative to traditional soy sauce, providing a subtly sweet, savory base. A combination of minced garlic, fresh ginger, and a splash of toasted sesame oil elevate the dish with irresistible fragrance. Just whisk together the sauce ingredients and set aside to have it ready when it’s time to add a flavorful punch to your veggies and chicken.

Stir Fry Assembly for Restaurant-Quality Results

Start by searing the chicken pieces until golden, then quickly stir fry your vegetables to retain their crunch. Add the chicken back with the sauce, and toss everything together in the hot pan. This fast, high-heat cooking preserves the vivid colors and crisp-tender texture of your veggies, ensuring each bite is full of life and flavor.

Serving Suggestions for a Complete Paleo Meal

Serve your stir fry over cauliflower rice or zucchini noodles for a perfectly Paleo plate. Sprinkle with sliced green onions or toasted sesame seeds for extra texture and a pop of freshness. This dish is balanced, filling, and perfect for a weeknight dinner or meal prep solution.

Nutritional Information and Serving Size

This recipe yields 4 generous servings. Each portion is high in protein, low in carbs, and rich in fiber from assorted vegetables, making it a great option for those who want to keep meals both hearty and healthy. Expect around 300–350 calories per serving, varying slightly with your choice of vegetables.

The Ultimate Paleo Stir Fry (Recap)

Combining the ease of a one-pan dish with the wholesomeness of real, unprocessed ingredients, this Paleo Chicken And Vegetable Stir Fry has what it takes to become a staple in your home. Its bold flavors, beautiful colors, and nourishing profile make it a crowd pleaser and a meal you’ll want to come back to again and again.

[ingredients]
1 lb boneless, skinless chicken breast or thighs, sliced thin
2 tbsp arrowroot starch (for chicken, optional)
1 red bell pepper, thinly sliced
1 yellow bell pepper, thinly sliced
1 small head broccoli, cut into florets
1 cup snap peas
2 medium carrots, sliced diagonally
1 small red onion, thinly sliced
2 tbsp avocado oil or coconut oil

For the sauce:
1/4 cup coconut aminos
2 tbsp chicken broth
2 tsp toasted sesame oil
2 cloves garlic, minced
1 inch fresh ginger, grated
1 tsp raw honey (optional, for sweetness)
1/4 tsp crushed red pepper flakes (optional, for spice)

To garnish:
Sliced green onions
Toasted sesame seeds
[/ingredients]

💡Meal Planning Tip: Save this recipe to automatically generate an organized shopping list with all ingredients sorted by store section—perfect for efficient grocery trips and stress-free meal planning.

CookifyAI meal planning interface

Instructions

  1. In a bowl, toss sliced chicken with arrowroot starch if using; this helps achieve a nice seared exterior. Set aside.
  2. Whisk together all sauce ingredients in a small bowl and set aside.
  3. Heat 1 tablespoon oil in a large skillet or wok over medium-high. Add chicken in a single layer and cook, stirring occasionally, until just browned and cooked through, about 5–6 minutes. Transfer chicken to a plate.
  4. Add remaining oil to the pan. Stir fry carrots, bell peppers, onion, snap peas, and broccoli for 3–4 minutes, until just tender but still crisp.
  5. Return chicken to skillet. Pour stir fry sauce over everything, tossing to coat and cook for 1–2 minutes more, until sauce thickens slightly.
  6. Spoon stir fry over cauliflower rice or zucchini noodles. Garnish with green onions and sesame seeds. Serve hot and enjoy!

Weekly Meal Planning

This recipe is perfect for meal prepping lunches or dinners throughout the week. Save and schedule this recipe to your meal plan to automatically combine ingredients from multiple meals and generate a smart, organized shopping list.

Planning Benefits:

  • Effortlessly calculates ingredient quantities across recipes
  • Sorts your shopping list by grocery store aisle
  • Reduces food waste by aggregating overlapping ingredients
  • Streamlines meal prep for the whole week—no more last-minute scrambles

Pro tip: When planning multiple meals, schedule your week to let CookifyAI automatically adjust ingredient quantities—making batch cooking and shopping effortless!

Cook and Prep Times

Prep Time: 20 minutes
Cook Time: 15 minutes
Total Time: 35 minutes

Crispy Paleo Orange Chicken: A Zesty, Allergy-Friendly Takeout Classic

Crispy Paleo Orange Chicken (Gluten-free, Soy-free, AIP Option) • Heal Me Delicious

Introduction

Looking for a crowd-pleasing dinner that’s both delicious and meets a variety of dietary needs? This Crispy Paleo Orange Chicken is bursting with vibrant citrusy flavor, boasts a perfectly crisp coating, and is naturally gluten-free, soy-free, and ready for Autoimmune Protocol (AIP) modifications. It’s a fantastic solution for those craving classic takeout flavors in a wholesome, whole-foods package that’s easy to prep and quick to cook.

Why You’ll Love This Crispy Paleo Orange Chicken

The magic of this recipe is in the golden, grain-free coating and sticky-sweet orange glaze. By using arrowroot or tapioca starch and coconut aminos instead of soy sauce, you get a crispy coating and tangy sauce that’s allergy-friendly and every bit as satisfying as takeout. It’s a healthy twist on a classic that’s guaranteed to impress family or guests—whether they follow a special diet or not.

Making the Zesty Orange Sauce

The secret to a standout orange chicken is in the sauce. Fresh orange juice provides brightness, while honey or maple syrup adds natural sweetness. Coconut aminos bring a salty umami note, and ginger infuses a subtle warmth. The sauce thickens up beautifully, clinging to every crisp morsel for that perfect sweet-tangy bite. For AIP, simply omit the pepper and use maple syrup instead of honey, ensuring the dish fits your healing journey.

Coating and Frying for Ultimate Crispiness

Chicken pieces are dredged in a light starch and then shallow-fried in healthy avocado or coconut oil. This method yields irresistibly crispy bites without the heaviness of deep frying. A simple dredge and quick fry means minimal prep and cleanup, yet delivers on that restaurant-quality crunch.

Serving Suggestions for Crispy Paleo Orange Chicken

Serve with cauliflower rice, steamed broccoli, or sautéed bok choy for a complete paleo and AIP-friendly meal. Finish with a flutter of green onions or a sprinkle of orange zest for a bright, beautiful touch. It’s delicious fresh, and leftovers taste even better the next day.

Nutritional Information and Serving Size

This recipe yields 4 servings. Each serving contains approximately 360 calories, with balanced protein, healthy fat from the frying oil, and moderate natural sugars from the orange juice and sweetener.

Crispy Paleo Orange Chicken (Recap)

Crispy Paleo Orange Chicken is the ultimate healthy takeout remake: crunchy, sticky, bright with orange flavor, and naturally gluten-, soy-, and grain-free. It’s weeknight-friendly, family-approved, and totally satisfying—diet restrictions or not!

[ingredients]
For the Chicken:
1 lb boneless skinless chicken breast or thighs, cut into 1-inch cubes
1/2 cup arrowroot starch or tapioca starch
1/2 tsp sea salt
1/4 tsp black pepper (omit for AIP)
2–3 tbsp avocado oil or coconut oil, for frying

For the Orange Sauce:
1/2 cup fresh orange juice (about 2 oranges)
1 tsp orange zest
2 tbsp honey (or maple syrup for AIP)
2 tbsp coconut aminos
2 tsp grated ginger
1 tbsp apple cider vinegar
1/4 cup chicken broth (or water)
1 tbsp arrowroot starch or tapioca starch + 1 tbsp water, mixed to make a slurry
Optional: sliced green onions and extra orange zest, for garnish
[/ingredients]

💡Meal Planning Tip: Save this recipe to automatically generate an organized shopping list with all ingredients sorted by store section—perfect for streamlined grocery trips and stress-free meal planning.

CookifyAI meal planning interface

Instructions

  1. Pat chicken pieces dry. Toss with arrowroot starch (or tapioca), sea salt, and black pepper (omit for AIP) until well coated.
  2. In a large skillet over medium heat, add 2–3 tbsp avocado or coconut oil. Working in batches, fry the chicken pieces for 3–4 minutes per side until golden and cooked through. Remove and drain on paper towels.
  3. In a small saucepan, combine orange juice, orange zest, honey (or maple syrup), coconut aminos, ginger, apple cider vinegar, and chicken broth. Bring to a simmer over medium heat.
  4. Whisk in the arrowroot starch slurry. Continue cooking for 2–3 minutes, stirring, until the sauce thickens and becomes glossy.
  5. Add the crispy chicken to the sauce and toss until well coated.
  6. Serve immediately over cauliflower rice, garnished with green onions and extra orange zest if desired.

Weekly Meal Planning

This recipe is fantastic for weekly meal prep—it stays crispy and flavorful, and pairs well with a variety of sides. Save and schedule this recipe to seamlessly plan your meals and create a master shopping list that consolidates every ingredient across the week.

Planning Benefits:

  • Smartly calculates total ingredient quantities for all saved meals
  • Organizes everything by grocery store section
  • Prevents duplicate purchases and forgotten items
  • Keeps your meal prep organized, varied, and stress-free

Pro tip: If you plan this recipe and other paleo or AIP dishes, CookifyAI will calculate your total needs for ingredients like chicken and starches, so you buy just the right amount and avoid food waste.

Cook and Prep Times

Prep Time: 15 minutes
Cook Time: 20 minutes
Total Time: 35 minutes

Gluten-Free Chicken and Ramen Stir Fry: A Quick, Flavor-Packed Weeknight Delight

Gluten-Free Chicken and Ramen Stir Fry Recipe

Introduction

There’s something undeniably satisfying about digging into a steaming bowl of stir fry, especially when it’s quick, nourishing, and loaded with bold flavors. This Gluten-Free Chicken and Ramen Stir Fry brings your favorite takeout experience home—minus the gluten. With tender pieces of chicken, crisp vegetables, and perfectly chewy ramen noodles, it’s a meal that satisfies cravings and keeps weeknight cooking stress-free.

Flavorful and Fast: Why You’ll Love This Ramen Stir Fry

This recipe is a crowd-pleaser because it packs an impressive punch of umami-rich flavors, thanks to a simple gluten-free stir fry sauce and the ease of gluten-free ramen noodles. Ready in about 30 minutes, it’s ideal for busy evenings, meal prep, or family dinners where everyone can enjoy a dish that looks and tastes like it came from your favorite local restaurant.

Building the Ultimate Gluten-Free Stir Fry Sauce

The secret to an unforgettable stir fry is in the sauce. This recipe uses tamari or coconut aminos as a gluten-free alternative to soy sauce, blended with garlic, ginger, and a touch of sesame oil for depth. A splash of rice vinegar and a drizzle of honey balance the savory notes. Whisk the sauce ingredients together and let them sit for a few minutes; you’ll notice the flavors develop into a perfectly balanced, irresistible coating for your noodles and chicken.

Assembling Your Stir Fry: Chicken, Veggies, and Ramen

Start by sautéing bite-sized chicken pieces until golden, then add a vibrant mix of vegetables—think bell peppers, snap peas, and carrots for color and crunch. Toss in the cooked gluten-free ramen, pour over the sauce, and stir-fry everything together. The result? A glossy, noodle-packed bowl brimming with flavor, crunch, and satisfaction.

Serving Suggestions for a Memorable Gluten-Free Chicken and Ramen Stir Fry

Serve this stir fry hot from the skillet and finish with a sprinkle of green onions, toasted sesame seeds, or chili flakes for a custom kick. Pair it with a light side salad, steamed edamame, or a simple miso soup for a complete, balanced meal that’s as easy to prepare as it is to devour.

Nutritional Information and Serving Size

This recipe yields about 4 hearty portions. Each serving typically contains 400 to 450 calories, delivering a balanced combination of protein, vegetables, and gluten-free carbohydrates. It’s a healthy, wholesome way to satisfy weeknight takeout cravings—without the gluten.

Gluten-Free Chicken and Ramen Stir Fry (Recap)

Combining succulent chicken, crisp veggies, and perfectly chewy gluten-free ramen, this stir fry is a flavorful, one-bowl meal that comes together in a snap. It’s perfect for busy families, meal preppers, and anyone seeking a satisfying gluten-free dinner option.

[ingredients]
2 (3.5 oz) packages gluten-free ramen noodles (discard seasoning packets)
1 lb boneless, skinless chicken breast, cut into bite-sized pieces
1 tbsp olive oil or avocado oil
1 red bell pepper, thinly sliced
1 cup sugar snap peas, trimmed
1 cup shredded carrots
3 garlic cloves, minced
1-inch piece ginger, peeled and grated
1/4 cup gluten-free tamari or coconut aminos
2 tbsp honey or maple syrup
1 tbsp rice vinegar
1/2 tsp toasted sesame oil
Salt and pepper, to taste
Optional toppings: sliced green onions, toasted sesame seeds, chili flakes
[/ingredients]

💡Meal Planning Tip: Save this recipe to automatically generate an organized shopping list. All ingredients will be sorted by store section, making your weekly grocery trips smoother, quicker, and stress-free.

CookifyAI meal planning interface

Instructions

  1. Cook the gluten-free ramen noodles according to package instructions. Drain, rinse under cold water, and set aside.
  2. In a small bowl, whisk together tamari (or coconut aminos), honey, rice vinegar, and toasted sesame oil. Set the sauce aside.
  3. Heat oil in a large skillet or wok over medium-high heat. Add chicken pieces, season lightly with salt and pepper, and cook until browned and cooked through, about 5–6 minutes. Transfer chicken to a plate.
  4. Add bell pepper, snap peas, and carrots to the pan. Stir-fry for 2–3 minutes until crisp-tender.
  5. Stir in garlic and ginger, and cook for another 30 seconds until fragrant.
  6. Return chicken to the pan. Add cooked ramen noodles and pour the sauce over everything. Toss well to coat and stir-fry for 1–2 more minutes, until everything is hot and well combined.
  7. Serve hot, topped with green onions, sesame seeds, or chili flakes if desired.

Weekly Meal Planning

This gluten-free stir fry is excellent for weekly meal prep—just portion into containers for grab-and-go lunches or quick dinners. Save and schedule this recipe to plan when you’ll make it and generate smart, consolidated shopping lists for all your weekly meals.

Planning Benefits:

  • Automatically calculates ingredient quantities across multiple recipes
  • Orchestrates shopping lists by grocery store sections
  • Prevents duplicate purchases
  • Reduces meal planning and prepping time

Pro tip: Planning multiple meals? Schedule your recipes to see overlapping ingredients, so you buy just what you need—cutting down on food waste and grocery bills.

Cook and Prep Times

Prep Time: 15 minutes
Cook Time: 15 minutes
Total Time: 30 minutes

10 Easy Paleo Dinners for Effortless, Wholesome Evenings

10 Easy Paleo Dinner Recipes You’ll Love

Introduction

Fuel your evenings with meals that are as satisfying as they are nourishing with these 10 Easy Paleo Dinner Recipes You’ll Love! Paleo cooking is all about fresh, wholesome ingredients and minimal fuss—perfect for anyone who loves big flavors without the stress of complicated prep. Whether you’re new to the paleo lifestyle or looking to expand your dinner rotation, this collection is guaranteed to please appetites and help your family eat well, every night of the week.

Why You’ll Love These Paleo Dinner Recipes

These paleo recipes focus on lean proteins, vegetables, and natural flavors, leaving out grains, dairy, and refined sugars. Not only are they quick to make and packed with nutrients, but each dish offers comforting tastes—zesty stir-fries, hearty skillets, and mouthwatering sheet pan dinners. Perfect for busy nights, picky eaters, and anyone looking to simplify healthy eating!

Quick Paleo Recipe Inspirations

You’ll find everything from one-pan meals and stir-fries to crowd-pleasing bakes. Designed for real life, these recipes come together fast, require minimal clean-up, and use easy-to-find ingredients. Each recipe highlights the natural flavors of meat, seafood, and crisp veggies, seasoned with herbs, citrus, and spices for maximum taste.

Your Menu: 10 Easy Paleo Dinners

1. Lemon Herb Grilled Chicken Thighs
2. Garlic Shrimp and Broccoli Stir-Fry
3. Balsamic Glazed Steak with Roasted Vegetables
4. Sheet Pan Salmon with Asparagus
5. Chicken Fajita Lettuce Wraps
6. Zucchini Noodle Bolognese
7. Spaghetti Squash with Ground Turkey Marinara
8. Sweet Potato and Kale Hash with Eggs
9. Coconut Curry Chicken Skillet
10. Cauliflower “Rice” and Beef Stir-Fry

[ingredients]
For these recipes, you’ll need pantry staples and fresh produce:
– Boneless, skinless chicken thighs
– Wild-caught shrimp
– Sirloin steak
– Salmon filets
– Lean ground turkey
– Eggs
– Sweet potatoes
– Asparagus, kale, zucchini, broccoli, cauliflower, bell peppers
– Garlic, fresh herbs (parsley, cilantro, basil)
– Lemons, limes
– Coconut milk, balsamic vinegar
– Olive oil, avocado oil
– Salt, black pepper, chili powder, cumin, paprika, curry powder
– Romaine or butter lettuce (for wraps)
[/ingredients]

💡Meal Planning Tip: Save these recipes to instantly generate a streamlined shopping list, organize ingredients by grocery store section, and stay on top of your meal prep. Meal planning and healthy eating have never been easier!

CookifyAI meal planning interface

Instructions

  1. Lemon Herb Grilled Chicken Thighs: Marinate chicken thighs in lemon juice, olive oil, parsley, and garlic. Grill 6–8 minutes per side until cooked through.
  2. Garlic Shrimp and Broccoli Stir-Fry: Sauté shrimp and broccoli in avocado oil with fresh garlic and a squeeze of lime.
  3. Balsamic Glazed Steak with Roasted Vegetables: Sear steak in a hot skillet, finish with balsamic glaze, and serve with roasted bell peppers, cauliflower, and sweet potatoes.
  4. Sheet Pan Salmon with Asparagus: Place salmon filets and asparagus spears on a baking sheet, drizzle with olive oil, and bake at 400°F for 15 minutes.
  5. Chicken Fajita Lettuce Wraps: Cook chicken strips with bell pepper and onion, season with cumin, chili powder, and paprika, and serve in lettuce leaves.
  6. Zucchini Noodle Bolognese: Spiralize zucchini, toss with ground turkey marinara sauce, and sprinkle with fresh basil.
  7. Spaghetti Squash with Ground Turkey Marinara: Roast spaghetti squash, top with ground turkey tomato sauce seasoned with Italian herbs.
  8. Sweet Potato and Kale Hash with Eggs: Sauté diced sweet potatoes until tender, add kale, and crack in eggs. Cook until eggs are done to your liking.
  9. Coconut Curry Chicken Skillet: Simmer chicken pieces in coconut milk with curry powder, garlic, and vegetables of your choice.
  10. Cauliflower “Rice” and Beef Stir-Fry: Stir-fry riced cauliflower, ground beef, and your favorite veggies with coconut aminos, garlic, and ginger.

Serving Suggestions

Garnish dishes with chopped fresh herbs, a squeeze of citrus, or sliced avocado to enhance flavor and presentation. Pair with a simple green salad or roasted seasonal vegetables for a complete meal that’ll keep you satisfied.

Nutritional Information and Serving Size

Each recipe serves 2–4, featuring lean proteins, healthy fats, and an abundance of vegetables. These dinners are naturally gluten-free, grain-free, and dairy-free—aligning perfectly with the paleo approach for optimal nourishment.

Recap: 10 Easy Paleo Dinner Recipes You’ll Love

Enjoy a variety of straightforward, wholesome meals that are as delicious as they are good for you. With bold flavors, minimal prep, and clean ingredients, these dinners make it easy to stick to your paleo goals—no stress, just mouthwatering results!

Weekly Meal Planning

With 10 versatile recipes to choose from, you can prep ahead, batch cook proteins, or mix and match sides to keep your meals exciting all week. Save and schedule these recipes for the week to automatically organize your shopping list, adjust serving sizes, and avoid missing any key ingredients.

Planning Benefits:

  • Consolidates all ingredients from your selected recipes
  • Sorts your shopping list by grocery section
  • Adjusts quantities—no more guesswork!
  • Minimizes food waste by preventing duplicate purchases
  • Saves you time and keeps your weekly meals streamlined

Pro tip: Schedule your meals and let CookifyAI show you overlapping ingredients (like chicken, eggs, or spices) so your shopping is efficient and nothing is left behind.

Cook and Prep Times

Prep Time (per recipe): 10–15 minutes
Cook Time (per recipe): 15–25 minutes
Total Time (per recipe): 25–35 minutes

These simple paleo dinner recipes make healthy eating accessible, full of flavor, and—best of all—easy enough for every busy weeknight!

Crispy Paleo Orange Chicken: Crunchy, Zesty, and Allergen-Friendly Takeout at Home

Crispy Paleo Orange Chicken (Gluten-free, Soy-free, AIP Option)

Introduction

Crispy Paleo Orange Chicken delivers the craveable crunch and zesty flavor of your favorite takeout, but in a wholesome, gluten-free, soy-free, and optionally AIP (Autoimmune Protocol) compliant package. This recipe skips questionable ingredients in favor of real food swaps without sacrificing taste or texture—making it a winning weeknight main that satisfies everyone at your table.

Why This Crispy Paleo Orange Chicken is a Crowd Pleaser

This chicken recipe boasts shatteringly crisp bites thanks to a clean, grain-free breading and a sticky citrus glaze loaded with fresh orange flavor. Best of all, it’s allergen-friendly: no soy, no gluten, and an effortless AIP option. Serve it over cauliflower rice or crisp salad greens for a family-friendly meal that rivals restaurant takeout—without the delivery fees or additives.

The Secret to Perfectly Crispy Grain-Free Chicken

For unbeatable crunch, toss chicken pieces in tapioca or arrowroot starch, then coat with a coconut flour mixture. Baking and then pan-frying creates a golden, irresistibly crispy crust. If following AIP, skip eggs and use a gelatin egg or mashed banana binding substitute. The result? Bites that stay crunchy even after being tossed in orange sauce.

Making the Bright and Tangy Orange Sauce

The sauce features fresh orange juice and zest for natural intensity, balanced by honey (or maple syrup for AIP), a splash of apple cider vinegar, and aromatic garlic and ginger. Coconut aminos mimic the salty depth of soy sauce—without the soy. Simmering the mixture creates a thick, glossy glaze that perfectly clings to every bite of chicken.

Serving Suggestions: Build a Vibrant Plate

Pair with steamed or riced cauliflower, broccoli, or snap peas for a vibrant, low-carb meal. For extra pop, garnish with green onions, orange slices, or a sprinkle of toasted sesame seeds (skip for strict AIP). This dish shines both freshly made and as leftovers.

Nutritional Information and Serving Size

This recipe yields 4 generous servings, each providing approximately 300 calories (depending on chicken cut and sweetener used), healthy fats, and plenty of protein. Free of gluten, soy, and grains, it’s also low in refined sugars and suitable for a variety of special diets.

Recipe Recap: Crispy Paleo Orange Chicken

Forget bland “healthier” takeout alternatives—this crispy paleo orange chicken brings bold flavor, satisfying crunch, and simple prep to your weeknight routine. With easy swaps for AIP, it’s as versatile as it is delicious.

[ingredients]
For the Chicken:
– 1.5 lbs boneless, skinless chicken thighs or breasts, cut into bite-sized pieces
– 1/3 cup tapioca or arrowroot starch
– 1/3 cup coconut flour
– 1 tsp sea salt
– 1/4 tsp black pepper (omit for AIP)
– 2 large eggs (OR substitute with 2 gelatin eggs or 1/2 cup mashed green banana for AIP)
– 3–4 tbsp coconut oil, avocado oil or other paleo-friendly oil for frying

For the Orange Sauce:
– 2/3 cup fresh orange juice (from about 2 oranges)
– Zest of 1 orange
– 2 tbsp coconut aminos
– 3 tbsp honey or maple syrup (use maple syrup for AIP)
– 1 tbsp apple cider vinegar
– 2 cloves garlic, grated or finely minced
– 1-inch fresh ginger, grated
– 1/4 tsp sea salt
– 2 tsp tapioca or arrowroot starch mixed with 1 tbsp water (for thickening)

Optional for Garnish:
– Sliced green onions
– Orange slices
– Toasted sesame seeds (omit for AIP)
[/ingredients]

💡Meal Planning Tip: Save this recipe to instantly generate a complete shopping list with AIP swaps or paleo-only ingredients sorted by section—making grocery trips and weekly meal planning effortless and organized.

CookifyAI meal planning interface

Instructions

  1. Prepare the Chicken: Place tapioca starch in one shallow bowl. In a second bowl, whisk eggs or prepare your AIP substitute. In a third bowl, combine coconut flour, salt, and pepper.
  2. Pat chicken dry, then toss pieces first in tapioca starch, then dip in egg (or AIP option), and finally dredge through coconut flour mixture. Set aside on a plate.
  3. Heat 2–3 tbsp oil in a large skillet over medium-high heat. Add chicken in batches, spacing pieces apart for crispiness. Cook 3–4 minutes per side until golden brown and cooked through. Transfer to a paper towel-lined plate and repeat with remaining chicken, adding more oil as needed.
  4. Make the Sauce: In a small saucepan, whisk together orange juice, zest, coconut aminos, honey (or maple), vinegar, garlic, ginger, and salt. Bring to a simmer. Stir together starch and water, then pour into the sauce. Simmer, whisking, until glaze thickens—about 1–2 minutes. Remove from heat.
  5. Combine: Drizzle sauce over crispy chicken pieces and toss gently to coat—or serve the sauce on the side for dipping.
  6. Serve: Plate over a bed of cauliflower rice or with sautéed greens. Garnish with optional toppings if desired.

Weekly Meal Planning

This recipe is a meal prep star—leftovers reheat beautifully and it pairs well with a range of simple veggies. Save and schedule this recipe to sync it with your week’s meals, and get an optimized, consolidated grocery list that includes all prep and pantry items.

Planning Benefits:

– Automatically tallies ingredients across all recipes for the week
– Groups shopping lists by produce, meat, grocery, and specialty sections
– Cuts down on forgotten ingredients and duplicate purchases
– Organizes your weekly meal routine for stress-free, healthy eating

Pro tip: When building your meal plan, use CookifyAI to spot overlapping ingredients (like coconut aminos, eggs, or oranges) across recipes. Consolidated shopping means less waste and smarter dinner planning!

Cook and Prep Times

Prep Time: 20 minutes
Cook Time: 20 minutes
Total Time: 40 minutes

Enjoy crispy, flavorful orange chicken whenever a takeout craving hits—made simple, clean, and meal plan-approved!

Paleo Perfection: Effortless, Flavor-Packed Sheet Pan Dinners for Busy Weeknights

Delicious Paleo Sheet Pan Meals

Introduction

Delicious Paleo Sheet Pan Meals are the ultimate solution for anyone seeking vibrant flavors and effortless weeknight dinners. By roasting seasoned proteins alongside fresh veggies on a single tray, these meals deliver bold taste, easy clean-up, and healthful balance in every bite. Sheet pan recipes are ideal for anyone following a Paleo lifestyle or simply looking for wholesome, naturally gluten- and dairy-free meals without the fuss.

Why These Paleo Sheet Pan Meals Are a Must-Try

This Paleo sheet pan meal radiates simplicity and versatility. Roasting ingredients on one tray melds their flavors beautifully caramelized veggies, juicy proteins, and aromatic spices come together for a meal that pleases both picky eaters and adventurous palettes. No need for extra pots, pans, or complicated prep; one pan means less mess and more time for what matters.

Build-Your-Own Paleo Sheet Pan Dinner

A successful Paleo sheet pan meal starts with quality, whole-food ingredients. Choose a hearty protein like chicken thighs, wild-caught salmon, or grass-fed beef. Surround it with colorful, Paleo-friendly vegetables broccoli, bell peppers, sweet potatoes, or Brussels sprouts are all excellent choices. A drizzle of olive oil, a squeeze of lemon, and your favorite spice blend will bring all the components to life.

Paleo Sheet Pan Meal Assembly

Arrange your protein at the center of a rimmed sheet pan, ringed with roughly chopped vegetables. Season everything generously, then roast in a hot oven. As everything cooks together, the meat flavors the veggies, while the high heat gives everything a perfectly crisped edge. In under 40 minutes, you’ll have a complete, nutritious meal that’s as beautiful as it is delicious.

Serving Suggestions for Your Sheet Pan Masterpiece

Plate your sheet pan meal straight from the oven, maybe topping it with a scatter of toasted nuts, a sprinkle of fresh herbs, or a dollop of Paleo-friendly sauce (think lemon-tahini or chimichurri). Serve over a bed of cauli-rice or beside simple greens for a showstopping meal with minimal cleanup.

Nutritional Information and Serving Size

This base recipe yields four hearty servings. Each portion is packed with protein (about 30–40g per serving, depending on the protein used) and plenty of fiber-rich veggies, for a filling, balanced Paleo meal. Calories will range from 350–500 per serving, depending on the specific ingredients and any toppings or sauces.

Delicious Paleo Sheet Pan Meals (Recap)

These sheet pan meals blend convenience with clean eating, letting the natural flavors of their ingredients shine. With minimal prep, easy cleanup, and total customizability, it’s no wonder these meals are a hit for families and busy professionals alike.

[ingredients]
1 pound boneless, skinless chicken thighs (or wild salmon fillets, or grass-fed steak strips)
2 cups broccoli florets
1 large red bell pepper, chopped
1 medium sweet potato, cubed
1 cup Brussels sprouts, halved
3 tablespoons olive oil or avocado oil
2 teaspoons smoked paprika
1 teaspoon garlic powder
1 teaspoon dried oregano
1/2 teaspoon sea salt and black pepper, or to taste
1 lemon, sliced
Optional: Chopped fresh parsley, sliced almonds, Paleo chimichurri or lemon-tahini sauce for garnish
[/ingredients]

💡Meal Planning Tip: Save this recipe to automatically generate an organized shopping list with all ingredients sorted by store section—perfect for efficient grocery trips and meal planning.

CookifyAI meal planning interface

Instructions

  1. Preheat your oven to 425°F (220°C). Line a large rimmed sheet pan with parchment paper.
  2. In a large mixing bowl, toss your protein and all vegetables with oil, smoked paprika, garlic powder, oregano, salt, and pepper until thoroughly coated.
  3. Arrange everything in a single layer on the prepared sheet pan. Place protein in the center and spread veggies around it. Nestle lemon slices over everything for extra flavor while roasting.
  4. Roast for 25–30 minutes, or until protein is cooked through and vegetables are tender and caramelized, flipping veggies halfway if desired.
  5. Remove from oven and garnish with fresh parsley, sliced almonds, or your favorite Paleo-friendly sauce. Serve immediately.

Weekly Meal Planning

This Paleo sheet pan recipe works beautifully for meal prep and busy weeks. Save and schedule this recipe to plan your meal days and generate streamlined shopping lists consolidating all ingredients from your meal plan.

Planning Benefits:

  • Auto-calculates total ingredient quantities when planning multiple meals
  • Organizes your grocery list by store section—never miss an item
  • Streamlines weekly meal prep and prevents ingredient waste

Pro tip: When planning Paleo lunches and dinners for the week, schedule this and other recipes together. CookifyAI will automatically tally total amounts needed (for example—if using broccoli in two meals, the list will sum it) so you shop with confidence and save time.

Cook and Prep Times

Prep Time: 15 minutes
Cook Time: 25–30 minutes
Total Time: 40–45 minutes

Enjoy effortlessly delicious, wholesome Paleo meals—perfect for busy weeknights or batch-cooking for the week ahead!

Cozy Fall Feasts: 11 Savory Paleo Sheet Pan Dinners to Warm Your Autumn Evenings

11 Paleo Sheet Pan Fall Dinners

Introduction

Nothing says ease and comfort like a sheet pan dinner—especially during the busy fall season when cooler weather calls for hearty, nourishing meals. These 11 Paleo Sheet Pan Fall Dinners deliver bold flavor, seasonal ingredients, and minimal cleanup. Perfect for anyone seeking a simple, balanced meal that satisfies family and friends, these one-pan wonders take the guesswork out of weeknight cooking.

Why These Paleo Sheet Pan Dinners Are a Fall Favorite

Fall produce shines in these dinners, bringing together root vegetables, squashes, lean proteins, and fragrant herbs in easy, hands-off prep. You’ll enjoy meals bursting with roasted flavors, caramelized edges, and diverse colors—without breaking your Paleo lifestyle. These recipes are designed to please varied palates and encourage trying new vegetable combinations all season long.

How to Build a Perfect Paleo Sheet Pan Dinner

The ideal sheet pan meal starts with high-quality protein (like chicken, pork, turkey, or fish), adds loads of seasonal vegetables, and rounds out with bold, Paleo-friendly seasonings. Cut everything into uniform pieces to ensure even roasting, toss with oil and spices, then let the oven do the work.

11 Paleo Sheet Pan Fall Dinners

  1. Sheet Pan Maple Dijon Chicken with Brussels Sprouts & Sweet Potatoes
    Savor the flavors of fall with marinated chicken thighs, crisp-tender Brussels sprouts, and sweet potato cubes tossed in a maple Dijon glaze.
  2. Autumn Harvest Sausage & Apple Tray Bake
    Paleo-compliant sausage, apples, carrots, onions, and parsnips create a sweet-savory symphony, ideal for cozy nights.
  3. Paleo Lemon Herb Salmon with Roasted Broccoli & Butternut Squash
    Wild-caught salmon fillets, citrusy herbs, and a medley of broccoli and butternut squash make for quick, nutrient-packed eating.
  4. Garlic Rosemary Pork Tenderloin with Roasted Cauliflower
    A simple rub of garlic and fresh rosemary infuses pork tenderloin, while cauliflower florets roast to caramelized perfection.
  5. Balsamic Chicken with Rainbow Root Vegetables
    Pair balsamic-glazed chicken breasts with beets, carrots, and turnips for a vibrant, tangy meal.
  6. Harissa Shrimp with Zucchini & Bell Peppers
    Shell-on shrimp roast alongside zucchini, red onions, and bell peppers tossed in spicy harissa paste for a bold seasonal twist.
  7. Pecan-Crusted Chicken & Roasted Green Beans
    Chicken breasts are coated in crush pecans and roasted with green beans and thin-sliced sweet potatoes for crunch and flavor.
  8. Apple Cider Glazed Turkey Cutlets with Brussels Sprouts
    Turkey cutlets bask in a tangy apple cider marinade next to halved fresh Brussels sprouts and red onions.
  9. Coconut Curry Cod with Acorn Squash & Kale
    Cod fillets, acorn squash slices, and kale take on the warmth of coconut curry spices in this easy-bake dinner.
  10. Paleo BBQ Chicken Drumsticks with Roasted Carrots
    Drumsticks coated in Paleo-friendly BBQ sauce roast with carrots and onions, creating deep, crowd-pleasing flavor.
  11. Roasted Steak Bites with Mushrooms & Root Veggies
    Tender steak bites, mushrooms, and hearty root vegetables round out this ultra-satisfying, all-in-one meal.

[ingredients]
Sample shopping list for one dinner (Sheet Pan Maple Dijon Chicken):
– 4 bone-in, skin-on chicken thighs
– 2 cups Brussels sprouts, halved
– 2 medium sweet potatoes, cubed
– 2 tablespoons olive oil
– 2 tablespoons Dijon mustard (sugar-free)
– 2 tablespoons pure maple syrup
– 1 teaspoon dried thyme
– Salt and pepper, to taste
[/ingredients]

💡Meal Planning Tip: Save these dinner ideas to instantly create a smart, organized shopping list with all your ingredients sorted by grocery store section—making your Paleo meal planning and shopping easier than ever.

CookifyAI meal planning interface

Instructions (for Sheet Pan Maple Dijon Chicken)

  1. Preheat oven to 425°F (220°C). Line a large sheet pan with parchment paper.
  2. In a bowl, whisk together olive oil, Dijon mustard, maple syrup, thyme, salt, and pepper.
  3. Add chicken, Brussels sprouts, and sweet potatoes to the pan. Drizzle with the dressing and toss to coat.
  4. Arrange chicken skin-side up among the vegetables. Roast for 30–35 minutes, or until chicken is cooked through and vegetables are tender and slightly caramelized.
  5. Serve hot and enjoy the seasonal flavors!

Weekly Meal Planning

Want to take meal planning off your plate? Use these 11 Paleo sheet pan recipes to structure a fuss-free, flavor-packed week. Save and schedule your week in CookifyAI to auto-calculate exactly what you need—no more duplicate purchases, missing ingredients, or last-minute grocery store runs!

Planning Benefits:

  • Consolidate ingredients for the entire week’s sheet pan dinners
  • View quantities by grocery section for super simple shopping
  • Spot ingredients you already have, reducing food waste

Pro tip: If multiple dinners use the same protein or vegetable, CookifyAI totals them for you, so you’ll buy the perfect amount. Try scheduling all 11 recipes to see meal prep organization in action!

Cook and Prep Times

Prep time per dinner: 15–20 minutes
Cook time per dinner: 25–40 minutes
Total time per dinner: 45–60 minutes

Recap: The Joy of Paleo Sheet Pan Dinners

With these 11 Paleo Sheet Pan Fall Dinners, you’ll enjoy stress-free evenings, cleaner kitchen counters, and balanced meals bursting with seasonal flavor. They’re the perfect companion to busy weeknights and crisp autumn days—and with streamlined meal planning, they make healthy eating truly effortless.

5-Day Paleo Breakfast Boost: Quick, Nutritious Meal Prep in Under One Hour!

Paleo Breakfast Meal Prep – Prep 5 Days of Breakfast in One Hour!

Introduction

A streamlined morning starts with a nutritious breakfast, and this Paleo Breakfast Meal Prep lets you set yourself up for five days of healthy, satisfying mornings—all in under an hour. It’s a smart way to reduce stress, curb cravings, and ensure you begin each day with a protein-packed, grain-free meal that keeps you full and energized. Perfect for busy weekdays or anyone looking to simplify their routine without sacrificing flavor or nutrition!

Flavorful, Simple, and Energizing Paleo Breakfasts

Packed with fresh veggies, wholesome eggs, and flavorful sausage or bacon, this breakfast meal prep packs serious taste in every bite. Each portion is perfectly balanced for the paleo diet, avoiding dairy, grains, or refined sugars. With a hearty mix of textures and vibrant colors, this recipe is as visually appealing as it is satisfying, making it a crowd-pleaser for the whole family or a busy professional’s go-to breakfast.

Building the Perfect Paleo Breakfast Meal Prep

The base of this meal prep is a combination of eggs and roasted veggies. Choose from favorites like bell peppers, spinach, mushrooms, or sweet potatoes, and add protein with high-quality sausage, bacon, or leftover roasted chicken. The key is to chop and assemble all ingredients uniformly, so each breakfast is quick to cook and easy to portion out.

How to Meal Prep for Five Days in One Hour

1. Preheat your oven and line a large sheet pan or use muffin tins for portion control.
2. Quickly chop desired veggies and protein, toss with olive oil, and season well, then arrange on the pan or divide evenly into the muffin tin.
3. Whisk eggs and pour over the vegetables and protein. Bake until set, then cool slightly before dividing into meal prep containers.
4. Store in the fridge for up to five days and simply reheat each morning—a hot, paleo-friendly breakfast ready in seconds.

Serving Suggestions to Elevate Your Paleo Breakfasts

Serve with a side of fresh fruit such as berries or an avocado for a dose of healthy fats and fiber. Top baked portions with fresh herbs like chives, parsley, or cilantro for an extra flavor kick. For added variety, swap out the veggies, change up the meat, or add a dollop of paleo salsa or guacamole on busy mornings.

Nutritional Information and Serving Size

This recipe yields five hearty breakfasts—one for each weekday—with each serving providing a balanced mix of protein, healthy fats, and complex carbs from vegetables. Each portion typically contains 250 to 300 calories, depending on the protein and veggies used, making them perfect for a satiating start.

Paleo Breakfast Meal Prep (Recap)

This recipe is your ticket to fast, flavorful, and fuss-free paleo breakfasts all week long. With just one hour of prep, you’ll have a week of satisfying, nutrient-dense meals that keep you energized and ready to tackle your day.

[ingredients]
10 large eggs
1/2 pound uncooked breakfast sausage or 6 slices paleo-friendly bacon
1 large sweet potato, peeled and diced
1 bell pepper, diced
1 cup fresh spinach, chopped
1 cup mushrooms, sliced
2 tablespoons olive oil (or avocado oil)
Salt and black pepper, to taste
Optional: 1/2 teaspoon smoked paprika or garlic powder
Fresh herbs, salsa, or avocado for serving
[/ingredients]

💡Meal Planning Tip: Save this recipe to automatically generate a detailed shopping list, perfectly sorted by grocery store section. CookifyAI’s intuitive tools make grocery trips quicker and meal planning effortless—no more forgotten ingredients or duplicate items!

CookifyAI meal planning interface

Instructions

  1. Preheat your oven to 400°F (200°C). Grease a 9×13-inch baking dish or two muffin tins for individual cups.
  2. In a large skillet, cook sausage (or bacon) over medium heat until fully cooked. Drain if needed, and set aside.
  3. On a baking sheet, toss diced sweet potato, bell pepper, spinach, and mushrooms with olive oil, salt, pepper, and optional spices. Spread in an even layer and roast for 10 minutes if using a baking dish, or set aside raw if using muffin tins.
  4. Whisk eggs in a large mixing bowl. Season with additional salt and pepper as desired.
  5. For a baking dish: Add cooked sausage and roasted vegetables to the dish. Pour whisked eggs evenly over the mixture, gently stirring to distribute.
  6. For muffin tins: Divide veggies and sausage evenly among cups, then pour in eggs to fill each about 3/4 full.
  7. Bake for 18-22 minutes, or until eggs are set and lightly golden at the edges (reduce baking time to 15-17 minutes for muffin cups).
  8. Allow to cool for 10 minutes, slice or pop out portions, and divide into five meal prep containers.
  9. Store covered in the refrigerator for up to five days. Reheat in the microwave for 45-60 seconds each morning before serving. Garnish as desired.

Weekly Meal Planning

Making breakfast in advance sets the tone for a smooth, healthy week! Save and schedule this recipe to enjoy the full benefits of CookifyAI—plan out your breakfast, lunch, and dinner, and generate a smart shopping list that covers every recipe.

Planning Benefits:

– Totals up all ingredients across your scheduled breakfasts and additional meals
– Organizes your grocery list by section, speeding up store trips
– Reduces food waste by preventing extra purchases and combining overlapping items
– Makes weekly meal prep more structured and less time-consuming

Pro tip: When prepping for multiple meals, use CookifyAI’s planner to double-check overlapping ingredients—like eggs or spinach—ensuring you buy just the right amount.

Cook and Prep Times

Prep Time: 15 minutes
Cook Time: 30-35 minutes
Total Time: 45-55 minutes

5-Day Paleo Breakfast Boost: Quick, Nutritious Meal Prep in Under One Hour!

Paleo Breakfast Meal Prep – Prep 5 Days of Breakfast in One Hour!

Introduction

A streamlined morning starts with a nutritious breakfast, and this Paleo Breakfast Meal Prep lets you set yourself up for five days of healthy, satisfying mornings—all in under an hour. It’s a smart way to reduce stress, curb cravings, and ensure you begin each day with a protein-packed, grain-free meal that keeps you full and energized. Perfect for busy weekdays or anyone looking to simplify their routine without sacrificing flavor or nutrition!

Flavorful, Simple, and Energizing Paleo Breakfasts

Packed with fresh veggies, wholesome eggs, and flavorful sausage or bacon, this breakfast meal prep packs serious taste in every bite. Each portion is perfectly balanced for the paleo diet, avoiding dairy, grains, or refined sugars. With a hearty mix of textures and vibrant colors, this recipe is as visually appealing as it is satisfying, making it a crowd-pleaser for the whole family or a busy professional’s go-to breakfast.

Building the Perfect Paleo Breakfast Meal Prep

The base of this meal prep is a combination of eggs and roasted veggies. Choose from favorites like bell peppers, spinach, mushrooms, or sweet potatoes, and add protein with high-quality sausage, bacon, or leftover roasted chicken. The key is to chop and assemble all ingredients uniformly, so each breakfast is quick to cook and easy to portion out.

How to Meal Prep for Five Days in One Hour

1. Preheat your oven and line a large sheet pan or use muffin tins for portion control.
2. Quickly chop desired veggies and protein, toss with olive oil, and season well, then arrange on the pan or divide evenly into the muffin tin.
3. Whisk eggs and pour over the vegetables and protein. Bake until set, then cool slightly before dividing into meal prep containers.
4. Store in the fridge for up to five days and simply reheat each morning—a hot, paleo-friendly breakfast ready in seconds.

Serving Suggestions to Elevate Your Paleo Breakfasts

Serve with a side of fresh fruit such as berries or an avocado for a dose of healthy fats and fiber. Top baked portions with fresh herbs like chives, parsley, or cilantro for an extra flavor kick. For added variety, swap out the veggies, change up the meat, or add a dollop of paleo salsa or guacamole on busy mornings.

Nutritional Information and Serving Size

This recipe yields five hearty breakfasts—one for each weekday—with each serving providing a balanced mix of protein, healthy fats, and complex carbs from vegetables. Each portion typically contains 250 to 300 calories, depending on the protein and veggies used, making them perfect for a satiating start.

Paleo Breakfast Meal Prep (Recap)

This recipe is your ticket to fast, flavorful, and fuss-free paleo breakfasts all week long. With just one hour of prep, you’ll have a week of satisfying, nutrient-dense meals that keep you energized and ready to tackle your day.

[ingredients]
10 large eggs
1/2 pound uncooked breakfast sausage or 6 slices paleo-friendly bacon
1 large sweet potato, peeled and diced
1 bell pepper, diced
1 cup fresh spinach, chopped
1 cup mushrooms, sliced
2 tablespoons olive oil (or avocado oil)
Salt and black pepper, to taste
Optional: 1/2 teaspoon smoked paprika or garlic powder
Fresh herbs, salsa, or avocado for serving
[/ingredients]

💡Meal Planning Tip: Save this recipe to automatically generate a detailed shopping list, perfectly sorted by grocery store section. CookifyAI’s intuitive tools make grocery trips quicker and meal planning effortless—no more forgotten ingredients or duplicate items!

CookifyAI meal planning interface

Instructions

  1. Preheat your oven to 400°F (200°C). Grease a 9×13-inch baking dish or two muffin tins for individual cups.
  2. In a large skillet, cook sausage (or bacon) over medium heat until fully cooked. Drain if needed, and set aside.
  3. On a baking sheet, toss diced sweet potato, bell pepper, spinach, and mushrooms with olive oil, salt, pepper, and optional spices. Spread in an even layer and roast for 10 minutes if using a baking dish, or set aside raw if using muffin tins.
  4. Whisk eggs in a large mixing bowl. Season with additional salt and pepper as desired.
  5. For a baking dish: Add cooked sausage and roasted vegetables to the dish. Pour whisked eggs evenly over the mixture, gently stirring to distribute.
  6. For muffin tins: Divide veggies and sausage evenly among cups, then pour in eggs to fill each about 3/4 full.
  7. Bake for 18-22 minutes, or until eggs are set and lightly golden at the edges (reduce baking time to 15-17 minutes for muffin cups).
  8. Allow to cool for 10 minutes, slice or pop out portions, and divide into five meal prep containers.
  9. Store covered in the refrigerator for up to five days. Reheat in the microwave for 45-60 seconds each morning before serving. Garnish as desired.

Weekly Meal Planning

Making breakfast in advance sets the tone for a smooth, healthy week! Save and schedule this recipe to enjoy the full benefits of CookifyAI—plan out your breakfast, lunch, and dinner, and generate a smart shopping list that covers every recipe.

Planning Benefits:

– Totals up all ingredients across your scheduled breakfasts and additional meals
– Organizes your grocery list by section, speeding up store trips
– Reduces food waste by preventing extra purchases and combining overlapping items
– Makes weekly meal prep more structured and less time-consuming

Pro tip: When prepping for multiple meals, use CookifyAI’s planner to double-check overlapping ingredients—like eggs or spinach—ensuring you buy just the right amount.

Cook and Prep Times

Prep Time: 15 minutes
Cook Time: 30-35 minutes
Total Time: 45-55 minutes

Egg-Free Butternut Breakfast Meatballs: A Savory-Sweet Morning Delight

Butternut Breakfast Meatballs (Egg-Free)

Introduction

Butternut Breakfast Meatballs (Egg-Free) are the ultimate savory-sweet addition to your morning routine. These flavorful meatballs blend tender butternut squash with your choice of ground meat, roasted spices, and fresh herbs. Unlike classic breakfast meatballs, this egg-free recipe caters to those with allergies or dietary preferences without sacrificing taste or texture, making it a wonderful option for family brunches or meal-prepped breakfasts.

Deliciously Unique Butternut Breakfast Meatballs

What sets these breakfast meatballs apart is the natural sweetness of roasted butternut squash, which keeps the meatballs moist and flavorful even without eggs. Paired with warm spices such as cinnamon and nutmeg plus a hint of sage and garlic, each bite offers a comforting yet vibrant flavor profile that stands out at any breakfast table.

Perfecting the Butternut Mixture

Start by roasting the butternut squash for enhanced sweetness and smooth texture. When mixed into the meatball blend, it acts as a binder (in place of eggs) while also adding a dimension of flavor and moisture. A small amount of almond flour or oats provides further structure, ensuring the meatballs stay together and hold their shape during baking.

Assembling and Cooking Your Meatballs

Once the mixture is combined, shaping and baking couldn’t be simpler. Scoop the mixture into uniform balls for even cooking. Baking—not frying—means less mess and healthier results, and the aroma of butternut and warming spices will have everyone coming to the kitchen.

Serving Suggestions for Butternut Breakfast Meatballs

These meatballs are delicious on their own, but for a complete breakfast, serve them with sautéed greens, roasted potatoes, or a creamy dairy-free sauce. For an on-the-go option, wrap them in a collard green or tortilla with your favorite toppings. The balance of savory and sweet makes them a crowd pleaser for all ages.

Nutritional Information and Serving Size

This recipe yields approximately 18 medium-sized meatballs (about 4–6 servings). Each serving is high in protein, vitamin A, and dietary fiber, and is naturally egg-free and dairy-free, depending on your choice of meat and binder. Calorie content will vary based on the protein selected.

Butternut Breakfast Meatballs (Recap)

With their warm spices, subtle sweetness, and allergy-friendly ingredients, these egg-free Butternut Breakfast Meatballs are an easy, nutritious way to bring creative flavor to breakfast—meal prep just got a serious upgrade!

[ingredients]
1 cup cooked and mashed butternut squash (roasted for best flavor)
1 lb ground turkey, chicken, or pork
1/2 small onion, finely diced
2 cloves garlic, minced
1/3 cup almond flour or rolled oats
1 tablespoon fresh sage or thyme, chopped (or 1 tsp dried)
1/2 teaspoon ground cinnamon
1/4 teaspoon ground nutmeg
3/4 teaspoon salt
1/2 teaspoon black pepper
Optional: Pinch of chili flakes or smoked paprika for added warmth
[/ingredients]

💡Meal Planning Tip: Save this recipe to automatically generate an organized shopping list with all ingredients sorted by store section—perfect for efficient grocery trips and seamless meal planning.

CookifyAI meal planning interface

Instructions

  1. Preheat your oven to 400°F (200°C). Line a baking sheet with parchment paper.
  2. If using fresh butternut squash, peel and cube it. Toss with a little olive oil and roast for 20–25 minutes until tender. Cool slightly, then mash to make 1 cup.
  3. Combine mashed butternut squash, ground meat, onion, garlic, almond flour (or oats), sage, cinnamon, nutmeg, salt, pepper, and chili flakes/paprika (if using) in a large bowl. Mix until well incorporated—avoid over-mixing for tender meatballs.
  4. Scoop out tablespoon-sized portions and roll into balls. Place evenly spaced on the prepared baking sheet.
  5. Bake for 18–20 minutes, or until browned and cooked through (internal temperature should reach 165°F for poultry).
  6. Serve warm, or let cool and store in the refrigerator for up to 4 days, or freeze for later use.

Weekly Meal Planning

These Butternut Breakfast Meatballs are meal prep all-stars—make a batch on Sunday and enjoy them throughout the week, or freeze for future breakfasts. Save and schedule this recipe to plan when to make it and instantly generate a shopping list that consolidates ingredients for all your planned meals.

Planning Benefits:

– Automatically calculates total ingredient quantities when planning multiple recipes
– Organizes your shopping list by grocery store section
– Helps prevent duplicate purchases and forgotten items
– Streamlines weekly meal prep for stress-free mornings

Pro tip: Schedule your recipes in CookifyAI to spot overlapping ingredients and save on groceries. For example, if another weekly recipe uses fresh herbs or ground meat, you’ll know just how much to buy—minimizing waste and maximizing freshness.

Cook and Prep Times

Prep Time: 20 minutes
Cook Time: 20 minutes
Total Time: 40 minutes
(plus extra roasting time if starting with fresh butternut squash)

Energize Your Mornings: 5 Nutritious Paleo Breakfast Recipes for a Power-Packed Start

5 Paleo Breakfast Ideas — Energizing Paleo Meal Plan Favorites

Introduction

Looking for a way to jumpstart your mornings without the grains, dairy, or processed sugars? These 5 Paleo Breakfast Ideas are designed to fuel your body with whole, clean ingredients that energize and satisfy. Perfect for the busy professional or anyone following a Paleo lifestyle, these breakfasts make meal planning simple—so you can power through your day with steady, natural energy.

Deliciously Energizing Paleo Breakfasts

Unlike traditional breakfasts heavy on bread or cereals, these Paleo favorites rely on protein-rich eggs, vibrant veggies, and healthy fats. Whether you’re meal prepping or seeking a quick grab-and-go option, these recipes offer exciting flavors, easy prep, and nutrient-dense combinations to keep mornings stress-free and delicious.

The Top 5 Paleo Breakfast Ideas

Here are five unbeatable Paleo breakfasts that stand out for their incredible taste and convenience. Mix and match them throughout your week to keep things interesting and balanced.

  1. Egg and Veggie Muffins: Whisk eggs with chopped spinach, tomatoes, bell peppers, and onions. Pour into muffin tins and bake until set for a portable, savory breakfast that’s packed with nutrients.
  2. Sweet Potato Hash with Sausage: Sauté diced sweet potato, onion, and kale in olive oil. Add crumbled Paleo-friendly sausage for a warm, satiating breakfast bowl that’s ready in minutes.
  3. Banana Almond Pancakes: Mash ripe bananas and mix with eggs and almond flour. Pan-cook into light, naturally sweet pancakes—perfect with fresh berries and a drizzle of almond butter.
  4. Coconut Chia Breakfast Pudding: Combine chia seeds with coconut milk and let chill overnight. Top in the morning with nuts and sliced fruit for a fiber-rich, creamy start.
  5. Avocado Breakfast Boats: Halve avocados, remove a bit of flesh, and crack an egg inside. Bake until the egg is set, then sprinkle with herbs and chili flakes for a nourishing meal loaded with healthy fats.

Serving Suggestions for a Balanced Paleo Plate

Pair your chosen breakfast with a side of berries or a handful of raw nuts for added fiber and crunch. For a savory twist, add a dash of hot sauce to your egg-based dishes or a sprinkle of cinnamon to sweet recipes. Each idea can be prepped ahead and even doubled for grab-and-go efficiency.

Nutritional Information and Serving Size

Each Paleo breakfast idea is designed for a single serving and delivers a satisfying balance of protein, healthy fats, and complex carbs. Average calories per serving range from 250 to 400, ensuring sustainable morning energy without spikes or crashes.

[ingredients]
6 large eggs
2 cups chopped leafy greens (spinach, kale)
1 bell pepper, diced
1 small sweet potato, diced
1/2 onion, diced
2 Paleo-friendly sausages
2 ripe bananas
1/2 cup almond flour
1 can (13.5 oz) full-fat coconut milk
1/4 cup chia seeds
2 avocados
Assorted nuts, berries, herbs, and spices for garnish
[/ingredients]

💡Meal Planning Tip: Save this recipe collection to automatically generate an organized shopping list with all ingredients sorted by store section—perfect for efficient grocery trips and meal planning.

CookifyAI meal planning interface

Instructions

  1. Egg and Veggie Muffins: Preheat oven to 350°F. Grease a muffin tin. Whisk eggs, mix in greens, pepper, and onion. Fill tins and bake 18-20 minutes or until set.
  2. Sweet Potato Hash with Sausage: Heat olive oil in a skillet. Sauté sweet potato and onion until softened. Add chopped sausage and kale; cook until browned and kale wilts.
  3. Banana Almond Pancakes: Mash bananas, whisk with eggs and almond flour. Pour small rounds on a nonstick skillet and cook 2-3 min per side. Serve with berries.
  4. Coconut Chia Breakfast Pudding: Stir chia seeds into coconut milk. Chill overnight. Top with nuts and sliced fruit before serving.
  5. Avocado Breakfast Boats: Halve avocados, remove some flesh to fit an egg. Place in baking dish, crack an egg in each, and bake at 400°F for 12-15 min. Finish with herbs and chili flakes.

Weekly Meal Planning

These Paleo breakfasts are ideal for weekly meal prep. Save and schedule these recipes to organize what you’ll eat each morning and generate a smart shopping list with everything you need.

Planning Benefits:

  • Automatically calculates ingredient totals across breakfast recipes
  • Organizes shopping lists by store sections
  • Prevents buying extra or missing essentials
  • Streamlines meal prep for the entire week

Pro tip: When planning out your week, schedule these breakfasts in CookifyAI and see how overlapping ingredients (like eggs and greens) increase efficiency, reduce costs, and help streamline your morning routine.

Cook and Prep Times

Prep Time: 15 minutes
Cook Time: 10–25 minutes (depending on recipe)
Total Time: Approximately 30 minutes per breakfast (some can be prepared in advance)

Energize Your Mornings: 40+ Delicious Whole30 Breakfast Recipes to Kickstart Your Day!

40+ Whole30 Breakfast Recipes: Easy & Delicious Meal Ideas

Introduction

Finding breakfast inspiration on Whole30 can be challenging, but it doesn’t have to mean boring or repetitive meals. Whether you’re craving a savory breakfast hash, an egg-free bowl, or just need something quick and hearty, this collection offers a wide variety of satisfying and nourishing options—all Whole30 approved! These recipes will help you start your mornings with energy and great taste, making it easier to stick to your Whole30 goals.

Why These Whole30 Breakfast Recipes Are a Game Changer

This packed collection of 40+ Whole30 breakfast recipes delivers more than just eggs and bacon. You’ll discover creative combos, creative uses for leftovers, and crowd-pleasing breakfast bakes that keep you full and satisfied. Bursting with flavor and loaded with nutrient-dense ingredients, each recipe is crafted to support your healthy lifestyle while fitting seamlessly into your busy schedule.

How to Build a Sustainable Breakfast Routine on Whole30

Consistency is key for Whole30 success, and these recipes help lay the groundwork for a sustainable morning routine. Many options are make-ahead friendly, freezer-friendly, or designed for batch cooking, ensuring you always have something compliant ready to go. By rotating through this variety of meals, you’ll keep breakfast exciting and minimize early morning decision fatigue.

Sample Whole30 Breakfast Ideas

Mix and match recipes from this list to keep things interesting all month long:

  • Sweet Potato Hash with Sausage, Peppers & Spinach
  • Egg Muffins with Broccoli and Turkey
  • Crispy Breakfast Tostones (Fried Plantains) with Avocado
  • Smoked Salmon Breakfast Salad with Dill & Lemon
  • Savory Cauliflower Oatmeal with Almond Butter
  • Paleo Breakfast Casserole with Ground Beef and Veggies
  • Avocado, Tomato & Prosciutto Breakfast Stacks
  • Shakshuka (Eggs Poached in Spicy Tomato Sauce)
  • Banana & Chia Pudding with Berries (Egg-Free)
  • Turkey & Sweet Potato Breakfast Skillet
  • Leftover Veggie Breakfast Stir-Fry
  • Chicken Apple Sausage Patties with Greens
  • Caramelized Onion and Mushroom Frittata
  • Breakfast Stuffed Peppers
  • Roasted Root Vegetable Hash with Poached Eggs
  • Breakfast Salad Bowls with Warm Lemon Dressing

[ingredients]
Sample Ingredients List for Your Whole30 Weekly Breakfasts:
Eggs
Sweet potatoes
Bell peppers
Leafy greens (spinach, kale, arugula)
Avocado
Ground turkey or chicken
Compliant sausage or bacon
Fresh or smoked salmon
Coconut milk or almond milk (unsweetened)
Plantains
Seasonal veggies (onion, tomato, zucchini, cauliflower)
Spices: cumin, paprika, garlic, dill, pepper
Berries and bananas (in moderation, for sides)
Lemon
Olive or avocado oil
[/ingredients]

💡 Meal Planning Tip: Save this Whole30 breakfast collection with CookifyAI to instantly generate an organized shopping list. All your breakfast staples and fresh produce will be automatically sorted for faster, more efficient grocery trips—no more guesswork or missed ingredients!

CookifyAI meal planning interface

How to Meal Prep Whole30 Breakfasts Like a Pro

1. Pick 3–4 recipes to prep on the weekend.
2. Batch-cook hash or casserole recipes and store in single-serving containers in the fridge or freezer.
3. Prep grab-and-go options like egg muffins or chia pudding for busy mornings.
4. Keep fresh greens, avocados, and cooked proteins on hand for quick assembly.
5. Rotate different protein and veggie combos throughout the week for variety.

Weekly Meal Planning

Taking the guesswork out of Whole30 breakfasts is easier than ever with CookifyAI. Save and schedule your favorite recipes to effortlessly plan your week, consolidate all breakfast (and other meal) ingredients, and adjust quantities for families or meal prep batches.

Planning Benefits:

  • Shop once for the week and get everything you need, organized by store section
  • Prevent duplicate purchases with smart ingredient tracking
  • Cut down on food waste and forgotten items
  • Keep your Whole30 meals organized and stress-free

Pro tip: Planning multiple weeks? Schedule all meals at once—even snacks and lunches—to see ingredient overlaps and buy exactly what you need!

Cook and Prep Times

Prep Time (per recipe, average): 10–20 minutes
Cook Time (per recipe, average): 10–30 minutes
Total Time: Most recipes are 30 minutes or less; casseroles and bakes may take up to 45 min for larger batches

Recap: Make Whole30 Mornings Simple and Satisfying

With this diverse roundup of 40+ Whole30 breakfast recipes, mornings can be easy, delicious, and anything but routine. Mix and match your favorites and let CookifyAI simplify your meal planning and shopping experience—for Whole30 breakfast success all month long!

Energize Your Mornings: 10 Easy Paleo Breakfast Recipes for a Healthy Start

10 Easy Paleo Breakfast Recipes

Introduction

Looking for energizing breakfasts free from grains, dairy, and refined sugars? These 10 easy paleo breakfast recipes are packed with flavor and nutrition, making your mornings simple and stress-free. By focusing on whole, nourishing ingredients, these breakfasts will help you start your day feeling satisfied and fueled—without the morning rush or decision fatigue.

Why Choose Paleo Breakfasts?

Paleo breakfasts are all about clean eating and natural energy. They skip processed foods and focus on protein, healthy fats, and fiber-rich veggies or fruits to keep you fuller longer. Whether you’re seeking a quick grab-and-go option or a leisurely weekend meal, this list covers everything from savory scrambles to sweet pancakes, all adaptable for your meal planning needs.

10 Easy Paleo Breakfast Recipes

1. **Egg and Veggie Muffins**
Mini frittatas loaded with spinach, tomatoes, and bell peppers—perfect for make-ahead breakfasts.

2. **Sweet Potato Hash with Sausage**
Pan-fried sweet potatoes, onions, and your favorite paleo-friendly sausage: quick, filling, and bursting with flavor.

3. **Banana Almond Pancakes**
Mash banana with almond flour and eggs, then cook up fluffy pancakes—no added sugar needed!

4. **Avocado and Smoked Salmon Salad**
Creamy avocado, smoked salmon, red onion, and microgreens tossed in lemon juice—a nutrient boost in every bite.

5. **Coconut Chia Pudding**
Mix chia seeds with coconut milk and top with berries for a fiber-rich, prep-ahead breakfast.

6. **Bacon and Zucchini Fritters**
Shredded zucchini and crispy bacon combine for a savory patty that’s portable and reheats well.

7. **Paleo Breakfast Burrito (Egg Wrap)**
Use thin omelets as wraps filled with sautéed veggies and diced chicken or turkey.

8. **Berry Coconut Smoothie Bowl**
Blend frozen berries with coconut milk, then top with nuts and seeds for crunch.

9. **Shakshuka (Eggs Poached in Spicy Tomato Sauce)**
Poach eggs in a zesty tomato-pepper sauce for a warming, one-pan breakfast.

10. **Apple Cinnamon Breakfast Bake**
Baked apple slices with nuts, cinnamon, and a touch of coconut oil—a naturally sweet start to your day.

[ingredients]
For Egg and Veggie Muffins:
– 8 large eggs
– 1 cup spinach, chopped
– 1/2 cup cherry tomatoes, halved
– 1/2 cup bell peppers, diced
– Salt and pepper to taste
– 1 tablespoon olive oil

For Sweet Potato Hash:
– 2 medium sweet potatoes, peeled and diced
– 1/2 onion, diced
– 2 paleo-friendly sausage links, sliced

For Banana Almond Pancakes:
– 2 ripe bananas
– 2 eggs
– 1/2 cup almond flour

For Avocado and Smoked Salmon Salad:
– 1 ripe avocado, sliced
– 3 ounces smoked salmon
– 1/4 red onion, thinly sliced
– Handful microgreens

For Coconut Chia Pudding:
– 1/3 cup chia seeds
– 1 1/2 cups coconut milk
– 1/2 cup mixed berries

For Bacon and Zucchini Fritters:
– 1 medium zucchini, grated and squeezed dry
– 3 strips bacon, cooked and crumbled
– 2 eggs

For Paleo Breakfast Burrito (Egg Wrap):
– 3 eggs
– 1/2 cup sautéed vegetables
– 1/3 cup cooked chicken or turkey

For Berry Coconut Smoothie Bowl:
– 1 cup frozen berries
– 1/2 cup coconut milk
– 2 tablespoons pumpkin seeds

For Shakshuka:
– 1 tablespoon olive oil
– 1 cup diced tomatoes (fresh or canned)
– 1/2 bell pepper, sliced
– 2-3 eggs
– 1 teaspoon smoked paprika

For Apple Cinnamon Breakfast Bake:
– 2 apples, sliced
– 1/2 cup chopped nuts
– 1 teaspoon cinnamon
– 1 tablespoon coconut oil
[/ingredients]

💡Meal Planning Tip: Save this entire recipe list to instantly generate a coherent shopping list grouped by store aisles for stress-free groceries and organized breakfast meal prep.

CookifyAI meal planning interface

Instructions

  1. Egg and Veggie Muffins: Preheat oven to 350°F. Whisk eggs with veggies, season with salt and pepper, and pour into greased muffin tins. Bake 20 minutes.
  2. Sweet Potato Hash: In a skillet, cook sausage until browned. Remove, then sauté onions and sweet potatoes in the same pan until tender. Return sausage to pan, season, and serve.
  3. Banana Almond Pancakes: Mash bananas, mix with eggs and almond flour. Fry scoops of batter on a nonstick skillet for 2-3 minutes per side.
  4. Avocado and Smoked Salmon Salad: Toss avocado, salmon, onion, and microgreens with lemon juice. Serve immediately.
  5. Coconut Chia Pudding: Combine chia seeds and coconut milk. Stir well, refrigerate overnight. Top with fresh berries.
  6. Bacon and Zucchini Fritters: Combine grated zucchini, bacon, and eggs. Scoop patties onto a hot skillet, cook 3 minutes per side until golden.
  7. Paleo Breakfast Burrito: Whisk eggs, pour into a hot pan, swirl to make a thin omelet. Slide onto a plate, fill with veggies and meat, then roll.
  8. Berry Coconut Smoothie Bowl: Blend berries and coconut milk, pour into a bowl, top with seeds and nuts.
  9. Shakshuka: Heat oil, sauté peppers and tomatoes, add spices. Simmer, make wells, crack eggs in, cover and cook until egg whites are set.
  10. Apple Cinnamon Breakfast Bake: Toss apples with nuts, cinnamon, and melted coconut oil. Bake at 350°F for 25 minutes.

Weekly Meal Planning

Balancing multiple breakfasts for the entire week is much easier with a meal planning strategy. Save and schedule your favorite recipes from this list to create a complete breakfast rotation and let CookifyAI automatically tally and organize your ingredients.

Planning Benefits:

– Consolidates all ingredient quantities for the week so you never over- or under-buy
– Sorts grocery lists by store section for the fastest shopping trips
– Curbs food waste by helping you use up similar ingredients in multiple recipes
– Keeps your mornings varied, organized, and on track

Pro tip: Use CookifyAI’s scheduling feature to ensure you’re alternating between sweet, savory, and grab-and-go options, giving your mornings both balance and variety.

Cook and Prep Times

Prep Time (per recipe): 5–15 minutes
Cook Time (per recipe): 5–25 minutes
Total Time (per recipe): 10–30 minutes

Enjoy healthy, delicious, and fuss-free mornings with these easy paleo breakfast ideas!

Quick & Clean: 25-Minute Paleo Chicken Teriyaki for Takeout Lovers

25-Minute Paleo Chicken Teriyaki That Tastes Like Takeout

Introduction

When cravings for classic takeout hit, this 25-Minute Paleo Chicken Teriyaki delivers bold, restaurant-style flavor without the gluten, refined sugars, or lengthy prep. The succulent chunks of chicken soak up a glossy, umami-rich teriyaki sauce—crafted from wholesome, paleo-approved ingredients. Whip it up for a weeknight dinner or meal prep favorite that rivals your favorite takeout, but fits your nutritious lifestyle goals.

Why This Paleo Chicken Teriyaki Is a Must-Try

This dish cleverly swaps out conventional soy sauce and sugar for coconut aminos and natural sweeteners, resulting in a clean, allergy-friendly version that’s every bit as mouthwatering. The sauce caramelizes beautifully, clinging to tender chicken in a way that makes each bite compellingly satisfying—while keeping the entire recipe dairy-free, gluten-free, and grain-free.

Flavorful Paleo Teriyaki Sauce in Minutes

The speedy sauce combines coconut aminos (a soy sauce substitute), toasted sesame oil, fresh ginger, garlic, and a touch of honey or maple syrup for sweetness. Arrowroot starch thickens it into the classic glossy texture, while a splash of rice vinegar adds balance. This homemade blend takes just five minutes but brings takeout-style depth of flavor—naturally.

Easy Steps for Restaurant-Quality Chicken

Start by browning boneless chicken pieces in a pan for a golden exterior and juicy interior. While the chicken sears, quickly whisk together the teriyaki sauce. Once the chicken is cooked, pour in your sauce and simmer until irresistibly sticky and fragrant. Serve over cauliflower rice or steamed broccoli for a complete paleo-friendly meal that manages to feel indulgent and healthy.

Serving Suggestions for a Perfect Paleo Plate

For a full takeout-inspired meal, pair your chicken with sautéed vegetables (like snap peas, broccoli, or bell peppers) and a scoop of cauliflower rice. Garnish with sesame seeds, sliced scallions, or a squeeze of lime for even more flavor. This versatile recipe works equally well in lunchboxes, meal prep containers, or family-style sharing at dinnertime.

Nutritional Information and Serving Size

This recipe yields 4 generous servings. Each serving (with sauce and 1 pound of chicken) contains approximately 230 calories, 25 grams of protein, 7 grams of healthy fats, and is low in sugar and carbs—making it perfect for paleo and whole foods meal plans.

Why You’ll Love 25-Minute Paleo Chicken Teriyaki (Recap)

You get the beloved sweet and savory flavors of classic chicken teriyaki—in a version that’s ready fast, uses clean ingredients, and leaves you feeling energized instead of sluggish. It’s an all-star recipe for anyone seeking a quick meal that satisfies both cravings and wellness goals.

[ingredients]
1 lb boneless, skinless chicken thighs or breasts, cut into bite-sized pieces
1 tbsp olive oil or avocado oil
1/4 cup coconut aminos
2 tbsp honey or pure maple syrup
2 tbsp water
1 tbsp rice vinegar (or apple cider vinegar for strict paleo)
1 tsp toasted sesame oil
2 cloves garlic, minced
1 inch fresh ginger, grated
1 tsp arrowroot starch (or tapioca flour)
1/4 tsp black pepper
Pinch of sea salt
Optional garnishes: sesame seeds, sliced green onions, lime wedges
[/ingredients]

💡Meal Planning Tip: Save this recipe to instantly generate a streamlined shopping list—perfect for hitting the store with every ingredient organized by section. This ensures stress-free grocery trips and effortless meal planning!

CookifyAI meal planning interface

Instructions

  1. Heat olive oil in a large skillet over medium-high heat. Season the chicken lightly with sea salt and black pepper, then add to the hot pan. Sauté for 3–4 minutes per side, until golden and cooked through. Remove and set aside.
  2. While the chicken cooks, whisk together coconut aminos, honey, water, vinegar, sesame oil, minced garlic, grated ginger, and arrowroot starch in a small bowl until smooth.
  3. Return the cooked chicken to the pan. Pour the teriyaki sauce over the chicken, stirring to coat evenly.
  4. Simmer for 2–3 minutes, stirring continually, until the sauce thickens and becomes glossy, coating the chicken evenly.
  5. Garnish with sesame seeds, green onions, or a squeeze of lime. Serve hot over cauliflower rice, steamed veggies, or your favorite paleo sides.

Weekly Meal Planning

This paleo chicken teriyaki is a fantastic addition to your weekly meal prep rotation. Save and schedule this recipe in your meal planner to automatically generate a detailed shopping list that syncs with all your weekly meals.

Planning Benefits:

  • Calculates all ingredient totals across your entire meal plan, preventing unnecessary purchases
  • Sorts all grocery items by store section for faster shopping
  • Helps you coordinate side dishes, snacks, and main meals in one spot
  • Makes meal prep and batch cooking simple and organized

Pro tip: If you’re doubling recipes or planning more than one meal for the week, schedule meals together—CookifyAI adds up all your needs (like coconut aminos or chicken) so your shopping is precise, effective, and budget-friendly.

Cook and Prep Times

Prep Time: 10 minutes
Cook Time: 15 minutes
Total Time: 25 minutes

Wholesome in a Flash: Quick 30-Minute Whole30 Meals for Busy Weeknights

30 Minute Whole30 Meals

Introduction

Sticking to a Whole30 diet doesn’t have to mean spending hours in the kitchen. These 30 Minute Whole30 Meals are packed with flavor, made with wholesome ingredients, and designed to fit even the busier days. Whether you’re prepping dinner after work or need a quick lunch, this recipe balances speed, simplicity, and satisfaction—making clean eating both approachable and delicious.

Why You’ll Love These 30 Minute Whole30 Meals

Busy weeknights call for recipes that come together fast, and this one delivers with minimal effort and maximum taste. With lean proteins, vibrant veggies, and zesty seasonings, you’ll enjoy a restaurant-quality meal that fits right into your Whole30 journey. Plus, the one-pan method keeps prep and cleanup easy—a lifesaver when your schedule is full.

Simple Whole30 Weeknight Skillet

Whole30 meals shine when layered with savory spices, fresh herbs, and colorful vegetables. This skillet brings together chicken (or shrimp), bell peppers, onions, zucchini, and a punchy blend of garlic and lemon for a one-pan wonder. The result? A deeply satisfying dish with bursts of color and crunch that’s as nourishing as it is tasty.

Preparing an Effortless Whole30 Skillet

Start by prepping all your ingredients before you heat the pan—this ensures a streamlined cooking process. Sauté your protein with the seasoning until golden and cooked through, then remove and cook your veggies in the same pan, letting them get slightly caramelized for extra flavor. Layer everything back in, finish with lemon juice and fresh herbs, and you’re ready to serve.

Serving Suggestions for 30 Minute Whole30 Meals

Serve your skillet over a bed of cauliflower rice or next to a crisp green salad for extra texture and nutrients. Garnish with a wedge of lemon and a sprinkle of fresh parsley. For an extra boost, add a side of smashed avocado topped with red pepper flakes.

Nutritional Information and Serving Size

This recipe makes 4 hearty servings. Each serving typically contains around 280–320 calories, depending on your protein choice. It’s low in carbs, rich in protein and fiber, and totally free from dairy, grains, and added sugars—hitting all the Whole30 marks!

30 Minute Whole30 Meals (Recap)

Enjoy fast, flavorful Whole30-compliant meals that keep you energized and satisfied. With just one pan and a handful of fresh ingredients, this recipe proves that wholesome eating can be quick, easy, and totally delicious.

[ingredients]
1 lb boneless, skinless chicken breast or shrimp, cut into bite-sized pieces
1 tbsp olive oil or avocado oil
1 red bell pepper, sliced
1 yellow bell pepper, sliced
1 medium zucchini, sliced into half-moons
1 small red onion, sliced
2 cloves garlic, minced
1 tsp smoked paprika
1/2 tsp dried oregano
1/2 tsp salt, or to taste
1/4 tsp black pepper
Juice of 1 lemon
2 tbsp fresh parsley, chopped
Serve with: Cauliflower rice or fresh salad greens
Optional: Pinch of crushed red pepper flakes for heat
[/ingredients]

💡Meal Planning Tip: Save this recipe to automatically generate an organized shopping list with all ingredients sorted by store section—perfect for efficient grocery trips and meal planning.

CookifyAI meal planning interface

Instructions

  1. Heat oil in a large skillet over medium-high heat. Add chicken or shrimp. Season with smoked paprika, oregano, salt, and pepper. Sauté for 4–6 minutes (shrimp: until just opaque; chicken: until fully cooked), then transfer to a plate.
  2. Add bell peppers, zucchini, and red onion to the skillet. Sauté for 6–8 minutes until slightly tender and caramelized on edges.
  3. Add garlic and cook for 1 minute, stirring constantly.
  4. Return cooked chicken or shrimp to the skillet. Toss everything together and cook for another 2–3 minutes to heat through.
  5. Remove from heat. Squeeze in lemon juice and toss with fresh parsley.
  6. Serve warm over cauliflower rice or salad greens. Add red pepper flakes if desired.

Weekly Meal Planning

This recipe is a meal prep superstar—great for making ahead and reheating throughout the week. Save and schedule this recipe to plan out your Whole30 days and instantly generate smart shopping lists that consolidate all ingredient needs—making your meal prep seamless.

Planning Benefits:

  • Automatically calculates total ingredient quantities for multiple meals
  • Organizes shopping lists by aisle for faster grocery runs
  • Prevents duplicate purchases and ensures nothing is forgotten
  • Makes your Whole30 meal schedule streamlined and stress-free

Pro tip: With CookifyAI, schedule several Whole30 recipes for the week to see overlapping ingredients, so you buy just what you need—reducing food waste and saving money!

Cook and Prep Times

Prep Time: 10 minutes
Cook Time: 20 minutes
Total Time: 30 minutes

33 Delicious Paleo, Keto & Whole30 Recipes for Flavorful, Low-Carb Living

33 Best Paleo and Keto Recipes {Whole30, Low Carb}

Introduction

Finding delicious meals that fit Paleo, Keto, and Whole30 lifestyles can be a challenge, but this handpicked collection of 33 recipes proves healthy eating can be vibrant, satisfying, and incredibly flavorful. From comforting dinners to energizing breakfasts and guilt-free treats, these dishes highlight wholesome ingredients while keeping carbs in check. They’re crowd-pleasers perfect for sharing, meal prepping, and making life easier whether you’re just starting or a seasoned pro in clean eating.

Why You’ll Love These Paleo, Keto & Whole30 Recipes

Each recipe in this roundup delivers maximum flavor with minimal carbs, relying on fresh vegetables, high-quality proteins, and healthy fats. You won’t miss the grains, sugar, or dairy thanks to inventive substitutions and bold seasonings. These meals are perfect for anyone following Paleo, Keto, or Whole30 – and ideal for families seeking easy, nourishing dishes everyone will love.

Essential Ingredients for 33 Paleo and Keto Recipes

A good meal plan starts with simple staples. Stock your kitchen with the following ingredients and you’ll be ready to whip up a wide variety of delicious low-carb dishes:

[ingredients]
– Fresh vegetables: cauliflower, broccoli, zucchini, spinach, kale, bell peppers, tomatoes
– Lean proteins: chicken breasts, turkey, ground beef, salmon, shrimp, eggs
– Healthy fats: avocado, olive oil, coconut oil, ghee
– Nuts and seeds: almonds, walnuts, chia seeds, flaxseed
– Pantry seasonings: garlic, onion powder, paprika, Italian herbs, turmeric, cumin
– Non-dairy milks: unsweetened almond or coconut milk
– Coconut aminos (soy sauce substitute)
– Cauliflower rice and zoodles (zucchini noodles)
– Fresh citrus for zest and dressings
– Fresh herbs: parsley, cilantro, basil, rosemary
[/ingredients]

💡 Meal Planning Tip: Save this entire recipe collection to instantly generate a categorized shopping list with every ingredient you need, making whole-food shopping automatic, efficient, and stress-free.

CookifyAI meal planning interface

Paleo and Keto Recipe Highlights

From hearty main courses to quick lunches and snacks, here’s a sneak peek of what you’ll find in the 33 Best Paleo and Keto Recipes collection:

  • Creamy Lemon Garlic Chicken Thighs: Pan-seared and finished in a dairy-free lemon-garlic cream sauce.
  • Bison and Veggie-Stuffed Peppers: Lean bison and cauliflower rice in sweet pepper boats.
  • Keto Shrimp Scampi with Zucchini Noodles: All the buttery, garlicky flavor, minus the pasta.
  • One-Pan Tuscan Salmon: Rich with sun-dried tomatoes, olives, and spinach.
  • Whole30 Beef Chili: Hearty, spice-packed, and filling with no beans or sugar.
  • Buffalo Cauliflower Bites: Crispy, craveable snack with a spicy kick.
  • Frittata Muffins: Perfect grab-and-go breakfast packed with spinach and herbs.
  • Zoodle Pad Thai: A lighter take on the classic, with tender chicken and a tangy almond sauce.
  • Savory Herb-Crusted Pork Tenderloin: Roasted with garlic, rosemary, and thyme.

Cooking and Assembly Tips

– Batch-cook proteins and freeze for busy weeks.
– Spiralize or rice extra veggies ahead of time for lunches and dinner in minutes.
– Keep fresh herbs in a glass of water in the fridge to make quick flavor boosters for salads, bowls, and sautés.

Serving Suggestions and Add-Ons

Pair your mains with easy sides like roasted cauliflower, mashed avocado, or a simple kale salad. Many recipes are perfect for meal prepping—just portion into containers for the week or store in the freezer for longer shelf life.

Nutritional Information and Serving Size

Each recipe in this collection is portioned to satisfy without overloading on carbs, usually yielding between 2 to 6 servings and ranging from about 250 to 500 calories per serving, depending on the meal. These balanced meals support energy, satiety, and your wellness goals.

The 33 Best Paleo and Keto Recipes (Recap)

Eating Paleo, Keto, or Whole30 doesn’t mean giving up flavor or convenience. With these 33 recipes, you can enjoy classics reimagined in cleaner, tastier ways – perfect for families and busy weeknights alike.

Instructions

Each recipe in the collection includes step-by-step instructions designed to make healthy cooking approachable for every skill level. Sample basic instructions for a typical dish, such as Creamy Lemon Garlic Chicken Thighs:

  1. Preheat oven to 400°F. Pat chicken thighs dry and season with salt, pepper, and garlic powder.
  2. Heat oil in a large, oven-safe pan over medium-high heat. Sear chicken on both sides until golden, about 4 minutes per side.
  3. Remove chicken temporarily, add garlic, and sauté until fragrant. Stir in coconut milk, lemon zest, and juice. Return chicken to skillet, spoon sauce over, and bake 15 minutes until cooked through.
  4. Serve topped with chopped parsley and enjoy with roasted veggies or cauliflower rice.

Weekly Meal Planning

Using this roundup for weekly meal prep multiplies the benefits of clean eating. Save and schedule your favorite recipes for the week. CookifyAI’s smart planner will:

  • Automatically calculate total quantities of ingredients for the week
  • Consolidate shopping lists by grocery store section (produce, proteins, pantry items)
  • Prevent food waste by maximizing overlapping ingredients
  • Streamline your prep, so you spend less time planning and more time enjoying healthy meals

Pro tip: Try scheduling your recipes—CookifyAI will handle all the calculations, optimize ingredient quantities, and keep you organized every week.

Cook and Prep Times (varies per recipe)

Prep Time: Ranges from 10 to 25 minutes
Cook Time: Ranges from 10 to 45 minutes
Total Time: Most recipes complete in 30–60 minutes

With this list of 33 Best Paleo and Keto Recipes, healthy meal planning and preparation become effortless, delicious, and entirely adaptable to your busy lifestyle.

30 Paleo Perfection: 30 Quick & Clean Meals for a Healthier Weeknight Feast

30 Easy Paleo Meals Ready in 30 Minutes

Introduction

Need real food on the table fast, but want to keep it clean and Paleo? With these 30 Easy Paleo Meals Ready in 30 Minutes, you can whip up delicious, wholesome dinners that satisfy every palate—without spending hours in the kitchen. Each recipe is gluten-free, grain-free, and dairy-free, making it perfect for anyone seeking healthful meals with minimal fuss.

Why These Paleo Recipes are a Game Changer

It’s tough to beat the combination of bold, natural flavors and ultimate convenience found in these quick Paleo dishes. Great for busy weeknights, each meal is loaded with lean proteins, fresh veggies, and vibrant herbs and spices. Plus, there’s no need to sacrifice variety: from skillet meals and stir-fries to easy grills and sheet pan wonders, you’ll enjoy a new taste adventure every night.

Ingredients for 30 Easy Paleo Meals

These recipes rely on classic Paleo staples that keep shopping and prepping simple yet versatile. Stock your kitchen with these essentials for weeklong variety:

[ingredients]
– Boneless skinless chicken breasts or thighs
– Grass-fed ground beef or turkey
– Wild-caught salmon or white fish
– Eggs
– Fresh leafy greens (spinach, kale, arugula)
– Zucchini, sweet potatoes, bell peppers, carrots, broccoli
– Garlic, onion, ginger
– Avocado and coconut oil
– Nuts and seeds (almonds, pumpkin seeds)
– Coconut aminos (soy-free soy sauce substitute)
– Crushed tomatoes or tomato paste
– Dried herbs: basil, oregano, thyme, cumin, paprika
– Fresh herbs: cilantro, parsley, mint
– Lemons, limes
– Sea salt, black pepper
[/ingredients]

💡Meal Planning Tip: Save this recipe collection in CookifyAI to instantly generate a complete, categorized grocery list. Streamline your shopping trips—no missed ingredients or wandering the aisles!

CookifyAI meal planning interface

Sample 30-Minute Paleo Meals You’ll Love

  • One-Pan Lemon-Garlic Salmon & Asparagus: Salmon fillets and fresh asparagus roast together with a bright lemon-garlic drizzle.
  • Chipotle Beef & Sweet Potato Skillet: Spiced ground beef with tender diced sweet potatoes and bell peppers.
  • Paleo Chicken Stir-Fry: Sautéed chicken breast strips tossed with broccoli, carrots, and coconut aminos.
  • Egg Roll in a Bowl: All the flavor of your favorite egg rolls—no wrapper needed! Just ground pork, shredded cabbage, and umami-rich seasoning.
  • Mediterranean Zucchini Noodle Bowls: Spiralized zucchini with grilled chicken, tomatoes, olives, and a drizzle of olive oil.
  • Spicy Thai Shrimp Lettuce Wraps: Juicy shrimp sautéed in coconut oil and served in crispy lettuce leaves with fresh herbs.

Paleo Meal Prep and Storage

Many of these dinners double as fantastic leftovers. Prep extra portions for healthy grab-and-go lunches. Most dishes keep well in the fridge for 2-3 days, and are easy to reheat.

Instructions Example: Paleo Chicken Stir-Fry

  1. Slice 1 pound of chicken breast into thin strips. Season with salt and pepper.
  2. Heat 2 tablespoons avocado oil in a skillet over medium-high heat. Add chicken and brown for 3-4 minutes.
  3. Add 1 cup sliced carrots, 1 cup broccoli florets, and 2 cloves minced garlic. Stir-fry 3-4 minutes until veggies are crisp-tender.
  4. Pour in 2 tablespoons coconut aminos. Toss for 1 more minute to coat and finish cooking chicken.
  5. Serve hot garnished with chopped cilantro.

Serving Suggestions & Nutritional Information

All 30 dishes are perfectly balanced and portioned for one to two servings per recipe. Each meal is packed with protein, healthy fats, and a rainbow of vegetables—typically ranging from 250 to 500 calories per serving, depending on ingredients.

Weekly Meal Planning

Bring sanity to your weeknights by planning these easy Paleo dinners in advance. Save and schedule this recipe collection in CookifyAI to map out which meals to make each day and instantly build a smart, consolidated grocery list.

What you’ll love:

– Automatically combines ingredients across all 30 recipes (no repeats on your list!)
– Sorts your list by produce, proteins, and pantry staples for the fastest shop ever
– Adjusts quantities based on your household or planned servings
– Keeps your meal plan and shopping experience seamless and stress-free

Pro tip: With CookifyAI, drag and drop recipes onto your meal calendar and see how major staples like eggs or chicken are calculated across the week, helping you budget and cut down on food waste.

Cook and Prep Times

Prep Time (per recipe): 10-15 minutes
Cook Time (per recipe): 15-20 minutes
Total Time (per recipe): 30 minutes or less

With these 30 Easy Paleo Meals Ready in 30 Minutes, keeping your meals clean, quick, and exciting is easier than ever. Start planning today for a happier, healthier week!

Fuel Your Day with a Savory Whole30 Butternut Chicken Breakfast Bowl: A Wholesome Paleo & Gluten-Free Delight

Savory Whole30 Butternut Chicken Breakfast Bowl – Paleo & Gluten Free

Introduction

Starting your day with a Savory Whole30 Butternut Chicken Breakfast Bowl is a smart way to fuel up with wholesome protein, nourishing vegetables, and balanced flavor. This breakfast bowl is made for busy mornings and health-focused meal preppers, featuring hearty roasted butternut squash, juicy chicken, and vibrant greens all brought together with zesty seasonings. It’s filling, energizing, and satisfies both Paleo and gluten-free diets, making it an excellent crowd pleaser for families and individuals alike.

The Flavorful Game Changer Your Morning Needs

What makes this breakfast bowl a standout is its harmonious blend of not just flavor, but also color and texture. The sweetness of roasted butternut squash pairs naturally with earthy chicken, while spinach or kale adds a fresh bite. A sprinkle of herbs and a drizzle of olive oil elevate each element, leaving you with a gourmet breakfast that comes together simply but feels special every time.

How to Get That Perfect Roast on Butternut Squash

To intensify the natural flavors, cube your butternut squash and toss it in olive oil, salt, pepper, and a dash of smoked paprika. Roast at 425°F for about 20-25 minutes, turning halfway through. You’re aiming for caramelized edges and a tender, melt-in-your-mouth bite. This roasting technique enhances the overall bowl, making every forkful rich and slightly sweet.

Chicken: Juicy, Flavorful, and Protein-Packed

For optimal results, use boneless chicken breasts or thighs, seasoned with garlic powder, onion powder, and dried thyme. Sear them in a skillet for 4–5 minutes per side, ensuring a golden crust and succulent interior, then slice or shred to your preference. Leftover rotisserie chicken can also be used for a shortcut without sacrificing flavor.

Customizing Your Breakfast Bowl

The base recipe is naturally Whole30, Paleo, and gluten-free, but customization is simple. Toss in sautéed spinach, kale, or baby arugula for greens, or add a soft-boiled egg for extra protein if your eating plan allows. A quick fresh salsa or an avocado fan adds color, healthy fats, and a refreshing contrast.

Nutritional Information and Serving Size

This recipe yields around 2 large breakfast bowls, each providing approximately 400–450 calories (depending on add-ins), over 30g of protein, and a wealth of vitamins A and C. It’s a nourishing, all-in-one breakfast that keeps you full and satisfied until lunchtime.

[ingredients]
• 2 cups butternut squash, peeled and cubed
• 2 chicken breasts or thighs (boneless, skinless)
• 2 tablespoons olive oil, divided
• 1 teaspoon smoked paprika
• 1/2 teaspoon garlic powder
• 1/2 teaspoon onion powder
• 1/4 teaspoon dried thyme
• Salt and pepper, to taste
• 2 cups fresh spinach or kale
• Optional: Avocado slices, salsa, fresh herbs for garnish
[/ingredients]

💡Meal Planning Tip: Save this recipe to automatically generate an organized shopping list with all ingredients sorted by store section – perfect for efficient grocery trips and stress-free meal planning!

CookifyAI meal planning interface

Instructions

  1. Preheat your oven to 425°F. Line a baking sheet with parchment paper.
  2. Toss the butternut squash cubes with 1 tablespoon olive oil, smoked paprika, salt, and pepper. Spread in an even layer on the baking sheet and roast for 20–25 minutes, flipping halfway through, until golden and tender.
  3. Meanwhile, season the chicken breasts (or thighs) with garlic powder, onion powder, dried thyme, salt, and pepper.
  4. Heat 1 tablespoon olive oil in a skillet over medium heat. Sear the chicken on both sides until browned and cooked through (about 4–5 minutes per side), then let rest for a few minutes before slicing or shredding.
  5. In the same skillet, quickly sauté spinach or kale just until wilted (about 1–2 minutes).
  6. Divide the roast butternut squash between two bowls. Top with sautéed greens and sliced or shredded chicken.
  7. Garnish with avocado slices, salsa, or fresh herbs if desired. Serve warm and enjoy!

Weekly Meal Planning

This Savory Whole30 Butternut Chicken Breakfast Bowl is ideal for prepping ahead and doubling up for weekday breakfasts or fast lunches. Save and schedule this recipe to automatically calculate all the ingredient amounts for however many servings you need, consolidating your shopping list and organizing every item by grocery section for maximum efficiency.

**Planning Benefits:**
• Automatically totals ingredients across all scheduled meals
• Organizes each shopping list by supermarket aisles
• Reduces duplicate purchases and last-minute trips
• Makes batch prepping and healthy eating super manageable

Pro tip: Schedule this recipe along with other Whole30 or Paleo meals to reveal overlapping ingredients — so you streamline prep, minimize waste, and save both time and money.

Cook and Prep Times

Prep Time: 10 minutes
Cook Time: 25 minutes
Total Time: 35 minutes

Enjoy a breakfast bowl that’s as nourishing as it is delicious — and discover how easy meal planning can be when every ingredient is organized for you!

Paleo Enchiladas Suizas: A Dairy-Free, Grain-Free Twist on a Classic Mexican Favorite

Paleo Enchiladas Suizas – The Defined Dish – Recipes

Introduction

Paleo Enchiladas Suizas offer a delicious twist on traditional Mexican comfort food by creating a vibrant, dairy-free, and grain-free dish that’s full of bold flavors and creamy goodness. This recipe features tender shredded chicken wrapped in pliable grain-free tortillas, all smothered in a tangy, green tomatillo sauce and a creamy, paleo-friendly “suiza” (Swiss-inspired) topping. Whether you’re following a paleo lifestyle or simply looking to lighten up your favorite Mexican dishes, these enchiladas are certain to please a crowd and fit seamlessly into weekly meal routines.

Why Paleo Enchiladas Suizas Stand Out

What makes these Paleo Enchiladas Suizas unique is their innovative use of wholesome ingredients to recreate a beloved classic. You’ll enjoy all the zesty, savory flavor of traditional enchiladas suizas, but in a form that’s naturally free from gluten, dairy, and refined sugars. The creamy green sauce, typically made with sour cream and cheese, is replaced here with rich coconut cream and fresh herbs, resulting in satisfying creaminess without any dairy. This approach allows you to savor deep, comforting flavors with a lighter nutritional profile.

Whipping Up the Creamy Suiza Sauce

The magic of this recipe lies in its luscious paleo-friendly suiza sauce. A mix of roasted tomatillos, garlic, mild green chiles, fresh cilantro, lime juice, and coconut cream blends together into a vibrant green sauce that’s both tangy and silky. Roasting the tomatillos and garlic enhances their sweetness, while coconut cream adds that signature richness. Taste and adjust lime, salt, or herbs as needed for a perfectly balanced sauce.

Assembling Your Paleo Enchiladas Suizas

Start by prepping your grain-free tortillas—store-bought paleo tortillas work well, or try homemade cassava flour varieties for optimal pliability. Shred cooked chicken breast or thigh meat and toss it with a portion of the suiza sauce for extra moisture and flavor. Fill each tortilla, roll tightly, and arrange in a casserole dish. Pour the remaining suiza sauce over the top, then bake until everything is bubbling and deliciously golden at the edges.

Serving Suggestions for a Crowd-Pleasing Meal

Serve these enchiladas hot from the oven, garnished with chopped cilantro, thinly sliced avocado, and a squeeze of fresh lime. Add a simple side like cauliflower rice or a crisp slaw of cabbage, carrots, and jalapeño for a complete paleo-friendly feast. Each bite delivers zesty, creamy, and comforting flavors that are perfect for weeknight dinners or special occasions.

Nutritional Facts and Serving Size

This recipe yields about 4 hearty servings. Each portion is packed with lean protein, healthy fats, and plenty of veggies. Depending on your choice of tortillas and chicken, each serving typically provides approximately 320-370 calories, making it a balanced and satisfying paleo dish.

Paleo Enchiladas Suizas: Flavorful, Nourishing, and Crowd-Friendly

By combining grain-free tortillas, shredded chicken, and a creamy, herby tomatillo sauce, this paleo take on enchiladas suizas offers authentic comfort food flavor with nourishing ingredients your whole family will love.

[ingredients]
1 pound cooked, shredded chicken breast or thighs
8 paleo tortillas (such as Siete or homemade cassava flour tortillas)
1 pound fresh tomatillos, husked and halved
2 cloves garlic, peeled
1 small white onion, quartered
1 jalapeño pepper, stemmed and seeded for mild heat
2 mild green chiles (such as Anaheim or poblano), seeded and coarsely chopped
1/2 cup full-fat coconut cream
1/2 cup packed fresh cilantro leaves + more for garnish
2 tablespoons olive oil
1 tablespoon lime juice
1 teaspoon ground cumin
Sea salt and freshly cracked black pepper, to taste
Sliced avocado and extra lime wedges, for serving
[/ingredients]

💡Meal Planning Tip: Save this recipe with CookifyAI to generate an organized, aisle-by-aisle shopping list—making those paleo grocery trips smoother and taking the guesswork out of meal planning.

CookifyAI meal planning interface

Instructions

  1. Preheat your oven to 425°F. Line a rimmed baking sheet with parchment paper.
  2. Place tomatillos, onion, jalapeño, green chiles, and garlic on the baking sheet. Toss with olive oil, salt, and cumin. Roast for 20 minutes or until veggies are softened and slightly charred.
  3. Remove from oven and let cool slightly. Transfer roasted veggies to a blender along with coconut cream, cilantro, lime juice, and a pinch of pepper. Blend until very smooth and creamy. Taste and adjust seasonings as needed.
  4. Reduce oven temperature to 350°F. Spread 1/2 cup of sauce in the bottom of a 9×13-inch baking dish.
  5. In a bowl, mix shredded chicken with 1/2 cup of the tomatillo suiza sauce to coat.
  6. Warm tortillas as needed to make them pliable. Fill each with about 1/4 cup of chicken mixture, roll up, and place seam-side down in the baking dish.
  7. Pour remaining suiza sauce evenly over the enchiladas, spreading to cover completely.
  8. Bake uncovered for 18-20 minutes, until heated through and sauce is bubbling at the edges.
  9. Garnish with sliced avocado, chopped cilantro, and extra lime wedges. Serve hot and enjoy!

Weekly Meal Planning

This Paleo Enchiladas Suizas recipe is perfect for preparing ahead—simply assemble the enchiladas, cover, and refrigerate before baking, or freeze for a grab-and-go meal later in the week! Schedule this recipe on CookifyAI for easy weekly planning, intelligent ingredient consolidation, and time-saving shopping lists.

Planning Benefits:

  • Automated grocery list combines ingredients from all your planned paleo meals
  • Organizes every item by store section for a more efficient shopping experience
  • Helps reduce duplicate purchases and food waste
  • Enables you to see ingredient overlap between recipes so you buy just what you need

Pro tip: When you plan with CookifyAI, you can avoid forgotten ingredients and last-minute grocery runs—even when prepping for a week full of family favorites!

Cook and Prep Times

Prep Time: 25 minutes
Cook Time: 40 minutes
Total Time: 1 hour 5 minutes

15 Whole30 Make-Ahead Breakfasts: Quick, Nutritious, and Delicious Recipes for Busy Mornings

15 Easy, Fast, Make Ahead Whole30 Breakfast Recipes!

Introduction

Starting your day with a nourishing, Whole30-compliant breakfast doesn’t have to be time-consuming or flavorless. These 15 Easy, Fast, Make Ahead Whole30 Breakfast Recipes are designed for busy weekday mornings, ensuring you enjoy variety, flavor, and nutrition—without the need to scramble before sunrise. You’ll discover make-ahead bakes, quick egg cups, portable bowls, and more options that fuel your wellness journey and simplify your morning routine.

Why These Whole30 Breakfasts Are a Game-Changer

Each recipe on this list is crafted to maximize flavor while keeping prep and cook times minimal. With make-ahead options and meal-prep friendly ingredients, you’ll stay ahead of cravings and hunger, even on your busiest days. Plus, these recipes are crowd-pleasers with bold, satisfying flavors and textures!

[ingredients]
Below are the common ingredients you’ll find among these easy, fast Whole30 breakfast options:

Dozen eggs
Cooked breakfast sausage or bacon (compliant with Whole30 guidelines)
Russet or sweet potatoes
Avocados
Bell peppers
Spinach or kale
Cherry tomatoes
Onions and garlic
Coconut milk or almond milk (unsweetened)
Olive oil or avocado oil
Fresh herbs (cilantro, parsley, chives)
Compliant salsa or hot sauce
Salt and pepper
Optional: mushrooms, zucchini, smoked salmon, cooked chicken, everything bagel seasoning
[/ingredients]

💡Meal Planning Tip: Save these recipes to instantly generate a categorized shopping list with all your ingredients sorted by store aisle. Meal planning has never been easier or more organized—perfect for Whole30 success!

CookifyAI meal planning interface

Instructions

We’ve compiled the basic prep steps for these Whole30 breakfast ideas—mix and match as needed or batch cook favorites for the week!

  1. Sheet Pan Breakfast Hash: Dice potatoes, peppers, and onions. Toss with oil, salt, and pepper. Roast on a sheet pan at 425°F for 20–25 minutes. Add cooked sausage or bacon and fresh spinach in the last 5 minutes.
  2. Egg Muffin Cups: Whisk 8 eggs with a splash of almond or coconut milk, pour into silicone muffin cups, and add chopped veggies, spinach, and cooked meat. Bake at 350°F for 20 minutes.
  3. Avocado Egg Boats: Halve avocados and scoop out some flesh. Crack an egg into each half, top with salt, pepper, and chives, then bake at 400°F for 12–15 minutes.
  4. Sweet Potato Breakfast Bowls: Microwave or roast sweet potatoes, then mash. Top with fried eggs, compliant salsa, and avocado slices.
  5. Loaded Veggie Frittata: Sauté diced veggies in a skillet, pour in whisked eggs, bake at 375°F for 15–20 minutes until set.
  6. Breakfast Meatballs: Mix ground chicken or turkey with chopped herbs, garlic, and grated veggies; bake at 400°F for 20 minutes. Enjoy with roasted veggies or greens.
  7. Coconut Chia Pudding: Combine coconut milk and chia seeds, refrigerate overnight. Top with compliant fresh fruit or nuts.
  8. Sausage and Potato Skillet: Sauté pre-cooked sausage with potatoes, onions, and kale. Serve hot or store in meal prep containers.
  9. Baked Egg Casserole: Mix eggs, shredded potatoes, spinach, and diced peppers in a dish. Bake at 350°F for 40 minutes. Slice and store for grab-and-go.
  10. Egg Salad Lettuce Wraps: Mix chopped hard-boiled eggs with Whole30 mayo, fresh herbs, and diced celery. Serve in lettuce leaves.
  11. Simple Breakfast Salad: Toss mixed greens with avocado, sliced hard-boiled eggs, and compliant smoked salmon. Drizzle with olive oil and lemon.
  12. Zucchini Egg Nests: Spiralize zucchini, form into nests on a baking sheet, crack an egg in each, bake at 400°F for 10–12 minutes.
  13. Mushroom and Tomato Stir Fry: Sauté mushrooms, tomatoes, and garlic in olive oil, serve with scrambled eggs on the side.
  14. Chicken & Veggie Breakfast Sauté: Stir fry pre-cooked chicken with leftover veggies, season to taste.
  15. Everything Bagel Breakfast Bowl: Layer roasted potatoes, sautéed greens, fried eggs, avocado, and a sprinkle of compliant “everything bagel” seasoning.

Weekly Meal Planning

These breakfast recipes are tailor-made for meal planning and batch cooking! Schedule and organize your Whole30 breakfasts for the entire week to automate shopping lists, prevent ingredient overlap, and streamline your prep.

Planning Benefits:

  • Automatically calculate total ingredients across all 15 Whole30 recipes—never buy too much or too little again
  • Organize your grocery list by store department for faster, simpler shopping
  • Avoid forgotten ingredients or duplicate purchases
  • Meal prep in big or small batches based on your schedule and appetite

Pro tip: When adding these recipes to your meal plan, use CookifyAI to see ingredient totals—great for optimizing your budget and reducing food waste while staying on track with Whole30!

Cook and Prep Times

Prep Time: 10–15 minutes per recipe
Cook Time: 10–35 minutes, depending on the dish
Total Time: Most recipes ready in 30 minutes or less (batch prep 1 hour for the whole week!)

Try these 15 Easy, Fast, Make Ahead Whole30 Breakfast Recipes to bring variety, flavor, and ease to your mornings—all while supporting your Whole30 goals!

Effortless Paleo Perfection: 15 One Pot Recipes for Bold, Flavorful Dinners

15 One Pot Paleo Meals Recipes

Introduction

Discover the simplicity of cooking wholesome, flavorful meals with these 15 One Pot Paleo Meals Recipes. Designed for those who love both convenience and nutrition, each recipe embraces fresh, whole ingredients that align with paleo principles—meaning no grains, dairy, or processed foods. By minimizing cleanup and maximizing flavors, these meals become ideal choices for busy weeknights or meal prep sessions.

Perfect for Flavorful, Effortless Dinners

What sets one pot paleo meals apart is their ability to deliver bold, satisfying flavors with minimal effort. By layering ingredients together in a single pot, flavors meld beautifully, creating hearty dishes with complex tastes. Every recipe in this collection is crafted for crowd-pleasing appeal, whether you’re feeding the family or impressing guests with a simple, robust dinner.

15 Tasty One Pot Paleo Meals Recipes

1. Chicken and Vegetable Skillet
2. Zucchini Noodle Beef Stroganoff
3. Lemon Garlic Shrimp with Asparagus
4. Sweet Potato and Kale Hash
5. Spiced Turkey and Cauliflower Rice
6. Italian Sausage and Pepper Stew
7. Coconut Curry Chicken Thighs
8. Mexican Chicken Fajita Skillet
9. Moroccan Lamb and Root Vegetables
10. Salmon and Broccoli Sheet Pan Bake
11. Cajun Chicken with Brussels Sprouts
12. Beef and Mushroom Zoodle Stir Fry
13. Tuscan Garlic Pork and Spinach
14. Chimichurri Steak and Roasted Vegetables
15. Thai Coconut Fish Stew

[ingredients]
The combined grocery list for all 15 recipes (great for prepping multiple meals!):
– Chicken breast and thighs (about 4 lbs)
– Ground beef and steak (3 lbs)
– Salmon fillets (2 lbs)
– Shrimp (1 lb)
– Pork tenderloin (1.5 lbs)
– Italian sausage (1 lb)
– Lamb stew meat (1 lb)
– Eggs (1 dozen)
– Cauliflower rice (3 bags or 2 heads)
– Zucchini noodles (4 medium)
– Sweet potatoes (6 medium)
– Kale (2 bunches)
– Bell peppers (6 assorted colors)
– Onions (4 large)
– Fresh garlic (2 bulbs)
– Spinach (2 bags)
– Mushrooms (1 lb)
– Asparagus (2 bunches)
– Broccoli florets (2 heads)
– Brussels sprouts (1 lb)
– Carrots (4 large)
– Cherry tomatoes (1 pint)
– Coconut milk (2 cans)
– Olive oil, avocado oil
– Lemons, limes
– Fresh parsley, cilantro, basil
– Pantry: Tomato paste, curry powder, chili powder, smoked paprika, cumin, Italian seasoning, sea salt, black pepper

💡Meal Planning Tip: Save this entire recipe collection to instantly generate a categorized grocery list—sorted by store section—for stress-free shopping and easy meal planning.

CookifyAI meal planning interface

General Instructions for One Pot Paleo Meals

  1. Choose your protein and vegetables according to the recipes above.
  2. Heat olive or avocado oil in a large skillet, Dutch oven, or sheet pan over medium-high heat.
  3. Sear the protein until browned and mostly cooked. Remove and set aside.
  4. In the same pot, sauté aromatic vegetables (onion, garlic, peppers) until fragrant.
  5. Add hearty vegetables first, followed by more delicate greens. Stir in spices and seasoning blends per recipe.
  6. Return protein to the pot and add any sauces (e.g., coconut milk, tomato paste, broth).
  7. Simmer until everything is fully cooked and flavors are blended, typically 15–25 minutes.
  8. If baking, combine all ingredients on a sheet pan and roast at 400°F for 20–25 minutes.
  9. Garnish with fresh herbs before serving for an extra burst of fresh flavor.

Serving and Storage Suggestions

Each recipe is designed to serve 3–4 and stores well in the fridge for up to 4 days, making them perfect for meal prep. Simply reheat on the stove or in the microwave for a quick and nourishing lunch or dinner. For extra freshness, add delicate herbs or a squeeze of lemon just before serving.

Nutritional Information and Serving Size

Serving sizes typically provide around 350–500 calories, 30–35g protein, and plenty of fiber per meal. Each recipe is gluten-free, dairy-free, and free from processed ingredients, making them well-suited for most paleo lifestyles.

One Pot Paleo Meals (Recap)

From bold Moroccan spices to classic Italian flavors, these one-pot paleo recipes are your answer to healthy, speedy, and satisfying dinners. Each dish makes the most of fresh, nutritious ingredients and keeps cleanup to a minimum—a winning combination for any home cook.

Weekly Meal Planning

One pot paleo meals are a game-changer for weekly meal prep—choose several recipes from this list to batch cook, portion, and enjoy throughout your busy week. Save and schedule meals in CookifyAI to streamline your planning, organize shopping lists, and make sure you never miss an ingredient.

Planning Benefits:

– Automatically calculates total ingredient quantities across all selected recipes
– Groups purchased items by grocery store departments
– Minimizes food waste by consolidating overlapping ingredients
– Lets you plan out lunches and dinners with drag-and-drop ease

Pro tip: By grouping similar ingredients like sweet potatoes or chicken across multiple recipes, you’ll optimize your grocery trips and get the most from fresh produce. Schedule your paleo meals in advance for the most efficient cooking experience.

Cook and Prep Times

Prep Time: 15–20 minutes per meal
Cook Time: 20–30 minutes per meal
Total Time: 35–50 minutes per meal (most can be prepped and cooked start to finish in under an hour)

Enjoy healthy, bold, and hassle-free dinners with these 15 One Pot Paleo Meals—your key to delicious eating and streamlined meal planning all week long!

40+ Flavor-Packed Paleo Recipes for Effortless Meal Prep

40+ of Our Favorite Paleo Recipes

Introduction

Discover a world of wholesome, vibrant, and delicious meals with our collection of 40+ favorite Paleo recipes. Centered on lean proteins, fresh vegetables, healthy fats, and natural sweeteners, Paleo recipes offer a flavorful and nourishing way to fuel your body. These recipes are perfect for weeknight dinners, lunch-box planning, or crowd-pleasing gatherings—each one proof that eating clean doesn’t have to be boring.

Why You’ll Love These Paleo Favorites

What makes these Paleo recipes irresistible is their diversity: from comforting casseroles to zesty salads and hearty soups, there’s a Paleo option for every craving. By relying on whole foods and skipping processed ingredients, you get bold flavors, clean nutrition, and meals the whole family will love. Paleo plans also inspire creative cooking swaps—think cauliflower rice, zucchini noodles, and inventive nut-based crusts.

Featured Recipe: One-Pan Lemon Herb Chicken & Veggies

Try this one-pan wonder for a quick and satisfying Paleo meal that pairs lean chicken breast with a medley of crisp veggies, all roasted with lemon, garlic, and fresh herbs. It’s a favorite for busy nights thanks to easy prep and fuss-free cleanup.

How to Plan Your Paleo Meals for Flavor and Simplicity

When planning Paleo meals, focus on versatility: a roast chicken can become tomorrow’s salad, and roasted veggies can serve as sides or the base of a hearty breakfast scramble. Batch-cooking proteins and prepping colorful vegetables keeps you on track and makes every mealtime a breeze.

Nutritional Information and Serving Size

These Paleo recipes use wholesome ingredients, providing balanced meals rich in protein, healthy fats, fiber, and micronutrients. Most recipes are gluten- and grain-free by design, serving 2-6 per dish.

[ingredients]
– Lean proteins: Chicken breast, salmon, turkey, ground beef, pork tenderloin, shrimp, eggs
– Vegetables: Sweet potatoes, broccoli, cauliflower, zucchini, peppers, spinach, carrots, asparagus
– Healthy fats: Extra virgin olive oil, coconut oil, avocado, nuts and seeds
– Herbs & spices: Garlic, rosemary, basil, thyme, cumin, paprika, turmeric
– Paleo-friendly flours: Almond flour, coconut flour, tapioca
– Natural sweeteners: Raw honey, maple syrup (used sparingly)
[/ingredients]

💡Meal Planning Tip: Save this collection to automatically create an organized shopping list sorted by store section. CookifyAI makes it effortless to shop for all your high-quality ingredients—mix and match meals with confidence!

CookifyAI meal planning interface

Instructions

  1. Choose 3–5 Paleo recipes for your week—pick a range of proteins and plenty of colorful veggies.
  2. Batch prep by marinating proteins, chopping vegetables, and pre-mixing spice blends in advance.
  3. For one-pan recipes, layer protein and vegetables on a lined sheet tray. Drizzle with healthy fats and season generously.
  4. Roast, grill, or sauté as directed (most are ready in 20–40 minutes).
  5. Serve directly, or portion leftovers into containers for grab-and-go lunches and snacks.

Weekly Meal Planning

This mix-and-match approach is ideal for efficient meal planning. Save and schedule these Paleo recipes in CookifyAI to plan your week, generate smart shopping lists, and ensure no Paleo ingredient is left behind.

Planning Benefits:

  • Combines ingredients from all planned meals for consolidated shopping
  • Organizes lists by grocery store section for time savings
  • Prevents duplicate and forgotten items
  • Helps you stick to grocery budgets and minimizes food waste

Pro tip: Schedule your Paleo meals and see overlapping ingredients for streamlined meal prep—if you choose three recipes with sweet potatoes, your shopping list calculates the total pounds needed!

Cook and Prep Times

Most Paleo recipes in this roundup can be prepped in 10–20 minutes, with cook times varying from 15–45 minutes depending on the recipe.

Whether you’re new to Paleo eating or a seasoned pro looking for meal planning inspiration, these 40+ recipes offer variety, nutrition, and unbeatable flavor. Let CookifyAI help you make Paleo meal prep easier—and more delicious—than ever!

Flavor Without Compromise: 18+ Paleo Recipes for Healthy, Delicious Meals

18+ Healthy Paleo Recipes That Don’t Compromise On Taste

Introduction

When it comes to eating clean and fueling your body with nutrient-dense foods, Paleo recipes truly shine. What makes them even better is you never have to give up on flavor or variety. With these 18+ Healthy Paleo Recipes That Don’t Compromise On Taste, you can enjoy a delicious and satisfying menu that supports your wellness goals—all while keeping your taste buds happy.

Why Choose Paleo? Flavor Meets Nutrition

The Paleo diet emphasizes whole, unprocessed ingredients—lean proteins, fresh produce, nuts, seeds, and healthy fats. This approach naturally enhances flavors, and when paired with the right herbs, spices, and cooking methods, each dish bursts with taste and texture. Whether you’re meal prepping for the week or making dinner for friends, Paleo recipes guarantee wholesome meals that everyone will love.

Top 18+ Healthy Paleo Recipes That Don’t Compromise On Taste

  • 1. Garlic Herb Grilled Chicken Thighs: Marinated in fresh herbs and citrus, then grilled for juicy, flavorful protein.
  • 2. Sweet Potato Breakfast Hash: Sauté sweet potatoes with onions, peppers, and eggs for a hearty morning meal.
  • 3. Thai Coconut Chicken Soup: Rich coconut milk with lemongrass, lime, and tender chicken.
  • 4. Lemon Dill Salmon Fillets: Baked salmon brightened with lemon and fresh dill, perfect for a quick weeknight dinner.
  • 5. Zucchini Noodle Bolognese: Spiralized zucchini with a hearty tomato and ground beef sauce.
  • 6. Cauliflower Fried Rice: Cauliflower rice stir-fried with veggies, eggs, and a splash of coconut aminos.
  • 7. Honey Garlic Pork Tenderloin: Roasted pork glazed with a paleo-friendly honey garlic sauce.
  • 8. Roasted Vegetable Medley: Colorful mix of root veggies roasted with olive oil and fresh herbs.
  • 9. Spaghetti Squash Pad Thai: A grain-free twist on a classic favorite.
  • 10. Avocado Tuna Salad Boats: Fresh tuna salad served in creamy avocado halves.
  • 11. Baked Eggplant Stacks: Eggplant rounds layered with tomato sauce and fresh basil.
  • 12. Chicken Fajita Lettuce Wraps: Seasoned chicken and peppers wrapped in crisp lettuce leaves.
  • 13. Pumpkin Coconut Curry: Creamy, comforting curry with hearty pumpkin and bite-sized vegetables.
  • 14. Herb-Crusted Cod: Flaky white fish baked with a simple nut and herb topping.
  • 15. Broccoli Almond Stir-Fry: Quick sauté with crunchy almonds and Asian-inspired seasonings.
  • 16. Paleo Turkey Chili: Hearty, bean-free chili loaded with ground turkey and vegetables.
  • 17. Chocolate Almond Energy Bites: No-bake snacks for an energy boost (and dessert cravings).
  • 18. Berry Coconut Chia Pudding: Creamy, satisfying, and perfect for breakfast or dessert.
  • 19. Grilled Shrimp Skewers: Marinated shrimp grilled to perfection for a light, protein-packed meal.

[ingredients]
(The exact ingredient list will depend on the specific recipe you select from the list above. Common Paleo staples include: chicken breast, salmon, eggs, ground beef/turkey, sweet potatoes, zucchini, cauliflower, various fresh vegetables, nuts, seeds, olive oil, coconut milk, lemons, garlic, and a variety of herbs and spices.)
[/ingredients]

💡Meal Planning Tip: Save these Paleo recipes to automatically generate an organized shopping list with all ingredients sorted by store section—perfect for efficient grocery trips and streamlined weekly meal planning.

CookifyAI meal planning interface

Instructions

Pick any recipe from the list above, and here’s how to start:

  1. Choose your favorite recipe and gather all the fresh, whole-food Paleo ingredients.
  2. Follow the recipe’s cooking instructions—most are simple, involving roasting, grilling, sautéing, or baking.
  3. Prepare a large batch for leftovers; many Paleo recipes hold up wonderfully for meal prep.
  4. Serve with fresh herbs or a sprinkle of nuts/seeds for extra crunch and flavor.

Serving Suggestions for Healthy Paleo Recipes

These Paleo dishes pair well with vibrant side salads, roasted root vegetables, or simply on their own to let the flavors shine. Add a drizzle of zesty lemon or a spoonful of homemade salsa for a finishing touch that brightens up each plate and keeps meals exciting.

Nutritional Information and Serving Size

Most of these Paleo recipes yield 2-6 servings, depending on the dish. They’re generally packed with protein, fiber, healthy fats, and minimal processed carbs, making them satisfying and supportive of a balanced lifestyle. Caloric content will vary—lean proteins and vegetables form the base, with healthy fats like olive oil or coconut topping up the energy.

Paleo Flavor Recap

With vibrant marinades, clever ingredient swaps, and fresh herbs, these Paleo dishes taste as amazing as they look. They’re hearty, nourishing, and never boring—proving clean eating can be full of excitement and delicious variety.

Weekly Meal Planning

Planning ahead turns healthy eating from a chore into a joy. Save and schedule your favorite Paleo recipes to effortlessly plan meals for the week, adjust portions as needed, and keep a running, organized shopping list that combines all ingredients without overflow or duplicates.

Planning Benefits:

  • Automatically calculates total ingredient amounts when you plan multiple meals
  • Organizes your shopping list by grocery store section for a seamless shopping experience
  • Eliminates forgotten ingredients and excess purchases
  • Makes meal prep routine efficient and stress-free

Pro tip: When planning a week of Paleo meals, schedule all your recipes to see overlapping ingredients. For example, if multiple recipes use eggs or olive oil, your shopping list will sum exact quantities—saving you time, money, and reducing food waste.

Cook and Prep Times

Prep Time: 15–25 minutes per recipe
Cook Time: 20–45 minutes per recipe
Total Time: 30–60 minutes (varies by recipe, many are meal-prep friendly for batch cooking)

By trying these Healthy Paleo Recipes, you’ll see that nutritious meals and rich, flavorful dishes can absolutely go hand in hand, making your meal planning both healthy and delicious.

“Paleo in 30: 20 Fast & Flavorful Weeknight Dinners for Healthy Living”

20 Best Quick Paleo Dinners for Weeknights

Introduction

Busy weeknights call for meals that are both nourishing and quick to prepare—and these 20 best Paleo dinner recipes deliver just that. Designed around whole, unprocessed ingredients, each recipe is simple, flavorful, and perfect for satisfying the whole family without spending hours in the kitchen. Whether you’re new to Paleo or simply craving fresh inspiration, this roundup makes it easy to stick to your healthy eating goals—even when time is short.

Why These Paleo Dinners Are the Ultimate Weeknight Solution

Each of these recipes focuses on protein-rich staples like chicken, beef, pork, seafood, and plenty of seasonal vegetables. Using fast-cooking techniques such as stir-frying, grilling, and sheet pan roasting, you’ll have dinner on the table in under 30 minutes—without resorting to processed ingredients or complicated steps. With bold spices and simple sauces, every meal is a crowd pleaser.

Paleo Dinner Recipe Shortlist

Here’s a tantalizing peek at what’s in store:

  • One-Pan Lemon Garlic Chicken Thighs
  • Beef & Broccoli Stir-Fry
  • Paleo Taco Skillet
  • Balsamic Glazed Pork Chops
  • Sheet Pan Salmon with Roasted Veggies
  • Zucchini Noodle Puttanesca
  • Thai Coconut Shrimp Curry
  • Cauliflower Fried Rice with Chicken
  • Spaghetti Squash Carbonara
  • Honey Garlic Steak Bites
  • Turkey and Sweet Potato Skillet
  • Paprika Chicken with Spinach
  • Grilled Shrimp and Pineapple Kebabs
  • Egg Roll in a Bowl
  • BBQ Pulled Pork Lettuce Wraps
  • Greek Chicken Souvlaki Bowls
  • Burger Bowls with Special Sauce
  • Pesto Zoodle Bowl with Chicken
  • Lime Cilantro Cod with Mango Salsa
  • Curried Ground Beef Bowls

These recipes use fresh vegetables, lean proteins, healthy fats, and a rainbow of herbs and spices for maximum flavor—no grains, dairy, legumes, or refined sugars needed.

[ingredients]
A well-stocked Paleo pantry makes weeknight cooking even quicker. Here’s a basic grocery list for these 20 meals:
– Chicken breasts or thighs
– Ground beef and ground turkey
– Pork chops and pork shoulder
– Salmon fillets and white fish (cod, tilapia)
– Shrimp
– Sweet potatoes, zucchini, cauliflower, broccoli, spinach
– Bell peppers, onions, garlic, tomatoes
– Coconut aminos, olive oil, avocado oil
– Lemons, limes, fresh herbs
– Spices: paprika, cumin, curry powder, chili flakes, Italian seasoning
– Almond flour (for certain breadings)
– Lettuce or cabbage (for wraps or bowls)

💡Meal Planning Tip: Save these Paleo recipes with CookifyAI to automatically generate a smart, organized shopping list—ingredients grouped by store section for effortless weeknight grocery runs and seamless meal planning.

CookifyAI meal planning interface

Instructions for Building Your Quick Paleo Dinners

  1. Choose your protein (chicken, beef, pork, fish, or shrimp) and a vegetable base that pairs well.
  2. Prepare your vegetables ahead or use pre-cut options for faster prep.
  3. Season generously with herbs and spices—think garlic, lemon, paprika, curry, or Italian seasoning.
  4. Opt for one-pan or one-skillet methods: sheet pan meals, skillet sautés, or quick stir-fries work best.
  5. If making wraps or bowls, layer greens or lettuce with cooked protein and veggies, then add fresh salsa, sauces, or simple dressings.
  6. Most recipes come together in 20–30 minutes—perfect for last-minute weeknight meals!

Serving Suggestions:

Pair with simple sides:
– Cauliflower rice or sweet potato mash for extra heartiness
– A green salad or slaw for crunch and freshness
– Drizzle with homemade Paleo sauces or dips

Nutritional Information and Serving Size

All recipes are designed for 2–4 servings. Calorie content ranges from 250 to 600 per serving, depending on the protein and vegetables chosen. Each meal is naturally gluten-free, low in carbs, and packed with vitamins, minerals, and healthy fats.

20 Best Quick Paleo Dinners for Weeknights (Recap)

With these recipes, dinner is never boring. From savory stir-fries to mouthwatering bowls and sheet pan meals, you’ll enjoy a delicious variety each night—all while keeping it clean and Paleo. Meal planning and prep are a breeze when you have these go-to dishes up your sleeve.

Weekly Meal Planning

Take your Paleo dinner game to the next level by scheduling your weekly meals in advance! Save and plan these recipes with CookifyAI to generate a single, comprehensive grocery list. The platform automatically totals ingredient quantities across every meal, organizes by store area, and eliminates duplicates—no more forgotten items or overbuying!

Planning Benefits:

  • One-click scheduling for weeknight dinners
  • Auto-generated, fully sorted shopping lists
  • Ingredient overlap calculation to avoid waste and streamline shopping
  • Customizable plans for your family’s preferences

Pro tip: Mix and match recipes from this list to keep your week deliciously diverse and stress-free. Get started with smart meal planning and make weeknight Paleo dinners your favorite part of the day.

Cook and Prep Times

Prep Time: 10–15 minutes per recipe
Cook Time: 15–25 minutes per recipe
Total Time: 20–30 minutes per dinner

Enjoy healthy, flavorful, and fast dinners all week with these 20 quick Paleo recipes!

Family-Friendly Paleo Dinners: Nutritious & Delicious Meals for Every Night

Family-Friendly Paleo Dinners for Every Night

Introduction

Family dinners are at their best when everyone—kids and adults alike—enjoys what’s on their plate, and that’s exactly what these Family-Friendly Paleo Dinners for Every Night deliver. Centered on wholesome whole-food ingredients and free from grains, dairy, and processed sugars, this approach to weeknight dinners packs in both nutrition and flavor. Get ready for easy, kid-approved meals that will become weeknight staples.

Why Paleo Dinners Are Your Weeknight Solution

Paleo dinner recipes are embraced for their simplicity, reliance on fresh ingredients, and naturally bold flavors. They’re perfect for families not only because they’re packed with vegetables and protein, but also because they’re filling and endlessly versatile—think comforting one-pan meals, fun build-your-own bowls, and hands-on skewers. Best of all, these dinner ideas come together with minimal fuss, making them ideal for busy schedules.

Building a Fantastic Family Paleo Meal

The key is balancing protein, vegetables, and healthy fats in a way that feels approachable for everyone. Family favorites include chicken sheet pan dinners, taco lettuce wraps, and veggie-packed stir-fries. Give kids a say by letting them assemble their meal components—this builds positive associations with healthy eating and encourages clean plates!

Family-Friendly Paleo Dinner Recipe

Here’s a classic recipe to get you started: Paleo Chicken Sheet Pan Dinner with colorful veggies. It’s customizable, quick to prep, and leaves plenty for leftovers.

[ingredients]
1 ½ lbs boneless, skinless chicken breasts or thighs, cut into bite-sized pieces
2 cups broccoli florets
1 red bell pepper, sliced
1 zucchini, sliced into half-moons
1 red onion, chopped
2 tablespoons olive oil
1 garlic clove, minced
1 teaspoon dried oregano
½ teaspoon smoked paprika
Salt and pepper, to taste
Fresh lemon wedges, for serving
Optional: fresh parsley, for garnish
[/ingredients]

💡Meal Planning Tip: Save this recipe to automatically generate an organized shopping list with all ingredients sorted by store section perfect for efficient grocery trips and meal planning.

CookifyAI meal planning interface

Instructions

  1. Preheat your oven to 425°F (220°C). Line a large baking sheet with parchment paper.
  2. In a large bowl, toss the chicken pieces with olive oil, garlic, oregano, paprika, salt, and pepper.
  3. Add the broccoli, bell pepper, zucchini, and onion to the bowl. Mix well to coat all veggies with the oil and spices.
  4. Spread the chicken and vegetables on the prepared baking sheet in an even layer.
  5. Bake for 22–25 minutes, stirring halfway through, until the chicken is cooked through and veggies are tender with crisp edges.
  6. Serve warm, garnished with fresh parsley and a squeeze of lemon. Let family members build their own plates for some hands-on fun!

Serving Suggestions and Variations

Pair this sheet pan dinner with mashed cauliflower or roasted sweet potatoes for extra satisfaction. Swap in shrimp or salmon instead of chicken, or your favorite family-friendly veggies. Add avocado for healthy fats or a simple Paleo ranch dip on the side for smaller kids.

Nutritional Information and Serving Size

This recipe serves 4 hearty portions. Each serving provides about 290–320 calories, 32g protein, 11g carbohydrates, and 12g healthy fats, depending on your exact ingredient choices and portion sizes. All ingredients are naturally gluten-, grain-, and dairy-free.

Weekly Meal Planning

Sticking to Paleo is much easier—and stress-free!—when you plan. Save and schedule this recipe alongside a week’s worth of Paleo dinners for automatic shopping lists, organized by produce, meats, pantry goods, and more.

Planning Benefits:

– Calculates total ingredient quantities across your week, reducing duplicated items
– Organizes lists by store section to speed up shopping
– Helps you batch prep for busy nights—no more last-minute dinner stress
– Prevents forgotten ingredients and accidental non-Paleo purchases

Pro tip: Use CookifyAI to see at a glance which recipes use overlapping ingredients. Planning multiple chicken or veggie-based meals? The shopping list will tally the exact amount needed for the week—saving you both time and waste.

Cook and Prep Times

Prep Time: 10 minutes
Cook Time: 25 minutes
Total Time: 35 minutes

Enjoy stress-free family dinners packed with flavor, nutrition, and fun—the Paleo way!

Healthy Harvest: 40+ Paleo & AIP Recipes for a Nutritious Thanksgiving Feast

40+ Paleo & AIP Recipes to Make for Thanksgiving

Introduction

Thanksgiving is a time to gather with loved ones and enjoy a feast that celebrates the flavors of the season. If you’re following a Paleo or AIP (Autoimmune Protocol) diet, you don’t have to miss out on traditional favorites or delicious variety. With over 40 Paleo & AIP recipes designed for Thanksgiving, you’ll have a whole table’s worth of satisfying dishes—each bursting with flavor, nourishing ingredients, and totally grain, dairy, and refined sugar free.

Why 40+ Paleo & AIP Thanksgiving Recipes Belong on Your Holiday Table

Following special diets during the holidays can feel limiting, but this roundup ensures everyone at your table eats well, regardless of dietary needs. Using whole food ingredients and creative swaps, these recipes are as delicious as they are allergy friendly. Surprise and delight your guests—for example, with a velvety mashed “potato” made from cauliflower, sweet potato casserole that’s naturally sweetened, or a show stopping pumpkin pie with a flaky almond flour crust!

40+ Paleo & AIP Thanksgiving Recipes: Crowd Pleasers From Starters to Dessert

These are the best Paleo and AIP Thanksgiving recipes for the season:

Starters & Appetizers

  • Roasted Butternut Squash Soup (AIP, Paleo)
  • Turkey & Vegetable Meatballs (AIP, Paleo)
  • Prosciutto-Wrapped Asparagus Bundles
  • Deviled “Eggs” with Avocado Filling
  • Apple Cider Braised Brussels Sprouts (AIP, Paleo)
  • Homemade Cranberry Chutney

Main Dishes

  • Herb-Roasted Turkey Breast with Garlic (AIP, Paleo)
  • Maple Glazed Roast Chicken
  • Pork Tenderloin with Fresh Thyme
  • Sage & Lemon Stuffed Whole Fish

Starchy Sides & “Breads”

  • Mashed Cauliflower “Potatoes” (AIP, Paleo)
  • Sweet Potato & Apple Bake (AIP, Paleo)
  • Carrot & Parsnip Mash
  • Crispy Herb Roasted Root Vegetables
  • Paleo Biscuits (Cassava/Arrowroot based)
  • Coconut Flour “Cornbread”

Vegetable Sides

  • Roasted Green Beans with Garlic Oil
  • Brussels Sprouts with Bacon (AIP, Paleo)
  • Maple-Glazed Carrots (AIP, Paleo)
  • Roasted Broccoli & Garlic
  • Balsamic Roasted Beets
  • Cauliflower Stuffing (AIP, Paleo)
  • Autumn Squash with Rosemary

Gravy & Sauces

  • Homemade Paleo Turkey Gravy (AIP option)
  • Sugar Free Cranberry Sauce

Salads

  • Spinach, Apple & Pomegranate Salad
  • Kale & Roasted Sweet Potato Salad
  • Simple Green Salad with Lemon Vinaigrette

Desserts

  • Paleo Pumpkin Pie (AIP option, almond/coconut crust)
  • Apple Crisp with Coconut Topping
  • AIP Sweet Potato Pie Bars
  • Pumpkin Custard (AIP, Paleo)
  • Paleo Cranberry Crumble
  • Coconut Whipped Cream

Beverages

  • Spiced Apple Cider (AIP, Paleo)
  • Pumpkin Spice Latte (Dairy Free, Paleo)
  • Chilled Hibiscus Tea

[ingredients]
A sample shopping list for a well rounded Paleo & AIP Thanksgiving:
– 1 whole turkey breast or roast chicken
– 2 pounds sweet potatoes
– 1 head cauliflower
– Assorted root vegetables (parsnips, carrots, beets, turnips)
– 1 bag fresh spinach
– 1 bunch kale
– 2 pomegranates
– Coconut flour, almond flour, arrowroot or cassava flour
– Garlic, onions, fresh herbs (rosemary, thyme, sage)
– Coconut cream/milk
– Apple cider vinegar
– Avocados, apples, butternut squash
– Pastured eggs (optional for Paleo versions)
– Unrefined maple syrup or honey
– Olive and avocado oil
– Spices: cinnamon, cloves, ginger, turmeric, sea salt

💡Meal Planning Tip: Save these recipes to quickly generate organized shopping lists, categorized by grocery aisle. This saves you time on meal prep and ensures you never miss an ingredient—even on the busiest holiday weeks!

CookifyAI meal planning interface

Instructions & Key Preparation Tips

1. **Plan ahead:** Choose your favorite recipes from each category. Many AIP & Paleo side dishes can be made a day or two before—soups, mashes, and baked goods freeze or refrigerate well.
2. **Batch-cook sides:** Roasting multiple vegetables together is both time and energy efficient.
3. **Stay organized:** Make sauces and gravies ahead, and reheat gently before serving.
4. **Assemble salads and dressings last minute** for freshness.
5. **Desserts:** Bake pies, custards, and crumbles the night before for best texture.

Weekly Meal Planning

Thanksgiving week can get hectic—let a smart system help! Save and schedule your recipes to plan out each course, consolidate ingredients, and generate an automatic shopping list that combines all your Paleo & AIP Thanksgiving needs.

Planning Benefits:

  • Automatically adjusts ingredient quantities for guest count
  • Keeps track of what you have vs. what you need to buy
  • Organizes lists by store section for efficient shopping trips
  • Makes multi-recipe prep seamless and stress-free

Pro tip: If you’re cooking for multiple dietary preferences, use ingredient overlap features to combine quantities for shared ingredients like sweet potatoes, fresh herbs, and more—eliminating duplicate purchases and reducing kitchen chaos.

Cook and Prep Times

Prep Time: 1–2 hours per full meal (varies by menu and number of dishes)
Cook Time: 1–3 hours (roasting meats, baking casseroles, etc.)
Total Time: 3–5 hours for a complete multi-course Thanksgiving spread

Create a Thanksgiving to remember—full of gratitude, flavor, and festive dishes everyone at the table can enjoy, all while staying true to Paleo & AIP principles. With smart planning and a curated list of recipes, you’ll be ready for a seamless, satisfying holiday. Happy feasting!

Paleo Swedish Meatballs: Creamy, Dairy-Free Comfort with a Lingonberry Twist

Paleo Swedish Meatballs with Creamy Sauce and Lingonberry Jam

Introduction

If you’re seeking a meal that delivers classic comfort and rich flavor without the grains and dairy, these Paleo Swedish Meatballs with Creamy Sauce and Lingonberry Jam are exactly what your dinner table needs. This recipe masters the art of tender meatballs in a velvety, dairy-free sauce, complemented by the sweet tang of lingonberry jam. It’s a wholesome, crowd-pleasing dish that satisfies cravings while aligning with paleo principles—perfect for sharing with family or serving on special occasions.

Why Paleo Swedish Meatballs are a Must-Try

These meatballs stand out for their irresistibly moist texture and the depth of flavor from a blend of traditional spices. Rich, creamy sauce made without dairy ensures that everyone—even those sensitive to grains and lactose—can enjoy a true taste of Sweden. The final touch of lingonberry jam provides a delightful, tart counterpoint that elevates this dish and brings the flavors into perfect harmony.

Building the Perfect Paleo Creamy Sauce

To replicate the classic Swedish cream sauce, this recipe uses coconut milk and beef broth, thickened with a bit of arrowroot starch. Dijon mustard and a splash of coconut aminos add complexity, while freshly ground black pepper gives a gentle kick. This luscious sauce clings beautifully to the meatballs, making every forkful memorable.

Preparing and Serving Swedish Meatballs with a Paleo Twist

Start by mixing ground beef and pork with almond flour, egg, and traditional spices like allspice and nutmeg for authenticity. After shaping and baking or pan-searing the meatballs, simmer them gently in the sauce. A generous spoonful of lingonberry jam on the side adds both color and Nordic flair—serve over cauliflower mash or zucchini noodles for a full paleo meal.

Serving Suggestions for a Complete Paleo Feast

For a classic experience, pair your meatballs with a simple side of mashed cauliflower or roasted root vegetables. Garnish with fresh parsley and an extra dollop of jam for presentation. This dish also packs well for meal prep, offering easy lunches or dinners through the week.

Nutritional Information and Serving Size

This recipe serves four and provides approximately 350-400 calories per serving, offering a balance of protein, healthy fats, and satisfying flavor. Grain-free and dairy-free, it’s an ideal option for those following paleo diets or looking for a hearty, nourishing meal.

[ingredients]
1 lb ground beef
1/2 lb ground pork
1/2 cup almond flour
1 egg
1/4 cup almond milk (unsweetened)
1 small onion, finely grated
1 garlic clove, minced
1/2 tsp ground allspice
1/2 tsp ground nutmeg
3/4 tsp salt
1/2 tsp black pepper

For the Creamy Sauce:
1 cup coconut milk (full fat)
3/4 cup beef broth
1 tbsp arrowroot starch (mixed with 2 tbsp water)
1 tbsp coconut aminos
1 tsp Dijon mustard
Salt and black pepper to taste

For Serving:
Paleo-friendly lingonberry jam (store-bought or homemade)
Fresh parsley, for garnish
[/ingredients]

💡Meal Planning Tip: Save this recipe to automatically generate an organized shopping list with all ingredients sorted by store section—perfect for efficient grocery trips and meal planning.

CookifyAI meal planning interface

Instructions

  1. Preheat your oven to 400°F (200°C). Line a baking sheet with parchment paper.
  2. In a large bowl, combine ground beef, ground pork, almond flour, egg, almond milk, onion, garlic, allspice, nutmeg, salt, and pepper. Mix with your hands until just combined—do not overmix.
  3. Form the mixture into evenly sized meatballs (about 1.5 inches). Place on the prepared baking sheet.
  4. Bake for 15-18 minutes, or until cooked through and lightly browned. Alternatively, pan-sear the meatballs in batches over medium heat with olive oil until browned and cooked through.
  5. While the meatballs cook, make the sauce. In a saucepan, combine coconut milk, beef broth, coconut aminos, Dijon mustard, salt, and pepper. Bring to a simmer.
  6. Mix arrowroot starch with water in a small bowl to form a slurry, then stir into the sauce. Simmer for 2-3 minutes, stirring, until thickened.
  7. Add the baked (or seared) meatballs to the sauce and simmer for another 3-4 minutes on low heat to coat.
  8. Serve the meatballs hot, topped with fresh parsley and a spoonful of paleo-friendly lingonberry jam.

Weekly Meal Planning

This recipe is perfect for batch cooking and meal prep—meatballs keep well and taste even better after the flavors meld. Save and schedule this recipe to plan your dinners, coordinate shopping lists, and keep your weeknight meals on track.

Planning Benefits:

  • Automatically calculates total ingredient quantities across your entire meal plan
  • Organizes shopping lists by store section for optimal efficiency
  • Prevents duplicate purchases and helps eliminate forgotten ingredients
  • Streamlines meal prep, so you spend less time planning and more time enjoying

Pro tip: When planning multiple meals, schedule your recipes to see which ingredients overlap. If you’re making two meals with coconut milk this week, your auto-generated list ensures you buy just the right amount—no more last-minute store runs!

Cook and Prep Times

Prep Time: 20 minutes
Cook Time: 20 minutes
Total Time: 40 minutes

25 Paleo Dinner Recipes: Wholesome Meals for Every Night of the Week

25 Paleo Dinner Recipes

Introduction

Savoring variety is essential to staying inspired in the kitchen, and with these 25 Paleo dinner recipes, you’ll never have to worry about mealtime repetition. The Paleo diet focuses on whole foods, lean proteins, vegetables, fruits, and healthy fats, making dinner both nourishing and satisfying. Whether you’re new to Paleo or simply looking to expand your repertoire, these recipes deliver bold flavors and optimal nutrition for every night of the week—and for families and meal preppers alike.

Why Make These 25 Paleo Dinner Recipes?

Each recipe on this list offers a unique blend of flavors, quick prep times, and straightforward ingredients—making weeknight dinners not only healthy but genuinely delicious. From sizzling skillet meals to slow-cooked favorites, these dishes are crafted to keep your taste buds delighted while fitting neatly into a wholesome eating plan. Plus, with a wide variety of proteins and veggies, you’ll keep every dinner fresh, exciting, and perfectly Paleo-friendly.

A Collection of Flavorful Paleo Dinners

You’ll find everything from fragrant stir-fries and hearty soups to inventive wraps and roasts—ideal for those seeking both variety and nutrition. Choose your favorites, rotate them weekly, and enjoy stress-free meal planning that keeps both your body and palate satisfied.

Sample Paleo Dinner Recipes Included

1. Lemon Herb Roast Chicken with Root Vegetables
2. Sheet Pan Salmon and Broccoli
3. Cauliflower Fried “Rice” with Shrimp
4. Zucchini Noodle Spaghetti Bolognese
5. Balsamic Glazed Steak with Roasted Asparagus
6. Chicken Fajita Lettuce Wraps
7. Paleo Thai Curry with Chicken and Veggies
8. Sweet Potato and Ground Beef Hash
9. Turmeric Grilled Chicken with Cucumber Salad
10. Garlic Mushroom Pork Chops
11. Citrus Marinated Grilled Shrimp Skewers
12. Beef and Broccoli Stir-Fry (with coconut aminos)
13. Spaghetti Squash Primavera
14. Slow Cooker Barbacoa Beef
15. Turkey, Apple & Sage Stuffed Acorn Squash
16. Coconut Lime Chicken Thighs
17. Paleo Jambalaya
18. Salmon Cakes with Lemon Dill Sauce
19. Baked Herb-Crusted Cod
20. Green Chile Chicken Soup
21. Asian-Inspired Lettuce Wraps
22. Moroccan-Inspired Lamb Stew
23. Pulled Pork over Roasted Cauliflower Mash
24. Sun-Dried Tomato Basil Meatballs
25. Grilled Vegetable & Steak Kebabs

[ingredients]
Here are typical ingredients you’ll need for these Paleo recipes:
– Lean proteins (chicken breasts/thighs, ground turkey, beef sirloin, salmon)
– Fresh vegetables (broccoli, zucchini, bell peppers, sweet potatoes, spinach, cauliflower)
– Cooking fats (olive oil, avocado oil, coconut oil, ghee)
– Aromatics (garlic, onion, ginger)
– Herbs and spices (basil, parsley, thyme, rosemary, turmeric)
– Fruits (lemons, limes, apples, tomatoes)
– Coconut aminos (as a soy sauce substitute)
– Nuts and seeds (for some recipes; like almonds or pumpkin seeds)
– Sea salt and pepper
[/ingredients]

💡 Meal Planning Tip: Save this collection to CookifyAI to instantly create a categorized shopping list—making it easier to organize your grocery trip and avoid missing essential ingredients for your Paleo dinners.

CookifyAI meal planning interface

Instructions

For each of these recipes, follow these fundamental steps:

  1. Gather and prep your ingredients. Wash and chop all vegetables, measure out your spices, and prep proteins for quick assembly.
  2. Cook the protein first. For most skillet or sheet pan meals, start by searing or baking the protein. For soups and stews, begin by sautéing aromatics and browning the meat.
  3. Add vegetables and seasonings. Add chopped veggies and your choice of flavor boosters (herbs, coconut aminos, citrus juice) to build depth and brightness in each dish.
  4. Simmer, roast, or grill as directed. Cook according to your chosen recipe, making sure proteins are done and vegetables are cooked just until tender for optimal nutrient retention.
  5. Serve and garnish. Add fresh herbs, a squeeze of citrus, or a sprinkle of seeds or nuts (if included in the recipe) right before serving.

Weekly Meal Planning

Planning a week’s worth of Paleo dinners ensures variety while simplifying your grocery routine. Save and schedule this Paleo dinner collection to CookifyAI to:

  • Automatically calculate all the ingredients you’ll need across multiple recipes
  • Organize your shopping list by grocery store sections for efficiency
  • Avoid duplicate purchases and last-minute trips to the store
  • Simplify meal preps with clear daily plans

Pro tip: By batch scheduling your meals, CookifyAI totals how much chicken, produce, or seasonings you need for the week—minimizing food waste and maximizing your time in the kitchen.

Cook and Prep Times

While each recipe varies, most take 20-40 minutes from start to finish, with minimal prep work required if you organize your shopping list ahead of time—a key to stress-free Paleo meal planning!

With these 25 Paleo dinner recipes, you’re well on your way to enjoying healthy dinners that are never boring—and with smart tools like CookifyAI, planning and prepping your week is easier than ever.

Harvest Casserole: A One-Pan Comfort Meal for Paleo & Whole30 Lifestyles

Harvest Casserole {Paleo, Whole30}

Introduction

Looking for a cozy, nutrient-packed one-pan meal that keeps things clean and simple? This Harvest Casserole {Paleo, Whole30} is your answer. Featuring seasonal vegetables, savory ground meat, and creamy coconut milk, this dish delivers hearty comfort without compromising on wholesome ingredients. Perfect for midweek dinners or meal prep, it’s a flavorful crowd pleaser that fits beautifully into both paleo and Whole30 meal plans.

Why This Harvest Casserole Shines

This casserole packs autumn’s best into one streamlined dish: tender sweet potatoes, juicy apples, fresh greens, and protein-rich ground turkey or chicken. The touch of sage and thyme creates true fall flavor, while creamy coconut milk adds just the right amount of richness. It’s filling, family friendly, and naturally gluten and dairy free.

Harvest Casserole Filling Secrets

For the ultimate texture and flavor, cut your veggies into bite-sized cubes. Sauté onions and garlic to build a fragrant base, blend in the ground meat, and stir in apples and sweet potatoes. The coconut milk keeps everything moist and brings all the fall flavors together. Prepping your greens at the end ensures they stay vibrant and retain their nutrients.

Assembling and Baking Your Casserole

Simply layer cooked ground meat and veggies in a baking dish, pour over the herby coconut milk, and bake until bubbling and golden. This hands-off approach allows the ingredients’ flavors to meld in the oven, while your kitchen fills with mouthwatering, savory aromas.

Serving Suggestions for a Complete Meal

Harvest Casserole is excellent on its own, but you can dress it up with a sprinkle of fresh herbs before serving. Pair it with a leafy salad or a side of roasted Brussels sprouts for even more color and nutrition. It also reheats beautifully for meal-prepped lunches or dinners.

Nutritional Information and Serving Size

This recipe makes 4–6 hearty servings, depending on portion size. Each serving is packed with protein, complex carbs, and healthy fats—offering balanced macros with approximately 350–400 calories per serving, depending on your protein and veggie choices.

Harvest Casserole {Paleo, Whole30} (Recap)

This one-pan meal combines lean protein, seasonal produce, fragrant herbs, and creamy coconut milk, making it a go-to for healthy comfort food lovers. The ease of prep and adaptability to meal planning makes it an all-star for anyone on Paleo or Whole30, and a delicious seasonal favorite for everyone else.

[ingredients]
1 lb ground turkey or chicken
1 onion, diced
2–3 cloves garlic, minced
1 large sweet potato, peeled and diced
2 apples, diced
2 cups chopped kale or spinach
1/2 cup full-fat coconut milk
1 tsp dried sage
1 tsp dried thyme
1/2 tsp salt (more to taste)
1/2 tsp black pepper
2 tbsp olive oil or avocado oil
Optional: 1/2 cup chopped pecans for topping
[/ingredients]

💡Meal Planning Tip: Save this recipe to automatically generate a smart shopping list with all ingredients sorted by grocery section. It makes planning healthy, compliant meals for the week quick and frustration-free!

CookifyAI meal planning interface

Instructions

  1. Preheat your oven to 375°F. Grease a 9×13-inch baking dish with a little oil.
  2. Heat olive oil in a large skillet over medium heat. Add diced onions and sauté until translucent, about 3–4 minutes. Add garlic and cook until fragrant.
  3. Add ground turkey or chicken, breaking up with a spoon. Cook until no longer pink and starting to brown, about 5–7 minutes.
  4. Stir in sweet potatoes and apples, cooking for 2–3 minutes until slightly softened.
  5. Add kale or spinach and cook until just wilted. Season the mixture with sage, thyme, salt, and pepper.
  6. Transfer everything to the prepared baking dish. Pour coconut milk evenly over the mixture and gently toss or spread to combine.
  7. If using, sprinkle chopped pecans on top for added crunch and flavor.
  8. Bake uncovered for 25–30 minutes, or until sweet potatoes are fork tender and the casserole is bubbling.
  9. Remove from the oven and let stand a few minutes before serving. Garnish with extra herbs if desired.

Weekly Meal Planning

This Harvest Casserole is an excellent addition to your weekly meal rotation—great for dinners and ideal for prepping in advance. Save and schedule this recipe to automatically add it to your meal plan, consolidate a full shopping list, and coordinate all your meals for the week.

Planning Benefits:

  • Auto-calculates total ingredient quantities for all scheduled meals
  • Organizes your shopping list by grocery section
  • Eliminates duplicates and prevents forgotten staples
  • Makes your healthy eating journey seamless and efficient

Pro tip: If you’re prepping multiple Whole30 or Paleo meals, schedule and batch your recipes to find overlapping ingredients, streamline shopping, and minimize food waste.

Cook and Prep Times

Prep Time: 15 minutes
Cook Time: 35 minutes
Total Time: 50 minutes

Paleo Sheet Pan Magic: Wholesome One-Pan Dinners Made Simple

Delicious Paleo Sheet Pan Meals

Introduction

Looking for a flavor-packed meal that’s easy to prepare and clean up? Delicious Paleo Sheet Pan Meals are the answer. With just one pan, you can roast a balanced combination of protein and veggies, seasoned beautifully to create a meal that’s both nutritious and satisfying—the perfect choice for busy weeknights and health-conscious families.

Why Paleo Sheet Pan Meals Stand Out

Sheet pan meals are loved for their convenience: minimal prep, hands-off cooking, and easy clean up. What makes paleo sheet pan dinners extra special is the focus on wholesome, real-food ingredients—lean proteins, seasonal vegetables, and heart-healthy fats, all roasted together so the flavors intensify and mingle. This style of meal is endlessly customizable and perfect for feeding a crowd or meal prepping ahead.

Choosing Ingredients for the Perfect Paleo Sheet Pan Meal

Select a quality protein—think chicken thighs, salmon fillets, or pork tenderloin. Next, pack your pan with a variety of colorful vegetables like bell peppers, broccoli, sweet potatoes, and red onions. Add a drizzle of extra virgin olive oil, a squeeze of lemon, and your favorite paleo-friendly spices or fresh herbs such as rosemary, thyme, or smoked paprika. Simple trim, toss, and roast for incredible results.

How to Assemble Your Paleo Sheet Pan Meal

Arrange the vegetables in a single layer on your pan, making a space for your protein so everything cooks evenly. Season everything generously and pop the pan in a hot oven. Halfway through, give the veggies a quick toss to ensure caramelized edges on every bite. Finish the dish with a squeeze of fresh lemon juice or a sprinkle of chopped herbs just before serving for that restaurant-quality flair.

Serving Suggestions for Stunning Paleo Sheet Pan Meals

Serve your sheet pan creation straight from the oven—no need for extra dishes. Add a side of fresh greens or a simple slaw to round out the meal. These paleo dinners work just as well for lunch the next day, so save the leftovers for an effortless, delicious meal.

Nutritional Information and Serving Size

This recipe yields four hearty servings, each providing lean protein, fiber-rich vegetables, and healthy fats. Calorie count varies based on the specific protein and vegetables used, but you can expect around 350-450 calories per serving, making it a clean and nourishing meal.

Delicious Paleo Sheet Pan Meals (Recap)

Paleo sheet pan meals combine efficiency, nutrition, and irresistible flavor. By roasting everything together, you get deeply caramelized vegetables, perfectly cooked protein, and minimal mess—ideal for any home cook seeking simple, crowd-pleasing meals.

[ingredients]
1 pound boneless, skinless chicken thighs (or salmon fillets, pork tenderloin, steak)
2 cups broccoli florets
1 large sweet potato, diced
1 red onion, sliced
1 red bell pepper, sliced
3 tablespoons olive oil or avocado oil
1 teaspoon garlic powder
1 teaspoon smoked paprika
1/2 teaspoon sea salt
1/2 teaspoon black pepper
Juice of 1 lemon
Fresh rosemary or thyme, to taste
[/ingredients]

💡Meal Planning Tip: Save this recipe to automatically generate an organized shopping list with all ingredients sorted by store section—perfect for efficient grocery trips and meal planning.

CookifyAI meal planning interface

Instructions

  1. Preheat your oven to 425°F (220°C) and line a large sheet pan with parchment paper for easy cleanup.
  2. Spread the diced sweet potato, broccoli florets, red onion, and bell pepper in a single layer on the pan. Drizzle with half the olive oil and season with half the garlic powder, smoked paprika, salt, and pepper. Toss to coat.
  3. Nestle the chicken thighs (or other chosen protein) among the veggies. Drizzle with the remaining olive oil and season with the remaining spices. Sprinkle fresh rosemary or thyme on top.
  4. Roast for 25-30 minutes, tossing the vegetables halfway through, until the chicken is cooked through (reaches 165°F internal temperature) and veggies are tender and caramelized.
  5. Squeeze fresh lemon juice over the entire sheet pan before serving. Garnish with additional herbs if desired.
  6. Serve hot and enjoy leftovers for lunch the next day!

Weekly Meal Planning

This recipe is a star for weekly meal prep, offering flexibility and ease. Save and schedule this recipe to plan out your week, automatically generating a smart shopping list that compiles ingredients from all your planned meals.

Planning Benefits:

  • Totals up all ingredient amounts across selected recipes
  • Organizes your grocery list by store section
  • Prevents double buys and missing items for a streamlined shopping trip
  • Simplifies your week—one big prep, easy dinners every night

Pro tip: When creating a full week of paleo meals, schedule your dishes so shopping lists show the total vegetables, proteins, and pantry items needed. This ensures zero waste and eliminates guesswork.

Cook and Prep Times

Prep Time: 15 minutes
Cook Time: 30 minutes
Total Time: 45 minutes

Easy Chicken Carnitas: A Flavor-Packed Slow Cooker & Instant Pot Recipe

Chicken Carnitas (Slow Cooker or Instant Pot)

Introduction

Chicken Carnitas made in a slow cooker or Instant Pot offer all the flavor-packed goodness of traditional carnitas, but with a healthier twist and incredible ease. Infused with citrus, garlic, and aromatic spices, this dish delivers irresistibly tender, shredded chicken with crispy edges—perfect for tacos, burrito bowls, or salads. Enjoy the savory depth and complexity of classic carnitas without hours of hands-on cooking.

Why These Chicken Carnitas Are a Must-Make

This recipe stands out for its simplicity and versatility. Chicken carnitas cook up beautifully in either the slow cooker or Instant Pot, so you can set it and forget it or speed things up when you’re short on time. The result? Juicy, flavorful chicken with a gorgeous crispy finish that rivals your favorite taqueria. It’s a family-friendly crowd pleaser and ideal for meal prep, transforming into multiple delicious dinners throughout the week.

Building Deep Flavor in Your Carnitas

Using a blend of fresh citrus juice, smoky chipotle peppers, and warm spices ensures the chicken is deeply flavorful, not bland or one-dimensional. A short broil at the end caramelizes the edges, delivering that classic carnitas texture. Whether you use boneless thighs or breasts, the result is always satisfyingly tender and easy to shred.

Serving Suggestions: Beyond Tacos

While chicken carnitas shine in tacos with fresh cilantro and diced onions, don’t stop there! Pile them high on salads, in burrito bowls with rice and beans, or stuffed into quesadillas. Leftovers work brilliantly for next-day lunches and freeze beautifully for future meals, making this recipe an MVP for busy households.

Nutritional Information and Serving Size

This recipe yields about 6 generous servings. Each serving contains roughly 180–220 calories (chicken only), with a balanced protein profile and lots of bold flavor. Toppings and tortillas add minimal extra calories, so you can customize for your dietary goals.

Flavorful Chicken Carnitas Recap

Spiced, citrusy, and crisped to perfection, these chicken carnitas simplify mealtime without sacrificing taste. They’re wonderfully adaptable for any occasion—whether you’re feeding a hungry family or prepping meals ahead for the week.

[ingredients]
2 ½ pounds boneless, skinless chicken thighs or breasts
1 tablespoon olive oil
1 small onion, finely diced
4 cloves garlic, minced
1 orange, juiced (about ⅓ cup)
1 lime, juiced (about 3 tablespoons)
2 teaspoons smoked paprika
2 teaspoons ground cumin
1 teaspoon dried oregano
1 teaspoon salt
½ teaspoon black pepper
1–2 chipotle peppers in adobo, minced (or to taste)
Optional: fresh cilantro, diced red onion, lime wedges for serving
[/ingredients]

💡Meal Planning Tip: Save this recipe to instantly generate a smart, organized shopping list—ingredients grouped by grocery aisle—so meal planning and grocery trips are faster and more efficient.

CookifyAI meal planning interface

Instructions

  1. Prepare the chicken: Pat chicken pieces dry and season all sides with salt and pepper. Place in the slow cooker or Instant Pot.
  2. Add flavors: Drizzle olive oil over chicken. Add diced onion, minced garlic, orange juice, lime juice, chipotle peppers, paprika, cumin, and oregano. Toss to coat evenly.
  3. Slow Cooker: Cover and cook on LOW for 6–7 hours or HIGH for 3–4 hours, until chicken is very tender and shreds easily.
    Instant Pot: Seal and cook on Manual/High Pressure for 12 minutes (for thighs) or 10 minutes (for breasts), then allow pressure to release naturally for 5 minutes before quick-releasing.
  4. Shred chicken: Remove cooked chicken to a large plate or bowl. Shred with two forks, then return to the cooking liquid to soak up maximum flavor.
  5. Crisp it up (optional but recommended): Preheat your oven broiler. Spread shredded chicken on a rimmed baking sheet, spooning a bit of the cooking liquid on top. Broil for 4–6 minutes, until edges are browned and crispy.
  6. Serve: Enjoy chicken carnitas hot in tortillas with toppings, over rice, or as part of a salad bowl.

Weekly Meal Planning

Chicken Carnitas are the ultimate meal prep powerhouse—delicious, versatile, and perfect for cooking in batches! Save and schedule this recipe for the week to enjoy effortless meals and smart shopping. CookifyAI helps you plan exactly what you need:

  • Automatically calculates how much chicken and other key ingredients to buy for multiple meals
  • Combines all shopping lists by grocery section for a smoother trip
  • Prevents forgotten ingredients and overbuying, saving both time and money

Pro tip: When making a batch for weekly lunches or dinners, schedule chicken carnitas with other recipes to see exactly how ingredients overlap, so you’ll know if you need more citrus, onion, or chipotle peppers for the week.

Cook and Prep Times

Prep Time: 10 minutes
Cook Time: 3–4 hours (Slow Cooker on High) or 12 minutes (Instant Pot, plus pressure build/release)
Total Time: 3–7 hours (set-it-and-forget-it) or 35 minutes (Instant Pot method)

Honey Garlic Perfection: Flavor-Packed AIP/Paleo Meatballs for Any Meal

AIP/Paleo Honey Garlic Meatballs (Gluten-free) • Heal Me Delicious

Introduction

AIP/Paleo Honey Garlic Meatballs are a winning combination of sweet, savory, and garlicky flavors—all in juicy, tender, and gluten-free bites. This simple recipe is the answer for those seeking a crowd-friendly appetizer, a nourishing lunch, or an effortless weeknight dinner. With minimal prep and a handful of real-food ingredients, you’ll have a dish that works deliciously with a variety of sides, keeps well for meal prep, and is loved by kids and adults alike.

Why These Honey Garlic Meatballs Stand Out

What makes these meatballs so unique? The secret is in the sticky, aromatic honey garlic sauce that perfectly coats every bite. Not only are these meatballs AIP- and Paleo-compliant, but they’re also gluten-free, grain-free, and refined-sugar free. The combination of naturally sourced sweetener and savory herbs creates a balanced flavor punch that brings excitement to the table—without any inflammatory ingredients.

Simple Steps to Flavor-Packed Meatballs

The journey to great meatballs starts with using high quality ground meat (such as turkey, chicken, or beef) and binding them with grain-free flours like cassava or coconut flour. Fresh garlic, dried herbs, and a hint of sea salt bring depth and robust flavor to the mix. The honey garlic sauce, gently simmered to a glossy finish, adds a luscious coating that elevates this dish above the usual weeknight fare.

Serving and Presentation Tips

Serve these meatballs over a bed of cauliflower rice, zucchini noodles, or alongside roasted vegetables for a nourishing grain-free meal. You can garnish with sliced green onions or a sprinkle of sesame seeds (Paleo only) for visual appeal and added crunch. For gatherings, spear them with decorative picks and serve as savory-sweet appetizers.

Nutritional Info & Servings

This recipe yields about 16–18 meatballs (4–5 servings). Each serving is approximately 220–250 calories, depending on the meat chosen and side dishes. Naturally dairy-free, egg-free, nut-free, and gluten-free, these meatballs are a great option to accommodate many dietary needs.

AIP/Paleo Honey Garlic Meatballs (Recap)

These honey garlic meatballs offer an ideal mix of satisfying protein and bold flavor, all while staying true to AIP, Paleo, and gluten-free guidelines. They’re perfect for meal prepping, family dinners, or impressing guests—without sacrificing any of your healthy commitments.

[ingredients]
For the Meatballs:
1 lb ground turkey, chicken, or beef
2 tbsp cassava flour or coconut flour
2 garlic cloves, minced
1/2 tsp sea salt
1/2 tsp dried oregano
2 tbsp finely chopped green onion (green parts only)
1 tbsp olive oil or avocado oil (for cooking)

For the Honey Garlic Sauce:
1/3 cup honey
3 tbsp coconut aminos
2–3 garlic cloves, minced
1 tbsp apple cider vinegar
1/4 tsp sea salt
2 tsp arrowroot starch + 2 tbsp water (for thickening)
Optional: Extra green onions or sesame seeds for garnish (omit sesame for strict AIP)
[/ingredients]

💡Meal Planning Tip: Save this recipe to automatically generate a neatly organized shopping list with all your AIP and Paleo pantry essentials, sorted by store section. Enjoy efficient, stress-free grocery trips and streamlined meal planning for the week!

CookifyAI meal planning interface

Instructions

  1. Preheat your oven to 400°F (205°C) and line a baking sheet with parchment paper.
  2. In a large bowl, combine ground meat, cassava or coconut flour, minced garlic, sea salt, dried oregano, and green onions. Mix gently until just combined.
  3. Form the mixture into 1.5-inch meatballs and place them evenly on the prepared baking sheet.
  4. Heat oil in a skillet over medium heat. Brown meatballs in batches for 2–3 minutes on each side, then return them to the baking sheet.
  5. Bake in the oven for 10–12 minutes, until cooked through.
  6. Meanwhile, make the sauce: in a small saucepan, combine honey, coconut aminos, minced garlic, apple cider vinegar, and sea salt. Bring to a simmer over medium-low heat.
  7. In a small bowl, whisk together arrowroot starch and water. Stir this slurry into the simmering sauce and cook until slightly thickened (about 2–3 minutes). Remove from heat.
  8. Toss cooked meatballs in the honey garlic sauce until well coated. Garnish with green onions or (if not strict AIP) sesame seeds if desired. Serve immediately.

Weekly Meal Planning

This recipe is ideal for weekly meal planning. Save and schedule this recipe in CookifyAI to plan when to enjoy it, and let the app handle smart shopping lists that combine all your meal groceries in one place.

Planning Benefits:

– Calculates total ingredients needed for all your planned dishes (no more running out!)
– Organizes your list by store section—no backtracking at the supermarket
– Avoids ingredient duplicates or omissions for a healthier, waste-free kitchen
– Makes meal prep for specialized diets (like AIP or Paleo) effortless and organized

Pro tip: Planning both lunches and dinners? Schedule all your recipes so you’ll automatically get accurate quantities for any overlapping items—like garlic or coconut aminos—saving you time, money, and stress.

Cook and Prep Times

Prep Time: 15 minutes
Cook Time: 20 minutes
Total Time: 35 minutes

Enjoy these flavor-packed, family-approved AIP/Paleo Honey Garlic Meatballs for your next meal!

Paleo Perfection: 10 Effortless Dinner Recipes for Flavor-Packed Weeknights

10 Easy Paleo Dinner Recipes You’ll Love

Introduction

Eating Paleo doesn’t mean sacrificing flavor or spending hours in the kitchen. These 10 Easy Paleo Dinner Recipes are designed to deliver nourishing, crave-worthy meals that align with your healthy lifestyle and fit your busy weeknights. From vibrant stir-fries to hearty one-pan bakes, each dish makes dinnertime deliciously simple—without grains, dairy, or processed ingredients. Impress family and friends with recipes that focus on clean eating and fresh flavors!

Why These Paleo Dinner Recipes Rock

What sets these recipes apart is their combination of simplicity, speed, and bold taste. With minimal prep and wholesome real-food ingredients, each meal delivers satisfaction and all-around appeal—making Paleo fun and totally sustainable. They’re perfect for meal prepping, family-style dinners, or whenever you want something healthy but don’t want to spend all evening cooking.

10 Must-Try Paleo Dinner Ideas

Below is a roundup of our favorite Paleo-friendly dinners that you’ll want to save and make on repeat.

  1. Sheet Pan Lemon-Herb Chicken and Veggies: Toss chicken thighs with lemon, garlic, and mixed veggies; then roast for a hands-off, all-in-one meal.
  2. Cauliflower Fried “Rice”: Riced cauliflower stir-fried with eggs, veggies, and shredded chicken—it’s quick, satisfying, and packed with flavor.
  3. Salmon with Avocado Salsa: Pan-seared salmon filets topped with bright, creamy avocado salsa for a refreshing, dinner-in-minutes option.
  4. Beef and Broccoli Stir Fry: Tender strips of beef sautéed with broccoli in coconut aminos and ginger for a grain-free, takeout favorite.
  5. Spaghetti Squash Bolognese: Slow-simmered meat sauce over roasted spaghetti squash for all the comfort—none of the pasta!
  6. Paleo Turkey Zucchini Meatballs: Juicy turkey meatballs baked with shredded zucchini and Italian herbs, served with homemade tomato sauce.
  7. Greek Chicken Skillet: One-pan chicken cooked with fresh tomatoes, olives, garlic, and oregano—Mediterranean flavors in under 30 minutes.
  8. Paleo Taco Lettuce Wraps: Lean ground beef or turkey spiced and served in crisp lettuce cups, topped with avocado for a low-carb taco night.
  9. Honey Garlic Shrimp & Broccoli: Sweet-and-savory shrimp sautéed with broccoli and bell pepper—a perfect weeknight dinner under 20 minutes.
  10. Roasted Sweet Potato & Sausage Hash: Chunks of sweet potato, sausage, onions, and spinach roasted together for hearty comfort food with minimal cleanup.

[ingredients]
For all 10 recipes, you’ll commonly need:
– Chicken breasts or thighs (about 2 lbs)
– Salmon filets (4)
– Beef sirloin or flank steak (1 lb)
– Ground turkey or beef (1 lb)
– Shrimp (1 lb)
– Eggs (4)
– Zucchini (2)
– Cauliflower (1 head or 16 oz riced)
– Broccoli (2 heads)
– Sweet potatoes (2 large)
– Mixed bell peppers (3)
– Fresh tomatoes (2)
– Avocado (2)
– Garlic (1 bulb)
– Olive oil or avocado oil (as needed)
– Sea salt, pepper, dried herbs (oregano, thyme, basil, Italian seasoning)
– Coconut aminos or tamari (for stir-fries)
– Lemon (2)
– Lettuce (1 head, for wraps)

💡Meal Planning Tip: Save this recipe to automatically generate an organized shopping list with all ingredients sorted by store section—perfect for efficient grocery trips and meal planning!

CookifyAI meal planning interface

Sample Recipe: Paleo Beef and Broccoli Stir-Fry

  1. Slice 1 lb beef thinly against the grain. Cut 1 head broccoli into florets.
  2. Heat 1 tbsp oil in a wok. Sear beef for 1-2 minutes, then transfer to a plate.
  3. Add broccoli and a splash of water. Stir-fry until crisp-tender, about 3 minutes.
  4. Return beef to the pan. Stir in 1/4 cup coconut aminos, 1/2 tsp ginger, and 1 minced garlic clove. Cook 1-2 minutes more. Serve hot.

Weekly Meal Planning

Batch cooking these easy Paleo dinners keeps your week stress-free and meals varied. Save and schedule this recipe to plan which nights to cook each meal and use CookifyAI to generate a consolidated shopping list, streamlining your Paleo journey.

Planning Benefits:

  • Auto-calculates total amounts for shared ingredients across recipes
  • Organizes lists by grocery store aisle for quicker trips
  • Ensures you don’t double-buy or forget essentials
  • Makes meal prep simple, even for a whole week of Paleo eating!

Pro tip: When planning several Paleo dinners, schedule your recipes to spot overlapping ingredients—helping reduce waste and further simplifying shopping.

Cook and Prep Times

Total Time per recipe: 20 to 40 minutes
Most of these dinners can be prepped ahead and many freeze beautifully if you want to double up and stock your freezer!

Enjoy Effortless, Flavor-Filled Paleo Dinners!

With fresh produce, lean proteins, and vibrant flavors, these 10 easy Paleo dinner recipes will inspire your healthy meal planning all year long. Keep your weeknights fresh, simple, and utterly delicious—Paleo-style.

Healthy Orange Chicken: A Zesty, Low-Cal Takeout Alternative

Healthy Orange Chicken

Introduction

Craving Chinese takeout without the extra calories and heavy oils? Healthy Orange Chicken is your answer. Bursting with tangy, citrus-forward flavor and just the right amount of sweetness, this dish delivers all the comfort of your favorite classic—with a light, nutritious twist. Perfect for busy weeknights or meal prepping, it’s a crowd pleaser that gives you a balanced, homemade alternative to restaurant fare.

Healthy Orange Chicken with Fresh, Vibrant Flavors

What makes this Healthy Orange Chicken stand out is its use of real orange juice and zest, lean chicken breast, and a simple, homemade sauce with less sugar and salt than takeout. The result? Crisp-tender chicken coated with a glossy, naturally sweet-and-savory orange glaze, all without deep frying or artificial ingredients.

Mastering the Lighter Orange Sauce

Healthy orange chicken sauce gets its magic from fresh orange juice, zest, a splash of soy sauce, and a touch of honey for sweetness. Arrowroot or cornstarch gives the sauce body, while fresh ginger and garlic provide aromatic depth. This approach skips heavy syrups and corn starch batters, letting real, wholesome flavors shine.

Assembling Your Healthy Orange Chicken

Start by searing bite-sized chicken pieces in a skillet with just a little oil until golden brown. Then, toss the chicken in your homemade orange sauce and cook until thickened and glossy, coating every morsel. Serve it over brown rice, quinoa, or steamed veggies for a vibrant, complete meal.

Serving Suggestions for a Nutritious Twist

Healthy Orange Chicken pairs beautifully with stir-fried broccoli, snap peas, or even cauliflower rice. Top with sliced green onions, a sprinkle of sesame seeds, or a handful of fresh cilantro for color, crunch, and an extra dose of nutrients.

Nutritional Information and Serving Size

This recipe yields about 4 servings. Each serving provides roughly 250–300 calories, with high protein from the chicken and vitamin C from the orange. It’s lower in added sugars and sodium compared to takeout, making it suitable for a health-conscious lifestyle.

Healthy Orange Chicken (Recap)

This Healthy Orange Chicken recipe combines bright citrus flavor with lean protein and a lighter sauce—perfect for nutritious meal prep and weeknight dinners.

[ingredients]
1 pound boneless, skinless chicken breasts, cut into bite-size pieces
2 tablespoons arrowroot or cornstarch, divided
1 tablespoon olive oil
Zest and juice of 1 large orange (about 1/3 cup juice)
2 tablespoons low-sodium soy sauce (or tamari)
2 tablespoons honey or maple syrup
2 garlic cloves, minced
1 teaspoon fresh ginger, grated
1/4 teaspoon crushed red pepper flakes (optional)
2 tablespoons water
Sliced green onions and sesame seeds for garnish
Cooked brown rice or steamed veggies, for serving
[/ingredients]

💡Meal Planning Tip: Save this recipe to automatically generate an organized shopping list with all ingredients sorted by store section—perfect for efficient grocery trips and meal planning.

CookifyAI meal planning interface

Instructions

  1. In a medium bowl, toss the chicken pieces with 1 tablespoon of arrowroot or cornstarch until evenly coated.
  2. Heat the olive oil in a large skillet or wok over medium-high heat. Add the chicken and cook, turning occasionally, until browned and cooked through (about 5–6 minutes). Remove chicken from the skillet and set aside.
  3. In a small bowl, whisk together the orange juice, zest, soy sauce, honey, garlic, ginger, crushed red pepper (if using), water, and remaining tablespoon of arrowroot or cornstarch until well combined.
  4. Pour the sauce into the same skillet. Cook, stirring constantly, until the sauce thickens and becomes glossy (about 2–3 minutes).
  5. Return the cooked chicken to the pan, tossing to coat evenly in the sauce. Heat through for another minute, then remove from heat.
  6. Serve chicken over brown rice or steamed veggies. Garnish with sliced green onions and a sprinkle of sesame seeds.

Weekly Meal Planning

This recipe is ideal for weekly meal prep! Save and schedule this recipe to plan which day you’ll enjoy it and to generate a consolidated, easy-to-follow shopping list for all your weekly meals.

Planning Benefits:

  • Automatically calculates total ingredient quantities across all your planned recipes
  • Organizes shopping lists by grocery section for faster shopping
  • Avoids duplicate purchases and forgotten items
  • Makes healthy meal prep organized and hassle-free

Pro tip: When planning your week, schedule all your recipes so overlapping ingredients (like garlic or rice) are accounted for, ensuring you buy just what you need.

Cook and Prep Times

Prep Time: 15 minutes
Cook Time: 15 minutes
Total Time: 30 minutes

Energize Your Midday: 35+ Wholesome Paleo Lunch Recipes for a Vibrant Day

35+ Delicious Paleo Lunch Recipes for a Healthy, Energized Day

Introduction

Rejuvenate your midday with an energizing paleo lunch that’s both nutritious and flavorful. Paleo recipes embrace whole foods—lean proteins, fresh vegetables, and healthy fats—delivering sustained energy and focus for the rest of your day. With more than 35 handpicked recipes, there’s always something new to keep your lunches exciting and satisfying without grains, dairy, or processed sugars.

Why Paleo Lunches Are a Game Changer

Paleo lunches stand out for their vibrant flavors and satisfying combinations. They provide clean energy, help avoid the post-lunch slump, and support your health goals. Fresh salads, protein-packed bowls, warming soups, and simple wraps ensure you never get bored while staying on track with your wellness. Whether you meal prep for the week or whip up something quick, these paleo recipes are designed to be crowd-pleasers at home or for packed lunches on the go.

Recipe Highlights: Creative and Wholesome

Here’s just a taste of what’s in store:

  • Grilled Chicken and Avocado Salad – juicy, marinated chicken paired with creamy avocado, crisp greens, and a zesty citrus vinaigrette.
  • Turkey Lettuce Wraps – a crunchy, refreshing take on lunch, loaded with lean protein and colorful veggies.
  • Cauliflower Rice Sushi Bowls – all the sushi flavors you love in a light, grain-free bowl.
  • Sweet Potato & Tuna Cakes – crisp on the outside and moist inside, perfect with a tangy paleo mayo.
  • Paleo Thai Basil Beef – savory beef with herbs and veggies, ready in 20 minutes for a quick lunch fix.
  • Avocado Chicken Salad Stuffed Peppers – creamy, protein-rich filling nestled in refreshing bell pepper boats.

Ingredient Staples for Paleo Lunch Success

Having these paleo-friendly ingredients on hand makes delicious lunches effortless:

  • Fresh greens (spinach, arugula, kale, romaine)
  • Lean proteins (chicken, turkey, grass-fed beef, wild salmon, tuna, eggs)
  • Healthy fats (avocado, olive oil, coconut oil, nuts and seeds)
  • Colorful vegetables (peppers, cucumber, cauliflower, sweet potato, carrots, tomatoes)
  • Flavor boosters (lemon, lime, herbs, garlic, ginger, coconut aminos)

💡Meal Planning Tip: Save this entire collection to instantly generate an organized shopping list—ingredients are grouped by store section for hassle-free grocery runs and simplified meal planning.

CookifyAI meal planning interface

Sample Paleo Lunch Recipe: Grilled Chicken & Avocado Salad

Ingredients:

  • 2 grilled chicken breasts, sliced
  • 4 cups mixed greens
  • 1 avocado, sliced
  • 1/2 cucumber, thinly sliced
  • 1/2 red onion, thinly sliced
  • 1/4 cup cherry tomatoes, halved
  • 2 tbsp extra-virgin olive oil
  • 1 tbsp lemon juice
  • Salt, pepper, fresh basil or cilantro
  1. Toss greens, cucumber, red onion, tomatoes, and avocado in a large bowl.
  2. Slice grilled chicken and lay on top.
  3. Whisk olive oil and lemon juice, season; drizzle over salad. Sprinkle with herbs.

Serving Suggestions for a Nourishing Lunch

Serve any of these recipes with a side of sliced seasonal fruit, a crispy handful of roasted nuts, or a cup of homemade bone broth. For portable lunches, use mason jars for layered salads or bento boxes for creative meal assembly.

Nutritional Information and Serving Sizes

Each paleo lunch delivers a balanced macros profile—generally featuring 25-35g protein, plenty of fiber, and healthy fats to keep you full and fueled. Recipes can be doubled for meal prep or adjusted for portions to suit your needs.

Weekly Meal Planning

Planning paleo lunches ahead streamlines your week, reduces stress, and keeps healthy eating on track. Save and schedule these recipes to your CookifyAI meal planner. You’ll enjoy:

  • Automatic ingredient consolidation across recipes
  • Shopping lists sorted by grocery store sections
  • No more food waste or forgotten items
  • Effortless weekly meal prep—you’ll know exactly what and how much to buy!

Pro tip: When planning multiple dishes, schedule your week to see overlaps in ingredients (like avocado or greens), so you buy just the right amount—making smart use of perishables and saving on your food bill.

Cook and Prep Times

Prep Time: Varies by recipe—most under 20 minutes
Cook Time: 10 to 25 minutes per dish (for meal-prepped proteins, as little as five minutes!)
Total Time: 15 to 35 minutes per lunch

With these 35+ delicious paleo lunch recipes, your midday meals can be anything but routine—nourishing your body, saving you time, and keeping you inspired all week long.

Wholesome Egg Roll Bowl: Your Ultimate Gluten-Free & Dairy-Free Meal Prep Solution

Nutritious Meal Prep Egg Roll Bowl (Gluten Free & Dairy Free)

Introduction

Looking for a meal that’s as flavorful as your favorite takeout, but lighter and healthier? This Nutritious Meal Prep Egg Roll Bowl is the answer. Packed with vibrant veggies, lean protein, and satisfying Asian-inspired flavors, these bowls are naturally gluten free, dairy free, and perfect for an easy, make-ahead lunch or dinner. You’ll love how quickly this dish comes together, offering both convenience and crave-worthy taste.

Flavorful & Wholesome Egg Roll Bowls

Unlike traditional egg rolls, this deconstructed bowl skips the deep frying and wheat wrappers, instead focusing on the bold, umami-rich filling. The combination of tender ground turkey or chicken, sautéed cabbage, carrots, and a punchy homemade sauce gives you all the satisfaction of an egg roll, but in a fresher, lighter form—ideal for busy weekdays or anyone following gluten free and dairy free diets.

Crafting the Perfect Egg Roll Bowl

The magic of this recipe is in its flexibility: use your favorite ground protein, mix and match veggies, and adjust the seasonings to suit your palate. Tamari or coconut aminos provide savory depth without gluten, while a hint of sesame oil and ginger delivers authentic Asian flair. Serve with a side of cooked rice (white, brown, or cauliflower) for a complete and filling meal.

Meal Prep for Effortless Healthy Eating

A big advantage of these Egg Roll Bowls is their meal prep friendliness. They reheat beautifully, making them ideal for batch-cooking. Portion them into airtight containers, and you’ll have a delicious, balanced meal ready to grab throughout the week—skipping the midday scramble and takeout temptation.

Serving Suggestions for Egg Roll Bowls

Top your bowls with freshly sliced green onions, a sprinkle of sesame seeds, or a squeeze of lime for added brightness. Like a little heat? Drizzle with sriracha or chili garlic sauce. For a lower-carb version, swap the rice for additional sautéed veggies or cauliflower rice.

Nutritional Information & Serving Size

This recipe yields 4 generous servings, each packed with lean protein and fiber-rich veggies. Without added rice, a serving contains approximately 250-300 calories (depending on your protein and add-ins), with balanced macronutrients and plenty of vitamins and minerals.

Nutritious Meal Prep Egg Roll Bowl (Recap)

This no-fuss bowl delivers all the punchy, satisfying flavors of an egg roll—without the gluten, dairy, or excess calories. Crowds love it for meal prep, and it’s endlessly adaptable to suit your pantry and preferences.

[ingredients]
1 lb ground turkey or chicken (or pork)
1/2 large onion, diced
3 cloves garlic, minced
1 tablespoon fresh ginger, minced
4 cups shredded green cabbage (or coleslaw mix)
1 cup shredded carrots
3 tablespoons gluten free tamari or coconut aminos
1 tablespoon sesame oil
1 tablespoon rice vinegar
1 teaspoon sriracha or chili garlic sauce (optional)
Salt and black pepper, to taste
2 green onions, sliced (for garnish)
1 tablespoon sesame seeds (for garnish)
Cooked rice or cauliflower rice, for serving (optional)
[/ingredients]

💡Meal Planning Tip: Save this recipe to automatically generate an organized shopping list with all ingredients sorted by store section—perfect for efficient grocery trips and meal planning.

CookifyAI meal planning interface

Instructions

  1. Heat a large skillet or wok over medium-high heat. Add the ground turkey or chicken. Cook, breaking it up with a spoon, until browned and cooked through, about 5-6 minutes.
  2. Push the meat to the sides of the pan, then add the diced onion. Cook for 2 minutes until softened. Stir in the garlic and ginger; sauté for 30 seconds until fragrant.
  3. Add the shredded cabbage and carrots. Stir to combine. Cook for 3-4 minutes, stirring occasionally, until the veggies are tender but still crisp.
  4. Pour in the tamari (or coconut aminos), sesame oil, rice vinegar, and sriracha (if using). Toss everything together. Season with salt and pepper to taste. Cook for another 1-2 minutes, until well combined and heated through.
  5. Remove from heat. Serve over cooked rice or cauliflower rice if desired. Garnish with sliced green onions and sesame seeds.
  6. For meal prep, divide the mixture into 4 containers. Let cool before refrigerating. Add rice/cauliflower rice just before eating, or store separately.

Weekly Meal Planning

This Egg Roll Bowl recipe is the ultimate meal prep hero. Save and schedule this recipe to your weekly meal plan and generate smart, consolidated shopping lists for all your planned meals.

Planning Benefits:

  • Automatically calculates total ingredient quantities across all recipes
  • Organizes shopping lists by grocery section for super-efficient trips
  • Keeps you on track with all your gluten & dairy free meal prep goals
  • Avoids duplicate purchases and last-minute dashes to the store

Pro tip: When batching meals for the week, plan your recipes together to see ingredient overlap—like onions, garlic, or fresh ginger—so everything is perfectly portioned and nothing goes to waste.

Cook and Prep Times

Prep Time: 10 minutes
Cook Time: 15 minutes
Total Time: 25 minutes

Nourishing Creamy White Chicken Chili: Your Ultimate AIP & Paleo Comfort Bowl

White Chicken Chili (AIP, Paleo) • Heal Me Delicious

Introduction

White Chicken Chili is celebrated for its creamy texture, subtle heat, and comforting flavors—an ideal choice for anyone seeking a hearty meal without the heaviness of traditional chili. This AIP and Paleo version transforms the classic dish into an allergy-friendly meal, free from nightshades, dairy, and legumes. It’s perfect for cozy family dinners or meal prepping nutritious lunches during colder months, making it a true all-star of healthy home cooking.

Why You’ll Love This White Chicken Chili (AIP, Paleo)

This recipe delivers all the satisfying, creamy goodness of classic white chicken chili without the common allergens. It swaps out beans and dairy for naturally rich flavors from coconut milk, bone broth, and plenty of vegetables. The result is a thick, flavorful chili that’s easy on sensitive systems and crowd-approved for both flavor and comfort.

Building Richness Without Dairy or Nightshades

To create a luscious, creamy base, this chili uses coconut milk and pureed cauliflower—clever swaps that deliver decadence without inflammation triggers. Aromatic herbs and vegetables like leeks, garlic, and zucchini fill the chili with depth, while poached chicken brings in protein. The pureed base melds all the flavors together, ensuring each spoonful is balanced and soothing.

Simple Assembly for a Satisfying Meal

Start by sautéing your aromatics and vegetables, then add chicken thighs and bone broth to poach until tender. Next, blend some of the cooked vegetables and broth with coconut milk and cauliflower for that signature creamy texture. Return everything to the pot, finish with fresh herbs, and enjoy! This one-pot meal comes together in under an hour and feels indulgent while being truly nourishing.

Sensational Serving Suggestions

Top each bowl with an extra swirl of coconut cream, crisped leeks, or a sprinkle of fresh parsley for color and flavor. Pair your chili with a side of roasted sweet potatoes or an AIP-friendly flatbread to mop up every drop. For meal prep, portion into containers with steamed greens or cauliflower rice for a complete, healing lunch.

Nutritional Information and Serving Size

This recipe yields about 4 to 6 generous servings. Each portion contains roughly 350 calories, 25g protein, and plenty of vitamins from the array of vegetables, making it a nourishing option for any meal plan.

White Chicken Chili (AIP, Paleo)—The Perfect Allergy-Friendly Comfort Meal

Brimming with nutrient-rich ingredients and free of common allergens, this white chicken chili is a nourishing, crowd-pleasing staple for anyone following an AIP or Paleo plan. Its creamy texture and mellow flavor profile make it a versatile dish for weeknight dinners and meal prep alike.

[ingredients]
1 lb boneless skinless chicken thighs
4 cups chicken bone broth (AIP or homemade)
1 medium onion, finely diced
2 leeks (white and light green parts), sliced
4 garlic cloves, minced
2 medium zucchini, diced
1 head cauliflower, cut into florets
1 cup full-fat coconut milk
2 Tbsp olive oil or coconut oil
1 tsp dried oregano (AIP compliant)
1 tsp dried thyme
1/2 tsp ground ginger
1/2 tsp sea salt (plus more to taste)
Fresh parsley, chopped (for garnish)
Optional: 1 Tbsp nutritional yeast for umami (AIP reintro/Paleo)
[/ingredients]

💡Meal Planning Tip: Save this recipe to instantly generate a sorted shopping list for stress-free grocery runs and streamlined meal planning—especially helpful when balancing multiple dietary needs in your household.

CookifyAI meal planning interface

Instructions

  1. Heat olive or coconut oil in a heavy-bottomed pot over medium heat. Add onion and leeks; sauté until soft and fragrant, about 5 minutes.
  2. Stir in garlic, oregano, thyme, ginger, and a pinch of sea salt. Cook for 1 minute until aromatic.
  3. Add zucchini and cauliflower florets to the pot. Sauté veggies for 3–4 minutes, then pour in the chicken broth.
  4. Submerge chicken thighs in the broth. Bring to a boil, then reduce to a simmer and cook uncovered for 15–18 minutes, or until chicken is cooked through and vegetables are very tender.
  5. Remove chicken thighs and set aside. Carefully ladle half the vegetables plus about 1 cup of broth into a blender. Add coconut milk and blend until silky. (Alternatively, use an immersion blender in the pot for a partially chunky texture.)
  6. Return blended mixture to the pot. Shred the chicken and stir it into the chili. Simmer another 5–10 minutes to meld flavors. Adjust salt to taste.
  7. Ladle chili into bowls and garnish with fresh parsley. Serve hot and enjoy!

Weekly Meal Planning

White Chicken Chili (AIP, Paleo) is a meal prep superstar—its flavor deepens after a day in the fridge, and it freezes beautifully for future lunches or dinners. Save and schedule this recipe to your meal plan to automatically combine and streamline your shopping list across the week’s dishes, so you always have what you need—no forgotten leeks or unexpected egg shortages!

Planning Benefits:

  • Easily totals and organizes ingredients for all your scheduled recipes
  • Simplifies grocery trips with lists sorted by store sections
  • Prevents double-buying and missed staples
  • Makes meal prepping for special diets like AIP and Paleo painless

Pro tip: When juggling multiple dietary restrictions, use the schedule tool to catch overlapping ingredients. For example, if this chili and another dish both use coconut milk, the planner will sum your needs, saving time and reducing food waste.

Cook and Prep Times

Prep Time: 15 minutes
Cook Time: 30 minutes
Total Time: 45 minutes

Enjoy a bowl of creamy, comforting White Chicken Chili that’s truly as healing as it is delicious—perfect for anyone following an AIP or Paleo lifestyle!

Energize Your Mornings: 5 Creative Paleo Breakfast Recipes & Smart Meal Planning Tips

5 Paleo Breakfast Ideas — Energizing Paleo Meal Plan Favorites

Introduction

Starting your day with a nutrient-rich, energizing breakfast sets a positive tone for healthy eating. These 5 Paleo Breakfast Ideas focus on whole, unprocessed foods packed with protein, healthy fats, and fiber—perfect for anyone following a Paleo meal plan or seeking a naturally energizing breakfast routine. Each idea is designed for flavor, simplicity, and maximum staying power, making them crowd-pleasers for families or on-the-go mornings alike.

Why These Paleo Breakfasts Stand Out

Paleo breakfasts go beyond basic eggs and bacon! These meal ideas offer creative takes on traditional classics—think veggie-packed scrambles, sweet berry bowls, and wholesome muffins, but all free from grains, dairy, and refined sugars. Their satisfying flavors and easy prep will turn even the busiest morning into a nourishing, enjoyable start.

5 Energizing Paleo Breakfast Ideas

  1. Sweet Potato & Kale Breakfast Hash

    Diced sweet potatoes, onions, bell peppers, and kale sautéed together in olive oil, finished with eggs cooked right in the skillet.
  2. Coconut Chia Pudding with Berries

    Chia seeds soaked overnight in coconut milk, topped with a mix of fresh strawberries, blueberries, and sliced almonds.
  3. Paleo Veggie Omelette

    Eggs whipped with spinach, tomatoes, mushrooms, and avocado, cooked gently in ghee for a filling protein-packed meal.
  4. Banana Almond Pancakes

    A batter of mashed bananas, almond flour, eggs, and cinnamon cooked into fluffy pancakes—serve with a drizzle of almond butter!
  5. Savory Breakfast Sausage Patties

    Ground turkey seasoned with herbs and spices, formed into patties and pan-seared—pair with quick-sautéed zucchini ribbons.

[ingredients]
For Sweet Potato & Kale Breakfast Hash:
– 1 large sweet potato, diced
– 1 cup kale, chopped
– 1/2 red onion, chopped
– 1 bell pepper, diced
– 2 tbsp olive oil
– 2 eggs
– Salt and pepper, to taste

For Coconut Chia Pudding:
– 1/4 cup chia seeds
– 1 cup canned coconut milk (unsweetened)
– 1/2 cup mixed berries
– 2 tbsp sliced almonds

For Paleo Veggie Omelette:
– 2 eggs
– 1/4 cup baby spinach
– 1/4 cup cherry tomatoes, halved
– 1/4 cup mushrooms, sliced
– 1/2 avocado, sliced
– 1 tsp ghee

For Banana Almond Pancakes:
– 1 ripe banana, mashed
– 2 eggs
– 1/2 cup almond flour
– 1/2 tsp cinnamon

For Breakfast Sausage Patties:
– 1/2 lb ground turkey
– 1/2 tsp garlic powder
– 1/2 tsp dried sage
– 1/2 tsp smoked paprika
– 1/4 tsp sea salt
– 1 cup zucchini, thinly sliced

[/ingredients]

💡Meal Planning Tip: Save this Paleo breakfast collection to generate a sorted grocery list automatically, organized by store section for faster shopping and effortless weekly meal planning!

CookifyAI meal planning interface

Instructions

  1. Sweet Potato & Kale Breakfast Hash:
    Heat olive oil in a skillet. Sauté sweet potato for 5–7 minutes, then add onion and bell pepper. After 4 minutes, stir in kale. Push veggies to sides, crack eggs in center, cover, and cook until eggs are set. Season with salt and pepper.
  2. Coconut Chia Pudding:
    Mix chia seeds and coconut milk in a jar, cover, and refrigerate overnight. In the morning, stir and top with berries and sliced almonds.
  3. Paleo Veggie Omelette:
    Beat eggs, then stir in spinach, mushrooms, and tomatoes. Heat ghee in a nonstick skillet, pour in egg mixture, and cook on medium until set. Top with avocado before serving.
  4. Banana Almond Pancakes:
    Whisk banana, eggs, almond flour, and cinnamon into a smooth batter. Pour scoops onto a hot skillet; cook 2–3 minutes per side. Serve warm with almond butter (optional).
  5. Breakfast Sausage Patties:
    Mix ground turkey with garlic, sage, paprika, and salt. Form into 4 small patties. Pan-fry over medium heat for 4 minutes per side. Remove patties and sauté zucchini ribbons in the same pan for 2 minutes.

Weekly Meal Planning

Rotating these 5 breakfasts throughout your week brings variety and balanced nutrition to your Paleo meal plan. Save and schedule these ideas in CookifyAI to plan your weeks, consolidate similar ingredients, and generate a smart shopping list for all Paleo meals at once.

Planning Benefits:

  • Calculates total ingredient amounts—buy the right quantity, every time.
  • Organizes shopping lists by store area (produce, protein, pantry, etc).
  • Helps track what you already have on hand to reduce food waste.
  • Makes weekly breakfast meal prep faster and more stress-free.

Pro tip: When planning several meals, organize and cross-link recipes so overlapping ingredients—like eggs or almond flour—are tallied up just once for maximized efficiency.

Cook and Prep Times

Prep time: 10–15 minutes per recipe
Cook time: 10–15 minutes per recipe
Total time per recipe: 20–25 minutes (except Chia Pudding, which soaks overnight)

Enjoy these energizing Paleo breakfast favorites for a deliciously healthy start to each morning!

Paleo Perfection: Nutritious, Kid-Approved Recipes for Happy Family Meals

Easy Paleo Recipes Your Kids Will Love

Introduction

Making nutritious, kid-friendly meals can be a challenge—especially if you’re following a paleo lifestyle. Whether you’re managing food sensitivities or simply want to focus on whole foods, finding recipes that are both healthy and appealing to kids is key. These easy paleo recipes strike the perfect balance: they’re packed with flavor, simple to prepare, and designed specifically with young appetites in mind. From breakfast to dinner, each dish is crafted to be a hit at the family table!

Why These Paleo Recipes Work for Kids

Paleo-inspired meals often highlight fresh ingredients and naturally sweet flavors, making them a win with children. Think savory chicken nuggets with a crispy almond flour coating, zesty veggie-packed stir fries, and snack bars sweetened with dates—not sugar. These dishes skip common allergens and refined sugars but don’t compromise on the fun or taste factor, ensuring meal times are both stress-free and delicious.

Sample Easy Paleo Recipe: Chicken Tenders with Veggies

One of the all-time kid favorites gets a simple paleo makeover. These chicken tenders are coated in almond flour and baked for a crunchy finish, while a colorful mix of roasted veggies rounds out the meal.

[ingredients]
– 1 lb chicken breast, cut into strips
– 1 cup almond flour
– 1/2 tsp paprika
– 1/2 tsp garlic powder
– 1/2 tsp sea salt
– 2 eggs, beaten
– 2 tbsp olive oil
– 2 cups broccoli florets
– 2 carrots, sliced
– 1 red bell pepper, chopped
– 1 tbsp olive oil (for veggies)
[/ingredients]

💡Meal Planning Tip: Save this recipe with CookifyAI to automatically generate a shopping list tailored for your weekly grocery run. All your ingredients organized by aisle saves time and keeps meal prep stress free!

CookifyAI meal planning interface

Instructions

  1. Preheat your oven to 400°F and line two baking sheets with parchment.
  2. In one shallow bowl, beat the eggs. In another, mix almond flour with paprika, garlic powder, and salt.
  3. Dip chicken strips first in the egg, then dredge in the almond flour mixture. Place on one baking sheet and drizzle with olive oil.
  4. On the second baking sheet, toss veggies with olive oil and a pinch of salt.
  5. Bake both sheets for 18–20 minutes, flipping chicken halfway through. Veggies should be tender and chicken golden brown.

More Paleo Kids’ Meal Ideas

  • Fruit & Nut Snack Bites: Blend dates, nuts, and shredded coconut together, roll into balls, and chill for an on-the-go treat.
  • Paleo Breakfast Pancakes: Combine mashed bananas, eggs, and a sprinkle of cinnamon for simple pancakes kids can top with berries.
  • Turkey & Veggie Meatballs: Mix ground turkey with chopped spinach and bake for a protein-packed lunchbox favorite.

Serving and Customizing Your Paleo Meals

Let kids get creative by offering simple dipping sauces (try homemade paleo ketchup or guacamole). Mix up the veggies based on what your kids enjoy, or add sweet potato fries for a twist. These recipes are flexible for picky eaters and can be prepped ahead for busy days.

Nutritional Information and Serving Size

Each batch of chicken tenders with veggies serves about 4 and contains approximately 280–350 calories per serving, depending on side choices and portion sizes. These recipes are also naturally gluten-free and dairy-free, aligning with common paleo guidelines.

Easy Paleo Recipes Kids Love (Recap)

With easy-to-find ingredients, minimal prep, and loads of kid-approved flavor, these paleo recipes make healthy eating both accessible and fun for the whole family. They’re crowd-pleasers designed to make parents’ lives easier and kids’ meals more exciting.

Weekly Meal Planning

Family meal planning is a breeze when you have a collection of easy paleo recipes ready to go. Schedule these recipes with CookifyAI to plan ahead, consolidate shopping lists, and adjust servings to fit your family’s needs all week long.

Planning Benefits:

  • Easily calculate ingredient quantities for the week to avoid overbuying
  • Consolidate all your recipes and shopping lists in one place
  • Organize your grocery list by store section for greater convenience
  • Effortlessly plan lunches, snacks, and dinners for hungry kids (and adults!)

Pro tip: When you add all your weekly paleo meals to CookifyAI, overlapping ingredients like eggs, veggies, and nuts are automatically combined—eliminating food waste and last-minute trips to the store!

Cook and Prep Times

Prep Time: 15 minutes
Cook Time: 20 minutes
Total Time: 35 minutes

Your family’s next favorite meal is just a recipe away—enjoy delicious, easy paleo dishes that are sure to be a hit with your kids!

Elevate Your Paleo Game: 5 Irresistible Salad Recipes for Fresh, Flavor-Packed Meals

5 Paleo Salad Recipes — Easy Paleo Recipes You’ll Crave

Introduction

Looking for a delicious and nourishing way to stick to your Paleo lifestyle? These 5 Paleo Salad Recipes deliver packed flavors, fresh ingredients, and satisfying textures in every bite—all while keeping things simple, clean, and truly crave-worthy. Perfect for meal prep, a quick lunch, or a crowd-pleasing dinner side, these salads are designed to make healthy eating a highlight of your day.

Why These Paleo Salad Recipes Stand Out

Each salad is crafted to maximize flavor and nutrition, featuring a mix of vibrant veggies, lean proteins, healthy fats, and zesty dressings. Whether you’re new to Paleo or a seasoned pro, these easy recipes introduce variety and excitement into your weekly routine—making healthy choices truly delicious.

Our 5 Must-Try Paleo Salad Recipes

  • Avocado Chicken Salad with Lime
  • Rainbow Veggie Crunch Salad
  • Simple Steak & Arugula Salad
  • Shredded Cabbage & Egg Salad
  • Smoky Salmon & Avocado Bowl

Essential Paleo Salad Ingredients

  • 2 cups cooked, shredded chicken breast
  • 2 ripe avocados, diced
  • 1 lime, juiced
  • 2 cups mixed greens (spinach, arugula, or kale)
  • 1 cup cherry tomatoes, halved
  • 1 medium cucumber, diced
  • 1 red bell pepper, sliced
  • 1 lb flank steak (for steak salad)
  • 4 cups baby arugula
  • 3 cups red or green cabbage, shredded
  • 4 hard-boiled eggs, chopped
  • 1 cup cooked wild-caught salmon, flaked
  • Olive oil, sea salt, pepper, garlic powder, and your favorite fresh herbs

💡Meal Planning Tip: Save these recipes to instantly generate a streamlined shopping list—each ingredient organized by store section for effortless meal planning and efficient grocery runs.

CookifyAI meal planning interface

Instructions

1. Avocado Chicken Salad with Lime

  1. In a large bowl, combine shredded chicken and diced avocados. Add lime juice, a drizzle of olive oil, and sea salt. Toss gently. Serve on a bed of mixed greens.

2. Rainbow Veggie Crunch Salad

  1. Combine cherry tomatoes, cucumber, red bell pepper, and mixed greens. Add a splash of olive oil, salt, and cracked black pepper. Toss and top with fresh herbs like parsley or basil.

3. Simple Steak & Arugula Salad

  1. Season flank steak with garlic powder, salt, and pepper. Grill or pan-sear to your liking, let rest, and slice thinly. Serve over a bed of arugula with olive oil and a squeeze of lemon.

4. Shredded Cabbage & Egg Salad

  1. In a bowl, mix shredded cabbage and chopped eggs. Add a drizzle of olive oil and season with sea salt and black pepper. For extra tang, add a splash of apple cider vinegar.

5. Smoky Salmon & Avocado Bowl

  1. Arrange wild-caught flaked salmon and diced avocado over mixed greens. Drizzle lightly with olive oil and sprinkle with smoked paprika or your favorite dried herbs.

Serving Suggestions for Paleo Salad Success

Pair any of these salads with Paleo-friendly soup or roasted vegetables for a complete meal. For a picnic or work lunch, store dressings separately and toss just before eating to keep greens crisp.

Nutritional Information and Serving Size

Each recipe yields 2 servings. With lean protein, healthy fats, and a bounty of veggies, each serving ranges from 250–400 calories—filling, energizing, and completely free from grains, dairy, or processed sugars.

5 Paleo Salad Recipes — The Recap

These crave-worthy Paleo salads prove that clean, whole-foods-based meals don’t have to be boring. With crisp veggies, zesty dressings, and protein-packed ingredients, you’ll look forward to every bite—making it easy to stay on track and satisfied.

Weekly Meal Planning

These 5 Paleo salads are ideal for weekly meal prep and planning. Save and schedule these recipes to map out your week, ensure variety, and generate a consolidated grocery list that prevents missed ingredients and waste.

Planning Benefits:

  • Combines overlapping ingredients for easy bulk buying
  • Organizes items by grocery section for quicker, less stressful shopping trips
  • Makes meal-prep day a breeze—just follow your list!
  • Helps you stick to healthy eating all week

Pro tip: Schedule all 5 salads in your weekly plan to see exactly how much chicken, eggs, or greens you need, reducing food waste and keeping you organized.

Cook and Prep Times

Prep Time: 15–20 minutes per salad
Cook Time: 0–10 minutes (if including grilled meats)
Total Time: 15–25 minutes per recipe

Enjoy these fresh, vibrant, and satisfying Paleo salads—your taste buds (and weekly routine) will thank you!

Slow Cooker Beef Stroganoff: Hearty Comfort for Effortless Family Dinners

Slow Cooker Beef Stroganoff: Comforting Recipe for Family Dinners

Introduction

Few dishes evoke comfort and warmth quite like classic Beef Stroganoff—and preparing it in the slow cooker makes this hearty favorite even simpler for busy families. This Slow Cooker Beef Stroganoff promises fork-tender beef, a rich, savory sauce, and an effortless cooking method. It’s a true crowd-pleaser: serve it for a cozy weeknight dinner or a relaxed weekend gathering, and watch it disappear fast.

Why Slow Cooker Beef Stroganoff Stands Out

What makes this version shine is the slow simmer: tender morsels of beef stew for hours in a creamy, mushroom-rich sauce, absorbing every ounce of flavor. This hands-off method ensures melt-in-your-mouth results and a fuss-free meal that doesn’t sacrifice depth or heartiness. Plus, it’s incredibly versatile—serve over egg noodles, mashed potatoes, or rice, and enjoy a comforting classic that satisfies every time.

Building the Perfect Stroganoff Sauce

The sauce is the secret hero here—a blend of savory beef broth, herbs, tangy sour cream, and umami from sautéed mushrooms. For extra flavor, a dash of mustard and Worcestershire sauce add complexity. Be sure to stir in the sour cream just before serving to keep the sauce velvety and smooth. Let everything warm together in the slow cooker, and enjoy the mouthwatering aroma as dinner time approaches.

How to Assemble a Classic Beef Stroganoff Dinner

Begin by browning the beef and sautéing the onions and mushrooms for a deeper, more developed base. Then, everything goes into the slow cooker—set it, forget it, and let the appliance do the work. When ready, simply toss the cooked beef sauce with your favorite noodles or starch, and top with a sprinkle of fresh parsley. It’s the ultimate no-stress, family-friendly meal.

Serving Suggestions for Comforting Family Dinners

Pair this hearty Beef Stroganoff with buttered egg noodles, creamy mashed potatoes, or fluffy rice. Add a crisp green salad or steamed veggies for balance, and maybe a warm roll to soak up the extra sauce. It’s comforting, filling, and ideal for both kids and adults. This recipe also keeps well, making it a great leftover option for lunch the next day.

Nutritional Information and Serving Size

This slow cooker recipe yields about 6 ample servings. With lean beef and plenty of mushrooms, each portion offers solid protein and nutrients, typically around 350–400 calories per serving (excluding noodles). It’s rich enough for an occasional indulgence—perfect for weekends or “treat yourself” dinners!

Slow Cooker Beef Stroganoff (Recap)

This savory, slow-cooked beauty delivers comfort and flavor without fuss—tender beef, luscious sauce, and easy prep make it a winning choice for family dinners. Serve, savor, and make it part of your regular meal rotation.

[ingredients]
2 pounds beef stew meat, cut into bite-size pieces
1 medium onion, diced
3 cloves garlic, minced
8 ounces mushrooms, sliced
1 cup beef broth
1 tablespoon Worcestershire sauce
1 tablespoon Dijon mustard
1 teaspoon salt
1/2 teaspoon black pepper
1 teaspoon paprika
1 tablespoon cornstarch (optional, for thickening)
1/2 cup sour cream
8 ounces wide egg noodles (for serving)
Fresh parsley, chopped (for garnish)
[/ingredients]

💡Meal Planning Tip: Save this recipe to automatically generate an organized shopping list with all ingredients sorted by store section—perfect for efficient grocery trips and streamlined meal planning.

CookifyAI meal planning interface

Instructions

  1. Optional but recommended: In a large skillet over medium-high heat, brown the beef in batches to develop flavor. Transfer browned beef to your slow cooker.
  2. In the same skillet, sauté onions and garlic until fragrant; add mushrooms and cook until softened, about 3–5 minutes. Transfer mixture to the slow cooker as well.
  3. Add beef broth, Worcestershire sauce, Dijon mustard, salt, black pepper, and paprika. Stir to combine all ingredients.
  4. Cover and cook on low for 7–8 hours, or on high for 4–5 hours, until the beef is fork-tender.
  5. If you prefer a thicker sauce, in the last 30 minutes, stir in a slurry made by dissolving cornstarch in 2 tablespoons of cold water.
  6. Just before serving, stir in the sour cream until the sauce is creamy and smooth. Adjust seasoning as needed.
  7. Meanwhile, cook the egg noodles according to package instructions.
  8. Serve the beef stroganoff over noodles, topped with fresh parsley.

Weekly Meal Planning

This Slow Cooker Beef Stroganoff is ideal for meal planning and batch cooking. Double the recipe for freezer-friendly leftovers, or schedule it on a busy weeknight for an effortless family meal. Save and schedule this recipe in CookifyAI to instantly generate and consolidate your shopping lists across all your meals for the week.

Planning Benefits:

  • Automatically tallies up ingredient amounts across planned recipes
  • Organizes your grocery list by store aisle for faster shopping
  • Prevents duplicate purchases and missing items
  • Simplifies your weekly meal prep and budgeting

Pro tip: Use CookifyAI’s scheduling feature to spot ingredient overlap—if this recipe shares onions or garlic with other meals, the shopping list will show your total need—no more guessing, no more waste.

Cook and Prep Times

Prep Time: 20 minutes
Cook Time: 7–8 hours (low) or 4–5 hours (high)
Total Time: 7.5–8.5 hours (low) or 4.5–5.5 hours (high)

Slow Cooker Italian Beef: The Ultimate Tender, Juicy & Flavor-Packed Recipe for Weeknight Delights

The Best Slow Cooker Italian Beef – Tender, Juicy & Flavor-Packed!

Introduction

If you’re seeking a hands-off dinner that doesn’t sacrifice flavor for convenience, The Best Slow Cooker Italian Beef is the answer. This recipe delivers fork-tender, juicy beef infused with a bold Italian seasoning blend and tangy peppers—a comfort food classic perfect for sandwiches, meal bowls, or hearty weeknight suppers. With minimal prep and a slow cooker doing most of the work, it’s a surefire crowd pleaser ideal for a family meal or casual get-together.

Why This Italian Beef Is a Must-Try

What sets this Italian beef apart is its combination of melt-in-your-mouth texture and layers of rich, robust flavor. Browned chuck roast slowly simmers in zesty pepperoncini brine, aromatic garlic, and Italian herbs, transforming into juicy shreds that are bursting with savory goodness. Whether piled onto crusty rolls or served with roasted vegetables, this dish brings unbeatable taste with very little effort.

Building Bold Italian Flavors

The key to authentic Italian beef lies in the blend of seasonings and the tang of pickled peppers. Pepperoncini or giardiniera add classic zest, while a mix of dried oregano, basil, and parsley infuses every bite. The beef simmers long and slow, letting all those flavors meld into a deeply savory, crave-worthy dish. For an extra kick, don’t be shy about adding more peppers to suit your spice preference!

Effortless Slow Cooker Preparation

Lightly searing the beef at the start helps lock in juices and develop a richer flavor, but you can also skip this step for a super-simple prep. Afterward, the meat and seasonings go straight into the slow cooker, where they need little more than an occasional stir. Six to eight hours later, you’ll have perfectly shreddable, tender beef ready for any meal.

Serving Suggestions for the Ultimate Italian Beef

Transform your juicy Italian beef into classic Chicago-style sandwiches by piling it onto hoagie buns and topping with provolone or mozzarella. For a lower-carb option, serve the beef over sautéed peppers or cauliflower rice. It also shines as a pizza or baked potato topping. Don’t forget extra pepperoncini and giardiniera for a tangy, crunchy finish!

Nutritional Information and Serving Size

This recipe yields 8 generous servings. Each serving (without bread or cheese) contains approximately 350 to 400 calories, with a protein-rich, satisfying profile that makes it a complete meal option.

The Best Slow Cooker Italian Beef (Recap)

This slow cooker Italian beef stands out for its fork-tender texture and bold, zesty flavor. Reliable, hands-off, and easy to customize—this is the crowd-pleasing recipe you’ll reach for time again.

[ingredients]
3 to 4 pounds beef chuck roast
1 tablespoon olive oil
1 tablespoon dried Italian seasoning
1 teaspoon garlic powder
1 teaspoon onion powder
1 teaspoon dried basil
1/2 teaspoon dried oregano
1 teaspoon salt
1/2 teaspoon black pepper
1 cup beef broth
1 (12 oz) jar pepperoncini peppers (with liquid)
Optional: 1/2 cup sliced giardiniera (hot or mild)
Hoagie rolls or sandwich buns, for serving
Sliced provolone or mozzarella cheese (optional)
[/ingredients]

💡Meal Planning Tip: Save this recipe to automatically generate an organized shopping list with all ingredients sorted by store section—perfect for efficient grocery trips and meal planning.

CookifyAI meal planning interface

Instructions

  1. Season the chuck roast generously with salt, pepper, Italian seasoning, garlic powder, onion powder, basil, and oregano.
  2. (Optional) Heat olive oil in a large skillet over medium-high heat. Sear the beef for 2–3 minutes per side until just browned. Transfer to slow cooker.
  3. Pour in beef broth and the entire jar of pepperoncini peppers with their liquid. Add giardiniera if using, and gently stir to combine.
  4. Cover and cook on LOW for 8–9 hours, or on HIGH for 4–5 hours, until the beef is fall-apart tender and shreds easily with a fork.
  5. Shred the meat in the slow cooker, mixing it with the cooking juices for maximum flavor.
  6. To serve, pile hot shredded beef onto hoagie rolls and top with provolone or mozzarella cheese, if desired. Spoon extra broth over the top for a classic “wet” sandwich, or serve with a side of peppers and veggies as preferred.

Weekly Meal Planning

This Italian beef recipe is a meal prep superstar. Make a large batch and enjoy it in different ways throughout the week—turn leftovers into soups, quesadillas, or freeze for another busy night. Save and schedule this recipe to plan your week’s meals and generate smart, consolidated shopping lists.

Planning Benefits:

  • Calculates total ingredient quantities across all saved recipes
  • Sorts your shopping list by store section to save time
  • Helps reduce food waste by preventing duplicate purchases
  • Makes meal prep manageable, organized, and stress-free

Pro tip: Schedule your recipes in CookifyAI to see overlapping ingredients, helping you buy exactly what you need for the week.

Cook and Prep Times

Prep Time: 15 minutes
Cook Time: 8 hours (LOW) or 4–5 hours (HIGH)
Total Time: About 8–9 hours

With its rich flavor, effortless prep, and versatile serving options, The Best Slow Cooker Italian Beef is a guaranteed hit for any weeknight or special occasion—let your slow cooker do the work and enjoy more time at the table!

25-Minute Paleo Chicken Teriyaki: Fast, Flavorful Takeout at Home

25-Minute Paleo Chicken Teriyaki That Tastes Like Takeout

Introduction

If you crave the bold, savory-sweet flavors of your favorite takeout meal but want to avoid hidden sugars, grains, or questionable ingredients, this 25-Minute Paleo Chicken Teriyaki is your new weeknight hero. This recipe nails that classic restaurant taste with a wholesome homemade teriyaki sauce, lean chicken, and fresh vegetables. It’s perfect for those following a Paleo lifestyle—or anyone wanting a cleaner, tastier spin on a timeless dish.

Flavorful and Fast: Why You’ll Love This Paleo Teriyaki

What sets this recipe apart is its rich, glossy sauce made with coconut aminos, fresh ginger, and just the right touch of natural sweetness. The chicken cooks up tender and juicy, while a vibrant mix of vegetables delivers color and crunch—all in 25 minutes. It’s a better-than-takeout crowd pleaser you’ll come back to again and again.

Paleo Teriyaki Sauce: Naturally Good

Classic teriyaki sauces rely on soy sauce and refined sugars, but this Paleo-friendly version swaps in coconut aminos for deep umami flavor and natural, minimally processed sweeteners (like honey or pure maple syrup). Fresh garlic and ginger add aromatic complexity, while a dash of apple cider vinegar brightens it all up. This sauce thickens beautifully in minutes and clings to every piece of chicken.

Quick Assembly of Your Takeout-Style Teriyaki

Start by searing chicken pieces for a crispy, golden exterior. Add your choice of veggies—like broccoli, snap peas, or bell peppers—for extra nutrients and color. Toss everything together with your homemade teriyaki sauce and simmer briefly until glossy and irresistible. Your meal is ready in less time than it takes for delivery to arrive.

How to Serve This Irresistible Paleo Chicken Teriyaki

Complete the meal by serving over cauliflower rice for a classic takeout vibe minus the grains. Garnish with toasted sesame seeds and chopped scallions. For extra crunch, add shredded carrots or sliced snap peas to the pan just before finishing the dish. This recipe is equally perfect for family dinners or make-ahead meal prep.

Nutritional Information and Serving Size

This recipe yields 4 generous servings. Each serving contains roughly 285 calories, 33g protein, 9g fat, and 14g carbohydrates (mostly from vegetables and natural sweetener). It’s gluten-free, dairy-free, and strictly Paleo—a guilt-free way to satisfy your teriyaki cravings!

25-Minute Paleo Chicken Teriyaki Recap

Ready in under half an hour, this meal delivers the signature glossy, umami-packed teriyaki flavor you love, all while keeping it wholesome and Paleo-compliant. Easy, fast, and totally delicious—your weeknight solution is here.

[ingredients]
1 1/2 lbs boneless, skinless chicken breasts or thighs, cut into bite-size pieces
1 tbsp arrowroot starch
2 tbsp coconut oil (or avocado oil)
1/4 cup coconut aminos (Paleo-friendly soy sauce alternative)
2 tbsp honey (or pure maple syrup)
2 tbsp apple cider vinegar
1 tbsp fresh ginger, grated
2 large garlic cloves, minced
1/4 cup water
1 tsp toasted sesame oil
3 cups broccoli florets (or a mix of your favorite stir-fry vegetables)
Salt and pepper, to taste
Optional garnishes: Sliced scallions, sesame seeds, crushed red pepper
[/ingredients]

💡Meal Planning Tip: Save this recipe to automatically generate an organized shopping list with all ingredients sorted by store section—perfect for efficient grocery trips and meal planning.

CookifyAI meal planning interface

Instructions

  1. In a medium bowl, toss the chicken pieces with arrowroot starch, a pinch of salt, and pepper.
  2. Heat coconut oil in a large skillet or wok over medium-high heat. Add chicken and cook, flipping occasionally, until golden and cooked through (about 6-8 minutes). Remove to a plate.
  3. In the same pan, add broccoli (and any additional vegetables). Stir-fry for 2-3 minutes until vibrant and just tender.
  4. While veggies cook, whisk together coconut aminos, honey, apple cider vinegar, grated ginger, minced garlic, water, and sesame oil in a small bowl.
  5. Return chicken to the pan, then pour the teriyaki sauce over everything. Stir and simmer for 2-4 minutes, or until the sauce thickens and coats the chicken and veggies evenly.
  6. Taste and adjust seasoning as needed. Remove from heat and garnish with scallions, sesame seeds, and crushed red pepper (if desired).
  7. Serve hot over cauliflower rice or Paleo-friendly sides.

Weekly Meal Planning

This quick-cooking Paleo Chicken Teriyaki is an ideal candidate for weekly meal prep. Save and schedule this recipe to plan exactly which days you want it and generate streamlined shopping lists that cover all your planned meals for the week.

Key Planning Benefits:

– Automatically calculates total ingredient needs across recipes
– Clusters grocery lists by store section (produce, meats, condiments—no backtracking in the aisles!)
– Cuts back on duplicate purchases and forgotten items
– Makes prepping multiple, balanced Paleo meals a breeze

Pro tip: By planning your meals in CookifyAI, you can see ingredient overlaps (like coconut aminos or fresh veggies) so you buy just what you need—reducing both cost and food waste. Schedule your week and confidently check off every ingredient as you go.

Cook and Prep Times

Prep Time: 10 minutes
Cook Time: 15 minutes
Total Time: 25 minutes

Enjoy delicious, healthy takeout flavor at home—fast, easy, and Paleo!

Cozy Comfort in a Bowl: The Ultimate Slow Cooker Beef Stroganoff Experience

Slow Cooker Beef Stroganoff for Cozy Nights

Introduction

There’s nothing quite like coming home to the comforting aroma of tender beef smothered in a rich, creamy sauce. This Slow Cooker Beef Stroganoff for Cozy Nights recipe delivers indulgent flavor with minimal effort—simply set it and forget it! Ideal for family dinners or cold evenings when you crave a hearty, soul-warming meal, this dish is perfect for making your nights feel extra special.

Deliciously Unique Slow Cooker Beef Stroganoff

What sets this slow cooker stroganoff apart is the melt-in-your-mouth beef that simmers for hours in a luscious mushroom and onion gravy, then gets finished with tangy sour cream for a signature silky texture. Served over egg noodles or rice, this meal is a proven crowd-pleaser—the ultimate warming dish when comfort is a must.

Preparing the Perfect Stroganoff Sauce

The magic begins with browning the beef for added flavor before layering it in your slow cooker. Aromatic onions, garlic, and mushrooms release rich, earthy notes as they cook, melding beautifully with beef broth and simple pantry spices. Finish with sour cream for a luxurious, creamy finish that ties everything together—perfect for spooning over wide noodles.

Assembling Your Slow Cooker Beef Stroganoff

When it comes to putting this dish together, simply add the browned beef, sautéed mushrooms, and aromatics to your slow cooker, pour in the broth, and let the slow heat work its magic. Hours later, a quick stir in of the sour cream transforms the sauce into a velvety masterpiece, ready to ladle onto plates.

Serving Suggestions for a Show Stopping Stroganoff

Spoon your slow cooker beef stroganoff over buttered egg noodles, creamy mashed potatoes, or fluffy rice. Garnish with freshly chopped parsley for a burst of color and freshness. Pair with a light green salad or steamed veggies to balance the rich flavors—this meal will make any dinner feel extra cozy and delicious.

Nutritional Information and Serving Size

This recipe yields about 6 generous servings. Each serving is approximately 420 calories (not including noodles or rice), with balanced protein and moderate fat. It’s a hearty meal perfect for chilly nights—a filling option that keeps everyone satisfied.

Deliciously Unique Slow Cooker Beef Stroganoff (Recap)

This recipe delivers unbeatable tenderness and classic savory flavor—slow-cooked bliss in every bite. When life gets busy, let your slow cooker do the work and enjoy a comforting, reliable dinner that always thrills.

[ingredients]
2 pounds beef stew meat, cut into 1-inch cubes
1 tablespoon olive oil
1 onion, finely chopped
3 cloves garlic, minced
12 ounces mushrooms, sliced
2 cups beef broth
1 tablespoon Worcestershire sauce
1 teaspoon Dijon mustard
1/2 teaspoon dried thyme
Salt & black pepper, to taste
3 tablespoons cornstarch (or flour)
1/4 cup water
1 cup sour cream
12 ounces egg noodles, cooked (for serving)
Fresh parsley, for garnish
[/ingredients]

💡Meal Planning Tip: Save this recipe to automatically generate an organized shopping list with all ingredients sorted by store section—perfect for efficient grocery trips and meal planning.

CookifyAI meal planning interface

Instructions

  1. In a large skillet, heat olive oil over medium-high heat. Sear the beef cubes in batches, browning them on all sides (about 2-3 minutes per batch). Transfer browned beef into your slow cooker.
  2. Add the chopped onion, garlic, and mushrooms to the same skillet. Sauté for 3-4 minutes until onions are softened. Add to the slow cooker.
  3. Pour in the beef broth, Worcestershire sauce, Dijon mustard, dried thyme, salt, and pepper. Stir until well combined.
  4. Cover and cook on low for 7-8 hours, or on high for 4 hours, until the beef is tender.
  5. In a small bowl, whisk together cornstarch and water. Stir the slurry into the slow cooker, cover, and cook on high for an additional 20-30 minutes until the sauce thickens.
  6. Right before serving, stir in the sour cream until smooth and creamy. Taste and adjust seasoning as needed.
  7. Serve hot over egg noodles, mashed potatoes, or rice. Sprinkle with fresh parsley for garnish.

Weekly Meal Planning

This Slow Cooker Beef Stroganoff shines as a make-ahead meal—prepare it on Sunday and enjoy fuss-free leftovers or quick meals during the week. Save and schedule this recipe to effortlessly add it to your meal plan, consolidate shopping lists, and see ingredient overlaps with your other planned dinners.

Planning Benefits:

  • Automatically calculates overall ingredient quantities for multiple recipes
  • Keeps your shopping list organized by departments—no more wasted time in store aisles
  • Reduces hassle and prevents missed or duplicate ingredients
  • Makes weekly meal routines predictable and smooth

Pro tip: Schedule your recipes in advance to take advantage of overlapping ingredients—saving money and reducing waste!

Cook and Prep Times

Prep Time: 20 minutes
Cook Time: 7-8 hours (low) or 4 hours (high)
Total Time: About 8-8.5 hours (including finishing steps)

One Week Paleo Plan: Savor the Simplicity of Clean, Flavor-Packed Meals

One Week Paleo Plan (Simple Meals, Big Flavor, Clean Eating)

Introduction

Embark on a week of revitalizing, flavorful, and wholesome meals with this One Week Paleo Plan. Rooted in the simplicity of clean eating, this menu is designed to deliver big flavor with minimal fuss—perfect for anyone seeking to boost their energy, ditch processed foods, and streamline mealtimes. Each meal is made from nutrient-dense ingredients, focusing on lean proteins, vibrant vegetables, healthy fats, and natural seasonings for a satisfying and nourishing week.

Why This One Week Paleo Plan Works

The beauty of a paleo plan is its foundation in whole foods and natural ingredients, making every meal both simple and powerful in flavor. This week-long menu eliminates guesswork with easy recipes that are naturally gluten- and dairy-free, packed with satisfying protein, and loaded with colorful produce. It’s a crowd-pleasing approach to eating clean without sacrificing taste—ideal for families or individuals looking to refresh their routine.

Smart Shopping and Meal Prep

To make your week seamless, this guide includes a consolidated grocery list tailored to the paleo-friendly pantry. Preparing ingredients like roasted veggies, grilled proteins, and hearty salads in advance can help you stick to your goals and enjoy effortless meals throughout the busy week.

One Week Paleo Sample Menu

Here’s a snapshot of your delicious paleo week—mix, match, and adjust as needed:

Day 1: Grilled Lemon-Herb Chicken with Roasted Sweet Potatoes and Steamed Broccoli
Day 2: Ground Turkey Lettuce Wraps with Avocado and Fresh Salsa
Day 3: Salmon Fillets with Garlic Asparagus and Cauliflower Mash
Day 4: Shredded Beef Taco Bowls (using cauliflower rice) with Pico de Gallo
Day 5: Baked Egg “Muffins” with Spinach, Tomato, and Bell Pepper (great for breakfast or lunch!)
Day 6: Zoodle (zucchini noodles) Stir-Fry with Chicken, Peppers, and Coconut Aminos
Day 7: Sheet Pan Roast: Chicken Thighs, Brussels Sprouts, Sweet Onions, and Carrots

[ingredients]

  • 2 lbs boneless, skinless chicken breasts or thighs
  • 1 lb ground turkey
  • 2 salmon fillets (about 1 lb total)
  • 1 lb beef roast (for shredding)
  • 12 large eggs
  • 4 medium sweet potatoes
  • 1 large head cauliflower
  • 4 avocados
  • 2 heads of romaine or butter lettuce
  • 1 bunch asparagus
  • 2 bell peppers
  • 1 pint cherry tomatoes
  • 1 large onion (or 2 small)
  • 1 bunch spinach
  • 1 bag broccoli florets (fresh or frozen)
  • 1 lb Brussels sprouts
  • 3-4 carrots
  • 2 zucchini (for zoodles)
  • 1 lemon
  • Fresh herbs: parsley, basil, oregano
  • Olive oil, coconut oil, or avocado oil
  • Coconut aminos (as a soy-free stir-fry sauce)
  • Salt, pepper, garlic, and preferred spices

[/ingredients]

💡Meal Planning Tip: Save this meal plan to instantly generate a organized, grocery store–friendly shopping list with everything sorted by section for maximum efficiency and stress-free meal prep. Never forget an ingredient again!

CookifyAI meal planning interface

Instructions: Prep and Cook Like a Pro

  1. Batch Prep Veggies: Wash, chop, and store veggies in airtight containers for easy access throughout the week.
  2. Marinate Proteins: Toss chicken or beef with olive oil, lemon juice, garlic, and fresh herbs. Marinate for at least 30 minutes or overnight for maximum flavor.
  3. Cook in Batches: Grill, roast, or bake proteins and veggies in advance. For breakfasts, bake egg “muffins” in a muffin tin and reheat as needed.
  4. Assemble Meals: Each day, combine prepped ingredients as outlined in the daily menu—just reheat, assemble, and garnish with fresh herbs, avocado, or salsa.
  5. Stir-Fry Night: Spiralize zoodles and sauté with prepped chicken, peppers, and coconut aminos for a speedy, healthy dinner.
  6. Beef Bowls: Use a slow cooker or pressure cooker for shredded beef, serve over cauliflower rice, and top with fresh salsa or pico de gallo.
  7. Final Touch: Add an extra squeeze of lemon or lime, a drizzle of olive oil, or a sprinkle of fresh herbs before serving to boost flavor and presentation.

Weekly Meal Planning

Taking on a full week of clean eating is easier when you plan ahead. Save and schedule your One Week Paleo Plan with CookifyAI and enjoy seamless meal planning features:

  • Comprehensive shopping lists that combine all ingredients from your weekly meals
  • Items sorted by grocery store sections for quick shopping trips
  • Automated calculation of ingredient totals—no more overbuying or running short
  • Drag-and-drop calendar lets you adjust your meal schedule with ease

Pro tip: Planning multiple meals? Add your favorite paleo recipes to the schedule—CookifyAI will instantly show where ingredients overlap, helping you reduce food waste and stay on budget.

Cook and Prep Times

Prep Time (batch for the week): 1 hour
Cook Time (per meal): 15–30 minutes
Total Weekly Time: 3–4 hours (including batch prep and nightly final assembly)

This One Week Paleo Plan delivers delicious meals, efficient prep, and ultimate convenience for anyone ready to enjoy simple, flavorful, and clean eating all week long!

Cozy Comfort: The Ultimate Crockpot Pot Roast Recipe

Crockpot Pot Roast Recipe

Introduction

Nothing says comfort quite like a classic Crockpot Pot Roast Recipe: tender beef, perfectly cooked vegetables, and a savory gravy all slow-cooked to perfection. With minimal prep and maximum flavor, this dish transforms a few simple ingredients into a hearty, satisfying meal the whole family will love. Perfect for busy weeknights, Sunday dinners, or any day you want a fuss-free meal with a big payoff.

Deliciously Unique Pot Roast Slow Cooker Inspiration

This pot roast stands out among slow cooker pot roast recipes thanks to its foolproof technique and harmonious blend of flavors. By letting the roast cook low and slow, you’ll unlock unbeatable tenderness—an ideal method for both well-marbled chuck roasts and leaner cuts. The vegetables soak up all the savory goodness, creating a complete meal in one pot that’s as easy as it is delicious.

Building Flavor in Your Slow Cooker Pot Roast

Elevate your pot roast by searing the beef before it goes into the Crockpot; this small step adds depth and a beautiful crust. Aromatics like onion and garlic, plus hearty carrots and potatoes, infuse every bite with rich flavor. Pouring in a simple blend of broth, Worcestershire sauce, and herbs ensures a luscious, well-seasoned gravy perfect for drizzling over the finished dish.

Assembling Your Crockpot Pot Roast

To get started, layer your vegetables at the bottom of the slow cooker to create a flavorful bed for the beef. After searing, set the roast atop the veggies, pour over your liquid mixture, add fresh or dried herbs, and set your slow cooker on low. The result: melt-in-your-mouth pot roast, fork-tender potatoes, and carrots—every component perfectly cooked with minimal effort.

Serving Suggestions for an Unforgettable Pot Roast Dinner

Serve your pot roast sliced or shredded, nestled alongside heaping portions of those savory potatoes and carrots. Scoop some of the rich, herby gravy overtop, and serve with crusty bread or buttery rolls. For an extra touch, sprinkle with fresh parsley or thyme for fresh flavor and a pop of color.

Nutritional Information and Serving Size

This Crockpot Pot Roast Recipe serves about 6. Each serving provides a balanced meal of protein, hearty vegetables, and savory sauce, averaging 400–500 calories depending on the cut of beef and any added sides—a nutritious, comforting staple for all ages.

Crockpot Pot Roast Recipe (Recap)

A champion among pot roast recipes, this slow cooker version is an effortless, crowd-pleasing classic that delivers melt-in-your-mouth beef with rich, homey flavors—perfect for any day of the week.

[ingredients]
3–4 lbs beef chuck roast (or your preferred cut)
1 tbsp vegetable oil
Salt and freshly ground black pepper to taste
1 large yellow onion, sliced
4 cloves garlic, minced
4–5 medium carrots, cut into large chunks
3–4 potatoes, cut into large chunks
2 cups low-sodium beef broth
1 tbsp Worcestershire sauce
2 tsp dried thyme (or 4–5 sprigs fresh)
1 bay leaf (optional)
1 tbsp cornstarch + 2 tbsp cold water (for thickening, optional)
Fresh parsley for garnish (optional)
[/ingredients]

💡Meal Planning Tip: Save this recipe to automatically generate an organized shopping list with all ingredients sorted by store section—perfect for efficient grocery trips and meal planning.

CookifyAI meal planning interface

Instructions

  1. Pat the beef roast dry and season generously with salt and pepper. Heat vegetable oil in a large skillet over medium-high heat. Sear the roast on all sides until golden brown, about 2–3 minutes per side. (This step is optional but highly recommended for added flavor.)
  2. Layer sliced onion, garlic, carrots, and potatoes in the bottom of the slow cooker.
  3. Transfer the seared roast to the slow cooker, placing it directly over the vegetables.
  4. In a small bowl, combine beef broth, Worcestershire sauce, and thyme. Pour this mixture over the roast.
  5. Add the bay leaf (if using). Cover and cook on LOW for 8–10 hours or until the roast is very tender and easy to shred with a fork. (Alternatively, cook on HIGH for 5–6 hours.)
  6. Once cooked, remove roast and vegetables to a platter. Skim fat from the top of the liquid. To thicken the gravy, whisk together cornstarch and cold water, then stir into the remaining liquid. Set the slow cooker to HIGH and cook for 10–15 minutes until thickened, if desired.
  7. Slice or shred the roast, spoon vegetables alongside, and drizzle with gravy. Garnish with chopped fresh parsley if you wish. Serve hot and enjoy!

Weekly Meal Planning

This recipe is the ultimate meal prep hero! Save and schedule this recipe to your weekly meal plan—CookifyAI automatically generates a shopping list that accounts for every planned meal, reducing extra trips and forgotten items.

Planning Benefits:

  • Consolidates all recipes and ingredient quantities for the week
  • Sorts your list by store sections for efficient shopping
  • Reduces food waste and avoids double-buying
  • Keeps your meal planning on point and stress-free

Pro tip: If another dinner this week uses potatoes or onions, CookifyAI will combine amounts so you get just what you need—no more last-minute store runs or wasted produce!

Cook and Prep Times

Prep Time: 20 minutes
Cook Time: 8–10 hours (LOW) or 5–6 hours (HIGH)
Total Time: 8–10 hours, 20 minutes (mostly hands-off)

Enjoy cozy, ultra-tender pot roast made easy—your slow cooker’s new signature dish!

Effortless Weeknight Magic: Tender Crock Pot Beef & Broccoli Delight

Mouthwatering Crock Pot Beef and Broccoli Recipe

Introduction

Nothing beats a classic like Crock Pot Beef and Broccoli if you’re after big flavor with minimal effort. This takeout favorite transforms into an effortless weeknight dinner—all thanks to slow-cooking magic. Tender slices of beef soak up a savory, umami-packed sauce, perfectly complemented by crisp-tender broccoli. It’s comforting, satisfying, and tastes even better homemade.

Why This Crock Pot Beef and Broccoli Recipe is a Must-Try

This dish is a game-changer for busy nights: just a handful of ingredients, a single slow cooker, and you’re rewarded with melt-in-your-mouth beef and crisp veggies. The sauce—rich with garlic, ginger, and soy—infuses every bite for a deeply savory, restaurant-quality finish. Serve it over fluffy white rice or tender noodles, and watch everyone ask for seconds.

Mastering Tender Crock Pot Beef and Broccoli

The secret to this recipe is using flank steak or sirloin, sliced against the grain for the most tender results. The beef simmers gently in a flavorful sauce made of beef broth, soy sauce, garlic, and ginger. Add the broccoli at the end to keep it bright green and just crisp enough—a wonderful contrast to the tender beef.

Effortless Assembly for a No-Fuss Meal

With just two main steps—layering the beef and sauce in the crock pot, then stirring in the broccoli toward the end—this recipe is virtually hands-off. You get maximum flavor with minimum time in the kitchen. It’s the ultimate solution when you want takeout taste at home, minus the stress and the wait for delivery.

Serving Suggestions for Irresistible Crock Pot Beef and Broccoli

This beef and broccoli pairs perfectly with steamed jasmine rice, brown rice, or noodles. For a fresh side, consider a cucumber salad or a sprinkling of toasted sesame seeds over the top. Leftovers? They’re just as tasty, making this dish ideal for meal prep and quick lunches.

Nutritional Information and Serving Size

This recipe yields about 4 hearty servings. Each serving contains approximately 350-420 calories, depending on your choice of beef and sauce thickness. It’s a satisfying meal, rich in protein, and balanced with nutritious vegetables.

Mouthwatering Crock Pot Beef and Broccoli (Recap)

This dish delivers all the comforting, bold flavors of your favorite takeout classic, but healthier, easier, and budget-friendly. It’s a surefire hit for weeknights, meal prepping, or anytime you crave a hearty, Asian-inspired meal without the extra work.

[ingredients]
1.5 pounds flank steak or sirloin, thinly sliced against the grain
3 cups broccoli florets (fresh or frozen, thawed)
1 cup beef broth or stock
1/2 cup low-sodium soy sauce
1/4 cup brown sugar
2 tablespoons sesame oil
3 cloves garlic, minced
1 tablespoon fresh ginger, grated (or 1 teaspoon ground)
2 tablespoons cornstarch (optional, for a thicker sauce)
2 tablespoons water (if using cornstarch)
Cooked rice or noodles, for serving
Optional: sliced green onions, sesame seeds for garnish
[/ingredients]

💡Meal Planning Tip: Save this recipe to automatically generate an organized shopping list with all ingredients sorted by store section—perfect for efficient grocery trips and meal planning.

CookifyAI meal planning interface

Instructions

  1. In a bowl, whisk together beef broth, soy sauce, brown sugar, sesame oil, garlic, and ginger.
  2. Place sliced beef in the crock pot. Pour sauce over the top and toss to combine.
  3. Cook on LOW for 4–5 hours or until the beef is meltingly tender.
  4. Mix cornstarch with water to make a slurry (if thicker sauce is desired), and stir it into the crock pot. Add the broccoli florets.
  5. Cover and continue cooking for another 30–45 minutes, until broccoli is bright green and just tender.
  6. Serve hot over rice or noodles. Garnish with green onions and sesame seeds, if desired.

Weekly Meal Planning

This recipe is an all-star for weekly meal prep. Save and schedule this recipe to plan your dinner rotation, and automatically generate smart shopping lists that consolidate ingredients from all your chosen meals.

Planning Benefits:

  • Automatically tallies total ingredients for all recipes on your plan
  • Groups items by grocery store sections (produce, meat, pantry, etc.)
  • Helps avoid overbuying thanks to consolidated lists
  • Ensures you never forget an ingredient for the week ahead

Pro tip: When planning multiple dinners—like this Crock Pot Beef and Broccoli plus a stir-fry or fried rice—schedule your recipes to see overlapping ingredients. CookifyAI combines quantities so you buy exactly what you need, cutting shopping time and preventing food waste.

Cook and Prep Times

Prep Time: 15 minutes
Cook Time: 5–6 hours (mostly hands-off)
Total Time: 5 hours 15 minutes–6 hours (including finishing and serving)

Enjoy a delicious, guaranteed crowd-pleaser with this crock pot beef and broccoli—perfectly planned and stress-free!

Set It and Forget It: The Ultimate Slow Cooker Garlic Butter Beef Recipe

Irresistible Slow Cooker Garlic Butter Beef Recipe

Introduction

Slow cooking beef in a luscious garlic butter sauce results in a dish that’s tender, aromatic, and packed with flavor. This Irresistible Slow Cooker Garlic Butter Beef Recipe is simplicity at its finest—just a few ingredients yield deeply satisfying comfort. It’s perfect for busy weeknights, special family dinners, or prepping meals in advance, promising to please everyone at your table.

Why You’ll Love This Slow Cooker Garlic Butter Beef

Slow cookers naturally coax out the juiciness of beef, but pairing it with rich garlic butter elevates the taste to gourmet status. The infusion of buttery garlic essence ensures each bite is melt-in-your-mouth tender. Bonus: it lets you “set it and forget it,” making it both incredibly convenient and crowd-pleasing.

The Secrets to Succulent Garlic Butter Beef

Choosing the right beef cut (like chuck or brisket) is key for achieving fork-tender results. Letting it bathe for hours in garlic-infused butter, fresh herbs, and a splash of broth transforms basic ingredients into a luxurious, savory roast with barely any effort.

Easy Assembly for Maximum Flavor

Start by browning the beef (if desired) to lock in flavor, then layer it in your slow cooker with generous dollops of seasoned garlic butter. All it takes is a handful of pantry staples and a few aromatic additions for a meal that tastes like you spent hours in the kitchen.

Serving Inspirations for Garlic Butter Beef

Serve your garlic butter beef atop creamy mashed potatoes, pillowy egg noodles, or roasted veggies. Finish with a spoonful of the slow-cooked pan juices for unforgettable flavor. Leftovers work beautifully in sandwiches, grain bowls, or freezer-friendly meal prep.

Nutritional Information and Serving Size

This recipe makes approximately 6 servings. Depending on the beef cut and portion size, each serving averages about 370–450 calories. It’s a protein-packed, flavor-forward meal you’ll return to again and again.

Irresistible Slow Cooker Garlic Butter Beef (Recap)

Tender beef and buttery garlic come together in a recipe that’s as easy as it is delicious. Simple prep and pantry staples deliver crowd-pleasing results, making this a must-try for anyone seeking comfort and convenience without sacrificing taste.

[ingredients]
2.5–3 pounds beef chuck roast (or brisket)
2 teaspoons salt
1 teaspoon black pepper
2 tablespoons olive oil
8 tablespoons (1 stick) unsalted butter, softened
8 garlic cloves, minced
1 tablespoon chopped fresh rosemary (or 1 teaspoon dried)
1 tablespoon chopped fresh thyme (or 1 teaspoon dried)
1/2 cup beef broth
Optional: 1 teaspoon onion powder, parsley or chives for garnish
[/ingredients]

💡Meal Planning Tip: Save this recipe to automatically generate an organized shopping list with all ingredients sorted by store section—perfect for efficient grocery trips and effortless meal planning.

CookifyAI meal planning interface

Instructions

  1. Pat the beef dry and season with salt and pepper. If desired, brown the beef in olive oil over medium-high heat for 2–3 minutes per side to enhance flavor.
  2. In a small bowl, combine softened butter, minced garlic, rosemary, thyme, and (if using) onion powder.
  3. Place beef in the slow cooker. Spread garlic butter mixture over the top and sides of the meat. Pour beef broth around (not on top of) the beef, keeping the butter mixture in place.
  4. Cover and cook on low for 8–9 hours, or until the beef is fall-apart tender. (Alternatively, cook on high for 4–5 hours.)
  5. Transfer beef to a platter and shred or slice as desired. Spoon pan juices over the top and garnish with parsley or chives if desired.

Weekly Meal Planning

This recipe fits perfectly into a weekly meal prep or batch cooking plan. Save and schedule this recipe to plan your menu and automatically generate a consolidated shopping list—CookifyAI organizes it by store section, ensuring smooth and efficient grocery trips.

Planning Benefits:

– Calculates total ingredient needs across all planned recipes
– Combines ingredients to avoid duplicates and reduce waste
– Reminds you of prep days for easy weeknight dinners
– Helps you stick to your meal plan while maximizing variety

Pro tip: Planning multiple slow cooker meals or beef dishes? Schedule your recipes and let CookifyAI do the math—know exactly how much beef, butter, and herbs to buy, no overbuying or missed items!

Cook and Prep Times

Prep Time: 10 minutes
Cook Time: 8–9 hours on low (4–5 hours on high)
Total Time: 8–9 hours 10 minutes (hands-on time: 10 minutes)

Effortless Slow Cooker Brisket: Your Go-To Recipe for Tender, Flavor-Packed Comfort Food

Effortless & Delicious Slow Cooker Brisket

Introduction

Few dishes match the satisfying, melt-in-your-mouth texture and savory flavor of a perfectly cooked brisket. With this recipe for Effortless & Delicious Slow Cooker Brisket, you can enjoy all the comfort and rich taste of traditional brisket—with a fraction of the work. Your slow cooker does the heavy lifting, turning a simple cut of beef and pantry staples into an irresistibly tender meal ideal for family gatherings, weeknight dinners, or impressing guests with minimal fuss.

Why This Slow Cooker Brisket is a Crowd Pleaser

This recipe shines thanks to its simplicity and unbeatable flavor. A straightforward blend of spices and aromatics infuses the brisket as it cooks low and slow, guaranteeing each slice is juicy and packed with taste. The set-it-and-forget-it method also frees up your time, letting you focus on sides or simply relax as dinner practically makes itself.

Perfecting the Flavorful Sauce

The secret to this brisket’s deep, complex flavor lies in the slow-cooked sauce. A blend of beef broth, tomato paste, and Worcestershire sauce enriches the brisket while a hint of brown sugar balances the savory notes. As the brisket cooks, its juices meld with the sauce, creating a rich gravy that’s perfect for spooning over slices of meat and your favorite side dishes.

How to Serve Effortless & Delicious Brisket

Once cooked, allow your brisket to rest before slicing against the grain to maximize tenderness. Serve it atop fluffy mashed potatoes, alongside roasted vegetables, or piled high on soft rolls for mouthwatering sandwiches. Don’t forget to drizzle with the slow-cooker sauce leftover you won’t want to miss a drop!

Nutritional Information and Serving Size

This Effortless Slow Cooker Brisket recipe yields approximately 8 hearty servings. Each portion is rich in protein and, thanks to the lean cut, is relatively moderate in fat compared to other beef dishes. Pair with a variety of vegetables for a balanced meal.

[ingredients]
3 to 4 pounds beef brisket, trimmed
2 teaspoons kosher salt
1 teaspoon black pepper
2 teaspoons smoked paprika
1 teaspoon garlic powder
1 teaspoon onion powder
1 tablespoon brown sugar
1 large onion, sliced
4 cloves garlic, minced
1/2 cup beef broth
1/3 cup tomato paste
2 tablespoons Worcestershire sauce
Optional: 1 teaspoon dried thyme or rosemary
Fresh parsley, for garnish
[/ingredients]

💡Meal Planning Tip: Save this recipe to automatically generate an organized shopping list—perfect for efficient grocery trips. CookifyAI makes meal planning a breeze, helping you never forget a key ingredient again!

CookifyAI meal planning interface

Instructions

  1. Mix salt, pepper, smoked paprika, garlic powder, onion powder, and brown sugar in a small bowl. Rub this spice blend all over the brisket.
  2. Layer sliced onions and minced garlic at the bottom of your slow cooker. Place the brisket on top (fat side up).
  3. In a separate bowl, whisk together beef broth, tomato paste, Worcestershire sauce, and optional herbs. Pour mixture over the brisket.
  4. Cover and cook on low for 8 to 10 hours, or until the brisket is fork-tender and shreds easily.
  5. Transfer brisket to a cutting board and let rest for 10 minutes. Slice against the grain for maximum tenderness.
  6. Skim fat from the cooking liquid, then pour the remaining sauce over the sliced brisket. Garnish with chopped parsley.
  7. Serve hot with your choice of sides, such as mashed potatoes or roasted vegetables.

Weekly Meal Planning

Brisket is an excellent choice for meal prepping—it reheats beautifully and can be used in a variety of ways throughout the week. Save and schedule this recipe with CookifyAI to consolidate your weekly grocery list, prevent duplicate purchases, and streamline meal planning.

Planning Benefits:

  • Automatically calculates total ingredient quantities when scheduling multiple meals
  • Creates organized shopping lists sorted by store section
  • Eliminates redundant buys and ensures nothing gets left behind
  • Simplifies batch cooking and prepping for busy weeks

Pro tip: Schedule brisket and other batch-cookable recipes together to maximize ingredient overlaps—think onions, garlic, and broth—and reduce both shopping trips and food waste.

Cook and Prep Times

Prep Time: 15 minutes
Cook Time: 8–10 hours (slow cooker)
Total Time: 8 hours 15 minutes to 10 hours 15 minutes

Enjoy effortless, impressive meals all week long—thanks to your slow cooker and a touch of meal planning with CookifyAI!

Home-Cooked Takeout: 17 Crockpot Chinese Recipes That Outshine Restaurant Classics

17 Delicious Crockpot Chinese Recipes That Beat Takeout

Introduction

Forget the cost and wait of delivery—these 17 Delicious Crockpot Chinese Recipes bring the iconic flavors of your favorite takeout dishes straight to your kitchen, with far less effort. Each dish is designed to maximize flavor and convenience, transforming simple ingredients into deeply satisfying meals right in your slow cooker. Whether you crave sweet, savory, or spicy, this collection covers all your comfort-food needs without complicated steps or hard-to-find ingredients.

Why Crockpot Chinese Recipes Are a Game-Changer

The slow cooker isn’t just for stews! With these recipes, you’ll capture the unmistakable taste and texture of classic Chinese fare—think melt-in-your-mouth beef, richly seasoned poultry, and vibrant veggies—while letting the crockpot do all the heavy lifting. One-pot preparation means less time in the kitchen and more time enjoying dinner with friends and family.

Crockpot Chinese Favorites: 17 Recipes You’ll Love

From crowd-pleasing sweet and sour chicken to bold Mongolian beef, these recipes rival your go-to restaurant order—plus, they use wholesome ingredients and often skip the deep-frying. Here’s a roundup of the best recipes included:

1. Crockpot Orange Chicken
2. Slow Cooker Mongolian Beef
3. Crockpot Sweet and Sour Pork
4. Honey Garlic Chicken Thighs
5. Classic Beef and Broccoli
6. Kung Pao Chicken
7. General Tso’s Chicken (Lighter Version)
8. Slow Cooker Szechuan Chicken
9. Pineapple Teriyaki Meatballs
10. Crockpot Cashew Chicken
11. Asian Braised Short Ribs
12. Chicken Lo Mein
13. Vegetable Chow Mein
14. Hot and Sour Soup
15. Slow Cooker Char Siu (Chinese BBQ Pork)
16. Lemon Pepper Chicken Wings
17. Beef Chow Fun

These dishes deliver bold flavors using pantry staples and a few Asian sauces—all with that irresistible slow-cooked tenderness.

The Secret to Saucy, Flavor-Packed Takeout at Home

What sets these slow cooker Chinese recipes apart is the way the crockpot infuses every ingredient with delicious sauce. Proteins become extra tender and soak up aromas of garlic, ginger, soy sauce, and spices. Vegetables retain their character without turning to mush, especially if added at the right time. For an authentic finish, toss in fresh green onions, sesame seeds, or steamed rice just before serving.

Serving Suggestions for the Ultimate Chinese Slow Cooker Night

Pair these crockpot recipes with simple sides like jasmine rice, steamed broccoli, or quick sautéed bok choy. Offer sriracha, chili oil, or extra soy sauce as table condiments to customize your meal. To create a full spread, dish up a variety for everyone to sample, just like your favorite buffet or family-style feast.

Nutrition and Serving Size

Most of these recipes yield 4-6 servings and can be doubled for parties or leftovers. Since you control the oil and sodium, homemade versions are often healthier than takeout—without sacrificing taste.

17 Delicious Crockpot Chinese Recipes (Recap)

This roundup showcases how simple it is to recreate restaurant-quality Chinese dishes at home. Thanks to your slow cooker, you’ll enjoy unbeatable tenderness and layered flavors—perfect for busy weeknights, relaxed weekends, or meal prep.

[ingredients]
Here’s a general master shopping list for these 17 crockpot recipes. For each specific recipe, check your chosen ingredient quantities.

Proteins:
– Boneless chicken thighs and breasts
– Beef flank, stew meat, or short ribs
– Pork shoulder or tenderloin
– Meatballs (ground pork or beef)
– Shrimp (for variations)

Vegetables:
– Bell peppers
– Broccoli florets
– Carrots
– Bok choy
– Snow peas
– Green onions
– Garlic & ginger

Sauces & Pantry Items:
– Soy sauce (low-sodium recommended)
– Hoisin sauce
– Oyster sauce
– Rice vinegar
– Sesame oil
– Brown sugar & honey
– Chicken/vegetable broth
– Cornstarch
– Chili paste (like Sriracha)
– White and jasmine rice
– Noodles (lo mein, chow mein, or rice noodles)
– Pineapple chunks

Garnishes (optional):
– Toasted sesame seeds
– Fresh cilantro or parsley
– Lime wedges
– Crushed peanuts

💡Meal Planning Tip: Save these recipes to automatically generate a sorted, organized shopping list—grouped by store section. Streamline your weekly meal prep and never forget a key ingredient again!

CookifyAI meal planning interface

Instructions

  1. Choose your desired crockpot Chinese recipe.
  2. Prep proteins and vegetables as specified (cubing, slicing, etc.).
  3. Layer ingredients into the slow cooker in the order your recipe directs—generally, sauces and aromatics on the bottom, meats and hardy veggies next, soft vegetables and garnishes added in the last hour of cooking.
  4. Set the crockpot: Most recipes cook on low for 5-7 hours or high for 2-4 hours.
  5. For optimal texture, stir in cornstarch slurry or leafy vegetables 30 minutes before serving to thicken sauces without overcooking veggies.
  6. Serve hot over rice or noodles, topped with green onions, sesame seeds, or your favorite condiments.

Weekly Meal Planning

This selection is ideal for meal prep—just assemble your favorite crockpot Chinese recipes and portion leftovers for grab-and-go lunches or future dinners. Save and schedule your recipes for the week with CookifyAI to effortlessly plan which nights to make them, and automatically consolidate ingredients into one smart shopping list.

Planning Benefits:
– Calculates total ingredient needs across all 17 recipes
– Organizes lists by grocery section (produce, protein, pantry)
– Reduces duplicate purchases, saving time and money
– Helps you balance protein, veggies, and flavors throughout the week

Pro tip: Schedule several recipes to see exactly how ingredients overlap—so you get the perfect amount of soy sauce, garlic, and veggies every time, minimizing waste.

Cook and Prep Times

Prep Time: 15-25 minutes per recipe
Cook Time: 2-7 hours (varies by dish and setting)
Total Time: Most meals are ready in under 8 hours from prep to serve (most of that hands-off!)

Enjoy the ease and deliciousness of Chinese takeout—made better at home with your crockpot!

Slow-Cooked Korean Beef: A Healthy & Flavorful Side Dish for Asian-Inspired Meals

Healthy Crock Pot Side Dishes: Korean Beef

Introduction

Looking for a flavorful, easy side dish that pairs well with any Asian-inspired meal? This Healthy Crock Pot Korean Beef is the answer! Effortlessly rich with savory, umami-packed flavors and a hint of sweetness, these tender beef pieces make the perfect complement to rice, steamed veggies, or even lettuce wraps. Using the slow cooker not only infuses every bite with depth, but also allows for hands-off cooking and healthier ingredient choices—a true crowd-pleaser for busy weeknights and gatherings alike.

Deliciously Unique Healthy Crock Pot Korean Beef

What sets this side dish apart is the balance between classic Korean flavors—soy, garlic, ginger, and a touch of heat—and ease of prep thanks to the crock pot. By choosing lean cuts of beef and minimal oil, this recipe delivers all the crave-worthy taste with less guilt. Paired with fresh herbs and crisp veggies, it’s a wholesome option that brings a burst of global flavor to your table.

Preparing the Perfect Korean Beef in Your Crock Pot

The magic starts with a simple marinade: low-sodium soy sauce, fresh ginger and garlic, a touch of honey (instead of sugar), rice vinegar, and a swirl of toasted sesame oil. For depth, add a spoonful of gochujang (Korean chili paste) or a pinch of red pepper flakes. By slow-cooking lean beef with this aromatic sauce, you achieve fork-tender, juicy results and let the flavors meld beautifully—all while keeping it healthy.

Assembling Your Healthy Korean Beef Side Dish

After your beef has cooked low and slow, shred or slice it and toss it with the remaining sauce in the crock pot. Top with chopped green onions and a sprinkle of toasted sesame seeds. Arrange the tender beef over steamed rice, next to roasted vegetables, or scoop into crisp lettuce cups. The result: a flexible, healthy side dish that’s perfect for meal prepping or special occasions.

Serving Suggestions for a Show-Stopping Side

Serve this Korean-inspired beef alongside fluffy brown rice, quinoa, or cauliflower rice for a nutritious base. Pair with quick-pickled cucumbers, sautéed bok choy, or a vibrant Asian slaw to create a balanced plate. For extra flavor, offer kimchi on the side, or drizzle with sriracha for extra heat. This side dish can even elevate simple grilled chicken or tofu mains.

Nutritional Information and Serving Size

This recipe yields about 6 hearty side servings. Depending on the cut of beef and how lean you go, each serving packs around 200–250 calories, with a lean protein boost and minimal sugar thanks to smart ingredient swaps. It’s deliciously satisfying and fits seamlessly into balanced meal plans.

Healthy Korean Beef Recap

Slow-cooking lean beef in a vibrant, homemade Korean sauce delivers a side dish that’s healthy, easy, and bursting with flavor. This recipe is sure to become a favorite for busy weeknights, lunchboxes, or entertaining friends.

[ingredients]
1 ½ pounds lean beef roast (such as sirloin or brisket), cut into large pieces
¼ cup low-sodium soy sauce
2 tablespoons honey
2 tablespoons rice vinegar
1 tablespoon toasted sesame oil
4 cloves garlic, minced
2 teaspoons fresh ginger, grated
1–2 tablespoons gochujang (or ½ teaspoon red pepper flakes, to taste)
1 teaspoon freshly ground black pepper
2 green onions, chopped (for garnish)
1 tablespoon toasted sesame seeds (for garnish)
Optional: 1 cup shredded carrots or sliced bell pepper (for extra veggies)
[/ingredients]

💡Meal Planning Tip: Save this recipe to automatically generate an organized shopping list with all ingredients sorted by store section—perfect for efficient grocery trips and smart weekly meal planning.

CookifyAI meal planning interface

Instructions

  1. In a mixing bowl, whisk together the soy sauce, honey, rice vinegar, sesame oil, garlic, ginger, gochujang (or red pepper flakes), and black pepper.
  2. Place the beef and optional vegetables in the crock pot. Pour the sauce over the top, making sure the beef is evenly coated.
  3. Cover and cook on low for 6–8 hours, or on high for 3–4 hours, until the beef is tender and easily shreds with a fork.
  4. Shred or slice the beef, then return it to the crock pot to toss with the sauce and absorb all the flavors.
  5. Sprinkle with chopped green onions and toasted sesame seeds before serving. Enjoy as a side with rice or alongside your favorite vegetables.

Weekly Meal Planning

This Healthy Crock Pot Korean Beef is ideal for weekly meal prep and planning. Save and schedule this recipe to plan your week and automatically generate a smart shopping list that combines ingredients from all your chosen recipes.

Planning Benefits:

  • Calculates total ingredient needs for all scheduled meals, reducing the chance of overbuying.
  • Sorts groceries by store section for faster, more organized shopping.
  • Eliminates duplicate purchases and forgotten ingredients, streamlining your week.

Pro tip: When you plan multiple meals, let CookifyAI aggregate your shopping list. For example, if you’re making this Korean beef and another dish with green onions, the list tallies how many bunches to buy, saving you money and effort.

Cook and Prep Times

Prep Time: 10 minutes
Cook Time: 6–8 hours on low (3–4 hours on high)
Total Time: 6 hours 10 minutes (minimum)

Slow Cooker Garlic Butter Beef Bites & Potatoes: Effortless Comfort in Every Bite

Slow Cooker Garlic Butter Beef Bites with Potatoes

Introduction

When you want a comforting, flavor-packed meal with minimal effort, these Slow Cooker Garlic Butter Beef Bites with Potatoes deliver every time. Succulent, bite-sized beef pieces melt in your mouth, while the potatoes absorb all the garlicky, buttery goodness. With the set-it-and-forget-it convenience of your slow cooker, you can serve a crowd-pleasing dinner even on your busiest days.

Why You’ll Love These Beef Bites

The secret to this recipe’s crowd-pleasing magic is the combination of rich, browned beef, creamy potatoes, and fragrant garlic butter—all slow simmered to perfection. This harmonious blend not only promises depth of flavor but also ensures fork-tender beef and perfectly cooked potatoes with hardly any hands-on time.

The Flavorful Butter Garlic Sauce

A generous amount of garlic and butter forms the backbone of this delicious sauce. As the beef and potatoes slowly cook, they absorb every note of flavor, creating a sauce that’s both bold and luscious. Feel free to add a sprinkle of fresh herbs—parsley or thyme—for a burst of color and freshness just before serving.

Easy Slow Cooker Assembly

With only a handful of pantry staples, assembling this dish is a breeze. Simply layer your bite-sized beef and chopped potatoes, pour over the seasoned garlic butter, and then let your slow cooker do its magic. By dinnertime, your kitchen will be filled with mouthwatering aromas and all you need is a simple green veggie or salad for a complete meal.

Serving Suggestions for a Cozy Dinner

Serve these Slow Cooker Garlic Butter Beef Bites with Potatoes alongside steamed broccoli or green beans for a colorful and satisfying plate. Garnish with extra chopped parsley and freshly cracked black pepper for a restaurant-worthy finish. This dish also pairs wonderfully with crusty bread to soak up any remaining sauce.

Nutritional Information and Serving Size

This recipe serves 4 generously, with each portion averaging around 480 to 520 calories, depending on your choice of beef cut and the exact amount of butter used. It’s a filling, well-balanced meal offering protein, hearty potatoes, and lots of flavor for weeknight or weekend dinners.

Slow Cooker Garlic Butter Beef Bites with Potatoes (Recap)

Simple prep, maximum flavor, and melt-in-your-mouth results—this slow cooker meal deserves a regular place in your dinner rotation, especially during busy weeks or when you’re craving some classic comfort food.

[ingredients]
1.5–2 pounds beef stew meat or sirloin, cut into 1-inch cubes
2 tablespoons olive oil
1.5 pounds baby potatoes, halved or quartered
4 tablespoons unsalted butter, melted
5 cloves garlic, minced
1 teaspoon dried thyme (or 1 tablespoon fresh, chopped)
1 teaspoon dried parsley (or 1 tablespoon fresh, chopped), plus extra for garnish
1 teaspoon onion powder
1/2 teaspoon smoked paprika
Salt and pepper to taste
Optional: 1/4 cup beef broth for added moisture
[/ingredients]

💡Meal Planning Tip: Save this recipe to automatically generate an organized shopping list with all ingredients sorted by store section—perfect for efficient grocery trips and meal planning.

CookifyAI meal planning interface

Instructions

  1. (Optional) Heat olive oil in a large skillet over medium-high heat. Sear the beef cubes for 2–3 minutes until browned on all sides (this step adds extra flavor, but can be skipped for convenience).
  2. Layer the browned (or raw) beef cubes and halved potatoes in the bottom of your slow cooker.
  3. In a small bowl, whisk together melted butter, minced garlic, thyme, parsley, onion powder, smoked paprika, salt, and pepper. Pour the mixture over the beef and potatoes.
  4. Add beef broth if using, for extra moisture.
  5. Stir gently to coat everything evenly with the garlic butter mixture.
  6. Cover and cook on Low for 6–7 hours, or until the beef is fork-tender and the potatoes are cooked through. Or, cook on High for 3–4 hours.
  7. Once cooked, adjust seasoning to taste. Garnish with extra parsley before serving.

Weekly Meal Planning

This recipe makes an ideal addition to weekly meal prep and busy-week dinner plans. Save and schedule this recipe to organize which nights to serve it and automatically generate smart shopping lists that combine and sort ingredients across all planned meals.

Planning Benefits:

  • Calculates total ingredient amounts for all your recipes
  • Sorts shopping lists by grocery store sections
  • Helps avoid duplicate purchases and ensures you don’t forget anything
  • Makes prepping multiple meals a week a breeze

Pro tip: When meal planning, schedule all your recipes so CookifyAI can consolidate overlapping ingredients—like potatoes or garlic—optimized for less waste and quicker shopping trips.

Cook and Prep Times

Prep Time: 15 minutes
Cook Time: 6–7 hours (Low) or 3–4 hours (High)
Total Time: 6 hours 15 minutes (Low) or 3 hours 15 minutes (High)

Protein-Powered Perfection: Easy Slow Cooker Garlic Butter Beef Bites for Busy Nights

High Protein Slow Cooker Garlic Butter Beef Bites – Easy Dinner Recipe!

Introduction

Looking for a protein-packed, flavor-rich dinner option that basically cooks itself? High Protein Slow Cooker Garlic Butter Beef Bites are the ultimate set-it-and-forget-it meal that boasts melt-in-your-mouth beef saturated with bold garlic and herb flavor. This recipe is both satisfying and simple to prepare, making it a top contender for busy weeknights or feeding a hungry crowd with minimal hands-on time.

Why Make High Protein Garlic Butter Beef Bites?

The appeal of these garlic butter beef bites lies in their robust taste, juicy tenderness, and hearty protein content—ideal for those who want a filling, muscle-friendly meal. Using the slow cooker means the beef becomes perfectly tender with almost no effort, and the buttery garlic sauce infuses each bite with crave-worthy richness. It’s a dinner everyone will love, and it’s easy to scale up or down depending on your needs.

How to Make the Garlic Butter Sauce for Beef Bites

The star of this recipe is a luscious garlic butter sauce that transforms humble beef cubes into a luxurious, restaurant-quality dish. Melted butter, plenty of minced garlic, and a sprinkle of fresh herbs create a sauce that’s both simple and irresistible. Pouring the sauce over the beef at the beginning ensures every piece is saturated in flavor by the end of cooking.

Step-by-Step Assembly for Your Slow Cooker Meal

Once your beef is cut into bite-sized pieces, just season, brown (optional, but intensifies flavor), and add to your slow cooker. Pour the garlic butter mixture over the top, toss everything together, and let the slow cooker work its magic. The hands-off cook time frees you up to focus on sides or simply unwind while dinner prepares itself.

Serving Suggestions for a Show-Stopping High Protein Dinner

Serve these beef bites over a bed of brown rice, whole-grain pasta, or fluffy mashed potatoes for a balanced, protein-heavy meal. Roasted vegetables or a starter salad are perfect accompaniments. For a lower-carb meal, pair the beef bites with steamed broccoli or zucchini noodles.

Nutritional Information and Serving Size

This recipe yields about 6 generous servings. Each serving contains approximately 32 grams of protein, depending on the cut of beef used, and about 320-400 calories. It’s a gratifying option for those following high-protein, low-carb, or keto diets!

High Protein Slow Cooker Garlic Butter Beef Bites (Recap)

Combining ease, nutrition, and knockout flavor, these slow cooker garlic butter beef bites are an ideal choice for anyone looking to boost their protein intake while enjoying classic, crowd-pleasing flavors.

[ingredients]
2 pounds beef sirloin or stew meat, cut into 1-inch cubes
Salt and pepper, to taste
2 tablespoons olive oil (for browning, optional)
4 tablespoons unsalted butter, melted
6 garlic cloves, minced
1 teaspoon dried Italian herbs (or a mix of dried rosemary, thyme, parsley)
1/2 teaspoon paprika (optional)
1 tablespoon Worcestershire sauce
Fresh parsley, chopped (for garnish)
[/ingredients]

💡Meal Planning Tip: Save this recipe to effortlessly create a detailed shopping list with all ingredients organized by grocery aisle—making dinner prep streamlined and efficient.

CookifyAI meal planning interface

Instructions

  1. Optional: Heat olive oil in a skillet over medium-high heat. Season beef cubes with salt and pepper, then sear for 2-3 minutes per side until lightly browned. Transfer to your slow cooker. (Skip this step for a quicker prep!)
  2. In a small bowl, whisk together melted butter, minced garlic, Italian herbs, paprika (if using), and Worcestershire sauce.
  3. Pour the garlic butter mixture over beef in the slow cooker, stirring gently to coat all pieces.
  4. Cover and cook on LOW for 5-6 hours or HIGH for 2.5-3 hours, until beef is fork-tender.
  5. Taste and adjust seasoning, if needed. Garnish with fresh chopped parsley before serving.

Weekly Meal Planning

High Protein Slow Cooker Garlic Butter Beef Bites are a meal prep dream—they reheat beautifully, making them an excellent choice for weekly dinners or lunchboxes. Save and schedule this recipe, and instantly generate a consolidated shopping list that automatically combines ingredients from all your planned meals.

How CookifyAI streamlines your week:

  • Auto-tallies ingredients for multiple recipes, simplifying bulk shopping
  • Creates grocery lists sorted by section for efficient store visits
  • Reduces food waste by tracking overlapping ingredients across your meal plan
  • Helps you stay organized for busy weeknights and meal prepping

Pro tip: Schedule your recipes in advance to see how ingredients overlap, ensuring you only buy what you need and have everything on hand—no last-minute runs to the store!

Cook and Prep Times

Prep Time: 10 minutes
Cook Time: 5-6 hours (LOW) or 2.5-3 hours (HIGH)
Total Time: 10 minutes (active) + slow cook time

Enjoy a protein-rich, savory meal with minimal effort and maximum flavor—ideal for any night of the week!

Cozy Fall Comfort: 45 Easy & Healthy Crockpot Meals to Savor the Season

45 Easy & Healthy Fall Crockpot Meals

Introduction

As autumn brings brisker weather and cozy evenings, nothing beats the convenience and comfort of a wholesome meal simmering away in your slow cooker. These 45 Easy & Healthy Fall Crockpot Meals are handpicked for their hearty flavors, nourishing ingredients, and simple prep—making dinnertime deliciously effortless. From savory stews to vibrant veggie chilis, these recipes will warm your kitchen and your soul, all while helping you eat well amidst the busy fall season.

Why Crockpot Meals Shine in Fall

When cool weather sets in, slow cookers become kitchen heroes. Not only do they transform seasonal produce and lean proteins into rich, satisfying meals, but they also free up your time by letting dinner cook itself. Each of these recipes is designed for a “set it and forget it” approach, delivering healthy, comforting flavors with minimal effort, and perfect for family dinners, meal prep, or cozy gatherings.

Crowd-Pleasing Autumn Crockpot Recipes

The beauty of these fall crockpot meals lies in their versatility and balance. You’ll find robust soups, hearty stews, and satisfying casseroles all featuring seasonal ingredients like pumpkin, apples, sweet potatoes, kale, and lean proteins. Many recipes are quick to assemble in the morning, so you can come home to a nourishing, ready-to-serve feast.

Meal Prep and Freezer Friendly

These crockpot meals are ideal for batch cooking—make extra for leftovers, pack up lunches, or freeze portions for busy nights later on. This not only saves time throughout the week, but also ensures that healthy, home-cooked meals are always within reach.

Sample Ingredients List for Fall Crockpot Meals

To give you a sense of the core ingredients you’ll use across these 45 healthy recipes, here’s a quick sample:

[ingredients]
– Lean meats (chicken breasts, turkey, lean beef)
– Autumn vegetables (sweet potatoes, carrots, butternut squash, kale, pumpkin)
– Whole grains (brown rice, quinoa, barley)
– Beans (black beans, kidney beans, chickpeas)
– Aromatics (onions, garlic, leeks)
– Herbs and spices (rosemary, thyme, sage, cinnamon)
– Low-sodium broth or stock
– Apples or pears for sweet-savory dishes
– Tomatoes (diced, crushed, or sauce)
– Light coconut milk or Greek yogurt for creaminess
[/ingredients]

💡Meal Planning Tip: Save these crockpot meal recipes to create an automatically organized shopping list—grouped by store section for maximum efficiency. You’ll breeze through the grocery store and skip forgotten items!

CookifyAI meal planning interface

Instructions

While each recipe will differ, here are the core steps common to most healthy fall crockpot meals:

  1. Chop your desired fall vegetables and lean proteins. Drain and rinse beans, if using.
  2. Layer ingredients in the slow cooker, starting with denser veggies at the bottom, followed by proteins, grains (if included), and aromatics.
  3. Add broth, tomatoes, or liquid of choice. Sprinkle with herbs and spices.
  4. Cover and cook on low for 6-8 hours or high for 3-4 hours, until ingredients are tender and flavors meld.
  5. Stir in finishing touches like leafy greens, a splash of coconut milk, or Greek yogurt near the end of cooking time.
  6. Taste and adjust seasoning if needed before serving.

45 Easy & Healthy Fall Crockpot Meals for Inspiration

Here are just a few ideas you’ll find among the 45 recipes:

  • Slow Cooker Chicken and Butternut Squash Stew
  • Hearty Lentil & Vegetable Soup
  • Crockpot Turkey Chili with Black Beans & Pumpkin
  • Moroccan Chickpea Stew
  • Apple Cider Pulled Pork
  • Curried Sweet Potato Soup
  • Gingered Pork and Cabbage Stew
  • Sage & White Bean Chicken Chili
  • Harvest Vegetable Stuffed Peppers
  • Cinnamon-Spiced Beef Stew with Carrots and Parsnips

Serving Suggestions

Serve these fall crockpot meals with whole grain bread, a simple salad, or steamed rice. Many are filling enough to stand alone, but pairing with a light side can help stretch leftovers. Garnish with fresh herbs, a dollop of yogurt, or a sprinkle of nuts for added texture and flavor.

Nutritional Information and Serving Sizes

Each recipe is crafted for balanced nutrition, featuring plenty of vegetables, lean proteins, and fiber-rich grains. Most meals yield 4-8 servings, averaging between 250-400 calories per portion and always emphasizing wholesome, real-food ingredients.

Meal Planning Strategy: 45 Easy & Healthy Fall Crockpot Meals (Recap)

With a slow cooker and these healthy recipes, dinner prep becomes simple, wholesome, and delicious. You’ll stay organized, minimize weeknight cooking stress, and enjoy warm, comforting meals all autumn long.

Weekly Meal Planning

Enjoy seamless weekly meal planning with these crockpot recipes. Save and schedule your favorite fall meals in CookifyAI to build a smart, consolidated shopping list for all your upcoming dinners. Planning this way helps:

– Automatically sum up ingredient amounts across multiple recipes
– Group groceries by store aisle for time-saving trips
– Eliminate forgotten items or accidental duplicate purchases
– Keep your weeknight meals balanced and stress-free

Pro tip: With CookifyAI, scheduling all 45 crockpot meals for the season ensures you’ll never run out of inspiration for cozy, healthy dinners—plus, your ingredient lists will always reflect exactly what you need!

Cook and Prep Times

Prep Time (per recipe): 10–20 minutes
Cook Time (per recipe): 4–8 hours in slow cooker
Total Time: 4.5–8.5 hours (mostly hands-off)

Embrace the flavors of fall with these easy & healthy crockpot meals—your slow cooker will become your best kitchen companion all season long!

Easy Slow Cooker Beef Manhattan: The Ultimate Comfort Food Classic

Easy Slow Cooker Beef Manhattan – Tender Comfort Food Classic

Introduction

There’s a reason Beef Manhattan is a comfort food staple: it’s hearty, savory, and drenched in flavorful gravy. By taking this classic and adapting it for the slow cooker, you get all the robust taste and tenderness you crave with almost no hands-on effort. This Easy Slow Cooker Beef Manhattan delivers fork-tender roast beef and velvety mashed potatoes, making it not only a family favorite but also the perfect dish to serve for weeknight dinners or casual gatherings.

Why Easy Slow Cooker Beef Manhattan Stands Out

Transforming the traditional Beef Manhattan into a slow cooker recipe means you get all the depth of flavor without the hassle. The beef cooks low and slow until it practically melts in your mouth, while the gravy becomes rich and developed. Plus, this one-pot wonder allows you to prep in the morning and come home to a hot, satisfying meal – perfect for busy schedules and hungry crowds!

Mastering the Slow Cooker Beef Manhattan

The key to a mouthwatering Beef Manhattan is slow-cooked beef that’s full of flavor and supremely tender, paired with mashed potatoes to soak up every drop of savory gravy. The slow cooker does all the heavy lifting here: simply season and sear your beef, add a savory broth, and let it cook all day. The results? Classic comfort with minimal fuss.

How to Serve Classic Beef Manhattan

Beef Manhattan is traditionally served open-faced: slices of roast beef and a ladle of rich gravy over thick, buttered bread, with a generous scoop of mashed potatoes. Garnish with freshly chopped parsley or a sprinkle of black pepper for a classic diner-style finish. Serve with a side of green beans or glazed carrots to round out this satisfying meal.

Nutritional Information and Serving Size

This recipe yields 6 hearty servings. Each portion (including beef, bread, mashed potatoes, and gravy) averages around 500-600 calories, making it a filling meal ideal for dinner. Customize further with lower-calorie bread or lightened-up mashed potatoes to suit your dietary goals.

[ingredients]
3 pounds beef chuck roast
1 teaspoon salt
1/2 teaspoon black pepper
2 tablespoons olive oil
1 packet (1 ounce) onion soup mix
2 cups beef broth
2 tablespoons Worcestershire sauce
1 tablespoon garlic powder
2 tablespoons cornstarch
1/4 cup cold water

For Serving:
6 slices thick white or sourdough bread
4 cups prepared mashed potatoes
Chopped parsley (optional)
[/ingredients]

💡Meal Planning Tip: Save this recipe to automatically generate a sorted shopping list with all the fresh and pantry staples you need—no more forgotten ingredients or last-minute grocery runs.

CookifyAI meal planning interface

Instructions

  1. Season the beef chuck roast with salt and pepper on all sides.
  2. Heat olive oil in a large skillet over medium-high heat. Sear beef on both sides until nicely browned (about 3–4 minutes per side). Transfer to your slow cooker.
  3. Sprinkle the onion soup mix over the beef, then pour in the beef broth and Worcestershire sauce. Sprinkle garlic powder evenly over the top.
  4. Cover and cook on LOW for 8–10 hours, or on HIGH for 5–6 hours, until beef is very tender and easily shreds with a fork.
  5. Remove beef from the slow cooker and shred or slice as desired. For gravy, mix cornstarch and cold water until smooth. Stir into the hot cooking liquid in the slow cooker and cook on HIGH for another 10–15 minutes, until thickened.
  6. To serve, place a slice of bread on each plate. Top with shredded beef, a generous ladle of gravy, and a scoop of mashed potatoes. Garnish with parsley if desired.

Weekly Meal Planning

This Easy Slow Cooker Beef Manhattan is not only a comforting dinner but also a meal prep hero—leftovers reheat beautifully for lunch or quick dinners later in the week. Save and schedule this recipe to quickly organize your week, coordinating your grocery list by ingredient and meal, and avoiding duplicate purchases.

Planning Benefits:

– Totals all ingredients across multiple recipes for efficient shopping
– Categorizes items by grocery store section
– Prevents overbuying and ingredient waste
– Simplifies prep for busy weekdays and meal preppers

Pro tip: If you’re planning more slow cooker meals this week, combine your recipes in CookifyAI to consolidate shopping lists, making meal planning smarter and your time at the grocery store much shorter.

Cook and Prep Times

Prep Time: 15 minutes
Cook Time: 8 hours
Total Time: 8 hours 15 minutes

Enjoy effortless, hearty comfort with this Easy Slow Cooker Beef Manhattan—a tender, flavor-packed meal that’s sure to please any crowd while keeping dinnertime stress-free!

Creamy Comfort in a Crockpot: Paula Deen’s Ultimate Mac and Cheese Recipe

Paula Deen’s Creamy Crockpot Mac and Cheese Recipe

Introduction

Craving a classic comfort dish that’s rich, creamy, and guaranteed to satisfy a crowd? Paula Deen’s Creamy Crockpot Mac and Cheese is your answer. This slow-cooked version yields irresistibly velvety pasta without the need to fuss over the stovetop. It’s a no-fail side dish for potlucks, holiday gatherings, or family dinners—everyone will ask for seconds!

The Magic Behind Paula Deen’s Crockpot Mac and Cheese

This beloved recipe stands out for its blend of sharp cheddar, buttery cream cheese, and evaporated milk—ingredients that create a luscious, indulgent sauce. Cooking it in the crockpot ensures each noodle soaks up maximum flavor and the texture remains ultra-creamy. Best of all, the recipe is incredibly simple and mostly hands-off, allowing you to prep other dishes or relax until dinnertime.

Why Pre-Cooking the Pasta is Key

For the perfect mac and cheese, start by boiling your macaroni until just tender (al dente). This is important—overcooked pasta can become mushy in the crockpot, so keep it slightly firm. Rinse with cold water to stop the cooking process, then gently fold into your creamy cheese mixture so each noodle gets coated and bakes to perfection.

Effortless Crockpot Assembly

After prepping your ingredients, simply layer everything in your slow cooker: the cooked macaroni, shredded cheeses, milk, and seasonings. Give it all a gentle stir, set the heat to low, and let the crockpot work its magic. The gentle heat ensures a silky, uniform sauce that pairs perfectly with the tender pasta.

Serving Suggestions for Crowd-Pleasing Mac and Cheese

Serve this decadent dish family-style straight from the crockpot or transfer to a platter topped with extra shredded cheese or fresh parsley for a pop of color. It pairs beautifully with barbecue, roasted vegetables, or as the star side for holiday feasts. For potlucks, keep it warm on the “low” setting—everyone will be coming back for more!

Nutritional Information and Serving Size

This recipe yields about 8 hearty servings. Each portion generally contains around 400–450 calories depending on your specific ingredients. While certainly indulgent, it fits right in as an occasional treat or holiday comfort food!

Creamy Crockpot Mac and Cheese (Recap)

Paula Deen’s slow cooker mac and cheese is creamy, cheesy, and effortlessly delicious. It’s the ultimate crowd-pleaser, featuring warm, comforting flavors that bring friends and family together for any occasion.

[ingredients]
2 cups uncooked elbow macaroni
4 cups shredded sharp cheddar cheese, divided
1 (12-ounce) can evaporated milk
1 1/2 cups whole milk
1/2 cup (1 stick) unsalted butter, melted
8 ounces cream cheese, cubed and softened
1/2 teaspoon salt
1/2 teaspoon black pepper
1/4 teaspoon garlic powder (optional)
1/4 teaspoon mustard powder (optional)
[/ingredients]

💡Meal Planning Tip: Save this recipe to automatically generate an organized shopping list with all ingredients sorted by store section—perfect for efficient grocery trips and meal planning.

CookifyAI meal planning interface

Instructions

  1. Cook macaroni in a large pot of boiling water until just al dente (about 5–6 minutes). Drain and rinse well with cold water to stop the cooking. Set aside.
  2. Spray the inside of your crockpot with nonstick cooking spray. Add the cooked pasta, 3 cups of cheddar cheese, evaporated milk, whole milk, melted butter, cream cheese, salt, pepper, garlic powder, and mustard powder (if using).
  3. Stir gently to combine all ingredients. Sprinkle the remaining 1 cup of cheddar cheese evenly over the top.
  4. Cover and cook on LOW for 2 to 2 1/2 hours, or until the cheese is melted, the sauce is creamy, and the edges are lightly golden. Stir once after 1 hour to make sure everything cooks evenly.
  5. After cooking, switch to the “warm” setting to prevent overcooking. Serve hot, garnished with fresh herbs if desired.

Weekly Meal Planning

This dish is a top candidate for meal prep and busy weeknight planning. Save and schedule this recipe to plan out your meals and instantly generate organized shopping lists. No more repeat purchases or forgotten staples—get everything you need in one trip!

Planning Benefits:

  • Automatically calculates ingredient quantities needed for your planned meals
  • Organizes grocery lists by store section for quicker shopping
  • Simplifies meal prep for weekday dinners, potlucks, or holidays
  • Reduces food waste with smarter ingredient management

Pro tip: When you plan multiple recipes for the week, overlapping ingredients are automatically consolidated. For example, if planning this mac and cheese and another recipe using cheddar, your list will total the cheese you need—no guesswork, no shortfalls.

Cook and Prep Times

Prep Time: 15 minutes
Cook Time: 2–2.5 hours (slow cooker)
Total Time: 2 hours 15 minutes (hands-off after prep)

Slow Cooker Southern Comfort: The Ultimate Crock Pot Swamp Potatoes Recipe

Crock Pot Swamp Potatoes Recipe | Easy & Delicious Dinner Idea

Introduction

Looking for a unique side dish or hearty main that requires minimal effort but delivers bold, comforting flavors? Crock Pot Swamp Potatoes are a savory, Southern-inspired dish that offers creamy potatoes slow-cooked with smoky sausage, sweet bell peppers, and onions in a rich, seasoned blend. This recipe is incredibly easy to assemble and perfect for busy weeknights, potlucks, or as a crowd-pleasing addition to your dinner table.

Why Try Crock Pot Swamp Potatoes?

This recipe stands out because of its rich flavor profile—smoky sausage, tender potatoes, and aromatic veggies meld together as they simmer slowly in the crockpot. It’s a true set-it-and-forget-it dish, freeing up your evening while guaranteeing a dish the whole family will love.

Flavorful, Foolproof Slow Cooking

Swamp Potatoes get their name from the moist, savory “swamp” that forms as the ingredients cook together and release their flavors. The results? Creamy, fork-tender potatoes that absorb smoky sausage flavors and juicy bell peppers. Feel free to add your favorite seasonings—Cajun seasoning, Old Bay, or simply salt, pepper, and a hint of garlic powder will turn up the flavor.

Perfect Pairings and Variations

Serve Crock Pot Swamp Potatoes as a main or hearty side. For protein, customize with smoked sausage, andouille, kielbasa, or even chorizo. For a vegetarian twist, skip the sausage and add extra beans or mushrooms. Pair it with grilled meats, fresh salad, or cornbread for a classic Southern feast.

Ingredients for Swamp Potatoes

[ingredients]
– 2 pounds russet or red potatoes, peeled and diced
– 12–16 ounces smoked sausage or kielbasa, sliced
– 1 large onion, chopped
– 1 green bell pepper, chopped
– 1 red bell pepper, chopped
– 3 cloves garlic, minced
– 1/2 cup chicken broth
– 1 tablespoon olive oil or melted butter
– 1 teaspoon Cajun seasoning (or Old Bay / seasoning salt)
– 1/2 teaspoon paprika
– Salt and pepper to taste
– Optional: 2 scallions, sliced for garnish
– Optional: Chopped parsley for serving
[/ingredients]

💡 Meal Planning Tip: Save this recipe and instantly generate a shopping list with all ingredients organized by store section. Streamline your grocery trips and never miss an ingredient again with CookifyAI!

CookifyAI meal planning interface

Instructions

  1. Lightly grease the inside of your crockpot or slow cooker with olive oil or cooking spray.
  2. Layer the diced potatoes, sliced sausage, chopped onion, and bell peppers in the crock pot.
  3. Add the minced garlic, then sprinkle Cajun seasoning, paprika, salt, and pepper over the top.
  4. Drizzle with the olive oil or melted butter and pour the chicken broth evenly over all ingredients.
  5. Stir gently to combine everything without breaking up the potatoes too much.
  6. Cover and cook on LOW for 6–7 hours or HIGH for about 3–4 hours, until potatoes are tender and the flavors have melded.
  7. Before serving, taste and adjust seasoning as needed. Garnish with sliced scallions or chopped parsley if desired.
  8. Serve hot as a main dish or as a hearty side!

Serving Suggestions and Storage

Enjoy these Swamp Potatoes as the highlight of your meal or as a filling side at your next potluck. Leftovers keep well in the refrigerator for up to 4 days and can be easily reheated.

Nutritional Information and Serving Size

This recipe yields about 6 generous servings. Each serving, including sausage, averages 320–350 calories, depending on sausage choice and added fats. If you want to lighten it up, choose turkey sausage and less oil.

Crock Pot Swamp Potatoes (Recap)

Swamp Potatoes offer irresistible flavor and the comforting texture of slow-cooked potatoes with the satisfaction of a one-pot meal. They’re simple, affordable, and endlessly customizable—a top pick for busy cooks.

Weekly Meal Planning

Planning your weeknight dinners just got easier! Save and schedule this recipe for effortless meal organization. CookifyAI consolidates all the ingredients needed for your chosen recipes, organizes your shopping lists by store section, and helps you avoid duplicate purchases—so meal prep is always simple and efficient.

Planning Benefits:

  • Automatically calculates total ingredient quantities for all recipes scheduled
  • Groups shopping lists by grocery aisle for faster trips
  • Prevents forgotten ingredients
  • Simplifies weekly meal prep and reduces food waste

Pro Tip: Planning multiple dinners? Schedule your recipes to see overlap in ingredients—like onions and bell peppers across several meals—ensuring you buy exactly what you need.

Cook and Prep Times

Prep Time: 15 minutes
Slow Cook Time: 6–7 hours on LOW (or 3–4 hours on HIGH)
Total Time: 6–8 hours (depending on slow cooker setting)

Feast Mode: 32 Insanely Good Thanksgiving Recipes to Wow Your Crowd

32 Insanely Good Thanksgiving Recipes The Whole Family Won’t Get Enough Of

Introduction

Thanksgiving is all about bringing the family together with unforgettable flavors, comforting classics, and a few creative twists. With so many dishes to prepare, finding the right recipes that everyone will love can feel overwhelming. That’s why this curated list of 32 insanely good Thanksgiving recipes will ensure your table is overflowing with crowd-pleasing options from appetizers to sides, mains, and show-stopping desserts.

Why These Thanksgiving Recipes Stand Out

Each recipe on this list combines time-honored tradition with clever updates for even more flavor and ease. Whether it’s a luscious, herby roast turkey, a velvety sweet potato casserole, or zesty cranberry salsa, these dishes blend simplicity, taste, and that special touch that makes Thanksgiving truly memorable. They’re designed to satisfy all ages and tastes—guaranteed to have everyone coming back for seconds.

The Ultimate Thanksgiving Spread: From Starters to Sweets

A great Thanksgiving menu spans a variety of flavors and textures. This roundup features appetizing starters, heartwarming sides, impressive mains, and indulgent desserts. Many recipes are make-ahead friendly, freeing you up to enjoy the celebration.

32 Insanely Good Thanksgiving Recipes

  • Herb-Roasted Turkey with Aromatic Gravy
  • Classic Bread Stuffing with Apples & Sausage
  • Creamy Mashed Potatoes with Brown Butter
  • Sweet Potato Casserole with Pecan Topping
  • Green Bean Almondine
  • Honey-Glazed Roasted Carrots
  • Cranberry Orange Relish
  • Buttery Parker House Rolls
  • Cheesy Broccoli Rice Casserole
  • Caramelized Onion Gravy
  • Baked Brie and Cranberry Bites
  • Bacon-Wrapped Asparagus Bundles
  • Parmesan and Herb Roasted Brussel Sprouts
  • Creamed Spinach Gratin
  • Savory Mushroom Bread Pudding
  • Loaded Deviled Eggs
  • Maple-Glazed Sweet Potatoes
  • Herbed Cornbread Dressing
  • Roasted Garlic Parmesan Cauliflower
  • Butternut Squash Soup with Sage
  • Turkey with Apple Cider Brine
  • Spiced Pumpkin Soup
  • Cranberry Jalapeño Salsa
  • Garlic Herb Compound Butter
  • Pumpkin Cheesecake Bars
  • Pecan Pie Blondies
  • Chocolate Bourbon Pecan Pie
  • Classic Apple Crisp
  • Brown Butter Pumpkin Pie
  • Salted Caramel Apple Tart
  • No-Bake Pumpkin Mousse
  • Mini Sweet Potato Pies

[ingredients]
For most of these recipes, you’ll need pantry staples along with seasonal produce, dairy, and proteins:
– Turkey (whole, or breast/thighs)
– Fresh herbs (sage, rosemary, thyme, parsley)
– Vegetables: potatoes, sweet potatoes, green beans, carrots, brussels sprouts, butternut squash, cauliflower, spinach, onions, garlic
– Fruits: apples, cranberries, oranges
– Breads/rolls
– Dairy: butter, cream cheese, heavy cream, milk, eggs, parmesan, cheddar
– Baking ingredients: brown sugar, maple syrup, pecans, pumpkin puree, flour, pie crusts
– Meats: sausage, bacon
– Cranberry sauce, gravy ingredients, and pantry spices
[/ingredients]

💡Meal Planning Tip: Save this entire recipe collection to auto-create your Thanksgiving shopping list. CookifyAI sorts ingredients by store section, saving you time and stress on your biggest grocery trip of the year.

CookifyAI meal planning interface

Instructions & Game Plan

  1. Plan your menu: Pick your favorite recipes from the list to match your family’s tastes and guest count.
  2. Grocery shop early: With an organized shopping list, grab everything ahead of time to avoid holiday crowds and out-of-stock frustrations.
  3. Prep in advance: Many sides, appetizers, and desserts can be made a day or two ahead and reheated for maximum flavor and minimal stress.
  4. Cook the turkey: Start early and let it rest while you finish quick sides and warm bread.
  5. Set up a festive spread: Arrange everything beautifully on platters. Don’t forget the sauces and extra gravy!
  6. Dessert station: Serve a variety for everyone’s preferences, from rich pies to bite-sized bars.
  7. Enjoy: Savor the feast and time with your loved ones.

Weekly Meal Planning

Building a big Thanksgiving feast is much easier with smart meal planning. Save and schedule these recipes with CookifyAI to keep your meal prep on track. You can split complex dishes across multiple days, auto-update serving sizes, and see ingredient overlaps for efficient shopping.

Planning Benefits:

  • Auto-calculates total ingredients so you buy just what you need (great for big celebrations!)
  • Generates a shopping list by grocery sections—grab all produce, dairy, or bakery goods in one go
  • Avoids accidental duplicate buys and prevents forgotten staples
  • Helps organize prep timelines so you’re never overwhelmed on the big day

Pro tip: Schedule your Thanksgiving plan to see at a glance which tasks and ingredients overlap—like fresh herbs used in both stuffing and gravy—making meal execution seamless.

Cook and Prep Times

Since you’ll be making several dishes, expect some overlapping prep; most can be made ahead. Here’s a guideline per dish:

  • Appetizers & simple sides: 20-40 minutes
  • Main turkey dishes: 2-4 hours including roasting and resting
  • Hearty casseroles: 45-70 minutes
  • Desserts: 25-70 minutes (plus chilling time for some)

Total time for a full meal: Plan to start a couple of days ahead, prepping sides and desserts for a smooth and festive Thanksgiving Day.

Recap: The Ultimate Thanksgiving Recipe Collection

These 32 insanely good Thanksgiving recipes deliver comfort and excitement, ensuring your holiday feast is bursting with flavor. By planning ahead and leveraging organized shopping lists, you can spend less time stressing and more time celebrating with your favorite people.

Cozy Thanksgiving Magic: 43 Must-Try Crockpot Recipes for a Stress-Free Feast

43 Cozy Thanksgiving Crockpot Recipes Everyone Will Love – Slow Cooking

Introduction

Thanksgiving is all about gathering around the table for comforting dishes, but the holiday can easily become overwhelming with all its cooking demands. That’s where these 43 Cozy Thanksgiving Crockpot Recipes come in. Slow cooking is your secret weapon—effortlessly delivering classic flavors and freeing up stove and oven space for that essential turkey or pie! Discover crowd-pleasing favorites, reinvented sides, and creative desserts, all ready with the push of a button.

Why You’ll Love These Slow Cooker Thanksgiving Recipes

These recipes make Thanksgiving simpler and stress-free. Imagine hands-off, foolproof mashed potatoes, succulent stuffing, and perfectly tender turkey—all while you enjoy time with family and friends. Slow cooking allows flavors to deepen and meld for extra-cozy results, producing delicious dishes with less hustle and no guesswork.

Top Slow Cooker Staples for Thanksgiving

This collection covers the big meal from start to finish, featuring:

  • Ultra-creamy mashed potatoes
  • Flavor-packed cranberry sauce
  • Classic green bean casseroles
  • Aromatic stuffing variations
  • Sweet potato delights
  • Festive soups and mulled ciders
  • Turkey breasts and succulent hams
  • Decadent slow-cooked desserts

How to Build a Cozy Thanksgiving Slow Cooker Feast

Start with appetizers like warm spinach-artichoke dip or slow-simmered butternut squash soup. For mains, let the slow cooker handle braised turkey breast or honey-glazed ham. Sides get a flavor and texture upgrade when done low and slow—think classic green beans, garlicky mashed potatoes, and sausage stuffing infused with herbs. You can even finish with pumpkin bread pudding or apple crisp, all done in a slow cooker!

Serving Suggestions for a Complete Thanksgiving Meal

Pair your slow-cooked favorites with traditional oven-roasted dishes or add fresh salads and crusty bread to round out textures and flavors. These crockpot recipes travel well, making them ideal for potlucks or hosting Thanksgiving in your home. Set out your spreads buffet-style for a relaxed, family-style atmosphere.

Nutritional Information and Serving Size

This collection features recipes serving anywhere from 4 to 12 guests. Most dishes come with options to customize for dietary needs—gluten-free stuffings, vegan-friendly casseroles, and lightened-up desserts—so everyone at your table gets a taste of holiday comfort.

Must-Try Thanksgiving Crockpot Recipes (Recap)

From classic mashed potatoes with garlic and chives, to maple-glazed Brussels sprouts, slow-cooked turkey gravy, and sweet apple cinnamon cobbler, there’s something here to satisfy every craving while keeping Thanksgiving stress-free.

[ingredients]
Mashed Potatoes:
– 5 lb russet potatoes, peeled and chopped
– 1 cup chicken broth
– 1/2 cup butter
– 3/4 cup sour cream
– Salt and pepper to taste

Cranberry Sauce:
– 1 (12 oz) bag fresh cranberries
– 1 cup orange juice
– 3/4 cup sugar
– Zest of 1 orange

Stuffing:
– 1 loaf day-old bread, cubed
– 1 small onion, diced
– 1 cup celery, chopped
– 1 cup chicken or vegetable broth
– 2 eggs
– 1 tbsp fresh sage
– Salt and pepper

Turkey Breast:
– 4 lb boneless turkey breast
– 1/4 cup butter, softened
– 2 tsp dried thyme
– 1 tsp garlic powder
– Salt and pepper

Sweet Potato Casserole:
– 4 cups sweet potatoes, peeled and cubed
– 1/2 cup brown sugar
– 1/4 cup butter
– 1/4 cup milk
– Mini marshmallows for topping

Dessert (Apple Crisp):
– 6 apples, peeled and sliced
– 1/2 cup granulated sugar
– 1/2 cup flour
– 1/2 cup oats
– 1/2 cup butter
– 1 tsp cinnamon
[/ingredients]

💡Meal Planning Tip: Save this entire Thanksgiving slow cooker collection to instantly generate an organized shopping list. Every ingredient will be grouped for quick grocery runs, helping you stay organized during busy holiday meal planning.

CookifyAI meal planning interface

Instructions

  1. For mashed potatoes: Add potatoes and broth to slow cooker. Cook on high for 3-4 hours until fork-tender, then mash with butter, sour cream, salt, and pepper.
  2. For cranberry sauce: Combine cranberries, orange juice, sugar, and zest in slow cooker. Cook on low for 4-5 hours, stirring occasionally, until berries burst and sauce thickens.
  3. For stuffing: Mix bread, onion, celery, broth, eggs, sage, salt, and pepper. Transfer to slow cooker and cook on low for 4 hours, stirring once halfway through.
  4. For turkey breast: Rub with butter, thyme, garlic powder, salt, and pepper. Place in slow cooker and cook on low for 6-7 hours or until internal temperature hits 165°F.
  5. For sweet potato casserole: Add sweet potatoes, brown sugar, butter, and milk to the slow cooker. Cook on high for 4 hours, then mash and top with mini marshmallows before the last 10 minutes.
  6. For apple crisp: Combine apples, sugar, flour, oats, butter, and cinnamon in slow cooker. Cook on low for 3 hours until apples are tender and topping is golden.

Weekly Meal Planning

With these crockpot recipes, prepping for Thanksgiving (or a cozy fall week) is simpler than ever. Save and schedule your favorites to your digital meal plan. CookifyAI automatically consolidates all ingredients, organizes your shopping list by category, and reduces food waste by calculating total quantities for overlapping items.

Planning Benefits:

  • Plan every Thanksgiving dish in advance with scheduled cooking days
  • Get smart, automatic ingredient totals for multiple recipes
  • Streamline your grocery shop and avoid duplicate purchases
  • See how dishes complement each other and balance out the meal

Pro tip: Batch schedule your crockpot recipes so multiple dishes finish around your ideal serving time—with no kitchen scrambling required.

Cook and Prep Times

Prep Time: 20-30 minutes per dish
Cook Time: 3-8 hours depending on the recipe
Total Time: Most dishes require minimal hands-on effort and can be kept warm until serving—perfect for busy holidays!

Streamline your Thanksgiving (and every busy week) with cozy, flavorful slow cooker recipes everyone will love—and let CookifyAI generate your ingredient lists and plans for stress-free, delicious results!

Crockpot Cranberry Apricot Chicken: A Sweet & Savory Slow Cooker Delight

Crockpot Cranberry Apricot Chicken

Introduction

If you’re searching for a simple yet flavor-packed family dinner, look no further than Crockpot Cranberry Apricot Chicken. The sweet tang of cranberries and apricots, balanced with tender chicken slow-cooked to perfection, creates a dish that’s both comforting and fuss-free. This set-it-and-forget-it recipe brings vibrant color and irresistible aroma to your dinner table, making it a perfect option for weeknights or when hosting guests.

Deliciously Unique Crockpot Cranberry Apricot Chicken

What makes this dish a standout is its harmonious blend of flavors: tart cranberries, sweet apricots, and savory chicken meld in a rich, glossy sauce thanks to low-and-slow crockpot cooking. The result is meltingly tender chicken infused with complex flavors, and a sweet-savory sauce that’s as good drizzled over rice as it is mopped up with bread. It’s impossible to resist!

Prepping the Fruit-Infused Sauce

For the sauce, combine whole-berry cranberry sauce and apricot preserves with a touch of Dijon and onion soup mix for a depth of flavor. The crockpot allows these distinct ingredients to combine, mellow, and infuse the chicken with both tart and sweet notes. Optional: add a splash of orange juice or a few orange zest strips for extra brightness.

Layering in the Crockpot

Start by arranging the chicken breasts or thighs in the bottom of your slow cooker. Pour the mixed sauce over the top, making sure every piece of chicken is well coated. A sprinkle of dried thyme or rosemary makes an excellent finish before starting your slow cook—no extra fuss required.

Serving Suggestions

This Crockpot Cranberry Apricot Chicken pairs beautifully with fluffy white rice, wild rice, or buttered egg noodles. For freshness and crunch, serve with steamed green beans or a simple side salad. Spoon plenty of the sweet-tart sauce over your side for a complete, comforting meal.

Nutritional Information and Serving Size

The recipe yields about 6 servings. Each serving has approximately 340–370 calories, depending on chicken cuts and portioning. It’s a lighter option that delivers maximum satisfaction from every bite.

Crockpot Cranberry Apricot Chicken (Recap)

This dish is a true crowd pleaser, delivering bold flavor with minimal prep. The balance of sweet, tangy, and savory makes it linger on the palate, and the crockpot prep guarantees your chicken stays moist and tender every time.

[ingredients]
2 1/2 to 3 pounds boneless, skinless chicken breasts or thighs
1 (14-ounce) can whole-berry cranberry sauce
1 cup apricot preserves
1 envelope (about 1 ounce) onion soup mix
2 tablespoons Dijon mustard
Optional: 1/4 cup orange juice or strips of orange zest
Optional: 1 teaspoon dried thyme or rosemary
Salt and black pepper, to taste
Fresh parsley, for garnish
[/ingredients]

💡Meal Planning Tip: Save this recipe to automatically generate a shopping list organized by grocery store aisle, making meal prep and shopping more efficient each week.

CookifyAI meal planning interface

Instructions

  1. Arrange chicken breasts or thighs in the base of your crockpot. Season lightly with salt and black pepper.
  2. In a mixing bowl, whisk together cranberry sauce, apricot preserves, onion soup mix, Dijon mustard, and optional orange juice/zest and herbs until well combined.
  3. Pour the fruit-and-mustard sauce evenly over the chicken, ensuring all pieces are well coated.
  4. Cover and cook on LOW for 5–6 hours or on HIGH for 2 1/2–3 hours, until chicken is cooked through and fork-tender.
  5. Before serving, taste and adjust seasoning with salt and pepper as needed. Garnish with chopped fresh parsley if desired.
  6. Serve chicken with a generous spoonful of sauce over rice or noodles, plus your favorite sides.

Weekly Meal Planning

This Crockpot Cranberry Apricot Chicken is ideal for batch cooking or prepping ahead—simply portion out leftovers for lunches or a second dinner. Save and schedule this recipe using CookifyAI to build your meal calendar, streamline how you shop, and see ingredient totals for all planned meals in one view.

Planning Benefits:

  • Consolidates ingredients across your planned recipes
  • Keeps shopping lists organized by grocery section for faster trips
  • Prevents overbuying and wasted ingredients
  • Makes prepping weeknight dinners stress-free

Pro tip: Schedule Crockpot Cranberry Apricot Chicken alongside other slow cooker recipes and CookifyAI will update your ingredient list—so you only buy as much chicken, preserves, and pantry staples as needed for your whole week’s plan!

Cook and Prep Times

Prep Time: 10 minutes
Cook Time: 5–6 hours on LOW or 2.5–3 hours on HIGH
Total Time: 5 hours 10 minutes (LOW) or 2 hours 40 minutes (HIGH)

Enjoy the sweet-smoky aroma and unbeatable ease of Crockpot Cranberry Apricot Chicken, and see how planning with CookifyAI transforms your meal routine!

Effortless Crockpot Stuffing: The Ultimate Hands-Off Thanksgiving Side Dish

Crockpot Stuffing Recipe: Easy Thanksgiving Side Dish for Dinner

Introduction

This Crockpot Stuffing recipe is the ultimate solution for those seeking a perfectly seasoned, fluffy, and moist Thanksgiving side dish with minimal effort. Let your slow cooker handle the work while you focus on the main course or enjoy more time with your guests. With classic flavors, hearty bread, vegetables, and herbs, this stuffing brings all the comfort of a traditional holiday meal—without crowding your oven.

Flavorful & Effortless Crockpot Stuffing

What sets this Crockpot Stuffing recipe apart is its incredible flavor married with ease of preparation. Slow cooking lets all the aromatic ingredients meld for a rich, savory taste and a beautifully tender texture. It’s not only stress-free but also frees up stove and oven space, making it ideal for busy holiday kitchens or simple weeknight dinners.

Perfecting Your Stuffing Base

To create the best texture, use a hearty bread such as French, Italian, or sourdough, cut into cubes and dried out beforehand. Sautéing onions and celery before adding them ensures they soften nicely and infuse the entire dish with flavor. Classic herbs—sage, thyme, and parsley—deliver that unmistakable Thanksgiving aroma and taste. For an extra layer, add a touch of poultry seasoning.

Easy Assembly in the Crockpot

Once you’ve prepped your ingredients, simply mix everything together with flavorful chicken or vegetable broth. The Crockpot does the rest, ensuring hands-off cooking and consistent results. You’ll have moist stuffing with pleasantly crispy edges on top, ready to serve straight from the slow cooker.

Serving Suggestions for a Show Stopping Side Dish

Serve this warm, straight from the Crockpot, garnished with fresh parsley for a pop of color. It pairs beautifully with turkey, chicken, ham, or any favorite main. Leftovers make a delicious lunch, or can be used in recipes like stuffing muffins or savory bread puddings.

Nutritional Information & Serving Size

This recipe yields about 8 to 10 generous servings. Each serving contains around 200 to 250 calories, depending on the bread and the amount of butter or broth used. It’s a classic comfort food that fits right in at any festive or family dinner.

Flavorful & Effortless Crockpot Stuffing (Recap)

Slow cooker stuffing is a game-changing side dish—big flavors, no hassle, and perfect for feeding a crowd. This recipe guarantees a comforting, crowd-pleasing side for any Thanksgiving table or hearty weeknight dinner.

[ingredients]
1 (16-ounce) loaf French, Italian, or sourdough bread, cut into 1-inch cubes (about 10 cups), preferably slightly stale
1/2 cup unsalted butter
2 cups yellow onion, finely chopped
1 1/2 cups celery, diced
3-4 garlic cloves, minced
1/4 cup fresh parsley, chopped (plus more for garnish)
1 tablespoon fresh sage, chopped (or 2 teaspoons dried)
2 teaspoons fresh thyme, chopped (or 1 teaspoon dried)
1 teaspoon poultry seasoning (optional)
1 teaspoon salt (adjust to taste)
1/2 teaspoon ground black pepper
2 1/2 to 3 cups low-sodium chicken or vegetable broth (start with less and add more as needed)
2 large eggs, lightly beaten (for binding; optional)
Nonstick spray or a little butter for greasing the Crockpot
[/ingredients]

💡Meal Planning Tip: Save this recipe to automatically generate an organized shopping list with all ingredients sorted by store section—perfect for efficient grocery trips and stress-free meal planning.

CookifyAI meal planning interface

Instructions

  1. Prepare the bread: Spread the cubed bread on baking sheets and let it sit uncovered overnight to dry, or bake at 300°F for 20-30 minutes, tossing occasionally, until crisp but not browned.
  2. Sauté vegetables: In a large skillet, melt butter over medium heat. Add onions and celery; sauté for 6-8 minutes until softened. Add garlic and cook for 1 minute more.
  3. Mix stuffing: In a large mixing bowl, combine bread cubes, sautéed vegetables, parsley, sage, thyme, poultry seasoning (if using), salt, and pepper. Toss to mix. Pour in broth little by little until bread is moistened but not soggy, then fold in eggs (if using) for a more cohesive texture.
  4. Slow cook: Lightly grease the Crockpot insert. Transfer stuffing mixture and cover. Cook on LOW for 3.5–4.5 hours or on HIGH for 2–3 hours, until heated through and edges are golden. For crispier edges, leave the lid slightly ajar for the last 30 minutes.
  5. Serve: Fluff with a fork and garnish with extra fresh parsley. Serve hot directly from the Crockpot.

Weekly Meal Planning

This Crockpot Stuffing is a fantastic make-ahead side that saves time for busy weeks and holidays. Save and schedule this recipe to map out your holidays, consolidate shopping with other dinner recipes, and never forget an ingredient.

Planning Benefits:

  • Automatically combines ingredient amounts for your entire week
  • Organizes lists by grocery aisle for faster shopping
  • Eliminates forgotten items and duplicate purchases
  • Makes multi-meal holiday prep seamless and stress-free

Pro tip: Schedule your recipes to optimize ingredient use—like buying celery or parsley once for this stuffing and other planned meals. Smarter lists mean less waste and more convenience!

Cook and Prep Times

Prep Time: 20 minutes
Cook Time: 3.5–4.5 hours (on LOW) or 2–3 hours (on HIGH)
Total Time: About 4–5 hours (much of it hands-off)

Slow Cooker Magic: 50 Effortless Thanksgiving Side Dishes for a Stress-Free Feast

50 Easy Thanksgiving Crockpot Side Dish Recipes

Introduction

Thanksgiving feasts are all about bringing people together for delicious comfort food without the stress. When oven space is at a premium and the stovetop’s crowded, these easy Thanksgiving Crockpot side dish recipes are your secret to a seamless, mouthwatering holiday meal. Let your slow cooker do the heavy lifting—these recipes deliver the classic flavors you love, hands-off, while you focus on the main event and spending time with friends and family.

Why Crockpot Sides Are the Ultimate Thanksgiving Game Changer

Not only do crockpot sides save oven space and minimize last-minute scrambling, but they also guarantee deeply developed flavors and perfect textures thanks to low-and-slow cooking. Many of these dishes are set-it-and-forget-it, making them ideal for both new cooks and experienced hosts looking to simplify their holiday meal. From creamy mashed potatoes to flavorful stuffing and tender root vegetables, you’ll find a winning option for every guest at your table.

Top Thanksgiving Crockpot Side Dishes to Try

Here are some crowd-pleasers you can prepare in your slow cooker for a truly effortless feast:

  • Creamy Mashed Potatoes
  • Classic Green Bean Casserole
  • Slow-Cooked Sweet Potato Casserole
  • Garlic Butter Corn
  • Maple Glazed Carrots
  • Cheesy Scalloped Potatoes
  • Southern Green Beans with Bacon
  • Homestyle Stuffing
  • Brown Sugar Butternut Squash
  • Cranberry Apple Stuffing
  • Parmesan Garlic Mushrooms
  • Honey Glazed Brussels Sprouts
  • Creamed Corn
  • Loaded Potato Casserole
  • Crockpot Mac and Cheese
  • Savory Cornbread Dressing
  • Sautéed Cabbage with Apples
  • Maple Dijon Carrots
  • Sweet ‘n Tangy Glazed Onions
  • Root Vegetable Medley

Sample Recipe: Slow Cooker Creamy Mashed Potatoes

Perfectly creamy with hints of garlic and tangy sour cream, mashed potatoes are a Thanksgiving must-have. Made in the slow cooker, these are as low-stress as it gets—just dump, cook, and mash.

[ingredients]
3 pounds russet potatoes, peeled and cubed
4 cloves garlic, minced
1 cup chicken or vegetable broth
1/3 cup sour cream
1/2 cup milk
4 tablespoons butter
Salt and pepper to taste
Optional: Chives or parsley for garnish
[/ingredients]

💡Meal Planning Tip: Save this recipe to automatically generate an organized shopping list with all ingredients sorted by store section—perfect for stress-free Thanksgiving prep with no forgotten items.

CookifyAI meal planning interface

Instructions

  1. Add potatoes, garlic, and broth to the crockpot. Cover and cook on high for 3–4 hours or until potatoes are fork-tender.
  2. Drain any excess broth, or reserve a little for mashing.
  3. Add butter, sour cream, and milk. Mash until creamy and smooth. Add salt and pepper to taste.
  4. Garnish with chives or parsley and serve warm.

Other Must-Try Crockpot Sides for Thanksgiving

  • Slow Cooker Green Bean Casserole: Toss green beans, mushroom soup, and crispy onions in your slow cooker for a comforting classic.
  • Cheddar Corn Pudding: Creamy, cheesy, and just a little sweet—perfect with turkey.
  • Herb Buttered Baby Red Potatoes: Toss potatoes with butter and herbs, then let the slow cooker do the rest.
  • Maple Pecan Glazed Carrots: Sweet, sticky, and nutty for a crowd-pleasing twist on a veggie favorite.

Weekly Meal Planning

Thanksgiving doesn’t have to be overwhelming! Save and schedule your favorite crockpot side dish recipes in CookifyAI to create a personalized meal plan and one smart shopping list that consolidates ingredients across all your Thanksgiving recipes.

Planning Benefits:

  • Calculates total ingredients needed for your entire holiday meal
  • Organizes your grocery list by store section—no more backtracking in crowded aisles
  • Combines overlapping ingredients to reduce waste and avoid duplicates
  • Simplifies prepping and cooking several sides at once for a more relaxing holiday

Pro tip: Plan your meals early in the week and use CookifyAI to keep track of what you already have at home. You’ll save time, money, and avoid Thanksgiving day stress!

Cook and Prep Times

Prep Time: Varies (typically 10–20 minutes per side)
Cook Time: 2–4 hours on high or 5–7 hours on low
Total Time: Most sides are ready in 3–6 hours (depending on the recipe)

Make Your Best Thanksgiving Yet

With these 50 easy Thanksgiving Crockpot side dish recipes at your fingertips, you’ll have more time to enjoy great food and good company. Let your slow cooker bring out the best in every dish, and make holiday meal planning easier than ever with smart tools like CookifyAI.

Slow-Cooker Splendor: Your Ultimate 2025 Thanksgiving Feast Made Easy

2025 Thanksgiving Crockpot Menu

Introduction

Thanksgiving is all about coming together over comforting, memorable dishes—and using a Crockpot can make the holiday less stressful while still delivering crowd-pleasing flavors. A 2025 Thanksgiving Crockpot menu streamlines your feast, letting you spend less time in the kitchen and more time with loved ones, all while ensuring your meal is warm, flavorful, and ready to impress.

Why Create a Crockpot Thanksgiving Menu?

This menu is the ultimate solution for cooks who want to enjoy Thanksgiving as much as their guests. Using slow cookers helps free up oven space, reduces last-minute kitchen chaos, and keeps dishes perfectly moist and infused with flavor. It’s a winning strategy whether you’re hosting a big family gathering or an intimate Friendsgiving.

2025 Thanksgiving Crockpot Menu Dishes

Each of these recipes brings tradition to your table with the ease of slow cooking:

  • Crockpot Herb-Basted Turkey Breast
  • Slow Cooker Savory Stuffing
  • Creamy Garlic Mashed Potatoes
  • Maple-Glazed Carrots
  • Cranberry Orange Compote
  • Pumpkin Pecan Bread Pudding

Let’s dive into the centerpiece recipe that ties it all together—Crockpot Herb-Basted Turkey Breast.

Crockpot Herb-Basted Turkey Breast

Succulent and aromatic, this turkey breast slow cooks in its juices for hours, turning out fork-tender and perfectly seasoned. The blend of fresh herbs, garlic, and citrus creates a centerpiece that both traditionalists and adventurous eaters will love.

[ingredients]
– 5-6 lb bone-in turkey breast, skin on
– 3 tbsp olive oil
– 1 tbsp fresh rosemary, chopped
– 1 tbsp fresh thyme, chopped
– 1 tbsp fresh sage, chopped
– 1 tsp salt
– 1/2 tsp black pepper
– 4 cloves garlic, minced
– 1 medium onion, sliced
– 1 lemon, sliced
– 1 cup low sodium chicken broth
[/ingredients]

💡Meal Planning Tip: Save this recipe and the entire menu to automatically generate a complete shopping list organized by store section—making your Thanksgiving grocery trip faster and stress-free!

CookifyAI meal planning interface

Instructions

  1. Pat turkey breast dry with paper towels. Rub olive oil all over the outside and under the skin.
  2. Mix rosemary, thyme, sage, salt, pepper, and minced garlic. Rub evenly under and over the skin.
  3. Place onion and lemon slices in the bottom of a large Crockpot. Pour in chicken broth.
  4. Set the turkey breast on top of the aromatics, skin side up.
  5. Cover and cook on LOW for 5-6 hours, or until the internal temperature reaches 165°F.
  6. (Optional) To crisp up the skin, broil the turkey breast in the oven for 3-5 minutes before carving.
  7. Let rest 10-15 minutes before slicing and serving with pan juices.

Serving Suggestions and Sides

Pair your Crockpot turkey with classic slow cooker stuffing, creamy mashed potatoes, sweet maple-glazed carrots, and a bright, tangy cranberry compote. For dessert, a pumpkin pecan bread pudding delivers all the warmth and spice of the season—no oven required!

Nutritional Information and Serving Size

This Crockpot turkey breast recipe serves 6-8, with each serving containing approximately 310 calories, 10g fat, 0g carbohydrates, and 55g protein. Sides will vary in their nutritional content but offer a balance of vegetables and hearty flavors.

Crockpot Thanksgiving Menu Recap

With this 2025 Thanksgiving Crockpot menu, you’ll serve a deliciously memorable feast with less fuss and more time to enjoy the holiday. Every dish boasts deep, rounded flavors and stays warm, perfect for seconds and relaxed buffet-style servings.

Weekly Meal Planning

Putting together a large meal is a breeze when you save and schedule these Thanksgiving recipes for the week. With CookifyAI, you can plan your entire menu, generate a perfectly organized shopping list, and ensure every ingredient is accounted for.

Benefits include:

  • Effortless calculation of total quantities for all ingredients across your menu
  • Shopping lists sorted by store sections for speed and convenience
  • No duplicate purchases or forgotten ingredients
  • Prep and cooking steps organized for smooth, timely execution

Pro tip: When planning for guests with special dietary preferences, add recipes for vegetarian or gluten-free options—CookifyAI will merge all ingredients into one streamlined shopping list for Thanksgiving perfection.

Cook and Prep Times

Prep Time: 30 minutes
Cook Time: 5-6 hours
Total Time: 6-7 hours (including resting and sides preparation)

Serve a holiday meal to remember—rich in tradition, full of flavor, and genuinely low stress—with this 2025 Thanksgiving Crockpot menu!

Mom’s Crockpot Stuffing: The Ultimate Stress-Free Thanksgiving Classic

Mom’s Crockpot Stuffing Recipe for Thanksgiving

Introduction

There’s nothing quite like a classic stuffing to complete your Thanksgiving table, and using a crockpot makes this beloved side even simpler. Mom’s Crockpot Stuffing Recipe ensures perfectly moist, flavorful stuffing without the oven hustle—freeing up precious space for turkey and pies. This “set it and forget it” approach guarantees consistently delicious results, keeping your holiday stress-free and your guests asking for seconds.

Why This Crockpot Stuffing is a Thanksgiving Star

This stuffing stands out because it’s incredibly flavorful and remains tender throughout—no more worrying about dried-out or soggy stuffing! The crockpot keeps everything at the ideal consistency, allowing the rich blend of aromatic herbs, soft bread cubes, and savory vegetables to shine. Plus, preparing it ahead means you can spend more time with family and less time juggling oven schedules.

Building Savory Layers of Flavor

The secret to extraordinary stuffing is all about layering flavors. Sautéing onions, celery, and herbs before combining them with buttery bread cubes gives this recipe its nostalgic, homemade taste that everyone looks forward to year after year. A hint of poultry seasoning and just the right amount of broth create a balance of moisture and aroma quintessential for Thanksgiving.

Crockpot Magic for Perfect Texture

Unlike baked versions, slow-cooking your stuffing in a crockpot gently infuses all ingredients for even flavor without drying out. The low-and-slow method means every mouthful is soft yet substantial, soaking up all the savory goodness from broth and aromatic vegetables. It’s easy to keep the stuffing warm right in the crockpot, so serving and second helpings are a breeze.

Serving Suggestions for Classic Thanksgiving Stuffing

Pair your crockpot stuffing with roast turkey and all the classic sides, like mashed potatoes, cranberry sauce, and gravy. For extra touches, mix in toasted pecans, dried cranberries, or sautéed mushrooms for added texture and nuance. Serve straight from the crockpot for a rustic presentation or spoon into a serving dish and garnish with fresh herbs.

Nutritional Information and Serving Size

This recipe yields about 8 to 10 generous servings, making it the perfect size for a festive gathering. Each serving contains approximately 200 to 240 calories, depending on the type of bread and amount of butter used. It’s a comforting, lighter alternative to traditional baked variations.

Mom’s Crockpot Stuffing Recipe for Thanksgiving (Recap)

With classic flavors and hands-off ease, this crockpot stuffing delivers comfort and nostalgia—the true essence of a Thanksgiving favorite. Its foolproof technique and crowd-pleasing taste make it a must-have side at your holiday table.

[ingredients]
12 cups dry bread cubes (white or whole wheat)
1 cup unsalted butter (2 sticks)
2 cups yellow onions, diced
2 cups celery, thinly sliced
3 cloves garlic, minced
3 large eggs, beaten
2 teaspoons poultry seasoning
1 1/2 teaspoons dried sage
1 teaspoon dried thyme
Salt and pepper, to taste
3 to 3 1/2 cups chicken or vegetable broth
Optional: 1/2 cup fresh parsley, chopped; 1 cup toasted pecans or dried cranberries
[/ingredients]

💡Meal Planning Tip: Save this recipe to automatically generate an organized shopping list with all ingredients sorted by store section—perfect for efficient grocery trips during busy holiday weeks!

CookifyAI meal planning interface

Instructions

  1. Prep your bread cubes in advance. Allow them to sit out overnight to dry, or toast in a 300°F oven for 20–25 minutes, stirring occasionally, until dry but not browned.
  2. In a large skillet, melt butter over medium heat. Add onions and celery, cooking until softened (about 7 minutes). Stir in garlic and cook for 1 minute more.
  3. In a large bowl, combine bread cubes with sautéed veggies and melted butter. Add the eggs, poultry seasoning, sage, thyme, salt, and pepper. Mix well.
  4. Pour in 3 cups of broth, tossing until the bread is moist but not soggy. Add more broth as needed for desired consistency. Stir in parsley and any optional mix-ins.
  5. Spray your crockpot insert with non-stick spray. Spoon the stuffing mixture in and cover.
  6. Cook on LOW for 4–5 hours, or HIGH for 2–3 hours. Stir once about halfway through for even cooking. If you prefer crispier edges, uncover for the last 30 minutes.
  7. Taste and adjust seasoning if needed, then serve warm, garnished with extra parsley if desired.

Weekly Meal Planning

This crockpot stuffing isn’t just for Thanksgiving—it’s perfect for hearty weeknight dinners or holiday potlucks. Save and schedule this recipe to effortlessly plan which days you’ll make it and generate a smart shopping list that consolidates all your recipes for the week.

Meal Planning Benefits:

– Calculates total ingredient needs across multiple recipes
– Organizes your shopping list by store aisle for speed and simplicity
– Keeps you from buying duplicates or missing key ingredients
– Makes holiday and weekly prep more efficient

Pro tip: When making several dishes for your Thanksgiving menu, schedule all your recipes and CookifyAI will automatically tally ingredients—so if you need celery for both stuffing and another dish, it ensures you buy just the right amount!

Cook and Prep Times

Prep Time: 25 minutes
Cook Time: 4–5 hours (on low)
Total Time: 4.5–5.5 hours

Effortlessly Sweet: Slow Cooker Maple & Brown Sugar Glazed Carrots Delight

Slow Cooker Magic: Maple & Brown Sugar Glazed Carrots

Introduction

Slow Cooker Magic: Maple & Brown Sugar Glazed Carrots delivers the perfect blend of sweet, buttery, and tender vegetables – all with minimal effort. The irresistible glaze of pure maple syrup and brown sugar transforms simple carrots into a standout side dish, making them ideal for holiday feasts, potlucks, or busy weeknight dinners. This recipe is a game changer for anyone looking for delicious, hands-off cooking that impresses every time.

Why You’ll Love These Maple & Brown Sugar Glazed Carrots

This recipe’s magic lies in the slow cooker: gentle, steady heat allows carrots to soak up a luxurious glaze, resulting in fork-tender veggies and a rich, caramelized finish. Each bite bursts with warm maple sweetness, enhanced by savory butter and a dash of fragrant cinnamon. With just a few pantry staples and almost no prep, you get a crowd-pleaser that both kids and adults adore.

Simple Ingredients for Big Flavor

Selecting high-quality maple syrup and tender, fresh carrots is key to the deep flavor of this dish. The sugar adds richness, while the butter brings everything together for a luscious, glossy coating. Don’t skip the pinch of cinnamon—it heightens the aroma and taste, creating a cozy, comforting side everyone will be asking for.

[ingredients]
2 lbs carrots (peeled and cut into 2-inch sticks or use baby carrots)
1/3 cup pure maple syrup
1/4 cup light brown sugar, packed
1/4 cup unsalted butter, melted
1/2 teaspoon salt
1/2 teaspoon cinnamon
1/4 teaspoon freshly ground black pepper
Optional: Chopped parsley for garnish
[/ingredients]

💡Meal Planning Tip: Save this recipe to instantly generate a smart shopping list that’s organized by store section, making grocery trips fast and efficient—even when you’re planning for multiple meals.

CookifyAI meal planning interface

Instructions

  1. Place peeled and cut carrots (or baby carrots) into your slow cooker.
  2. In a small bowl, whisk together melted butter, maple syrup, brown sugar, cinnamon, salt, and pepper until well combined.
  3. Pour the maple and brown sugar mixture over the carrots. Toss gently to coat the carrots evenly.
  4. Cover and cook on LOW for 4 to 5 hours or on HIGH for 2 to 2.5 hours, until the carrots are fork tender and coated in a glossy glaze.
  5. Stir well. If desired, garnish with chopped fresh parsley before serving.

Serving Suggestions for Glazed Carrots

These glazed carrots are an ideal side for roasted chicken, turkey, baked ham, or pork tenderloin. For a festive touch, sprinkle with toasted pecans or an extra drizzle of maple syrup before serving. Leftovers make a fantastic addition to salads or grain bowls later in the week.

Nutritional Information and Serving Size

This recipe serves 6 as a side. Each serving contains approximately 160 calories, making it both indulgent and wholesome. Perfect for meatless dishes, potlucks, or whenever you want to sneak extra veggies onto the table.

Try Slow Cooker Magic: Maple & Brown Sugar Glazed Carrots (Recap)

With just minutes of prep and the magic of your slow cooker, these maple & brown sugar glazed carrots become a comforting, sweet-savory side for any occasion. The irresistible combination of buttery glaze and tender carrots makes this dish a new classic in family meal rotations.

Weekly Meal Planning

Add this effortless side to your weekly meal plan for stress-free dinners. Save and schedule this recipe in CookifyAI to generate a shopping list that pools all ingredients—no more scrambling or last-minute store runs.

Planning Benefits:

  • Aggregates ingredient quantities for the week
  • Sorts your grocery list by store department
  • Keeps you from forgetting key ingredients
  • Makes meal prep effortless and streamlined

Pro tip: Combine this recipe with your main courses for the week in CookifyAI, and you’ll get an automatic tally of total produce, dairy, and other essentials needed. Bye-bye, food waste and repeat purchases!

Cook and Prep Times

Prep Time: 10 minutes
Cook Time: 4 to 5 hours on LOW (or 2 to 2.5 hours on HIGH)
Total Time: 4 to 5 hours, hands-off

Enjoy the rich, comforting flavors and easy prep of Slow Cooker Magic: Maple & Brown Sugar Glazed Carrots—all while making your meal planning easier and shopping trips smarter!

Cozy Comfort in a Crockpot: Sweet Potatoes with Marshmallow Magic

Easy Crockpot Sweet Potatoes with Marshmallows

Introduction

When it comes to side dishes that combine comfort and irresistible sweetness, Easy Crockpot Sweet Potatoes with Marshmallows stands out as a classic favorite. This recipe delivers creamy, fork-tender sweet potatoes crowned with a gooey marshmallow topping, all cooked with minimal hands-on time thanks to the slow cooker. Perfect for holiday feasts or cozy family dinners, this dish offers both nostalgia and convenience—just set it and forget it!

Compelling Reasons to Make Easy Crockpot Sweet Potatoes with Marshmallows

Few recipes capture the magic of sweet and savory like this one: the slow cooking process infuses sweet potatoes with rich brown sugar and warm spices, while airy marshmallows melt to golden perfection on top. It’s crowd-pleasing comfort food that fits into any busy schedule—effortlessly delicious, always a hit at gatherings, and an easy solution for stress-free meal planning.

How to Get Creamy, Flavorful Slow Cooked Sweet Potatoes

Begin by peeling and cubing fresh sweet potatoes for uniform cooking. Add brown sugar, butter, cinnamon, and a splash of vanilla to the crockpot. The slow cooker draws out the natural sweetness of the potatoes, gently caramelizing everything together. Near the end of the cook time, scatter mini marshmallows across the top. Replace the lid and allow them to melt into a luscious, gooey topping.

Perfect Crockpot Sweet Potatoes Every Time

For best results, avoid overfilling the crockpot to ensure the sweet potatoes cook evenly. Stir gently once or twice mid-cook for a uniform, melt-in-your-mouth texture. When it’s time to serve, the marshmallow layer adds a festive finish and pairs perfectly with the warm, spiced potatoes beneath.

Serving Suggestions for an Easy, Festive Side Dish

This recipe pairs well with roasted turkey, ham, or your favorite plant-based main. For extra flair, sprinkle a little chopped toasted pecans or a dash of nutmeg on top before serving. It’s an ideal addition to your holiday spread, potluck, or comforting weeknight dinner.

Nutritional Information and Serving Size

This recipe yields approximately 6 hearty servings. Each portion contains around 230-250 calories, depending on the amount of butter and marshmallows used—a sweet side that’s best enjoyed in moderation at festive meals.

Deliciously Simple Crockpot Sweet Potatoes (Recap)

A true comfort classic, this dish balances velvety sweet potatoes with a gooey marshmallow crown. Easy to prepare ahead and always a crowd favorite, it’s a must-have addition for both special occasions and casual dinners.

[ingredients]
3 lbs sweet potatoes, peeled and cut into 1-inch cubes
1/3 cup brown sugar
1/4 cup unsalted butter, melted
1/2 teaspoon ground cinnamon
1/4 teaspoon nutmeg (optional)
1/2 teaspoon salt
1 teaspoon vanilla extract
2 cups mini marshmallows
Optional: 1/3 cup chopped pecans for garnish
[/ingredients]

💡Meal Planning Tip: Save this recipe to instantly create a sorted shopping list, organized by store section, for stress-free grocery trips and streamlined meal planning!

CookifyAI meal planning interface

Instructions

  1. Lightly grease your crockpot insert. Add the peeled, cubed sweet potatoes.
  2. In a small bowl, mix the brown sugar, melted butter, cinnamon, nutmeg (if using), salt, and vanilla. Pour the mixture over the sweet potatoes and toss to coat evenly.
  3. Cover and cook on LOW for 5-6 hours or on HIGH for 2.5-3 hours, until the sweet potatoes are fork-tender. Stir gently after 2 hours for even cooking.
  4. Once the sweet potatoes are tender, sprinkle mini marshmallows evenly over the top.
  5. Cover the crockpot and allow the marshmallows to melt for 15-20 minutes on LOW. Once melted, turn off the crockpot. Optional: sprinkle with chopped pecans just before serving.
  6. Serve warm as a delicious side dish!

Weekly Meal Planning

This crockpot sweet potato recipe is a time saver for meal planning, making it an excellent addition to your weekly menu. Save and schedule this recipe using CookifyAI to plan meals, generate smart grocery lists, and keep your kitchen organized.

Planning Benefits:

  • Automatically calculates ingredient amounts for multiple recipes
  • Consolidates grocery lists by store section for quick, stress-free shopping
  • Prevents duplicate purchases and forgotten items
  • Simplifies your entire weekly meal prep routine

Pro tip: When scheduling recipes for the week, plan your meals together so overlapping ingredients like sweet potatoes and butter are efficiently combined in your shopping list, minimizing food waste and saving money.

Cook and Prep Times

Prep Time: 15 minutes
Cook Time: 2.5-3 hours (on HIGH) or 5-6 hours (on LOW)
Total Time: 2.75-6.25 hours (includes marshmallow melting time)

Easy & Flavorful Crock Pot Stuffing: The Ultimate Holiday Feast Hack

Crock Pot Stuffing Recipes for Easy and Flavorful Holiday Meals

Introduction

Crock Pot stuffing recipes are your secret weapon for effortless and delicious holiday meals. With minimal hands-on time and the help of your slow cooker, you can achieve perfectly moist, savory stuffing infused with rich flavors. This hassle-free method streamlines holiday meal prep—freeing up your oven and making your big feast far less stressful.

Flavorful Crock Pot Stuffing: The Crowd-Pleaser

What makes Crock Pot stuffing a must-try? Its slow, gentle cooking process allows bread cubes to soak up all the herby, savory goodness without drying out. Whether you’re serving a classic herb stuffing or adding sausage, apples, or cranberries for a creative twist, this side dish is a guaranteed crowd-pleaser. It stays warm for hours, feeds a crowd, and pairs beautifully with turkey, ham, or festive mains of any kind.

Key Ingredients for Easy Crock Pot Stuffing

Simple, wholesome ingredients come together in this classic holiday favorite:

[ingredients]
1 loaf (about 14-16 oz) of day-old bread, cubed (French, sourdough, or sandwich bread all work)
1 cup diced onion
1 cup diced celery
1/2 cup unsalted butter, melted
2-3 cups low sodium chicken or vegetable broth
2 large eggs, beaten
2 tablespoons chopped fresh parsley (or 2 teaspoons dried)
1 tablespoon chopped fresh sage (or 1 teaspoon dried)
1 tablespoon chopped fresh thyme (or 1 teaspoon dried)
1 teaspoon salt
1/2 teaspoon black pepper
Optional mix-ins: 1 cup sliced mushrooms, 1 cup cooked crumbled sausage, 1/2 cup dried cranberries, or 1/2 cup chopped apples
[/ingredients]

💡Meal Planning Tip: Save this recipe to automatically create a meticulously organized shopping list, sorted by store section, for efficient shopping and stress-free holiday meal prep.

CookifyAI meal planning interface

Instructions

  1. Grease the inside of your Crock Pot with butter or nonstick spray.
  2. Spread the bread cubes evenly in the slow cooker.
  3. In a skillet, sauté onions and celery in melted butter over medium heat until softened, about 5 minutes. (Add mushrooms here if using.)
  4. In a large bowl, whisk together broth, eggs, herbs, salt, and pepper. Stir in the sautéed vegetables (and any additional mix-ins like sausage, apples, or cranberries).
  5. Pour the mixture over the bread cubes and gently toss (use clean hands or a large spoon) to coat, ensuring the bread is evenly moistened. Add more broth as needed; the mixture should be moist, not soggy.
  6. Cover and cook on LOW for 4–5 hours, or until the stuffing is set and edges are golden. For a crispy top, leave the lid off for the last 30 minutes.
  7. Serve warm, straight from the slow cooker—no last-minute fuss required!

Serving Suggestions for Your Festive Stuffing

Crock Pot stuffing pairs perfectly with roast turkey, glazed ham, or plant-based mains. Serve as the star side dish for your holiday spread, and garnish with extra parsley for a fresh, festive look. Leftovers reheat wonderfully and make tasty additions to sandwiches or breakfast hash the next day.

Nutritional Information and Serving Size

This recipe yields approximately 10 generous servings. Each serving contains about 200-250 calories (not including optional mix-ins), making it a satisfying yet relatively light addition to your holiday table.

Flavorful Crock Pot Stuffing (Recap)

With its irresistibly moist center, crispy edges, and rich, aromatic flavors, Crock Pot stuffing is a holiday classic made easier. Customizable with your favorite mix-ins, this dish is sure to win rave reviews from friends and family alike.

Weekly Meal Planning

Planning your holiday or weekly meals ahead? Save and schedule this stuffing recipe with CookifyAI to automatically generate a streamlined shopping list, perfectly organized by grocery store department.

**Meal Planning Benefits:**

– Automatically sums up ingredient amounts across all your planned dishes
– Prevents buying duplicate items and forgetting the essentials
– Groups your shopping list for faster, more organized store visits
– Makes prepping for big meals (or leftovers!) simple and coordinated

**Pro tip:** When planning an entire holiday menu, schedule all your recipes—CookifyAI will total up the ingredients you’ll need, so you buy just the right amount, reduce waste, and avoid last-minute grocery runs.

Cook and Prep Times

Prep Time: 20 minutes
Cook Time: 4–5 hours (in Crock Pot)
Total Time: 4 hours 20 minutes to 5 hours 20 minutes

Enjoy the ease and flavor of homemade stuffing—no oven space required!

Festive Crockpot Magic: Stress-Free Appetizers & Sides for a Holiday Feast

Holiday Crockpot Appetizers & Sides You’ll Love

Introduction

When the holidays roll around and your kitchen is buzzing with activity, nothing beats the convenience of set-it-and-forget-it recipes. With these Holiday Crockpot Appetizers & Sides, you’ll keep your oven free for mains, delight guests with bold flavors, and stress less about timing. Let your slow cooker do the heavy lifting so you can focus on festive fun and hosting with ease.

Why These Crockpot Appetizers & Sides Are a Holiday Gamechanger

Using a crockpot for appetizers and sides isn’t just easy—it’s a clever strategy for maximizing flavor and efficiency. Slow cooking melds ingredients beautifully, resulting in tender, richly seasoned dishes that stay warm right on the buffet table. Whether it’s cheesy dips, candied sweet potatoes, or melt-in-your-mouth meatballs, these crowd-pleasers guarantee your guests will come back for seconds.

Crockpot Essentials: What to Make

Here are some beloved holiday crockpot appetizers and sides to consider:

  • Creamy Spinach Artichoke Dip – A bubbling, cheesy favorite
  • Sweet & Spicy Glazed Meatballs – Saucy, tender, and crave-worthy
  • Maple Candied Sweet Potatoes – Comforting and caramelized
  • Classic Green Bean Casserole – A hands-off version of the holiday staple
  • Cheesy Bacon Loaded Mashed Potatoes – Creamy, smoky, and irresistible
  • Slow Cooked Cranberry Sauce – So much better than store-bought!

Key Ingredients for the Ultimate Crockpot Holiday Spread

For these recipes, you’ll want to have the following handy:

[ingredients]
1 lb frozen meatballs
2 cups shredded mozzarella cheese
1 package (10 oz) frozen spinach, thawed and drained
1 can (14 oz) artichoke hearts, drained and chopped
1 block (8 oz) cream cheese
1/2 cup sour cream
1 can (10.5 oz) condensed cream of mushroom soup
2 lbs sweet potatoes, peeled and cubed
1/2 cup maple syrup
1/4 cup butter
1 bag frozen green beans (16 oz)
1 can french fried onions
1 cup cooked and crumbled bacon
2 lbs potatoes, peeled and cut
1/2 cup milk
1/2 cup shredded cheddar cheese
1 cup fresh cranberries
3/4 cup sugar
1 orange, zested and juiced
Salt & pepper to taste
Assorted seasonings (garlic powder, onion powder, cinnamon, nutmeg, paprika)
[/ingredients]

💡Meal Planning Tip: Save these crockpot recipes to instantly generate a streamlined shopping list organized by grocery aisle. This way, you’ll shop efficiently and ensure your holiday appetizers and sides are covered!

CookifyAI meal planning interface

Instructions

  1. For Each Appetizer or Side: Lightly grease your crockpot insert. Many recipes can be made simultaneously if you have multiple slow cookers.
  2. Creamy Spinach Artichoke Dip: Combine mozzarella, cream cheese, spinach, artichoke hearts, and sour cream in the slow cooker. Add a pinch of garlic powder, salt, and pepper. Cover and cook on LOW for 2-3 hours, stirring once until melted and bubbly.
  3. Sweet & Spicy Glazed Meatballs: Add meatballs with your favorite sauce (try a mix of chili sauce and grape jelly or BBQ sauce with sriracha). Cook on HIGH for 2-3 hours or LOW for 4-5 hours, stirring to coat.
  4. Maple Candied Sweet Potatoes: Layer sweet potatoes, drizzle with butter, maple syrup, cinnamon, and a touch of nutmeg. Cook on HIGH for 3-4 hours or LOW for 6-7 hours until fork-tender.
  5. Classic Green Bean Casserole: Combine green beans, cream of mushroom soup, a handful of fried onions, and seasonings. Cook on LOW for 4 hours, then stir and top with more fried onions before serving.
  6. Cheesy Bacon Loaded Mashed Potatoes: Place cubed potatoes and a splash of milk in the crockpot with salt and pepper. Cook on HIGH for 3-4 hours until tender. Mash in cheddar, cream cheese, and bacon before serving.
  7. Slow Cooked Cranberry Sauce: Combine cranberries, sugar, orange juice, and zest in the slow cooker and cook on HIGH for 2-3 hours until berries burst and sauce thickens. Stir occasionally.
  8. To Serve: Keep crockpot appetizers and sides warm on the “keep warm” setting for up to 2 hours. Garnish dips and casseroles with fresh herbs, extra cheese, or crispy toppings as desired.

Serving Suggestions for Crowd-Pleasing Crockpot Holiday Sides

Serve the dips with crostini, crackers, or fresh veggies. Scoop green bean casserole and mashed potatoes right onto plates next to the main course. Set out glazed meatballs and sweet potatoes in attractive bowls with toothpicks or serving spoons for easy, casual snacking.

Nutritional Information and Serving Size

This assortment is designed to serve 8–10 people per dish, perfect for holiday gatherings. Each side ranges from 100 (cranberry sauce) to over 300 calories (loaded mashed potatoes) per serving, depending on portion size and toppings. Most options offer make-ahead potential and easy scaling for larger groups.

Holiday Crockpot Appetizers & Sides (Recap)

Let your crockpot help create a memorable, fuss-free holiday spread. These appetizers and sides keep the menu varied, flavorful, and warm for guests—all while freeing up your oven and your time.

Weekly Meal Planning

Crockpot recipes are a lifesaver for weekly meal prep and holiday feasts alike. Save and schedule each crockpot recipe to fit into your weekly or holiday meal plan, automatically generating a master shopping list that intelligently combines quantities.

Planning Benefits:

  • Automatically sums up ingredient amounts across multiple sides and appetizers
  • Sorts ingredients by grocery aisle for smooth holiday shopping
  • Avoids duplicate purchases and forgotten ingredients
  • Makes prepping for parties or busy family weeks seamless and stress-free

Pro tip: When building your meal plan, schedule these crockpot favorites alongside main courses and desserts—the shopping list will show exactly how many potatoes, onions, and other staples you’ll need for all planned dishes, trimming waste and saving money.

Cook and Prep Times

Prep Time: 15–20 minutes per dish
Cook Time: 2–7 hours (depending on recipe and setting)
Total Time: Up to 8 hours (for the main batch—you can start early and enjoy hands off!)

Enjoy a stress-free, super-flavorful holiday with minimal effort—let your crockpot be the MVP of your festive kitchen!

Elevate Your Healthy Snack Game: The Ultimate Easy Whole30 Paleo Snack Board Guide

Easy Whole30 Paleo Snack Board | Kimbrough Daniels

Introduction

An Easy Whole30 Paleo Snack Board is a vibrant, satisfying way to serve healthy snacks that please every palate while aligning with clean eating goals. Bursting with fresh veggies, wholesome dips, crunch, and color, this snack board offers a simple yet creative solution for entertaining, meal prep, or family snacking. With approachable ingredients and endless customization, it’s ideal for anyone looking to keep their snacks both nutritious and delicious.

Why You’ll Love This Easy Whole30 Paleo Snack Board

Building a snack board that fits both Whole30 and Paleo guidelines doesn’t have to be complicated. This board uses flavorful, nutrient-rich ingredients so you can create a spread that’s loaded with variety and texture. With no grains, dairy, or sugar, it’s perfect for gatherings, lunch spreads, or prepping ahead for busy weeks—without ever sacrificing taste.

How to Build Your Perfect Snack Board

Begin with a large platter or wooden cutting board. Arrange a rainbow of crisp raw vegetables like carrots, cucumber, bell peppers, and cherry tomatoes. Add in perfectly boiled eggs, compliant deli meats, and easy homemade dips like guacamole or salsa. Sliced fruit, olives, and roasted nuts (check ingredients for compliance) round out the selection. Get creative with presentation—for example, fan out veggie sticks, cluster small piles of nuts, and fill small bowls with dips for visual appeal.

Tasty Dips and Pairings for Extra Flavor

A great snack board includes irresistible dips for dunking and pairing. Simple guacamole (avocado, lime, garlic, salt), a Whole30-approved salsa, and even a creamy almond butter (for fruits) are tasty options. Place dips in mini bowls for easy access. For extra convenience, prep dips ahead and store in airtight containers for quick assembly.

Smart Serving Ideas for Every Occasion

This snack board is a fantastic centerpiece for movie nights, after-school snacks, parties, or even an easy office lunch. Pair your platter with herbal tea or sparkling water for a refreshing bite. For maximum crunch, serve root veggie chips or baked sweet potato rounds alongside raw picks. Let guests customize their own little plates, encouraging variety and fun presentation.

Nutritional Information and Serving Size

A typical board serves 4 to 6 people, depending on the number and amount of components. Each serving is naturally high in fiber and healthy fats while remaining low in sugar. The absence of grains, dairy, or processed foods supports Whole30 and Paleo guidelines—making every bite nutrient dense and satisfying.

Easy Whole30 Paleo Snack Board (Recap)

This snack board proves just how flavorful and appealing Whole30 and Paleo eating can be. With a mix of creamy, crunchy, and fresh ingredients, it’s a go-to option for healthy crowd-pleasing snacks—no stress, just wholesome indulgence.

[ingredients]
Assorted raw veggies (carrots, cucumber, celery, bell peppers, cherry tomatoes)
Whole30 compliant deli meats (turkey, chicken, prosciutto)
Hard-boiled eggs, peeled
Fresh fruit (apple slices, orange segments, berries)
Whole30 compliant dips (guacamole, salsa, almond butter, compliant ranch)
Pitted olives
Roasted nuts (cashews, almonds)
Pickles and/or compliant sauerkraut
Optional: baked sweet potato rounds, root veggie chips
Fresh herbs (parsley or cilantro) for garnish
[/ingredients]

💡Meal Planning Tip: Save this recipe to automatically create an organized shopping list with all ingredients sorted by grocery aisle—making Whole30 and Paleo shopping easier and faster than ever!

CookifyAI meal planning interface

Instructions

  1. Wash and slice your chosen veggies into sticks, rounds, or bite-sized chunks.
  2. Arrange veggies on a large platter or board, clustering by color for a vibrant display.
  3. Slice or roll deli meats and nestle in between veggie sections.
  4. Peel and halve hard-boiled eggs, sprinkling with a little salt if desired; add to the board.
  5. Add fruit slices, pitted olives, and roasted nuts to small bowls or piles on the board.
  6. Place dips in mini bowls; add to open spaces on the board for easy dipping.
  7. Finish with optional extras: baked sweet potato rounds, root veggie chips, pickles, or sauerkraut.
  8. Garnish with fresh herbs for extra color and flavor, then serve!

Weekly Meal Planning

Prepping a Whole30 Paleo Snack Board is the ultimate way to simplify healthy snacking all week long. Save and schedule this recipe to plan snack days and generate smart shopping lists that consolidate ingredients across all your planned meals.

Planning Benefits:

– Calculates the total amount of each ingredient you’ll need for the week
– Organizes items by grocery store section for quick, efficient shopping
– Prevents overbuying or forgetting essentials—reduce waste and save money
– Makes prepping healthy snacks and meals totally stress-free

Pro tip: When you plan multiple recipes, schedule everything together to get a unified shopping list for the week, saving even more time and ensuring you have every Whole30/Paleo ingredient on hand!

Cook and Prep Times

Prep Time: 15 minutes
Cook Time: 10 minutes (for boiling eggs or baking sweet potato rounds, if desired)
Total Time: 25 minutes

Enjoy effortless, wholesome snacking—done the Whole30 and Paleo way!

Herb & Mushroom Marinated Grilled Chicken: A Garden-Fresh Flavor Feast

Savory Herb-Infused Grilled Mushroom Chicken

Introduction

Savory Herb-Infused Grilled Mushroom Chicken is a recipe that delivers bold, earthy flavors in an easy, grill-friendly package. Thanks to a marinade packed with fresh herbs and umami-rich mushrooms, this dish is both simple to prepare and guaranteed to please a crowd. It’s perfect for weeknight dinners, summer barbecues, or anytime you crave juicy, aromatic chicken with a gourmet twist.

The Allure of Savory Herb-Infused Grilled Mushroom Chicken

What makes this recipe stand out is the harmony between tender grilled chicken and an infusion of mushroom and herb flavors. The natural moisture of mushrooms keeps the chicken juicy, while fresh herbs brighten each bite, delivering a restaurant-quality dinner without complicated prep. This crowd-pleaser offers an irresistible combination of savory depth and refreshing brightness.

How to Create a Flavorful Herb and Mushroom Marinade

To achieve maximum flavor, blend fresh mushrooms with olive oil, garlic, and a medley of herbs like rosemary, thyme, and parsley. Marinating the chicken with this mixture not only locks in moisture but also infuses it with the earthy, herbaceous notes that set this dish apart. For best results, marinate for at least 30 minutes – or prepare it the night before for even deeper flavor.

Best Tips for Grilling Savory Herb-Infused Chicken

For juicy chicken with gorgeous grill marks, make sure your grill is hot and pre-oiled before placing the marinated chicken on the grate. Cook until the chicken is golden and just cooked through, basting occasionally with leftover marinade for added richness. Consider grilling extra mushrooms on skewers for a flavorful side, or serve over fresh salad greens for a complete meal.

Serving Suggestions for a Standout Dinner

Serve your grilled mushroom chicken with lemon wedges and a sprinkle of fresh chopped herbs. Pair with grilled vegetables, garlic mashed potatoes, or a hearty grain like farro. This dish also makes a fantastic addition to wraps, salads, or grain bowls, letting its bright flavors shine in a variety of settings.

Nutritional Information and Serving Size

This recipe yields 4 servings. Each serving contains approximately 320 calories, offering a balanced profile of lean protein, healthy fats, and filling fiber from the mushrooms and herbs. It’s a lighter option that doesn’t sacrifice flavor or satisfaction.

Savory Herb-Infused Grilled Mushroom Chicken (Recap)

This dish expertly blends the nuanced flavors of herbs and mushrooms with juicy grilled chicken. It’s a versatile and impressive recipe that makes for an easy weeknight meal or a standout dish at your next cookout.

[ingredients]
4 boneless, skinless chicken breasts
1 cup fresh mushrooms, finely chopped
3 tablespoons olive oil
3 cloves garlic, minced
1 tablespoon fresh rosemary, chopped (or 1 teaspoon dried)
1 tablespoon fresh thyme, chopped (or 1 teaspoon dried)
2 tablespoons fresh parsley, chopped
1 teaspoon salt
1/2 teaspoon black pepper
Juice of 1 lemon
Extra mushrooms for grilling (optional)
Lemon wedges and extra herbs for garnish
[/ingredients]

💡Meal Planning Tip: Save this recipe to instantly generate a categorized shopping list that makes weekly grocery runs faster and ensures you never forget a key ingredient.

CookifyAI meal planning interface

Instructions

  1. In a bowl, combine the chopped mushrooms, olive oil, garlic, rosemary, thyme, parsley, salt, pepper, and lemon juice. Mix well to create a marinade.
  2. Place chicken breasts in a large resealable bag or shallow dish. Pour the marinade over the chicken, ensuring all pieces are well-coated. Marinate for at least 30 minutes, or up to overnight in the refrigerator.
  3. Preheat your grill to medium-high and lightly oil the grates.
  4. Remove the chicken from the marinade, allowing excess to drip off (reserve some marinade to brush on while grilling if desired). Grill the chicken for 5-7 minutes per side, or until cooked through and the internal temperature reaches 165°F.
  5. Optional: Thread extra mushrooms onto skewers and grill alongside the chicken for 3-5 minutes, turning occasionally, until tender and lightly charred.
  6. Transfer chicken to a serving platter. Garnish with lemon wedges and extra chopped herbs. Slice and serve with your favorite sides.

Weekly Meal Planning

This Savory Herb-Infused Grilled Mushroom Chicken is ideal for meal prepping and weekly planning. Save and schedule this recipe for your week and instantly create organized shopping lists that consolidate all ingredients from multiple meals.

Meal Planning Advantages:

– Automatically calculates total ingredient amounts across planned recipes
– Groups shopping lists by store section for a seamless shopping experience
– Prevents duplicate purchases and streamlines meal prepping
– Supports efficient planning for busy weekdays or entertaining

Pro tip: When adding this dish to your weekly rotation, schedule your recipes to spot overlapping ingredients. For instance, if another recipe uses lemons or fresh herbs, you’ll see exactly how much to buy – cutting down on food waste and keeping your plan organized.

Cook and Prep Times

Prep Time: 15 minutes (plus at least 30 minutes marinating)
Cook Time: 15 minutes
Total Time: 1 hour (including marinating time)

“Fall to Perfection: A Hearty Grilled Chicken & Veggie Harvest Bowl for Autumn”

Grilled Chicken & Fall Veggie Harvest Bowl

Introduction

If you’re looking to enjoy the vibrant flavors of autumn in a balanced and satisfying dish, the Grilled Chicken & Fall Veggie Harvest Bowl is the answer. This recipe combines smoky, perfectly grilled chicken with a medley of seasonal vegetables—think sweet potatoes, Brussels sprouts, and roasted squash—all nestled over a wholesome grain base. With a simple yet elegant composition, this harvest bowl brings out the best of fall flavors and is ideal for hearty lunches and effortless weeknight dinners.

Why You’ll Love This Fall Harvest Bowl

What sets this bowl apart is the harmony of savory grilled chicken and roasted vegetables, enhanced with earthy herbs and a tangy vinaigrette drizzle. It’s an all-in-one nutritious meal that packs in protein, fiber, and antioxidants. Its customizable nature makes it a real crowd pleaser—simply adjust the veggies based on local availability or your family’s preferences. Plus, meal prepping these bowls in advance makes weekday meals a breeze!

Simple Steps to Flavorful Grilled Chicken

Marinate chicken breasts with olive oil, garlic, rosemary, and a hint of smoked paprika to deepen the grill flavor. Allow the chicken to soak up the marinade for at least 20 minutes before grilling for juicy, herb-infused results. Grill over medium-high heat until golden and just cooked through, maximizing tenderness and taste.

Roasting Perfect Fall Vegetables

Toss sweet potatoes, Brussels sprouts, and butternut squash cubes in olive oil, a sprinkle of salt, pepper, and dried thyme. Roast at 425°F until caramelized and crisped around the edges for unbeatable flavor and texture in your harvest bowl. For extra flair, add a handful of roasted pumpkin seeds or dried cranberries before serving.

Serving Suggestions for Grilled Chicken & Fall Veggie Harvest Bowl

Layer your favorite cooked whole grain—like quinoa, farro, or brown rice—as the base of your bowl. Top with slices of grilled chicken and mounds of warm roasted veggies. Drizzle with a simple balsamic vinaigrette or a lemon-herb yogurt sauce for extra brightness. A scattering of goat cheese or chopped pecans can add even more comfort and flavor to your meal.

Nutritional Information and Serving Size

This recipe generously serves 4. Each serving offers around 450 calories, with a balanced blend of lean protein, complex carbs, and gut-friendly fiber. It’s a nutritious option for those wanting to enjoy a hearty meal without compromising health goals.

Grilled Chicken & Fall Veggie Harvest Bowl (Recap)

The Grilled Chicken & Fall Veggie Harvest Bowl is your ticket to a delicious, satisfying meal that captures the best of the season. Whole, simple, and brimming with flavor, it’s a reliable recipe for busy nights and easy entertaining.

[ingredients]
2 boneless, skinless chicken breasts
2 tablespoons olive oil, divided
2 cloves garlic, minced
1 teaspoon dried rosemary
1/2 teaspoon smoked paprika
Salt and pepper, to taste
2 cups sweet potato, peeled and cubed
2 cups Brussels sprouts, trimmed and halved
1 cup butternut squash, cubed
1 teaspoon dried thyme
2 cups cooked grains (quinoa, farro, or brown rice)
2 tablespoons balsamic vinegar (or lemon juice)
Optional: pumpkin seeds, dried cranberries, goat cheese, or pecans for topping
[/ingredients]

💡Meal Planning Tip: Save this recipe to automatically create an organized, aisle-by-aisle shopping list—making your grocery trips simple and your weeknight dinners stress-free!

CookifyAI meal planning interface

Instructions

  1. Marinate the chicken: In a bowl, whisk together 1 tablespoon olive oil, garlic, rosemary, smoked paprika, salt, and pepper. Coat chicken breasts with the mixture and set aside for at least 20 minutes (or up to 2 hours in the fridge).
  2. Prepare the vegetables: On a large baking sheet, toss sweet potatoes, Brussels sprouts, and butternut squash with the remaining tablespoon of olive oil, dried thyme, salt, and pepper.
  3. Roast the veggies: Preheat oven to 425°F. Roast veggies for 25–30 minutes, stirring halfway through, until golden brown and tender.
  4. Grill the chicken: While veggies roast, heat a grill or grill pan over medium-high. Grill chicken for about 6–7 minutes per side (internal temperature should reach 165°F). Rest 5 minutes, then slice.
  5. Assemble the bowls: Divide cooked grains among four bowls. Top with roasted vegetables and grilled chicken slices. Drizzle with balsamic vinegar or lemon juice. Add optional toppings if desired.
  6. Serve immediately, or store in meal-prep containers for up to 4 days.

Weekly Meal Planning

This harvest bowl is a meal-prepper’s dream and adapts beautifully to your week’s schedule. Save and schedule this recipe in your CookifyAI meal plan to have shopping lists generated for the whole week—including overlapping ingredients between meals.

Planning Benefits:

– Consolidates all your meal ingredients into one tidy, store-organized list.
– Highlights how many portions you’ll need, saving time on recalculating recipes.
– Helps avoid waste by quantifying shared staples, such as olive oil or grains.
– Makes it easy to double up for lunches or adjust for family gatherings.

Pro tip: When you add multiple dinners to your meal plan, CookifyAI consolidates everything—so you shop smarter, prep efficiently, and enjoy flavorful meals all week.

Cook and Prep Times

Prep Time: 20 minutes
Cook Time: 30 minutes
Total Time: 50 minutes

Grilled Chicken Foil Packets: Quick, Flavorful, and Fuss-Free Meals for Any Occasion

Grilled Chicken Foil Packets with Veggies and Herbs

Introduction

Grilled Chicken Foil Packets with Veggies and Herbs deliver maximum flavor with minimal cleanup—perfect for busy weeknights or outdoor gatherings. This no-fuss grilling recipe lets tender chicken, fresh vegetables, and aromatic herbs cook together in their own juices, locking in moisture and producing delicious results every time.

Why Grilled Chicken Foil Packets Are a Must-Try

This dish stands out for its customizable versatility and ease. The sealed foil packets trap heat, ensuring even cooking and allowing veggies and chicken to soak in the flavor of olive oil, garlic, and herbs. It’s a foolproof method for juicy chicken and perfectly roasted, seasoned vegetables—making it a nutritious crowd pleaser.

The Perfect Herb and Veggie Medley

For flavor, choose a combination of fresh or dried herbs like thyme, rosemary, and parsley. Pair with colorful bell peppers, zucchini, cherry tomatoes, or any seasonal veggies on hand. A simple marinade of olive oil, garlic, and lemon takes everything over the top. The beauty of this recipe is its adaptability: you can swap in different vegetables or herbs to accommodate what’s in your fridge or garden.

Easy Assembly for Grilled Chicken Foil Packets

Simply toss your chicken and chopped veggies in the herb marinade. Divide the mixture among large sheets of foil, seal tightly, and grill for fuss-free cooking and serving. Each diner gets their own flavorful packet—no plates required! The result is a perfectly steamed, juicy, and aromatic meal.

Serving Suggestions for Grilled Chicken Foil Packets

Serve the packets directly from the grill alongside steamed rice, couscous, or warm crusty bread to soak up the delicious juices. Garnish with a squeeze of fresh lemon and extra chopped herbs for a restaurant-worthy presentation. These packets are also great for picnics and meal prep, as they reheat beautifully.

Nutritional Information and Serving Size

This recipe yields 4 generous servings, each offering a balanced mix of lean protein and nutrient-rich veggies. Each serving typically contains about 350-400 calories, making it a wholesome choice for lunch or dinner without the guilt.

Recipe Highlights (Recap)

Grilled Chicken Foil Packets with Veggies and Herbs combine simple assembly, easy cleanup, and fresh flavors—making them a smart solution for weeknight dinners or relaxed weekend grills.

[ingredients]
4 boneless, skinless chicken breasts (about 1.5 lbs)
2 bell peppers, sliced
1 medium zucchini, sliced
1 red onion, cut into wedges
1 cup cherry tomatoes, halved
3 tablespoons olive oil
2 tablespoons fresh lemon juice
4 garlic cloves, minced
2 teaspoons dried Italian herbs (or use a mix of thyme, rosemary, and oregano)
Salt and black pepper, to taste
Fresh parsley, chopped (for garnish)
Lemon slices, for serving
[/ingredients]

💡Meal Planning Tip: Save this recipe to automatically generate an organized shopping list with all ingredients sorted by store section—perfect for efficient grocery trips and streamlined meal planning.

CookifyAI meal planning interface

Instructions

  1. Preheat your grill to medium-high heat (or preheat oven to 400°F for indoor cooking).
  2. In a large bowl, whisk together olive oil, lemon juice, minced garlic, Italian herbs, salt, and pepper.
  3. Add chicken breasts and toss to coat. Add bell peppers, zucchini, onion, and cherry tomatoes, mixing well to combine.
  4. Cut 4 large sheets of heavy-duty aluminum foil. Divide the chicken and vegetable mixture evenly among the sheets.
  5. Top each with a lemon slice and sprinkle with extra herbs if desired. Fold the sides of the foil over the chicken and veggies, sealing packets securely.
  6. Grill packets, covered, for 18-22 minutes or until chicken is cooked through and vegetables are tender (or bake for 25-30 minutes). Avoid opening foil until ready to serve to keep flavors locked in.
  7. Carefully open packets (beware of steam!), garnish with fresh parsley, and serve immediately.

Weekly Meal Planning

This recipe fits seamlessly into healthy weekly meal planning. Save and schedule this recipe to plan when to make it and let CookifyAI generate smart shopping lists—for this dish or your entire weekly plan—cutting down on prep time and ensuring nothing gets forgotten.

Planning Benefits:

  • Combines ingredient amounts across all planned recipes for precise shopping
  • Organizes lists by grocery store section
  • Prevents overbuying or missing key items
  • Simplifies meal prep for the week with prep and cook reminders

Pro tip: Schedule multiple recipes in CookifyAI and watch ingredient lists auto-adjust for efficiency—for example, if you plan two recipes using bell peppers, your shopping list totals them up so you buy just what you need!

Cook and Prep Times

Prep Time: 15 minutes
Cook Time: 20 minutes
Total Time: 35 minutes

Cozy Autumn Feast: One-Pan Chicken Dinner with Perfectly Roasted Vegetables

Autumn Chicken Dinner with Roasted Vegetables Recipe

Introduction

This Autumn Chicken Dinner with Roasted Vegetables showcases the warmth and coziness of the season—all in one pan. Juicy, herb-marinated chicken and an assortment of colorful, perfectly caramelized autumn vegetables roast together for a meal that’s as stunning to serve as it is easy to prepare. Bursting with autumnal flavors and requiring minimal clean-up, this recipe is perfect for busy weeknights and festive gatherings alike.

Why You’ll Love This Autumn Chicken Dinner

This recipe combines hearty, aromatic chicken with roasted root vegetables like sweet potatoes, carrots, and parsnips, all coated in olive oil, rosemary, and thyme. The veggies absorb the savory chicken juices as everything cooks together, creating layers of natural flavor. It’s a comforting, all-in-one meal that pleases a crowd and makes your kitchen smell incredible.

Perfectly Balanced Roasted Vegetables

Getting the vegetable mix just right is key for texture and flavor. Sweet potatoes add richness, while red onions and parsnips bring sweetness that intensifies as they roast. A toss in garlic, rosemary, and a touch of olive oil caramelizes the veggies and ensures golden edges on every piece.

Marinating Chicken to Perfection

Start by marinating bone-in, skin-on chicken pieces in a mixture of olive oil, lemon juice, garlic, salt, pepper, and fresh herbs. Allowing the chicken to soak for even 30 minutes infuses it with juicy flavor and ensures a beautifully crisp, golden skin after roasting. Arrange the chicken over the vegetables so the rendered juices baste the veggies as they cook.

Serving Suggestions for a Cozy Autumn Chicken Dinner

Garnish the finished chicken and vegetables with more fresh herbs or a squeeze of lemon for brightness. Serve straight from the pan for an easy, rustic presentation. Pair with a simple green salad or crusty bread to soak up the flavorful juices, and you have a wholesome autumn feast that’s both simple and impressive.

Nutritional Information and Serving Size

This recipe yields about 4 generous servings, each packed with protein, antioxidants, and healthy fiber. Depending on the chicken and vegetable portions, each serving typically contains around 450-550 calories, making it filling yet balanced.

Autumn Chicken Dinner with Roasted Vegetables (Recap)

A single pan delivers the bold, comforting flavors of fall with minimal effort. Tender, juicy chicken and a vibrant array of roasted autumn veggies make this dish an ideal choice for meal prepping, family dinners, or holiday tables.

[ingredients]
4 bone-in, skin-on chicken thighs (or breasts)
2 tablespoons olive oil, divided
1 tablespoon fresh rosemary (or 1 teaspoon dried)
1 tablespoon fresh thyme (or 1 teaspoon dried)
2 cloves garlic, minced
1 lemon (zest and juice)
Salt and freshly ground black pepper
2 medium sweet potatoes, peeled and cubed
2 carrots, peeled and sliced
2 parsnips, peeled and sliced
1 red onion, cut into wedges
Optional: 1 apple, sliced (adds a touch of sweetness)
Optional: 1/2 teaspoon smoked paprika
[/ingredients]

💡Meal Planning Tip: Save this recipe to automatically generate a categorized shopping list—making ingredient gathering a breeze and simplifying your meal-planning process.

CookifyAI meal planning interface

Instructions

  1. In a large bowl, combine 1 tablespoon olive oil, lemon zest, lemon juice, garlic, rosemary, thyme, salt, pepper, and (if using) smoked paprika. Add the chicken and toss well to coat. Let marinate for at least 30 minutes (or up to overnight in the fridge).
  2. Preheat your oven to 425°F (220°C). While the chicken marinates, prepare the vegetables: combine sweet potatoes, carrots, parsnips, red onion, and apple (if using) on a large rimmed baking sheet. Drizzle with 1 tablespoon olive oil, season with salt and pepper, and toss to coat.
  3. Arrange the marinated chicken pieces on top of the vegetables, skin side up, ensuring everything’s in a single layer for even roasting.
  4. Roast for 35–45 minutes, until the chicken is golden and cooked through (165°F internal temperature) and the vegetables are tender and caramelized at the edges. Halfway through, baste the chicken with pan juices and stir the vegetables for even browning.
  5. Let rest for 5 minutes. Garnish with extra herbs and an additional squeeze of lemon if desired. Serve warm.

Weekly Meal Planning

This recipe is a stellar choice for your weekly meal prep lineup. Save and schedule this recipe using CookifyAI to plan which days you’ll enjoy it and get a dynamic, organized shopping list that blends seamlessly with your weekly meal plan.

Planning Benefits:

  • Automatically calculates precise ingredient quantities when planning multiple meals
  • Sorts shopping lists by grocery store section/clusters for speed and efficiency
  • Eliminates duplicate items and prevents forgotten ingredients
  • Streamlines weekly cooking and reduces meal-planning stress

Pro tip: When you add several recipes to your weekly meal plan, schedule them in CookifyAI to consolidate overlapping ingredients (like herbs, oil, or chicken) and cut down on food waste and grocery costs.

Cook and Prep Times

Prep Time: 20 minutes (plus marinating time)
Cook Time: 40 minutes
Total Time: 1 hour (excluding marinating time)

Enjoy the effortless coziness and deep flavors of autumn—meal planning, shopping, and dinner all made easy!

Grill & Gather: 25+ Whole30 Appetizers for Guilt-Free Entertaining

25+ Whole30 Appetizers (GF, DF, & Paleo Too!) for On & Off the Grill

Introduction

Looking for mouthwatering appetizers that meet Whole30, gluten-free (GF), dairy-free (DF), and paleo guidelines? This roundup of over 25 Whole30 appetizers is just what you need. Whether you’re firing up the grill or prepping your oven, these recipes guarantee crowd-pleasing flavor without compromising on ingredient standards. Ideal for entertaining, meal prepping, or satisfying snack cravings, you’ll find appetizers perfect for every season and occasion.

Why These Whole30 Appetizers Are a Must-Try

Packed with bold flavors and wholesome ingredients, these appetizers prove you don’t have to sacrifice taste for dietary restrictions. From sizzling grilled kabobs to vibrant dips and easy air fryer bites, each recipe is designed for simplicity and maximum enjoyment. They’re ideal for game night spreads, backyard BBQs, and weeknight snacking—delicious enough to please guests and family members, regardless of their dietary needs.

Perfect Grill & Pan Appetizers: Versatile for Any Setup

Whether you prefer firing up the grill for smoky, charred goodness or using your stovetop, our selection covers both. You’ll find grilled shrimp skewers, marinated chicken bites, veggie platters, and crispy pan-seared potato cakes—all Whole30-compliant for fresh, guilt-free munching.

Simple Dips & Spreads: Ready in Minutes

No party is complete without the perfect dip! Our Whole30 lineup includes creamy guacamole, roasted red pepper dip, zesty salsa, and nutty cauliflower hummus. Each pairs perfectly with sliced veggies or compliant chips for an appetizer table that disappears fast.

Meal Prep Magic: Planning Ahead for Whole30 Success

Most of these appetizers can be prepared in advance, making entertaining and weeknight snacking a breeze. A big platter of veggie sliders or a batch of grilled pineapple chicken skewers keeps fresh in the fridge and is easy to reheat or serve cold.

[ingredients]
Sample shopping list for these appetizers includes:

– Bell peppers
– Zucchini
– Cherry tomatoes
– Avocado
– Cauliflower
– Almond flour
– Chicken breast
– Shrimp
– Spices: cumin, paprika, chili powder
– Lime and lemon juice
– Fresh herbs (cilantro, parsley)

The exact amounts will vary by recipe, but these staples will cover most apps in the collection.
[/ingredients]

💡Meal Planning Tip: Save this Whole30 appetizer roundup to automatically generate a categorized, easy-to-follow shopping list for all your Whole30, GF, and paleo snacks and bites—making healthy eating and efficient shopping a breeze!

CookifyAI meal planning interface

Instructions: How to Build the Ultimate Whole30 Appetizer Spread

  1. Pick 4-5 favorite appetizer recipes based on your cooking method (grill or pan) and flavors you love.
  2. Add all recipes to your meal plan (handwritten or using a tool like CookifyAI).
  3. Gather all needed ingredients (see above for a basic list, or use CookifyAI for specifics).
  4. For grill appetizers: Preheat grill and prep proteins/veggies with Whole30-approved seasonings. Thread skewers, marinate as needed, and grill to perfection.
  5. For oven/pan recipes: Preheat oven/skillet, prep veggies/proteins, and bake, roast, or sauté until golden and cooked through.
  6. Prepare dips and spreads in advance. Store in airtight containers in the refrigerator until serving.
  7. Arrange appetizers on a large platter with coordinating dips. Garnish with fresh herbs and lemon/lime wedges for extra flavor.

Weekly Meal Planning for Whole30 Success

Planning your appetizers ahead not only takes the stress out of meal prep, but also ensures you stay Whole30-compliant and prepared for any snacking occasions. Save these recipes and schedule them with CookifyAI to build a full week of appetizers, add them to your recipes calendar, and generate a streamlined shopping list.

Planning Benefits:

– Mix and match multiple appetizers for potlucks, parties, or weekly snacking
– See exactly how much of each ingredient you’ll need—no need for extra trips to the store
– Organize ingredients by grocery section for fast, hassle-free shopping
– Reduce food waste by consolidating overlapping ingredients across planned recipes

Pro tip: Use scheduled shopping lists to batch-prep appetizers for the week, and assign “make ahead” snack nights for ultimate Whole30 convenience.

Cook and Prep Times

Prep Time: 10-20 minutes per recipe
Cook Time: 10-25 minutes per recipe
Total Time: 20-45 minutes (varies by recipe; dips are often ready in 15 minutes or less)

Take your Whole30 experience to the next level with these flavorful, simple appetizers that everyone will love. With meal planning and smart shopping made easy, eating clean and delicious has never been so effortless!

Paleo Party Perfected: Crafting a Colorful, Wholesome Platter for Every Celebration

How to Make the Perfect Paleo Party Platter – Miss Allie’s Kitchen

Introduction

A Paleo party platter is a show-stopping, nutrient-dense way to satisfy guests while staying true to clean eating principles. Vibrant, flavor-packed, and naturally gluten- and dairy-free, this arrangement brings together the best of meats, vegetables, dips, and fruit for an eye-catching spread. Whether you’re hosting a game night or a festive holiday gathering, this platter guarantees every guest can indulge in something delicious—all while fueling the party with whole, satisfying ingredients.

Why This Paleo Party Platter Is a Crowd Favorite

Versatility is the hallmark of this Paleo platter. The array of textures—crisp veggies, savory proteins, and creamy dips—means there’s truly something for everyone. It’s simple to prepare ahead, scalable for any group size, and you can let seasonal produce or local specialties shine. Plus, arranging a beautiful, wholesome platter signals to your guests that healthy can be indulgent, flavorful, and fun.

Crafting the Platter: The Foundation

Start with a large wooden board or slate tray—think visually! Layer it with vibrant veggies (carrot sticks, bell pepper strips, snap peas), a rainbow of fresh fruit (berries, grapes, kiwi), and protein-rich options like hard-boiled eggs, roasted chicken slices, or thinly sliced steak. Add variety with compliant cured meats (prosciutto, salami) and a few piles of spiced mixed nuts.

Paleo Dips & Sauces

Enhance your platter with Paleo-friendly dips—guacamole, salsa fresca, eggplant baba ghanoush, or cashew ranch dressing. Place them in small bowls and nestle them around the platter for convenient dipping. Consider a homemade pesto without cheese or a tangy olive tapenade.

Garnishes and Final Touches

Finish with fresh herbs (parsley, basil), lemon wedges, and a sprinkle of smoked paprika or everything-bagel seasoning for extra flair. Optional: Add quick-pickled veggies for tang and crunch. Use contrasting colors to ensure the platter feels inviting and abundant.

Nutritional Information and Serving Size

One large platter serves 8-10 people as an appetizer, with each serving packed with vitamins, high-quality proteins, healthy fats, and fiber—while containing no refined sugars, grains, or dairy. Customization makes it easy to change portion size and nutrient focus.

[ingredients]
Assorted raw veggies (carrots, bell peppers, cucumbers, snap peas)
Fresh fruits (grapes, berries, apple slices, kiwi)
Compliant cured meats (prosciutto, salami, turkey)
Roasted chicken breast or steak slices
Hard-boiled eggs
Spiced mixed nuts (almonds, cashews, pecans)
Paleo dips (guacamole, salsa, cashew ranch, baba ghanoush)
Olives and pickles
Fresh herbs (parsley, basil, mint)
Lemon wedges
Optional: pickled veggies, everything-bagel seasoning
[/ingredients]

💡Meal Planning Tip: Save this recipe to automatically organize your shopping list by store section—ensuring you never forget fresh herbs or the perfect crisp veggies for your platter. CookifyAI streamlines gathering everything you need for stress-free party prep!

CookifyAI meal planning interface

Instructions

  1. Wash and cut all veggies and fruit into bite-sized pieces for easy grabbing.
  2. Slice roasted chicken breast or steak into thin strips; halve hard-boiled eggs.
  3. Arrange small bowls of dips around the platter as anchors.
  4. Fan out cured meats and roasted proteins alongside dips, alternating with bright veggie and fruit clusters in between for color contrast.
  5. Add spiced mixed nuts and olives to fill in gaps and add more texture.
  6. Garnish with fresh herbs, lemon wedges, and optional seasoning right before serving.
  7. Serve immediately or refrigerate uncovered for up to 1 hour before your event to keep everything fresh and crisp.

Weekly Meal Planning

This Paleo party platter isn’t just a hit at gatherings—it’s also an excellent tool for weekly meal prep. Save and schedule this recipe to automatically generate a smart shopping list that consolidates all the ingredients you’ll need for your weekly plan.

Planning Benefits:

  • Consolidates ingredient quantities—no more overspending on produce or meats
  • Keeps your shopping organized by grocery aisle
  • Helps you re-purpose platter ingredients in lunchboxes or salads throughout the week
  • Prevents food waste by showing ingredient overlaps across all planned meals

Pro tip: Schedule your platter along with main meals in CookifyAI for instant shopping list math and ingredient cross-checks—making healthy eating effortless and efficient all week.

Cook and Prep Times

Prep Time: 25-30 minutes
Cook Time: 0–15 minutes (only for proteins if not already cooked)
Total Time: 30–40 minutes

This Paleo platter packs maximum flavor and nutrition into a showpiece you’ll be proud to share—simple, wholesome, and absolutely delicious!

Gluten-Free & Dairy-Free Delights: Whole30 and Paleo Appetizers to Wow Any Crowd

Whole30 & Paleo Appetizers (Gluten-Free, Dairy-Free)

Introduction

When it comes to gatherings, holidays, or casual get-togethers, finding appetizers that fit Whole30 and Paleo guidelines—while being gluten-free and dairy-free—can feel like a tall order. But with the right combination of fresh ingredients and clever seasoning, you can create delicious bites that everyone will love. Whether you’re hosting or bringing a dish to share, these appetizers deliver bold flavors in every gluten- and dairy-free bite.

Flavorful Simplicity: Why These Whole30 & Paleo Appetizers Stand Out

These easy appetizers shine by embracing wholesome ingredients and powerful seasonings. By skipping grains, legumes, and dairy, their natural flavors are accentuated, allowing fresh vegetables, savory proteins, and zesty dips to take center stage. Each bite is both satisfying and nutritious, proving that dietary restrictions don’t mean sacrificing taste or variety.

Curating a Crowd-Pleasing Appetizer Platter

Mix and match your appetizers for a visually appealing and satisfying platter. Think crispy baked chicken tenders, crunchy veggie sticks with creamy avocado dip, savory meatballs, or shrimp skewers. Add olives, nuts, and fresh fruit for color and texture. Arrange everything in sections for easy grabbing and a professional look.

Ingredients for Ultimate Whole30 & Paleo Appetizers

Choose a variety of classic Whole30 and Paleo-friendly nibbles to assemble your platter or craft individual appetizers:

[ingredients]
– 1 pound boneless, skinless chicken tenders (for baked tenders)
– 2 large avocados, ripe (for creamy dip)
– 1 garlic clove, minced
– Juice of 1 lime
– 1/2 teaspoon sea salt
– 1/4 teaspoon black pepper
– Mixed raw veggies: carrots, cucumbers, bell peppers, celery
– 1 pound ground turkey or beef (for mini meatballs)
– 1 teaspoon onion powder
– 1 teaspoon paprika
– 1/4 cup finely chopped parsley
– 12–16 large shrimp, peeled and deveined
– 2 tablespoons olive oil
– 1 teaspoon dried Italian herbs
– Kalamata olives, nuts, and fresh berries or grapes (for serving)
– Fresh herbs (optional, for garnish)
[/ingredients]

💡Meal Planning Tip: Save this recipe to automatically generate an organized shopping list with every ingredient sorted by store section—perfect for easy grocery trips and stress-free meal planning!

CookifyAI meal planning interface

Instructions

  1. Baked Chicken Tenders:
    • Preheat oven to 400°F. Line a baking sheet with parchment.
    • Season tenders with salt, pepper, and 1/2 teaspoon paprika. Drizzle with 1 tablespoon olive oil.
    • Bake for 18–20 minutes, flipping halfway, until cooked through and golden.
  2. Creamy Avocado Dip:
    • Scoop avocado into a bowl; mash with lime juice, minced garlic, salt, and pepper until smooth and creamy.
    • Serve immediately with veggie sticks.
  3. Mini Meatballs:
    • Mix ground turkey/beef with onion powder, paprika, parsley, remaining salt, and pepper.
    • Form into 16 small balls and place on a baking sheet.
    • Bake at 400°F for 15–18 minutes, until cooked through.
  4. Shrimp Skewers:
    • Toss shrimp with 1 tablespoon olive oil and Italian herbs.
    • Arrange on skewers and broil for 2–3 minutes per side, until pink and opaque.
  5. Assembly:
    • Arrange all finished appetizers on a platter with veggie sticks, olives, nuts, and berries.
    • Garnish with fresh herbs if desired. Serve immediately and enjoy!

Serving Suggestions

Pair these appetizers with sparkling water topped with fresh citrus or a pitcher of unsweetened herbal iced tea for a refreshing, vibrant table. Serve dips in small bowls, and use toothpicks or cocktail forks for easy, mess-free dining. The colorful display not only fits dietary needs but also delights guests visually and with every bite.

Nutritional Information and Serving Size

These appetizers yield an assorted platter serving 6-8 people. Each serving contains lean protein, healthy fats, and plenty of veggies. Calories per serving will vary based on your combination, generally ranging from 120 to 200 calories per appetizer option.

Whole30 & Paleo Appetizer Platter (Recap)

With naturally gluten-free and dairy-free ingredients, this selection of Whole30 and Paleo appetizers proves appetizers can be as healthy as they are flavorful. They’re substantial enough to satisfy, easy to prepare, and sure to please any crowd—no matter the dietary preference.

Weekly Meal Planning

These appetizers are perfect for meal prepping–great for making ahead and enjoying throughout the week as snacks, grab-and-go lunches, or party platters. Save and schedule this recipe to automatically plan which days to prep and receive smart shopping lists that bundle ingredients from all the meals you plan for the week.

Planning Benefits:

  • Automatically calculate how much of each ingredient you need for the week
  • Organize your grocery list by store sections for faster shopping
  • Cut out duplicate ingredient purchases—reduce waste and save money
  • Streamline your weekly meal prep from shopping to serving

Pro tip: Schedule all your recipes together to see overall ingredient needs and prevent overbuying, especially for bulk pantry staples like olive oil or spices.

Cook and Prep Times

Prep Time: 20 minutes
Cook Time: 25 minutes
Total Time: 45 minutes

With these Whole30 and Paleo appetizers, you’ll be ready for any gathering—delivering both taste and nutrition with every gluten-free, dairy-free bite!

Score Big on Flavor: Wholesome Paleo & AIP Game Day Recipes for a Winning Spread

Paleo and AIP Game Day Recipes – Heal Me Delicious

Introduction

Entertaining on game day doesn’t have to mean sacrificing your healthy lifestyle or flavor. These Paleo and AIP game day recipes offer mouthwatering, satisfying dishes free from grains, dairy, and common inflammatory ingredients—making them ideal for anyone following an autoimmune-friendly diet. Every bite delivers the excitement and comfort of classic game day food, transformed to align with your wellness journey.

Flavorful and Crowd-Pleasing Game Day Fare

This recipe collection proves that dietary restrictions can spark creativity and flavor! Combining seasonal ingredients, bold herbs, and clever swaps, these dishes mimic beloved favorites like wings, dips, and crunchy snacks—all without processed additives, gluten, or allergens. Whether you’re fueling the crowd for football or enjoying a cozy watch party at home, these recipes guarantee everyone can dig in.

Perfect Balanced Appetizers and Mains

Key to great Paleo and AIP game day recipes are satisfying dips, crispy bites, and protein-packed mains. Think crispy sweet potato fries baked to golden perfection, shredded chicken “nachos” on plantain chips, creamy avocado dip, and sticky baked wings glazed in a tangy, nightshade-free sauce. A mix of baked vegetables, lean proteins, and flavor-packed sauces keeps your snacks wholesome and deeply satisfying.

Entertaining Made Easy

Make your party stress-free by prepping most dishes ahead of time, and serve with a spread of crunchy veggies, homemade dips, and garnishes. These recipes double easily for larger crowds and turn leftovers into tasty lunches. The combination of color, crunch, and robust flavors means nobody misses out on their game day favorites!

Game Day Serving Ideas

Serve crispy “chips” made from yuca or coconut flour tortillas with a creamy, dairy-free ranch dip alongside roasted chicken skewers dusted with fresh herbs. For a satisfying centerpiece, offer a platter of sticky, honey-glazed AIP chicken wings. Add a side of roasted sweet potato “skins” and marinated veggie kabobs for a crowd-pleasing spread.

Nutritional Information and Serving Size

Each recipe in this collection is naturally gluten-free, dairy-free, and refined sugar-free—perfect for anyone on AIP or Paleo diets. Most party-sized appetizers come in servings of 4-6, ensuring plenty of delicious food for your crew, with average calories per serving ranging from 150-300, depending on recipe components.

Paleo and AIP Game Day Recipes (Recap)

From creamy dips to crispy snacks and satisfying mains, these recipes elevate your game day experience—proving that flavor and wellness do go hand-in-hand. Your guests may not believe these tasty recipes are Paleo and AIP-friendly!

[ingredients]
2 large sweet potatoes, sliced into fries
2 tbsp avocado oil
1 tsp sea salt
1 lb boneless chicken thighs, cut into bite-size pieces
1/4 cup coconut aminos
2 tbsp honey (omit for strict AIP)
1 tbsp garlic powder
2 ripe avocados, mashed
1 bunch fresh cilantro, chopped
1/2 cup cucumber, diced
1 lemon, juiced
1 bag plantain chips (or homemade)
Optional: Sliced green onions, radishes, or olives for garnish
[/ingredients]

💡Meal Planning Tip: Save this recipe to automatically generate an organized, AIP-compliant shopping list—sorted by store section for an effortless, efficient grocery trip.

CookifyAI meal planning interface

Instructions

  1. Preheat oven to 425°F. Toss sweet potato fries with 1 tbsp avocado oil and 1/2 tsp sea salt; spread in a single layer on a parchment-lined baking sheet. Bake 25-30 minutes, flipping halfway, until golden and crisp.
  2. Meanwhile, in a medium bowl, combine chicken bites with 1 tbsp avocado oil, coconut aminos, honey (if using), garlic powder, and remaining salt. Lay on a second lined baking sheet.
  3. Bake chicken pieces for 18-20 minutes, flipping once, until cooked through and caramelized. Broil for an additional 2 minutes for extra crispiness, if desired.
  4. Prepare creamy avocado dip: In a bowl, mash avocados with lemon juice, stir in cucumber, cilantro, and season lightly with sea salt to taste.
  5. Arrange sweet potato fries, baked chicken bites, and plantain chips on a large platter. Serve with avocado dip and optional fresh garnishes.

Weekly Meal Planning

These game day recipes are perfect for prepping ahead or building into your weekly meal plan for effortless, healthy snacking. Save and schedule this recipe to your digital meal plan, and CookifyAI will automatically combine ingredients from all planned recipes into one organized, AIP-friendly shopping list.

Planning Benefits:

  • Automatically calculates total quantities of each grocery item, even across multiple recipes.
  • Organizes everything neatly by store section—no more doubling back in the aisles!
  • Keeps your pantry organized and reduces waste by tracking what you already have.
  • Makes prepping and hosting stress-free with all your recipes in one spot.

Pro tip: If you’re planning multiple AIP meals for the week, let CookifyAI combine your lists for maximum simplicity and efficiency!

Cook and Prep Times

Prep Time: 20 minutes
Cook Time: 30 minutes
Total Time: 50 minutes

Healing Bites: The Ultimate AIP Charcuterie Board Experience

AIP Charcuterie Board – Heal Me Delicious

Introduction

An AIP Charcuterie Board is the epitome of a crowd-pleasing, flavorful spread that suits a variety of dietary needs—including Autoimmune Protocol (AIP). Perfect for gatherings, holidays, or even weekday snacks, this vibrant board features a curated selection of compliant meats, fresh produce, and fun finger foods, all free from common allergens and inflammatory ingredients. It’s a stunning and nourishing centerpiece with something delicious for everyone.

Why Choose This AIP Charcuterie Board?

Crafting an AIP Charcuterie Board is all about bold flavors, abundant textures, and visual appeal—without sacrificing dietary wellness. By using high-quality AIP-compliant ingredients, you ensure that everyone at the table, even those with food sensitivities, can indulge in a gorgeous array of snacks. This board is easy to customize, quick to assemble, and caters to all preferences while supporting healing and wellness.

Building Your Perfect AIP Charcuterie Board

The key to an incredible AIP charcuterie experience is variety. Highlight nitrate-free, unsweetened meats, pickled veggies, crisp produce, and creative AIP dips. Add seasonal fruit for sweetness and garnish with fresh herbs to tie everything together. Assembling a board is as much about taste as it is about color and composition—play with both for the ultimate feast for the senses.

Creative Pairings & AIP-Friendly Dips

Complement your proteins and veggies with AIP-compliant dips, such as guacamole, coconut yogurt tzatziki, or an avocado herb sauce. Offer plantain chips or homemade AIP crackers for crunch. Pair pickled radishes and olives with turkey breast or smoked salmon for elevated flavor combinations, and provide fresh berries and apple slices for a naturally sweet finish.

Serving Suggestions for a Show-Stopping AIP Board

Arrange your meats, vegetables, fruits, and dips on a large wooden board or platter. Garnish generously with fresh dill, basil, or parsley, and serve alongside small dishes and napkins for easy snacking. This charcuterie board pairs well with herbal tea or sparkling water, creating a satisfying and elegant snack spread for any occasion.

Nutritional Information and Serving Size

This AIP Charcuterie Board serves 4–6 people, depending on portion sizes and ingredient choices. Each serving is packed with clean proteins, healthy fats, and plenty of fiber and vitamins from the variety of fruits and vegetables. It’s a nourishing choice that supports healing and inflammation management.

AIP Charcuterie Board (Recap)

With endless combinations and vibrant flavors, this AIP Charcuterie Board from Heal Me Delicious offers a health-focused, highly customizable snack solution that keeps everyone happy and coming back for more.

[ingredients]
– 1/2 lb nitrate-free, sugar-free, AIP-compliant deli meat (turkey, roast beef, or prosciutto)
– 1 can wild-caught, no-salt-added smoked salmon or sardines (drained)
– 1 cup fresh vegetable sticks (carrots, cucumber, celery, jicama)
– 1 cup seasonal fresh fruit (berries, apple slices, kiwi, grapes)
– 1/2 cup AIP pickled vegetables (beets, radishes, cucumbers)
– 1/2 cup AIP-compliant olives (no nightshades, no vinegar)
– 1/2 cup coconut yogurt or AIP guacamole (for dipping)
– 1 cup plantain chips or homemade AIP crackers
– Fresh herbs (dill, basil, or parsley) for garnish
[/ingredients]

💡 Meal Planning Tip: Save this recipe to automatically create a categorized shopping list—including specialty AIP items—sorted by store section for the smoothest grocery experience and efficient weekly meal planning.

CookifyAI meal planning interface

Instructions

  1. On a large serving board, arrange deli meats and smoked fish in separate sections, folding or rolling the sliced meats for visual appeal.
  2. Fill small bowls with coconut yogurt, guacamole, and olives. Place bowls on opposite ends of the board.
  3. Arrange fresh veggie sticks and pickled vegetables in vibrant clusters around the meats and dips.
  4. Add fruit in small piles throughout the board to add color and sweetness.
  5. Fan out plantain chips or crackers in one or two spots for added crunch.
  6. Garnish with fresh herbs, tucking them between sections for a pop of color and freshness.
  7. Serve immediately, or cover and refrigerate for up to 2 hours before your event.

Weekly Meal Planning

Incorporate this AIP Charcuterie Board into your weekly meal planning for healthy lunches, easy dinners, or ready-to-go snacks throughout the week. Save and schedule this recipe to take advantage of CookifyAI’s smart shopping lists, which consolidate all your meal ingredients and organize them by store section—making AIP meal prep easier than ever.

Planning Benefits:

  • Automatically combines ingredient totals for all weekly meals
  • Organizes your shopping list for fast, effortless grocery trips
  • Prevents duplicate purchases and streamlines ingredient tracking
  • Supports diverse and compliant AIP meal plans

Pro Tip: When you schedule multiple AIP recipes, CookifyAI’s smart planner ensures you buy only what you need—cutting waste and maximizing efficiency. Plan ahead and relax, knowing your healing meals are covered.

Cook and Prep Times

Prep Time: 20 minutes
Cook Time: 0 minutes
Total Time: 20 minutes

Wholesome & Colorful: Crafting a Whole30, Paleo, and Gluten-Free Charcuterie Board

How-To: Charcuterie Board (Whole30, Paleo, GF)

Introduction

A thoughtfully designed charcuterie board brings people together and transforms simple ingredients into a visually stunning, flavor-packed centerpiece. This Whole30, Paleo, and gluten-free version proves that you don’t need crackers and cheese to wow your guests. Whether for a festive gathering, family night, or healthy snacking, it’s perfect for anyone mindful of their diet who still wants to indulge deliciously.

Why This Charcuterie Board is a Crowd-Pleaser

This board is all about bold flavors, crisp textures, and crowd-pleasing variety—without sacrificing your health goals. Carefully curated proteins, colorful fruits and veggies, and crunchy extras come together for a board that satisfies every palate while staying true to Whole30, Paleo, and gluten-free guidelines. It’s as beautiful as it is customizable, making it an instant hit at any gathering.

Key Components for a Whole30, Paleo, Gluten-Free Charcuterie Board

Skip the traditional cheese and processed meats by selecting compliant choices. Think nitrate-free prosciutto, sugar-free turkey or beef sticks, and an array of roasted nuts. Fill in with vibrant produce—crisp cucumbers, juicy grapes, vibrant berries, and sweet bell peppers. Add satisfying extras like olives, pickles, and even a tangy Whole30 ranch or guacamole for dipping.

Assembly Made Simple

Start by placing heartier items (like compliant deli meats, hard-boiled eggs, and small bowls of dips) in groups on your platter. Fill in the gaps with colorful vegetables, fruit slices, nuts, and pickles. For visual interest, alternate colors and textures. Leave some sections of the board with “repeat” items so guests can easily build their perfect plate.

Serving Suggestions for a Show-Stopping Board

Garnish with fresh herbs—think rosemary sprigs or chopped parsley—for a fresh aroma and pop of green. Serve with small forks, toothpicks, and napkins for easy, mess-free snacking. For parties, consider prepping a double board or replenishing smaller platters throughout the event.

Nutritional Information and Serving Size

How many people your charcuterie board serves will depend on your selections and platter size. A medium board, as described below, generally serves 6–8 as an appetizer. With protein, healthy fats, and plenty of vegetables, you get a satisfying and nutritious option for a range of diets.

[ingredients]
Protein:
– 8 ounces compliant prosciutto or turkey slices (sugar and nitrate-free)
– 4 hard-boiled eggs, halved
– 2 Whole30 or Paleo beef/turkey snack sticks, sliced

Vegetables:
– 1 cup baby carrots
– 1 bell pepper, sliced
– 1 cucumber, sliced
– 1 cup grape tomatoes

Fruits:
– 1 cup grapes
– 1 cup berries (strawberries, blueberries, raspberries)
– 1 apple, sliced

Extras:
– 1/2 cup assorted olives
– 1/2 cup kosher dill pickles or gherkins
– 1/2 cup roasted nuts (almonds, walnuts, cashews)

Dips:
– 1/2 cup Whole30 ranch or paleo guacamole

Garnish:
– Fresh herbs (parsley, rosemary)

[/ingredients]

💡Meal Planning Tip: Save this recipe to automatically generate an organized shopping list with all ingredients sorted by store section—perfect for efficient grocery trips and stress-free meal planning.

CookifyAI meal planning interface

Instructions

  1. Prepare dips (Whole30 ranch or paleo guacamole) and hard-boil eggs if needed. Slice fruit and veggies as directed.
  2. Arrange protein selections in separate sections on your board or platter.
  3. Fill in with rows and groupings of vegetables and fruit, alternating colors for visual appeal.
  4. Add olives, pickles, and roasted nuts to small bowls or directly onto the platter, filling gaps.
  5. Place dips in small ramekins and set them strategically on the board for easy access.
  6. Garnish with fresh herbs for a final touch of color and aroma.
  7. Serve immediately or cover tightly and refrigerate until ready to enjoy.

Weekly Meal Planning

This charcuterie board isn’t just for parties—it’s perfect for meal prepping healthy, grab-and-go snacks throughout your busy week. Save and schedule this recipe to easily plan ahead, generate smart shopping lists, and coordinate your snack and meal ingredients seamlessly.

Planning Benefits:

  • Automatically totals required ingredients across recipes on your plan
  • Organizes listed items by grocery section for maximum efficiency
  • Merges overlapping ingredients (e.g., eggs for breakfast and your charcuterie platter)
  • Reduces food waste and forgotten items

Pro Tip: For the best value and freshness, schedule your snack boards alongside meals—CookifyAI will show you if there’s overlap with staples like fruits, veggies, or proteins, making weekly prep faster and more budget-friendly.

Cook and Prep Times

Prep Time: 20 minutes
Cook Time: 10 minutes (if making hard-boiled eggs, otherwise 0 minutes)
Total Time: 25–30 minutes

Enjoy a colorful, compliant, and utterly crowd-pleasing charcuterie board without the stress—perfect for Whole30, Paleo, and gluten-free lifestyles!

Effortless Paleo Perfection: Flavor-Packed Sheet Pan Meals for Busy Weeknights

Delicious Paleo Sheet Pan Meals

Introduction

Delicious Paleo Sheet Pan Meals offer a quick, flavorful way to enjoy wholesome dinners packed with fresh veggies and protein, all with minimal cleanup. These all-in-one recipes are the perfect solution for busy weeknights when time and energy are limited, yet you still crave a nutritious and satisfying homemade meal. With endless customization options, sheet pan meals are a standout in any meal plan focused on real, unprocessed ingredients.

Why Paleo Sheet Pan Meals Are a Winner

Paleo sheet pan meals are a crowd pleaser for good reason: they blend the best of both worlds—maximum flavor and maximum simplicity. By roasting everything together, you get beautifully caramelized veggies, juicy proteins, and herb-infused goodness in every bite. Plus, these meals are naturally gluten-free and dairy-free, making them ideal for a variety of dietary needs.

Build-Your-Own Paleo Sheet Pan Meal Formula

Start with high-quality proteins like chicken thighs, salmon fillets, or pork tenderloin. Pair with hearty vegetables such as sweet potatoes, broccoli, and Brussels sprouts. Drizzle with olive oil, sprinkle with garlic, fresh herbs, and a touch of lemon for brightness. Roast at a high temperature to coax out rich flavors and achieve crave-worthy caramelization.

Foolproof Steps for a Flavorful Sheet Pan Supper

Chop your vegetables into equal-sized pieces for even roasting, and toss everything in a simple marinade or seasoning mix for deep flavor. Spread ingredients out on a lined baking sheet so they roast—not steam. Roast at 400°F to 425°F, flipping halfway through, until protein is cooked through and veggies are golden at the edges.

Paleo Sheet Pan Meal Serving Suggestions

Serve your sheet pan creation straight from the tray for a rustic, family-style dinner. Garnish with fresh herbs or a side of lemon wedges for added brightness. Pair with a crisp mixed green salad or cauliflower rice to round out this healthy, balanced meal.

Nutritional Information and Serving Size

A typical Paleo sheet pan meal serves 4 and is high in protein, fiber, and micronutrients, while being low in processed carbs. Most versions contain between 350–500 calories per serving, depending on protein and veggie selection. It’s a naturally satiating and guilt-free dinner choice.

Delicious Paleo Sheet Pan Meals (Recap)

Minimal prep, big flavor, and even bigger nutritional benefits—these sheet pan meals are perfect for both busy families and meal preppers. The versatility and ease of this cooking method mean you’ll never get bored, making it easy to stick with your wellness goals.

[ingredients]
1 lb boneless, skinless chicken thighs or wild salmon fillets
2 cups broccoli florets
1 medium red onion, sliced
1 large sweet potato, diced
1 cup Brussels sprouts, halved
3 tbsp olive oil
2 tsp garlic powder
1 tsp dried thyme
1 tsp dried rosemary
Zest and juice of 1 lemon
Salt and pepper to taste
Optional: Fresh parsley for garnish
[/ingredients]

💡Meal Planning Tip: Save this recipe to automatically generate an organized shopping list with all ingredients sorted by store section—perfect for efficient grocery trips and streamlined meal planning.

CookifyAI meal planning interface

Instructions

  1. Preheat oven to 425°F. Line a large rimmed baking sheet with parchment paper or foil.
  2. In a large bowl, toss sweet potatoes, broccoli, Brussels sprouts, and onion with 2 tbsp olive oil, garlic powder, thyme, rosemary, lemon zest, salt, and pepper.
  3. Spread vegetables evenly on the prepared pan.
  4. Drizzle remaining olive oil over chicken or salmon, and season with additional salt, pepper, and a squeeze of lemon juice. Nestle protein among the vegetables.
  5. Roast for 20–25 minutes (salmon) or 25–30 minutes (chicken), flipping veggies halfway; roast until protein is cooked through and vegetables are browned at the edges.
  6. Garnish with fresh parsley and serve hot alongside lemon wedges.

Weekly Meal Planning

Sheet pan meals are ideal for weekly meal prep—they hold up well in the fridge and reheat beautifully. Save and schedule this recipe for specific dinners and let smart shopping lists automatically calculate ingredients across your planned meals.

Planning Benefits:

  • Consolidates shopping lists according to recipes and servings planned
  • Organizes all ingredients by grocery store section
  • Prevents overbuying and forgotten ingredients
  • Streamlines meal prep so you can batch roast for the week in one go

Pro tip: When adding multiple paleo recipes to your plan, schedule them together and watch CookifyAI total up quantities for things like olive oil or herbs—saving you time, reducing food waste, and maximizing efficiency.

Cook and Prep Times

Prep Time: 15 minutes
Cook Time: 25–30 minutes
Total Time: 40–45 minutes

Enjoy the vibrant flavors and convenience of Delicious Paleo Sheet Pan Meals—your weeknight dinners just got easier, healthier, and tastier!

Revitalize Your Meals: Unlocking the Power of Whole30 Recipes for a Healthier You

Whole30 Recipes: Flavorful, Satisfying, and Easy Meals for Every Day

Introduction

Whole30 recipes are designed to reboot your eating habits by focusing on whole, nutrient-dense foods—no grains, dairy, sugar, legumes, or processed ingredients. These flavorful meals prove that healthy eating doesn’t have to be bland or complicated. Whether you’re new to the Whole30 challenge or a seasoned veteran, these recipes will keep your menu fresh and satisfying, making it easier to stick to your goals for thirty days and beyond.

Why Whole30 Recipes are a Game Changer

Whole30 recipes shine due to their bold flavors, clean ingredients, and adaptability for meal prep. Each dish is delicious on its own and can easily be incorporated into larger weekly meal planning, making your dietary reset not just possible but enjoyable. The “reset” approach also makes these recipes crowd-pleasers for family dinners or gatherings, since they focus on real food that everyone can appreciate.

Whole30 Staples to Keep on Hand

For hassle-free Whole30 meal prep, stock your kitchen with essentials such as fresh vegetables, high-quality proteins (like eggs, chicken, beef, or fish), and healthy fats (avocado, olive oil, coconut milk). Pantry items like coconut aminos and compliant spices ensure you’ll always be ready to whip up creative, satisfying dishes.

Sample Whole30 Chicken and Vegetable Sheet Pan Dinner

This recipe is as easy as it is flavorful: simply combine juicy chicken, colorful vegetables, and a handful of seasonings all on one pan for a stress-free, nourishing meal.

[ingredients]
2 boneless, skinless chicken breasts (cut into chunks)
2 cups broccoli florets
1 red bell pepper, sliced
1 yellow squash, sliced
1 small red onion, cut into wedges
2 tablespoons olive oil or avocado oil
1 teaspoon paprika
1 teaspoon garlic powder
1/2 teaspoon sea salt
1/2 teaspoon black pepper
1/2 teaspoon dried oregano
Lemon wedges for serving
[/ingredients]

💡Meal Planning Tip: Save this recipe to have every ingredient instantly sorted by grocery aisle—making your shopping trip and meal prep a breeze and ensuring you never miss an essential Whole30 ingredient.

CookifyAI meal planning interface

Instructions

  1. Preheat your oven to 425°F (220°C) and line a large baking sheet with parchment paper for easy cleanup.
  2. In a large bowl, combine the chicken pieces and all vegetables. Drizzle with olive oil and toss to coat evenly.
  3. Sprinkle paprika, garlic powder, sea salt, black pepper, and dried oregano over the mixture and toss again until everything is coated.
  4. Spread the mixture in a single layer on the prepared baking sheet.
  5. Bake for 20-25 minutes, stirring once halfway through, until the chicken is cooked through and the vegetables are golden and tender.
  6. Serve with fresh lemon wedges for extra zing.

Weekly Meal Planning

Whole30 recipes are ideal for prepping multiple meals at once. Save and schedule these recipes to plan your week ahead: your shopping list will update automatically, combine ingredients from each dish, and sort items by store aisle.

Planning Benefits:

  • Effortlessly calculate total quantities for all recipes in your plan
  • Eliminate duplicate items and forgotten essentials
  • See where ingredients overlap—making it easy to batch cook chicken, prep vegetables, or portion out meals in advance
  • Reduce food waste and make your Whole30 journey more efficient

Pro tip: Schedule your meals to get full visibility over your week—CookifyAI will pinpoint which days require meal prepping, ensuring you always have compliant and scrumptious food on hand.

Cook and Prep Times

Prep Time: 10 minutes
Cook Time: 25 minutes
Total Time: 35 minutes

Whole30 Recipes—Your Guide to Delicious Simplicity

These Whole30 recipes transform simple ingredients into vibrant, wholesome dishes you’ll genuinely look forward to. With streamlined prep and meal planning tools like CookifyAI, you’ll spend less time shopping and organizing, and more time enjoying the benefits of clean, flavorful eating.

Game Day Reinvented: The Ultimate Super Bowl Paleo Nacho Bar for Whole30 & AIP Lifestyles

Super Bowl Paleo Nacho Bar (Whole30 & AIP)

Introduction

The Super Bowl is synonymous with delicious snack spreads, but who says you have to compromise your nutrition goals for flavor? The Super Bowl Paleo Nacho Bar (Whole30 & AIP) transforms the game-day classic into a healthy, crowd-pleasing centerpiece. Enjoy all the zesty, crunchy, and creamy elements you expect from nachos—without grains, dairy, or unwanted additives. It’s perfect for anyone following Paleo, Whole30, or AIP diets, and sure to entice every guest, health-conscious or not.

Why This Super Bowl Paleo Nacho Bar Is a Game-Changer

Traditional nachos often rely on processed chips and cheese. This version brings robust flavor and satisfying crunch using plantain or sweet potato chips, savory protein, and a rainbow of fresh toppings, all tailored to Whole30 and AIP guidelines. No one will miss the dairy or grains—the bold seasonings, creamy avocado, and bright salsas bring all the indulgence and none of the guilt. Ideal for a big game party or healthy snack tables, this nacho bar lets guests build their own custom plate!

Building Your Healthy Nacho Bar Base

Every great nacho bar starts with a solid foundation. Swap out corn chips for sturdy, homemade slices of plantain or sweet potato, lightly baked or roasted to golden crispness. If short on time, some retailers carry compliant store-bought veggie chips—just check labels to keep things Whole30 and AIP-approved. This base packs flavor, fiber, and vitamins, turning a comfort food favorite into a nourishing treat.

Essential Healthy Nacho Toppings

Layer on seasoned ground beef, shredded chicken, or pulled pork—cooked simply with olive oil and allowed herbs and spices. Next, add fajita-style veggies, avocado slices or guacamole, and colorful options like shredded lettuce, radishes, or red onion. For more indulgence, drizzle with compliant cashew “cheese” sauce or coconut milk sour cream. Spoon on a quick salsa made from fresh tomatoes, cilantro, and lime.

Perfect Super Bowl Snacks: Serving Tips

Set up the nacho bar assembly-line style so everyone can layer their own masterpiece—perfect for mingling during commercials or halftime. For a visual wow-factor, group chips and toppings in vibrant bowls and platters. Add a big green salad or veggie tray for extra crunch, and offer sparkling water or fruit-infused mocktails for a full, healthy snack spread.

Nutritional Information and Serving Size

This recipe yields enough for 6–8 hearty game-day portions. Nutritional content varies by topping choices, but using baked plantain chips, lean protein, and plenty of vegetables keeps each serving packed with fiber, healthy fats, and protein around 300–400 calories per plateful.

Super Bowl Paleo Nacho Bar (Whole30 & AIP) Recap

This nacho bar is the ultimate healthy Super Bowl snack: crunchy, fresh, and totally customizable. Free of dairy, grains, and processed ingredients, it’s the go-to for anyone looking for delicious Super Bowl food that supports a healthier lifestyle.

[ingredients]
For the “chips”:
– 3 green plantains or 2 large sweet potatoes, thinly sliced
– 2–3 tbsp olive oil
– Sea salt, to taste

For the protein:
– 1 lb ground beef or shredded cooked chicken or pork
– 1 tbsp olive or avocado oil
– 1 tsp cumin (omit for strict AIP)
– 1/2 tsp paprika (omit for AIP)
– 1/2 tsp dried oregano (optional)
– 1/2 tsp garlic powder
– Salt and pepper (omit pepper for AIP), to taste

Toppings:
– 1–2 avocados, sliced or mashed
– 1 cup shredded lettuce
– 1/2 cup radishes, thinly sliced
– 1/2 red onion, thinly sliced
– 1/2 cup fresh salsa (tomato, cilantro, lime—omit nightshades for strict AIP)
– AIP/Paleo Cashew “cheese” sauce (optional)
– Coconut milk sour cream (optional)
– Chopped cilantro and sliced green onion

[/ingredients]

💡Meal Planning Tip: Save this recipe to automatically create a full shopping list with ingredients smartly organized by section—making healthy Super Bowl snack prep and weekly meal planning easy!

CookifyAI meal planning interface

Instructions

  1. Make the Chips: Preheat your oven to 400°F. Toss thinly sliced plantains or sweet potatoes with olive oil and a sprinkle of sea salt. Spread evenly on parchment-lined baking sheets and bake for 20–25 minutes, flipping halfway, until golden and crisp.
  2. Prepare the Protein: In a skillet over medium heat, warm oil and cook your protein of choice until cooked through, breaking up ground beef as it browns or shredding chicken/pork. Add herbs and spices (omit nightshades for AIP). Once cooked, taste and adjust seasoning.
  3. Prep the Toppings: While the chips bake, slice and prep all veggies and toppings. Mash avocados with a bit of lime and salt if making guacamole. Prepare salsa and compliant “cheese” or sour cream if using.
  4. Set Up the Nacho Bar: Arrange the chips, protein, and toppings in bowls. Let each guest assemble their plate: chips first, then hot protein, followed by toppings of choice.
  5. Enjoy immediately while the chips are crisp and the protein is warm.

Weekly Meal Planning

This nacho bar is not just for parties—it’s also a fantastic choice for meal prep! Save and schedule this recipe to plan specific days for healthy nachos, and instantly create a smart grocery list that combines ingredients for all your planned meals.

Planning Benefits:

– Calculates total quantities across recipes for easy bulk prep
– Organizes shopping lists by produce, pantry, meats, and more
– Helps you shop once, prep once, and avoid duplicate or missing ingredients
– Streamlines healthy eating all week, not just on game day

Pro tip: When adding multiple recipes—including this nacho bar—to your CookifyAI plan, you’ll see overlapping ingredients, so you buy exactly what you need and waste less. Easy, organized, and always healthy!

Cook and Prep Times

Prep Time: 20 minutes
Cook Time: 25 minutes
Total Time: 45 minutes

Yes, healthy Super Bowl snacks can be eye-catching and irresistible! Give this Paleo Nacho Bar a try for your next party—or add it to your weekly rotation for a fresh take on convenient, customizable meals.

Paleo Party Perfection: Bold Appetizers & Finger Food Favorites

Paleo Appetizers and Finger Foods for Parties!

Introduction

Impress your guests with a vibrant spread of Paleo appetizers and finger foods—perfect for parties, game nights, or casual gatherings. These easy-to-eat bites are naturally grain-free, dairy-free, and refined sugar-free, making them a perfect choice for guests with dietary preferences. Each recipe balances bold flavors with clean ingredients, ensuring everyone can dig in worry-free.

Why These Paleo Appetizers Are Always a Hit

Paleo appetizers and finger foods keep things exciting and wholesome. Think crisp veggie wraps, savory meatballs with zingy sauces, and loaded sweet potato bites. These dishes not only offer tongue-tingling flavors but also deliver on satiety—your guests will be satisfied without feeling weighed down. Plus, their vibrant presentation adds instant appeal to any party tray.

Quick and Tasty Paleo Finger Foods Lineup

These crowd-pleasing paleo appetizers are easy to prep in advance and quick to assemble before your next event:

  • Bacon-Wrapped Dates — Savory, sweet, and oh-so-satisfying.
  • Crispy Veggie Chips — Sliced beets, sweet potatoes, and carrots roasted to perfection.
  • Mini Meatballs — Seasoned with Italian herbs, perfect for dipping.
  • Stuffed Mushrooms — Filled with a herby, nutty spinach mixture.
  • Guacamole Cucumber Bites — Fresh, creamy avocado on crunchy cucumber rounds.

The Ultimate Paleo Meatballs Recipe

Here’s a simple Paleo meatball recipe to anchor your party table—flavorful, bite-sized, and completely grain-free.

[ingredients]
1 pound ground turkey, chicken, or beef
2 tablespoons almond flour
1 egg
1/4 cup finely chopped onion
2 cloves garlic, minced
2 tablespoons fresh parsley, chopped
1 teaspoon dried Italian herbs
1/2 teaspoon sea salt
1/2 teaspoon black pepper
Olive oil, for baking or pan frying
For serving: compliant marinara or chimichurri sauce
Optional: chopped fresh basil for garnish
[/ingredients]

💡Meal Planning Tip: Save this recipe to automatically generate an organized shopping list with all ingredients sorted by store section—perfect for prepping and shopping for your next party or weekly meals.

CookifyAI meal planning interface

Instructions

  1. Preheat your oven to 400°F (200°C) and line a baking sheet with parchment paper.
  2. In a large bowl, combine the ground meat, almond flour, egg, onion, garlic, parsley, herbs, salt, and pepper. Mix until just combined—don’t overwork the mixture.
  3. With clean hands, roll the mixture into 1-inch balls and place them on the prepared baking sheet. Drizzle or brush lightly with olive oil.
  4. Bake for 15–18 minutes or until cooked through. (Alternatively, pan-fry over medium heat until browned and cooked through.)
  5. Let cool slightly and serve alongside your choice of compliant dipping sauce. Sprinkle with chopped basil if desired.

Serving and Presentation Tips

Arrange your Paleo appetizers on a large platter or board. Use fresh herbs, veggie sticks, and colorful sauces for garnishes to create visual appeal. Offer toothpicks or skewers for easy grabbing—your guests will appreciate the convenience and flair.

Nutritional Information and Serving Size

This Paleo party spread serves about 8–10 as part of an appetizer assortment. Each serving of meatballs (about 3–4 pieces) contains approximately 120–160 calories, depending on protein choice and sauce.

Paleo Appetizer Party Recap

Paleo appetizers and finger foods prove you don’t need grains or dairy to have a flavorful, crowd-pleasing party spread. Their simplicity and bold flavors ensure everyone—even non-Paleo eaters—goes back for seconds.

Weekly Meal Planning

You can easily prep Paleo appetizers for weekday snacks, kids’ lunches, or to include as a healthy meal component. Save and schedule this recipe to your CookifyAI meal planner to automatically combine ingredients for all your planned recipes into a single, organized shopping list.

Planning Benefits:

  • Consolidates all ingredients from your week’s meal plan—no more double buying or last-minute store runs.
  • Organizes your shopping by store section for quick and efficient trips.
  • Helps reduce food waste by tracking overlapping ingredients.
  • Enables easy swaps and scaling based on party size or special diets.

Pro tip: Schedule your Paleo recipes to see at a glance how much meat, produce, or pantry items you’ll need for both parties and weeknight meals—taking the stress out of entertaining and healthy eating.

Cook and Prep Times

Prep Time: 20 minutes
Cook Time: 15–18 minutes
Total Time: 35–40 minutes

Elevate your next party with these Paleo finger foods—for delicious bites everyone can enjoy and a streamlined, worry-free prep experience!

One-Pan Perfection: A Delicious Gluten-Free, Paleo & Whole30 Chicken Skillet

Gluten Free, Paleo, and Whole30 Recipes

Introduction

Eating gluten free, Paleo, and Whole30 doesn’t mean sacrificing flavor, variety, or satisfaction. In fact, these diets are celebrated for their emphasis on whole, nutrient-dense foods and creative ingredient swaps. Whether you’re embarking on a dietary reset, managing food sensitivities, or simply want to keep your meals wholesome and naturally flavorful, this recipe brings together fresh vegetables, lean protein, and luscious, herb-driven sauces to create a meal that is comforting, satisfying, and completely compliant with gluten free, Paleo, and Whole30 guidelines.

Flavorful, Crowd-Pleasing Paleo Chicken and Vegetable Skillet

This one-pan chicken and vegetable skillet is a total weeknight hero: layers of seared chicken, crisp-tender veggies, and a medley of fresh herbs, all cooked together for maximum flavor and minimal cleanup. It’s naturally gluten free, conforms to Paleo and Whole30 standards, and is so vibrant and delicious you’ll never miss the grains, dairy, or processed ingredients.

Mastering Your Paleo and Whole30 Sauce

The real secret to making a compliant meal sing is in the sauce. Here, we blend fresh lemon juice, olive oil, garlic, and herbs like parsley and oregano to create a zesty drizzle. This sauce enhances the natural taste of the protein and vegetables, turning simple ingredients into something everyone will crave.

Assembling a Perfect Gluten Free, Paleo, and Whole30 Skillet

Start by searing boneless, skinless chicken breasts or thighs until golden. Remove the chicken, then toss in colorful veggies like bell peppers, zucchini, and broccoli. Deglaze with a splash of chicken broth, return the chicken to the pan, spoon on the herb sauce, and simmer everything together. The result: juicy, perfectly cooked chicken and vibrant veggies, all in one skillet.

Serving Suggestions for a Standout Paleo Meal

Serve this skillet meal straight from the pan, garnished with extra chopped herbs and lemon wedges. Complete the plate with a simple side salad for even more crunch and freshness. This recipe pairs beautifully with cauliflower rice or roasted sweet potatoes—both compliant and delicious options.

Nutritional Information and Serving Size

This recipe yields 4 hearty servings, each brimming with lean protein and a variety of fiber-rich vegetables. Each serving typically provides 250–350 calories, plenty of vitamins, and no gluten, grains, dairy, or added sugars—making it a wholesome meal for any night of the week.

Gluten Free, Paleo, and Whole30 Skillet (Recap)

This dish proves that clean eating isn’t about restriction—it’s about harnessing the best flavors from real ingredients. With one pan and a handful of simple components, you’ll have a meal that’s as crowd-pleasing as it is nourishing.

[ingredients]
1½ pounds boneless, skinless chicken breasts or thighs
1 tablespoon olive oil (or avocado oil)
1 teaspoon salt, divided
½ teaspoon black pepper
1 bell pepper, sliced
1 zucchini, sliced
1 small red onion, chopped
2 cups broccoli florets
⅓ cup chicken broth (no sugar, gluten free)
2 tablespoons lemon juice
1 teaspoon garlic powder or 2 cloves minced garlic
1 tablespoon fresh parsley, chopped
1 tablespoon fresh oregano, chopped
Extra lemon wedges for serving
[/ingredients]

💡Meal Planning Tip: Save this recipe to automatically generate a streamlined shopping list, perfectly sorted by department, so you can breeze through the store and reliably stay compliant with your dietary needs.

CookifyAI meal planning interface

Instructions

  1. Pat chicken dry and sprinkle with ½ teaspoon salt and the black pepper.
  2. Heat oil in a large skillet over medium-high heat. Sear chicken for 4–5 minutes per side until golden and cooked through. Remove chicken to a plate.
  3. Add bell pepper, zucchini, onion, and broccoli to the skillet. Season with remaining ½ teaspoon salt. Sauté for 4–5 minutes until starting to soften.
  4. Pour in the chicken broth and stir, scraping up any browned bits.
  5. Return the chicken to the skillet. Whisk together lemon juice, garlic, parsley, and oregano, then drizzle over chicken and vegetables.
  6. Simmer everything together for another 2–3 minutes until vegetables are crisp-tender and chicken is heated through.
  7. Serve hot, garnished with extra herbs and lemon wedges.

Weekly Meal Planning

This recipe is a meal prep star: it holds up beautifully in the fridge and reheats well, making it ideal for preparing ahead. Save and schedule this recipe to plan meals throughout the week and build smart, diet-compliant shopping lists automatically.

Planning Benefits:

  • Compiles all ingredients across your weekly plan to calculate exact quantities needed
  • Sorts ingredients by grocery section, making shopping for gluten free, Paleo, and Whole30 ingredients a breeze
  • Eliminates the hassle of tracking which meals use which components
  • Mitigates food waste and helps you stick to your healthy eating plan

Pro tip: Schedule all your recipes for the week and let CookifyAI organize your meal plan—so you never forget a crucial ingredient or accidentally double up.

Cook and Prep Times

Prep Time: 15 minutes
Cook Time: 20 minutes
Total Time: 35 minutes

Enjoy eating gluten free, Paleo, and Whole30—with greater simplicity, flavor, and organization than ever before!

Easy Stuffed Peppers: A Colorful, Versatile Weeknight Delight

Easy Stuffed Peppers

Introduction

Easy Stuffed Peppers are a delicious, wholesome meal that brings vibrant color, hearty flavor, and plenty of nutrition to your dinner table with minimal effort. This classic dish is perfect for busy weeknights, family dinners, or meal prepping, offering a satisfying combination of protein, vegetables, and grains all nestled inside tender, juicy bell peppers. Let your oven do most of the work as you enjoy a meal that feels both special and straightforward.

Why Everyone Loves These Easy Stuffed Peppers

These stuffed peppers stand out for their impressive flavor and remarkable simplicity. The juicy bell peppers act as edible bowls, filled to the brim with a savory blend of ground meat, fluffy rice, aromatic herbs, and melty cheese. With straightforward prep and endless ways to customize the filling, it’s no wonder this dish remains a crowd pleaser that satisfies kids and adults alike.

Flavorful and Versatile Stuffed Pepper Filling

The beauty of this recipe lies in its adaptability. Ground beef, turkey, or chicken all work wonderfully; pair them with cooked rice, diced tomatoes, onion, garlic, and Italian seasoning for a classic approach. Add a sprinkle of cheese for creamy richness, or toss in beans or corn for extra texture and nutrition. The filling can also be made ahead of time, making this recipe a dream for busy cooks.

Step-by-Step Assembly for Perfect Stuffed Peppers

To assemble, simply cut the tops off the peppers and remove the seeds. Fill each pepper generously with your seasoned meat and rice mixture, then top with cheese. Baked until the peppers are tender and the cheese is golden, these little edible vessels emerge from the oven bubbling and irresistible.

Serving Suggestions for Easy Stuffed Peppers

Serve these stuffed peppers as a complete meal with a side salad or roasted vegetables. For extra flair, garnish with chopped fresh parsley or a dollop of Greek yogurt. They’re also excellent reheated the next day, making them ideal for lunchboxes or dinner leftovers.

Nutritional Information and Serving Size

This recipe yields 4 hearty stuffed peppers, one per serving. Each serving contains approximately 350–400 calories, depending on the meat and cheese choices. Packed with protein, fiber, and vitamins, these peppers make a well-rounded main course you can feel good about serving.

Easy Stuffed Peppers (Recap)

These Easy Stuffed Peppers combine nutrition, vibrant presentation, and great taste, all with minimal prep work. Satisfying and versatile, they’re sure to become a staple in your meal rotation.

[ingredients]
4 large bell peppers (any color)
1 pound ground beef, turkey, or chicken
1 cup cooked rice
1 small onion, finely diced
2 cloves garlic, minced
1 can (14.5 oz) diced tomatoes, drained
1 teaspoon Italian seasoning
1/2 teaspoon salt
1/4 teaspoon pepper
1 cup shredded cheese (cheddar or mozzarella)
Optional: 1/2 cup frozen corn or black beans
[/ingredients]

💡 Meal Planning Tip: Save this recipe to automatically generate an organized shopping list with all ingredients sorted by store section — perfect for efficient grocery trips and meal planning!

CookifyAI meal planning interface

Instructions

  1. Preheat your oven to 375°F. Lightly grease a 9×13-inch baking dish.
  2. Cut the tops off the bell peppers and remove seeds and membranes. Arrange peppers upright in the prepared baking dish.
  3. In a large skillet over medium heat, cook ground meat, onion, and garlic until meat is browned and onion is soft. Drain excess fat.
  4. Stir in the cooked rice, diced tomatoes, Italian seasoning, salt, pepper, and optional corn or beans. Mix well to combine.
  5. Spoon the mixture evenly into each bell pepper. Top with shredded cheese.
  6. Add about 1/4 cup water to the bottom of the baking dish to help steam the peppers.
  7. Cover with foil and bake for 30 minutes. Remove foil and bake for another 10–15 minutes, until the peppers are tender and the cheese is bubbly and golden.
  8. Let rest for a few minutes before serving. Garnish as desired.

Weekly Meal Planning

This recipe is an all-star for meal prep and weekly dinner planning. Save and schedule this recipe so you can plan which nights you’ll make it, and CookifyAI will automatically generate a smart, consolidated shopping list for the week.

Planning Perks:

– Calculates total ingredient amounts across multiple recipes
– Sorts your shopping list by grocery store section for faster shopping
– Helps prevent duplicate purchases and forgotten items
– Makes it easy to prep meals ahead for a stress-free week

Pro tip: When you plan and schedule your week, CookifyAI shows where ingredients overlap—so if stuffed peppers and another recipe both need ground beef, it adds it up for you, saving time and reducing waste.

Cook and Prep Times

Prep Time: 15 minutes
Cook Time: 45 minutes
Total Time: 60 minutes

Paleo Power Lunches: 23+ Creative Meal Prep Recipes for Energized Days

23+ Paleo Lunch Recipes Perfect for Work or School

Introduction

Finding enough variety in your weekday lunches—without sacrificing nutrition or flavor—can be a challenge. This collection of 23+ Paleo lunch recipes is a game-changer: whether you’re powering through a workday or need something wholesome for your kids’ lunchboxes, these recipes are designed for energy, satiety, and irresistibly bold flavors. Every recipe is gluten-free, grain-free, refined sugar-free, and packed with whole foods, making it effortless to maintain your Paleo lifestyle wherever you are.

Why These Paleo Lunches Are a Crowd Pleaser

What makes this collection stand out is the diversity of flavors and the way in which these dishes keep well when prepped ahead. From vibrant salads and creative wraps to satisfying bowls and protein-packed mains, these recipes are anything but boring. Many are portable and can be enjoyed cold or at room temperature, making lunchtime seamless—no microwave required!

Meal Prep for the Win: Get Ahead with Paleo Lunches

The secret to healthy eating on busy days is meal prep, and every recipe in this roundup is tailored for batch-cooking and easy packing. By dedicating a little time on weekends, you’ll set yourself up for a week of nourishing Paleo lunches that help you avoid the last-minute, less healthy takeout option.

Top Picks from Our 23+ Paleo Lunch Recipes

Here’s a sneak peek at some standout options you’ll love:

  • Chicken Avocado Lettuce Wraps – Light, creamy, and full of healthy fats for long-lasting energy
  • Whole30 Turkey Meatballs – Great on their own, or served over zucchini noodles
  • Thai-Inspired Rainbow Salad – Crunchy, colorful vegetables paired with a zesty Paleo dressing
  • Sweet Potato & Broccoli Buddha Bowls – Roasted veggies with a savory seed sprinkle
  • Egg Roll in a Bowl – All your favorite flavors, none of the wrappers
  • Salmon Salad Stuffed Avocados – Perfect for a midday Omega-3 boost
  • Curried Chicken Salad Boats – Classic flavor with a Paleo twist
  • Zucchini Noodle Pesto Meal Prep – A herby lunch that feels like comfort food
  • Buffalo Ranch Chicken Poppers – Bite-sized, packable protein bombs

Paleo Lunch Ingredients At a Glance

Each recipe pulls from a list of nutrient-dense Paleo staples—fresh veggies, lean proteins, healthy fats, and natural seasonings—so you’ll never get bored. Here’s what you’ll likely need on your next shopping list:

[ingredients]
– Chicken breasts or thighs
– Ground turkey or grass-fed beef
– Canned salmon or tuna (in water)
– Avocados
– Fresh greens (spinach, romaine, arugula)
– Zucchini, bell peppers, carrots, broccoli
– Eggs
– Sweet potatoes
– Slivered almonds, pumpkin seeds, chia seeds
– Fresh herbs (cilantro, parsley, basil)
– Olive oil, avocado oil, coconut aminos, vinegars
– Spices: turmeric, curry powder, smoked paprika, garlic powder, ginger
[/ingredients]

💡Meal Planning Tip: Save these Paleo lunch recipes to automatically generate an organized shopping list with all ingredients sorted by store section—perfect for efficient grocery trips and hassle-free meal planning.

CookifyAI meal planning interface

Instructions for Paleo Lunch Prep

  1. Choose 2–3 recipes to batch prep for your week for variety and balanced nutrition.
  2. Use the shopping list above (or generated in your meal planning app) to purchase all ingredients in one trip.
  3. Spend 1–2 hours prepping and cooking in advance. For example, roast your proteins, wash and chop veggies, and assemble sauces or dressings.
  4. Pack individual servings in airtight, BPA-free containers for easy grab-and-go lunches.
  5. Store prepped meals in the fridge (most will keep well for up to 4 days).
  6. In the morning, simply grab your lunchbox and go—no more lunchtime decision fatigue!

Weekly Meal Planning

Making your Paleo journey even easier is a breeze with smart meal planning. Save and schedule your favorite Paleo lunch recipes to create a customized weekly plan and generate a consolidated shopping list across all planned meals.

Planning Benefits:

  • Calculates total ingredient amounts across multiple recipes
  • Organizes shopping lists by grocery store aisle for faster trips
  • Eliminates duplicate ingredient purchases and reduces food waste
  • Helps you stick to your wellness goals with pre-planned, balanced meals

Pro tip: When you pick several recipes for the week, use the scheduling tool to easily see overlapping ingredients—making sure you only buy what you need for all your lunch prep.

Cook and Prep Times

Prep Time (per recipe): 10–25 minutes
Cook Time (per recipe): 10–35 minutes
Batch Cook/Meal Prep Time (for the week): 1–2 hours

Enjoy stress-free, delicious Paleo lunches all week long—and have more energy to tackle whatever your days bring!

Energizing Elegance: Elderberry-Pomegranate Salmon Paired with a Symphony of Colorful Veggie Sides and Berry-Kale Salad

Elderberry and Pomegranate Salmon with Purple Snow Pea and Red Onion Sauté, Roast Eggplant with Sugar-Free “Honey,” and Massaged Purple Kale and Red Cabbage Salad with Blackberries

Introduction

If you’re looking to infuse your dinner table with vivid color, bold flavors, and a healthful boost, this vibrant trio of dishes delivers in every way. Elderberry and Pomegranate Salmon offers antioxidative depth and a subtle tang; paired with a bright Purple Snow Pea and Red Onion Sauté, earthy Roast Eggplant drizzled with a clever sugar-free “honey,” and a Massaged Purple Kale and Red Cabbage Salad crowned with juicy blackberries, this meal is as stunning to serve as it is nourishing and satisfying. Each component complements the other, making it a memorable centerpiece for weeknight dinners or festive gatherings.

Why This Flavorful Platter Stands Out

This show-stopping main and its vegetable-rich sides celebrate color, seasonal freshness, and flavor. The elderberry-pomegranate glaze adds sophistication to the salmon, the sauté is naturally sweet and crunchy, the roasted eggplant is umami-rich, and the salad offers a burst of berry sweetness with every bite. It’s a unique combination designed to surprise and delight, making it a favorite for families or anyone eager to explore ingredient-driven cooking.

The Art of Perfect Elderberry-Pomegranate Salmon

The glaze blends antioxidant-rich elderberry syrup and pomegranate molasses, creating an irresistibly tangy but gently sweet finish. Brush it over salmon fillets and roast until the fish is moist and flaky. This method locks in flavor while creating a beautiful glazed appearance. Whether wild-caught or farmed, salmon’s richness is balanced by the tart, fruity glaze—an ideal match for nutrient-dense vegetables.

Sensational Sides with a Twist

For the sauté, purple snow peas and thinly sliced red onions quickly cooked until just tender create a colorful, crunchy side full of natural sweetness. The oven-roasted eggplant’s creamy interior and crisped edges are elevated by a drizzle of sugar-free “honey” (use a monk fruit syrup or your preferred sugar-free alternative), bringing subtle sweetness without the sugar.

The massaged purple kale and red cabbage salad is a feast for the eyes and the palate: tossing the greens with lemon juice makes them tender, and the salad bursts with flavor from ripe blackberries and a simple vinaigrette.

Beautifully Balanced Serving Suggestions

Arrange thin slices of salmon over a bed of the sauteed snow peas and onions, nestle golden eggplant wedges on the side, and top everything off with a generous scoop of purple kale and red cabbage salad. Finish with a scattering of extra berries and a drizzle of your preferred sugar-free sweetener over the eggplant for a restaurant-quality plate right at home.

Nutritional Information and Serving Size

This recipe serves 4, packing each plate with omega-3s, antioxidants, fiber, and vitamins. A serving (including salmon, sauté, eggplant, and salad) is approximately 475 calories, with loads of beneficial nutrients—ideal for balanced, wholesome eating.

[ingredients]
For the Elderberry and Pomegranate Salmon:
– 4 salmon fillets (5–6 oz each)
– 2 tbsp elderberry syrup
– 2 tbsp pomegranate molasses
– 1 tbsp olive oil
– 1 tsp Dijon mustard
– 1 clove garlic, grated
– ½ tsp sea salt
– ¼ tsp black pepper

For the Purple Snow Pea and Red Onion Sauté:
– 2 cups purple snow peas, trimmed
– 1 small red onion, thinly sliced
– 1 tbsp olive oil
– ½ tsp salt
– Pinch of black pepper

For the Roast Eggplant with Sugar-Free “Honey”:
– 1 large eggplant, sliced into ½-inch rounds
– 2 tbsp olive oil
– 1 tbsp monk fruit syrup or sugar-free honey substitute
– ½ tsp smoked paprika
– ¼ tsp salt

For the Massaged Purple Kale and Red Cabbage Salad:
– 2 cups purple kale, stemmed and shredded
– 1 cup red cabbage, thinly sliced
– 1 cup fresh blackberries
– 2 tbsp lemon juice
– 1 tbsp olive oil
– Salt and pepper to taste
[/ingredients]

💡 Meal Planning Tip: Save this recipe to instantly generate a sorted shopping list for all components of this dish—making grocery trips and weekly meal planning notably easier!

CookifyAI meal planning interface

Instructions

  1. Make the Salmon Glaze: In a small bowl, whisk together the elderberry syrup, pomegranate molasses, olive oil, Dijon mustard, grated garlic, salt, and pepper.
  2. Prepare & Roast the Salmon: Preheat oven to 400°F (200°C). Place salmon fillets on a lined baking sheet. Brush generously with the elderberry-pomegranate glaze. Roast for 12–15 minutes or until salmon flakes easily with a fork.
  3. Roast the Eggplant: Arrange eggplant rounds on a second baking sheet. Brush each side with olive oil, sprinkle with smoked paprika and salt. Roast alongside the salmon for 15–20 minutes, flipping halfway. Drizzle with monk fruit syrup or sugar-free honey just before serving.
  4. Sauté the Snow Peas & Onions: Heat olive oil in a skillet over medium-high heat. Add sliced red onion and cook for 2 minutes until just softened. Add snow peas, sauté 3–4 minutes until bright and just tender. Season with salt and pepper.
  5. Prepare the Salad: In a large bowl, toss purple kale and red cabbage with lemon juice, olive oil, salt, and pepper. Massage greens for 2–3 minutes until tender. Gently fold in blackberries just before serving.
  6. Assemble & Serve: Layer the sautéed snow peas and onions on each plate, top with glazed salmon, arrange eggplant slices on the side, and finish with a generous heap of the kale/cabbage salad. Serve warm or at room temperature.

Weekly Meal Planning

Smart meal planning gets much easier when you use recipes like this. Save and schedule this dish with CookifyAI to organize which days you want to prepare it; the platform instantly consolidates ingredient quantities, balances your grocery list, and streamlines your shopping.

Planning Benefits:

  • Automatically adds all components to your calendar and shopping list
  • Combines overlapping ingredients across all dishes, reducing waste
  • Sorts items by grocery aisle for ultra-efficient trips
  • Makes prepping healthy, colorful meals as easy as a few clicks

Pro tip: Plan your week’s meals in CookifyAI to see how shared ingredients (like olive oil or blackberries) are tallied up—no manual calculations needed!

Cook and Prep Times

Prep Time: 25 minutes
Cook Time: 20 minutes
Total Time: 45 minutes

This dish celebrates vivid color, powerful antioxidant ingredients, and effortless elegance—the perfect synergy of taste and nutrition for family dinners or special occasions. Save time at the store and ensure you always have what you need by saving this recipe with CookifyAI today!

Spooky Sweets Reimagined: Paleo & AIP Halloween Candy for Autoimmune Relief

Paleo Halloween Candy – AIP & Paleo Recipes for Autoimmune Disease Relief

Introduction

Paleo Halloween Candy is the answer for anyone seeking to enjoy festive treats while honoring dietary needs, especially those managing autoimmune diseases with paleo or AIP (Autoimmune Protocol) guidelines. These candies swap refined sugar and artificial additives for nourishing, natural ingredients—so you can celebrate without compromise.

Why These Paleo Halloween Candies are a Must-Try

Traditional Halloween candies often sneak in inflammatory ingredients that can trigger symptoms for those with autoimmune conditions. This homemade paleo Halloween candy selection delivers nostalgic flavors and fun shapes but skips the dairy, grains, legumes, and processed sugars. They’re easy to make, naturally sweetened, and the ideal crowd-pleaser for parties and trick-or-treat alternatives.

Creating Paleo & AIP-Friendly Candy Centers

Craft creamy, rich candy fillings using ingredients like coconut butter, carob, unsweetened coconut shreds, and real fruit. Options like homemade “caramel” (from dates and coconut cream) or nut/seed-free fat bombs can be adapted for most AIP restrictions. Chilling the centers before dipping ensures a firm, satisfying bite every time.

Coating and Decorating Your Homemade Candies

Use a paleo-approved chocolate (like unsweetened dark chocolate or homemade carob “chocolate” for AIP) for silky coatings. Melt with coconut oil and dip each candy for a glossy finish—then, sprinkle with naturally colored AIP-friendly sprinkles (try shredded coconut colored with beet or spinach powder). Let set in the fridge for 30 minutes before serving.

Fun Ways to Serve Paleo Halloween Candy

Arrange your candies in festive cupcake liners or on a spooky serving tray for a Halloween party centerpiece. Offer a variety of fillings—like pumpkin spice, mint, or simple carob truffles—to satisfy all flavor preferences while staying on plan. These make fun family cooking projects too!

Nutritional Information and Serving Size

This base recipe yields about 18 bite-sized candies. Each serving contains roughly 90 calories, primarily from healthy fats and natural sugars, making them a treat best enjoyed in moderation as part of your paleo or AIP lifestyle.

Homemade Paleo Halloween Candy Recap

Enjoy the whimsy of Halloween treats without the worry. These candies provide all the fun, flavor, and festivity, using straightforward, anti-inflammatory ingredients suitable for those with autoimmune conditions or anyone following a paleo lifestyle.

[ingredients]
1/2 cup coconut butter, softened
1/4 cup coconut oil
1/4 cup unsweetened shredded coconut
2 tbsp carob powder (for AIP) or cocoa powder (for Paleo)
1/4 cup pure maple syrup or honey
1 tsp vanilla extract (omit for strict AIP)
Pinch of sea salt
Dark chocolate chips or homemade AIP carob coating (for dipping)
Optional: Beet or spinach powder for natural sprinkles
[/ingredients]

💡Meal Planning Tip: Save this recipe to instantly create an organized shopping list with all ingredients sorted by store section—making your paleo and AIP meal planning and candy prep a breeze!

CookifyAI meal planning interface

Instructions

  1. Line a baking sheet with parchment paper. Mix softened coconut butter, coconut oil, shredded coconut, carob/cocoa powder, maple syrup, vanilla, and salt in a bowl until smooth.
  2. Using a small cookie scoop or spoon, portion mixture into small balls or shapes. Place on the prepared sheet.
  3. Freeze the candy centers for 30 minutes or until firm.
  4. If coating, melt dark chocolate chips (or AIP carob coating) with a little coconut oil over gentle heat.
  5. Dip each frozen candy center into the melted chocolate/coating. Place back on lined tray and sprinkle with natural “sprinkles” if desired.
  6. Chill candies in the fridge for 30 more minutes, until set.
  7. Store in an airtight container in the fridge for up to a week, or freeze for longer storage.

Weekly Meal Planning

Homemade paleo Halloween candy fits seamlessly into your weekly meal and treat planning! Save and schedule this recipe to see when the best day is to prep, and let CookifyAI consolidate shopping lists and coordinate ingredients for all your paleo/AIP snacks and meals.

Planning Benefits:

  • Calculates total ingredient quantities if you want to double or triple your batch
  • Automates grocery organization by store section
  • Avoids accidental duplicate purchases
  • Makes prepping for holidays or special diets stress-free and fun

Pro tip: When planning treats and main meals together, schedule your recipes so all shared ingredients (like coconut oil or honey) are tallied, reducing waste and keeping you on track for AIP or paleo goals.

Cook and Prep Times

Prep Time: 20 minutes
Chill Time: 1 hour
Total Time: 1 hour 20 minutes

These Paleo Halloween candies prove you can have festive fun—and delicious sweets—while prioritizing your health and autoimmune relief. Happy snacking!

Delicious Paleo Sheet Pan Meals: Your Ultimate Guide to Quick, Nutritious, and Flavor-Packed Cooking

Delicious Paleo Sheet Pan Meals

Introduction

Delicious Paleo Sheet Pan Meals are the ultimate answer for anyone seeking both flavor and simplicity in the kitchen. This cooking approach combines wholesome, nutrient-rich ingredients with effortless preparation and cleanup. By roasting everything together on a single sheet pan, you lock in deep, caramelized flavors while keeping your workspace neat. Whether you’re planning easy weeknight dinners or prepping make-ahead lunches, sheet pan meals streamline your Paleo lifestyle without sacrificing taste.

Why Paleo Sheet Pan Meals Are a Game Changer

This recipe stands out because it brings together a synergy of savory proteins and vibrant vegetables, all roasted to perfection. The high-heat cooking method enhances natural sweetness, keeps meats juicy, and tenderizes root vegetables—resulting in a harmonious, crowd-pleasing dish. It’s the perfect meal for busy families, meal preppers, or anyone wanting a healthy dinner on the table fast.

Perfecting Your Paleo Sheet Pan Meals

To achieve balanced flavors and textures, arrange your proteins and vegetables in a single layer—avoiding overcrowding, which can cause steaming instead of roasting. Toss everything in a robust blend of olive oil, fresh garlic, lemon juice, and herbs for a massive boost in flavor. Swapping in seasonal produce and favorite Paleo-friendly spices keeps this recipe fresh and exciting.

Mix-and-Match Paleo Protein and Veggie Ideas

Proteins like chicken thighs, salmon fillets, or grass-fed steak work beautifully on a sheet pan. Pair them with sweet potatoes, Brussels sprouts, broccoli, and bell peppers for a rainbow of nutrients. For extra flavor, add a handful of sliced red onions or finish with a sprinkle of chopped fresh parsley and lemon zest just before serving.

Serving Suggestions for Delicious Paleo Sheet Pan Meals

Let your finished sheet pan meal shine as the centerpiece. Serve with a crisp green salad or a side of cauliflower rice. For extra flair, offer Paleo-approved sauces like chimichurri or tzatziki. These meals are also ideal for storing as pre-portioned lunches for the week—simply cool, divide, and refrigerate.

Nutritional Information and Serving Size

This recipe yields 4 hearty servings. Each portion typically offers a balanced mix of lean protein and non-starchy veggies, averaging around 350–400 calories per serving (final values vary depending on specific ingredients). Enjoy a nourishing meal that supports both satiety and your health goals.

Why Paleo Sheet Pan Meals Will Be Your Go-To (Recap)

With simple prep, minimal cleanup, and endless adaptability, this recipe fits any busy lifestyle. Expect bold flavors, vibrant colors, and wholesome ingredients—all in one easy dish that keeps everyone satisfied.

[ingredients]
1 lb chicken thighs or wild-caught salmon fillets
2 cups sweet potatoes, peeled and cubed
2 cups broccoli florets
1 red bell pepper, sliced
1 cup Brussels sprouts, halved
2 tbsp olive oil or avocado oil
1 tsp sea salt
1/2 tsp black pepper
2 cloves garlic, minced
Juice of 1 lemon
1 tsp dried thyme (or rosemary or Italian seasoning)
Optional: fresh parsley and lemon zest for garnish
[/ingredients]

💡Meal Planning Tip: Save this recipe to instantly generate an organized shopping list with all your ingredients, neatly sorted by store section. Shopping and meal planning have never been easier!

CookifyAI meal planning interface

Instructions

  1. Preheat oven to 425°F (220°C). Line a large sheet pan with parchment paper for easy cleanup.
  2. In a large bowl, combine sweet potatoes, broccoli, bell pepper, and Brussels sprouts. Drizzle with half the olive oil, sprinkle with half the salt and pepper, and toss.
  3. If using chicken thighs or salmon, drizzle with the remaining oil, season with salt and pepper, and rub with minced garlic and dried herbs.
  4. Spread vegetables evenly on the sheet pan. Nestle the protein pieces among the vegetables.
  5. Squeeze lemon juice over everything for brightness.
  6. Roast for 25–30 minutes, until chicken is golden and cooked through or salmon flakes easily. Stir vegetables halfway for even browning.
  7. Garnish with fresh parsley and lemon zest before serving.

Weekly Meal Planning

Delicious Paleo Sheet Pan Meals are tailor-made for weekly meal prep. Save and schedule this recipe to your meal planner and generate smart, consolidated shopping lists—streamlining your cooking and grocery trips week after week.

Benefits of using CookifyAI:

  • Automatically calculates total ingredient needs for all planned recipes
  • Organizes your list by grocery section for speed and convenience
  • Avoids duplicate ingredient purchases
  • Makes meal prep more efficient and stress-free!

Pro tip: Planning several meals? Schedule them in CookifyAI and get totals for shared ingredients—preventing waste and overbuying while saving time in the kitchen.

Cook and Prep Times

Prep Time: 15 minutes
Cook Time: 30 minutes
Total Time: 45 minutes

Fall in Love with Autumn: 17+ Cozy and Creative Backyard Wedding Ideas

17+ Charming Fall Backyard Wedding Ideas

Introduction

Looking for ways to make your autumn wedding both magical and intimate? Fall backyard weddings offer a stunning canvas of rich colors, crisp air, and natural romance. With a few inspired touches, your celebration can feel cozy, luxurious, and distinctly personalized—no expensive venue required.

Why Choose a Fall Backyard Wedding?

A backyard wedding during the fall embodies warmth, comfort, and a sense of home. The golden hour glow, vibrant foliage, and the chance to infuse sentimental touches into your décor create lasting memories for you and your guests. Plus, backyard weddings are naturally budget-friendly and perfect for creative meal planning.

17+ Charming Fall Backyard Wedding Ideas

1. **Rustic Wood Ceremony Arch**
Frame your vows with a handmade wood arch decorated with trailing vines, pumpkins, sunflowers, or dried wheat. The rustic style perfectly pairs with the autumn backdrop.

2. **Candlelit Aisle**
Create a dreamy walk down the aisle using tall lanterns, mason jars filled with tealights, or an arrangement of pillar candles, adding a warm, inviting glow as the sun sets.

3. **Velvet Accent Details**
Incorporate cozy velvet ribbons, table runners, or throw pillows in autumn hues like burgundy, forest green, and deep gold.

4. **Apple Cider Welcome Bar**
Greet guests with a hot apple cider station featuring cinnamon sticks, sliced apples, and optional spiced rum for an extra autumnal kick.

5. **Harvest-Inspired Centerpieces**
Arrange pumpkins, gourds, eucalyptus, and seasonal blooms as unique table centerpieces that exude a festive fall feeling.

6. **Blanket Baskets for Guests**
Offer plaid blankets in woven baskets for guests who may get chilly, making everyone feel comfortable and cared for.

7. **Intimate Bistro Lighting**
Drape string lights or Edison bulbs above your ceremony and reception spaces for a twinkling, intimate ambiance.

8. **Farmhouse Dining Tables**
Use long, wooden tables with mismatched chairs for a laid-back, farmhouse-inspired reception, encouraging easy conversation and connection.

9. **DIY S’mores Station**
Set up a fire pit and provide all the fixings for guests to make their own gooey s’mores—a crowd-pleaser for all ages.

10. **Personalized Pumpkin Place Cards**
Use small pumpkins or gourds with hand-lettered name tags as unique and memorable place cards.

11. **Seasonal Foliage Flower Crowns**
Gift your wedding party with headpieces crafted from preserved fall leaves, berries, and rustic florals.

12. **Mulled Wine Signature Cocktail**
Warm everyone up with a signature mulled wine cocktail infused with spices, perfect for cooler fall evenings.

13. **Chic Outdoor Lounge Area**
Create a cozy lounge with vintage couches, poufs, and rugs, giving guests a spot to relax and take in the scenery.

14. **Caramel Apple Wedding Favors**
Send your guests home with individually wrapped caramel apples, a sweet and thematic treat.

15. **Autumn Leaf Confetti**
Replace traditional confetti with hand-punched or naturally fallen autumn leaves for a colorful, biodegradable touch.

16. **Fall-Themed Photo Booth**
Style a backdrop with hay bales, pumpkins, and garlands of leaves for memorable, themed photos.

17. **Seasonal Menu and Dessert Bar**
Feature hearty fall favorites like squash soup, roasted veggies, and mini pies on your menu—easy to prep for a backyard setting.

18. **Pumpkin Spice Latte Cart**
Add a touch of fun with a mobile pumpkin spice latte cart for caffeine lovers.

[ingredients]
For a backyard wedding menu, consider easy, fall-themed dishes:
– Butternut squash soup
– Roasted chicken or turkey with herbs
– Harvest salad with apples, walnuts, and goat cheese
– Freshly baked bread rolls
– Mini pumpkin or apple pies
– Hot apple cider, mulled wine, or pumpkin spice lattes
– S’mores fixings (graham crackers, chocolate bars, marshmallows)
– Seasonal fruits for grazing boards
[/ingredients]

💡Meal Planning Tip: Save this backyard wedding menu to instantly generate a categorized shopping list. Streamline your recipe prep and ensure you don’t miss any ingredients during the festivities!

CookifyAI meal planning interface

Instructions

  1. Plan your ceremony setup in advance, identifying spaces for the arch, seating, and lounge areas.
  2. Prepare your fall menu. For hot dishes and drinks, make use of slow cookers or chafing dishes to keep everything warm throughout the event.
  3. Decorate tables with your harvest-inspired centerpieces and place setting pumpkins a day ahead if possible.
  4. Drape bistro lights and set up lanterns or candles for evening ambiance.
  5. Arrange blanket baskets and outdoor lounge seating for maximum guest comfort.
  6. Assemble your DIY stations (s’mores, cider, or latte bar) with signs and prep utensils for easy, self-serve fun.
  7. Coordinate your wedding timeline, including meal service, photo booth time, and special toasts, to ensure a smooth flow.

Weekly Meal Planning

Don’t let wedding stress take over—save and schedule your wedding recipes to create a seamless shopping and prep plan. With CookifyAI, you can easily plan meals for the big day and any pre- or post-wedding gatherings!

Planning Benefits:

– Auto-calculates quantities for any headcount
– Consolidates all ingredients by grocery store section
– Eliminates duplicates for efficient shopping
– Helps coordinate timelines for batch cooking, prep, and serving

Pro tip: When juggling multiple events (rehearsal dinner, brunch), schedule your recipes in advance to see where ingredients overlap—reducing food waste and stress!

Cook and Prep Times

Prep Time: 2-3 days (for setup and decor prep)
Cooking Time: 2-6 hours (depending on menu items and servings)
Total Time: Varies (allow for setup, food prep, and event flow)

With these charming fall backyard wedding ideas, your autumn celebration will be as inviting as it is memorable—perfect for cozying up with loved ones and savoring every moment (and delicious bite). Happy planning!

Autumn Elegance: Whip Up a 15-Minute Apple Cheddar Harvest Board Appetizer

Apple Cheddar Harvest Board | Easy 15-Minute Fall Appetizer!

Introduction

The Apple Cheddar Harvest Board is an inviting, colorful platter that flawlessly captures the essence of autumn with just 15 minutes of prep. This easy fall appetizer blends crisp apples, creamy cheddar cheese, and a rainbow of complementary snacks—delivering a showcase of flavors and textures in every bite. Its simplicity and visual appeal make it the ideal starter for cozy gatherings, holiday parties, or even a weeknight treat when you crave something special with minimal effort.

Why This Apple Cheddar Harvest Board Is a Crowd Pleaser

This appetizer board is both deliciously unique and incredibly easy to assemble. The sharpness of cheddar compliments the sweet tartness of fresh apples, while accompaniments like honey, nuts, and crackers allow you to customize every bite. With no cooking required, this board is a fuss-free solution for entertaining and guaranteed to wow guests of all ages with its harvest-inspired abundance.

Building the Perfect Apple Cheddar Harvest Board

Begin by selecting a variety of apples—such as Honeycrisp, Pink Lady, or Granny Smith—for contrasting flavor and color. Choose a good-quality sharp or aged cheddar cheese and cut it into slices or cubes. Add visual and flavor interest with extras like honey, roasted nuts, cured meats, dried fruits, and a selection of crackers or baguette slices. Cluster ingredients artistically on a large wooden board or platter, arranging items for a farm-to-table, inviting look.

Serving Suggestions for Maximum Enjoyment

Drizzle honey over apple slices for added sweetness, or pair cheddar with fig preserves for a gourmet twist. For extra crunch, offer candied or smoked nuts. This board shines when served alongside apple cider, sparkling wine, or crisp white wine. Don’t forget to provide small forks and napkins—guests will want to sample everything!

Nutritional Information and Serving Size

The Apple Cheddar Harvest Board, as outlined, serves 6 to 8 as an appetizer. One serving (assuming moderation with nuts and cheese) typically contains around 200–250 calories, predominantly from the healthy fats in cheese and nuts and the natural sugars in apples and dried fruit. This board also delivers a balance of protein, fiber, and antioxidants—all from whole, seasonal ingredients.

Apple Cheddar Harvest Board (Recap)

Combining tart apples and sharp cheddar with rustic autumn accompaniments makes this 15-minute appetizer board a celebration of fall flavors. Its beautiful presentation and balance of sweet, savory, and crunchy elements make it the ultimate, crowd-pleasing start to any gathering.

[ingredients]
2 large apples (such as Honeycrisp or Granny Smith), cored and sliced
8 ounces sharp cheddar cheese, sliced or cubed
1 cup assorted crackers or sliced baguette
1/2 cup roasted almonds or walnuts
1/4 cup honey or fig preserves
1/2 cup dried cranberries or apricots
Optional: Sliced salami, grapes, or fresh thyme for garnish
Lemon wedge (to keep apples from browning)
[/ingredients]

💡Meal Planning Tip: Save this recipe to automatically create an organized shopping list—all ingredients grouped by store section. This makes prepping for parties or weeknight snacks effortless and efficient.

CookifyAI meal planning interface

Instructions

  1. Slice apples and drizzle with a little lemon juice to prevent browning.
  2. Arrange cheddar slices or cubes, apples, crackers, and nuts on a large platter or board.
  3. Add small bowls of honey or fig preserves for dipping.
  4. Scatter dried fruit among the board for added color and flavor.
  5. (Optional) Add sliced salami, clusters of grapes, or sprigs of fresh thyme for garnish and variety.
  6. Serve immediately and enjoy within 1 hour for the freshest taste and best texture.

Weekly Meal Planning

This versatile appetizer doubles beautifully in meal prep routines—think fun lunchbox boards or effortless after-school snacks. Save and schedule this recipe in CookifyAI to streamline your weekly menu, consolidate ingredient amounts, and avoid duplicate purchases.

Planning Benefits:

  • Combines and calculates ingredients across all your recipes for streamlined shopping
  • Sorts items by grocery aisle to save time at the store
  • Helps reduce food waste by only buying what you need
  • Lays out an efficient prep timeline so entertaining is stress-free

Pro Tip: Add multiple easy boards or snack platters to your week using CookifyAI’s scheduling tool to ensure you always have wholesome, festive snacks on hand—no last-minute store runs needed!

Cook and Prep Times

Prep Time: 15 minutes
Cook Time: 0 minutes
Total Time: 15 minutes

Chic Fall Entertaining: Stylish Themes, Menus, and Decor Tips for Your Perfect Autumn Party

Stylish Fall Party Theme Ideas

Introduction

Transform your gatherings this autumn with these stylish fall party theme ideas, designed to make planning easy while delighting your guests with a cozy, elegant atmosphere. Fall celebrations are all about rich, warm colors, inviting scents, and seasonal comfort foods—making this the perfect season to host an unforgettable get-together.

Why Choose a Stylish Fall Party Theme?

A thoughtfully chosen fall party theme instantly elevates your event, making it memorable for you and your guests. Whether you’re hosting a friendsgiving, a harvest dinner, or a laid-back backyard soirée, the right theme streamlines décor, menu planning, and even your playlist. Better yet, a fall-inspired gathering is an ideal way to enjoy hearty foods, hot drinks, and the beauty of the season’s changing leaves.

Top 5 Stylish Fall Party Theme Ideas

  1. Chic Harvest Dinner: Celebrate autumn’s bounty with a rustic-elegant tablescape featuring mini pumpkins, gourds, earthy linens, and a palette of burnt orange, sage, and gold. Center your menu around roasted vegetables, apple cider, and artisan breads.
  2. Cozy Campfire Night: Gather outdoors with plush blankets, string lights, and a fire pit. Serve s’mores, hot cocoa, and grilled treats. Add storytelling or acoustic music for an intimate, nostalgic vibe.
  3. Elegant Wine & Cheese Tasting: Showcase local wines and curated cheeses alongside pears, figs, and sourdough crackers. Decorate with twinkle lights, wooden boards, and rich burgundy hues for sophisticated flair.
  4. Modern Pumpkin Soirée: Move beyond classic pumpkin décor with sleek ceramics, white pumpkins, gold accents, and a minimalist tablescape. Serve pumpkin-inspired small bites and signature pumpkin cocktails for a chic twist.
  5. Boho Autumn Brunch: Combine macramé runners, mismatched vintage dishes, and vibrant floral arrangements. A brunch menu of quiches, spiced pastries, and mimosas completes the laid-back yet stylish event.

Fall Party Menu Must-Haves

No fall party is complete without a menu that’s both seasonal and crowd-pleasing. Focus on warm appetizers, comforting mains, and clever cocktails or mocktails—with plenty of options for customization based on your theme.

  • Appetizers: Roasted squash crostini, mini apple pies, baked brie with cranberry compote
  • Main Courses: Herb-roasted chicken, vegetarian pumpkin risotto, pulled pork sliders
  • Sides: Sweet potato mash, maple-glazed brussels sprouts, fall salads with pecans and pears
  • Desserts: Salted caramel apple tart, pumpkin cheesecake bars, spiced cookies
  • Drinks: Mulled wine, hot apple cider, cinnamon-spiked sangria

💡Meal Planning Tip: Save all your party recipes to generate an organized shopping list sorted by store section—a lifesaver for stress-free holiday party planning.

CookifyAI meal planning interface

Decor & Ambiance Tips for Fall Parties

  • Layer in textures with throw blankets, velvet pillows, and autumn foliage arrangements.
  • Use candles or string lights for soft, cozy lighting indoors or outdoors.
  • Create a signature scent by simmering orange slices with cinnamon sticks and cloves on the stove.
  • Personalize place settings with handwritten name cards on mini pumpkins or leaves.

Weekly Meal Planning

Stylish fall parties often mean prepping multiple dishes in advance. Save and schedule your favorite party recipes to seamlessly plan what to prep each day—generating smart shopping lists, coordinating cook times, and consolidating overlapping ingredients.

Planning Benefits:

  • Keep track of prep timelines for multiple party dishes
  • Automatically organize shopping lists by grocery store section
  • Reduce food waste by calculating total ingredient needs
  • Stay ahead with a visual plan for what to cook (and when!) leading up to your party

Pro tip: Use CookifyAI’s weekly meal planner to map out your menu—making it easy to delegate tasks or hand off your list to a friend or family member.

Final Tips for a Memorable Fall Event

From selecting a theme to designing your menu and ambiance, stylish fall parties are all about thoughtful touches and warm hospitality. Choose elements that reflect your personal style and focus on seasonal ingredients and décor. With streamlined meal planning and smart shopping lists, you’ll spend less time stressing and more time celebrating with your guests!

Healing Bites: Crafting the Ultimate AIP Charcuterie Board Experience

AIP Charcuterie Board – Heal Me Delicious

Introduction

A well-crafted AIP Charcuterie Board delivers on both variety and flavor while sticking to the Autoimmune Protocol (AIP) diet’s guidelines. This delightful platter is packed with vibrant colors, satisfying textures, and savory, naturally delicious ingredients—all free from grains, dairy, nightshades, nuts, and processed foods. Whether you’re entertaining, meal prepping, or simply want a beautiful way to snack, this AIP Charcuterie Board breathes fresh flavor and creativity into every gathering.

Why This AIP Charcuterie Board Is a Hit

This board stands out because it celebrates natural, healing ingredients within the AIP framework—without sacrificing taste or sophistication. The recipe is endlessly adaptable: mix and match roasted veggies, fruits, compliant deli meats, traditional AIP crackers, and homemade dips for a spread that satisfies everyone, AIP or not. With the right composition, it’s a beautiful, crowd-pleasing center piece for any brunch, holiday, or weeknight snack attack.

Composing the Ultimate AIP Charcuterie Board

The backbone of a good AIP charcuterie board is variety. Choose an assortment of compliant items to captivate everyone’s senses:

  • Quality AIP Meats: Think prosciutto, turkey, or chicken breast made without added sugars or non-compliant spices.
  • Crisp Veggies: Sliced cucumber, jicama, radish, carrots, or thinly roasted sweet potato rounds add crunch and color.
  • Fresh Fruits: Berries, sliced apples, pears, or figs provide natural sweetness.
  • AIP Crackers: Make your own with coconut or cassava flour.
  • Homemade Dips: Think guacamole (no nightshades), AIP ranch, or whipped avocado.
  • Pickled or Fermented Foods: Olives, compliant pickles, or sauerkraut bring tang and gut health benefits.

Arrange everything artfully for ultimate snacking satisfaction.

DIY AIP Dips and Additions

Choose a few homemade dips to level up your board. AIP-friendly ranch made from coconut cream and herbs, or a beet hummus using coconut milk and roasted beets, adds creamy texture and bold color. For extra healing power, include sauerkraut or kimchi made without non-AIP spices to provide probiotics and a satisfying zing.

Serving Suggestions and Presentation

Serve your charcuterie board on a beautiful wooden platter or marble slab. Group ingredients by color and shape for visual impact. Garnish with fresh herbs like dill, thyme, or parsley. For added flair, include a small bowl of honey or coconut yogurt for dipping sliced fruit, and provide toothpicks for easy grabbing.

Nutritional Information and Serving Size

This AIP Charcuterie Board serves 4 to 6 as a satisfying snack or light meal. Nutritional content varies by ingredients, but you can expect a platter rich in fiber, healthy fats, quality protein, and antioxidants—ideal for supporting an anti-inflammatory lifestyle.

Recap – AIP Charcuterie Board

This show-stopping AIP Charcuterie Board is a feast for the eyes and the body. Vibrant, healing ingredients come together in a delicious spread that feels indulgent and inclusive, perfect for gatherings or a nourishing meal.

[ingredients]
AIP-compliant deli meats (turkey, prosciutto, chicken breast) – 12 oz total
1 cup sliced cucumber
1 cup baby carrots or rainbow carrots, sliced
1 cup jicama, sliced or sticks
1 cup radishes, sliced
1 cup roasted sweet potato rounds
AIP crackers (homemade or compliant store-bought) – 16 pieces
1 cup fresh berries (blueberries, strawberries)
1 apple, sliced
1 pear, sliced
1/2 cup pitted olives (check for AIP compliance)
1/4 cup naturally fermented sauerkraut
Dip options: AIP ranch, whipped avocado, or beet hummus – 1/2 cup each
Fresh herbs (for garnish)
Optional: coconut yogurt or honey for fruit dipping
[/ingredients]

💡Meal Planning Tip: Save this recipe to instantly generate an organized AIP shopping list with all ingredients sorted by store section—no more forgetting specialty items or searching for AIP-compliant foods.

CookifyAI meal planning interface

Instructions

  1. Prep all produce: Wash and slice vegetables and fruits. Roast sweet potato rounds at 400°F for 20 minutes, flipping halfway through; let cool.
  2. Prepare dips: Whip up AIP-approved ranch, avocado, or beet hummus using compliant ingredients.
  3. Arrange components: On a large serving platter, artistically arrange meats, crackers, veggies, fruits, olives, and sauerkraut.
  4. Add dips and garnish: Place dips in small bowls on the platter. Garnish the board with fresh herbs and a small bowl of honey or coconut yogurt if using.
  5. Serve immediately: Present your stunning board for snacking and sharing. Refrigerate leftovers promptly.

Weekly Meal Planning

This AIP Charcuterie Board is ideal for meal planning—prep individual components ahead of time and customize for different days. Schedule this recipe in your weekly meal rotation to automatically combine it with your other planned meals, generating a consolidated shopping list sorted by every grocery aisle.

Planning Benefits:

  • Seamlessly calculate ingredient quantities across multiple days
  • Prevent duplicate weekly purchases and potential waste
  • Ensure you never forget specialty AIP or produce items
  • Stay organized and efficient in your weekly meal prep

Pro tip: Schedule multiple recipes at once to instantly see which ingredients overlap, allowing you to buy just what you need—perfect for the nuanced requirements of AIP eating.

Cook and Prep Times

Prep Time: 20 minutes
Cook Time: 20 minutes (for roasted vegetables)
Total Time: 40 minutes

Enjoy the art of healthy, healing snacking with this AIP Charcuterie Board—fulfilling, delicious, and meal prep ready!

Autumn Bites: 40 Crowd-Pleasing Fall Appetizers to Wow Your Guests!

40 Bite-Sized Fall Appetizers for a Large Crowd

Introduction

Planning a fall gathering, holiday celebration, or game day party? Serving a selection of bite-sized fall appetizers is a guaranteed way to please a crowd—each guest gets to sample multiple flavors, and there’s something for everyone! This collection of 40 recipes highlights autumn’s best ingredients: think savory pumpkin, roasted squash, apples, pears, cranberries, and comforting cheeses, all in portable little packages. These crowd-pleasers are perfect for feeding a large group, and they allow you to enjoy your own party instead of working in the kitchen.

Why These Bite-Sized Fall Appetizers are Always a Hit

Finger foods make entertaining festive and stress-free. These autumn-inspired appetizers, from mini tarts to skewers and crispy phyllo bites, are as practical as they are delicious. Each one offers a unique medley of flavors—think sweet and spicy, creamy and crunchy—using seasonal produce to capture the warmth of fall. The make-ahead options and variety mean you’ll have fewer last-minute worries and plenty of time to mingle with guests.

40 Crowd-Pleasing Fall Appetizer Ideas

Here’s a mouthwatering list to inspire your menu. Mix and match these recipes to create a customizable fall feast:

1. Mini Pumpkin Cheese Balls
2. Apple and Brie Crostini with Honey
3. Butternut Squash & Goat Cheese Phyllo Cups
4. Cranberry Pecan Baked Brie Bites
5. Sausage Stuffed Mushrooms
6. Roasted Sweet Potato Rounds with Spicy Aioli
7. Mini Harvest Cheddar Quiches
8. Pear and Prosciutto Skewers
9. Caramelized Onion & Fig Puff Pastry Squares
10. Maple-Glazed Bacon-Wrapped Dates
11. Mini Chicken Pot Pie Bites
12. Savory Pumpkin Hummus Shooters
13. Apple Cider Glazed Meatballs
14. Roasted Beet Goat Cheese Toasts
15. Spiced Pumpkin Deviled Eggs
16. Turkey, Cranberry & Brie Pinwheels
17. Cheesy Stuffed Acorn Squash Rings
18. Wild Mushroom Tartlets
19. Autumn Veggie Flatbread Squares
20. Zucchini and Parmesan Fritters
21. Sweet and Spicy Candied Pecan Clusters
22. Smoked Salmon & Dill Cucumber Rounds
23. Chipotle Sweet Potato Mini Tacos
24. Mini Cornbread Muffins with Whipped Maple Butter
25. Roasted Brussels Sprout Skewers
26. Prosciutto Wrapped Asparagus
27. Pumpkin & Herb Cheese Puff Pastries
28. Mini Turkey Sliders with Cranberry Mayo
29. Apple Cheddar Chutney Dip with Pretzel Sticks
30. Savory Spinach & Ricotta Phyllo Rolls
31. Roasted Red Pepper and Walnut Dip with Pita Chips
32. Stuffed Mini Bell Peppers
33. Cranberry Pistachio Goat Cheese Log Crostini
34. Pulled Pork Sliders with Apple Slaw
35. Miniature Pumpkin Soup Sip Cups
36. Baked Gnocchi Bites with Sage Butter
37. Parmesan & Herb Popcorn
38. Mini Roasted Veggie Skewers
39. Crispy Cauliflower Buffalo Bites
40. Three-Cheese Mini Mac & Cheese Cups

[ingredients]
Pumpkin puree
Softened cream cheese
Goat cheese log
Brie cheese wheel
Puff pastry sheets
Phyllo dough
Mini tartlet shells
Fresh apples and pears
Butternut squash
Sweet potatoes
Mini bell peppers
Cranberries (fresh and dried)
Cooked turkey breast
Cooked bacon, crumbled sausage
Assorted nuts (pecans, walnuts, pistachios)
Fresh herbs (sage, parsley, dill)
Maple syrup and honey
Onion, garlic
Roasted red peppers
Spinach and zucchini
Parmesan, cheddar, ricotta cheeses
Slider buns or mini breads
Cucumber and asparagus
Spices (nutmeg, cinnamon, smoked paprika)
Olive oil, butter, and pantry staples
[/ingredients]

💡 Meal Planning Tip: Save these appetizers in CookifyAI to compile all ingredients into a smart, organized shopping list. Every item is sorted by store section, so you can breeze through the grocery store and make planning for your large gathering truly stress-free!

CookifyAI meal planning interface

Instructions

Since these appetizers range in prep time and complexity, here’s a universal approach for batching party bites:

  1. Choose 5–8 recipes to provide a variety of flavors, textures, and dietary preferences for your crowd.
  2. Read through each recipe and create a consolidated ingredient list.
  3. Prepare dips and spreads up to two days ahead; assemble fresh the day of the event.
  4. Prep vegetables and pre-cook meats as needed to save last-minute time.
  5. Bake or assemble pastries, tarts, and skewers on the day of serving for optimal flavor and texture.
  6. Arrange on large platters or plan for self-serve stations to keep traffic flowing.

Weekly Meal Planning

Don’t limit these appetizers to just one big event! With CookifyAI, you can save and schedule your favorite bites throughout the fall season for various gatherings, family snack boards, or even fun weeknight dinners.

Planning Benefits:

  • Automatically calculates your total ingredient needs across several recipes
  • Organizes all items by grocery store area for an efficient shopping trip
  • Prevents double-buying and missed ingredients
  • Keeps your weekly or party meal prep streamlined and stress-free

Pro tip: When you add multiple appetizers to your CookifyAI plan, overlapping items like cream cheese, herbs, or pastry are instantly combined—making both shopping and prepping easier, reducing waste and last-minute store runs.

Cook and Prep Times

Prep Time per Appetizer: 15–25 minutes
Cook Time per Appetizer: 10–30 minutes
Total Time for 5–8 Varieties (batch prep): 2–3 hours (including make-ahead items)

With this collection of 40 bite-sized fall appetizers, you’ll be prepared to satisfy a large crowd with the flavors of the season—all while making entertaining as simple as possible!

25 Wholesome Paleo Dinners: Quick, Simple, & Healthy Recipes for Busy Weeknights

25 Easy Paleo Dinner Recipes (Quick, Simple & Healthy!)

Introduction

Discover the perfect solution for busy weeknights and wholesome eating with these 25 easy paleo dinner recipes. Each dish is designed for maximum flavor, minimal prep, and complete adherence to paleo principles—no grains, dairy, or processed ingredients. With options ranging from sizzling stir-fries to satisfying sheet pan meals, you’ll have healthy dinners on the table in no time. Whether you’re new to paleo or looking for fresh meal planning inspiration, this collection delivers variety and convenience.

Why Choose These Easy Paleo Dinner Recipes?

Each recipe in this roundup puts a premium on bold, fresh flavors backed by simple cooking techniques. Because they’re quick to prepare—often in 30 minutes or less—and use accessible, natural ingredients, these paleo dinners fit seamlessly into even the busiest schedules. They’re also easily batch-cooked for leftovers, making them an ideal staple for healthy meal planning.

How to Build Balanced Paleo Dinners

The paleo diet emphasizes whole, unprocessed foods: quality proteins, nutrient-dense vegetables, healthy fats, and fresh herbs for maximum nourishment. These recipes highlight practical ways to combine these foods into complete meals, whether it’s a skillet of garlic shrimp and zucchini noodles or a comforting coconut curry chicken cooked in one pot. With options for every palate and dietary need, dinner time becomes simple, satisfying, and stress-free.

25 Easy Paleo Dinner Recipes (Quick, Simple & Healthy!)

Here are 25 delicious ideas to fuel your paleo journey:

  1. One-Pan Lemon Garlic Chicken Thighs – Juicy chicken roasted with garlic, lemon, and veggies.
  2. Sheet Pan Salmon & Roasted Rainbow Vegetables
  3. Creamy Coconut Curry Chicken
  4. Ground Beef Sweet Potato Skillet
  5. Paleo Tacos with Lettuce Wraps – Taco night with ground turkey in crisp lettuce leaves.
  6. Garlic Butter Shrimp & Zucchini Noodles
  7. Easy Baked Herb Pork Chops
  8. Grilled Steak with Chimichurri Sauce
  9. Beef & Broccoli Stir Fry – Classic flavors with coconut aminos instead of soy.
  10. Chicken Fajita Bowls
  11. Egg Roll In a Bowl – All the flavors, none of the wrappers!
  12. Thai Basil Turkey Larb
  13. Roasted Garlic Cauliflower Soup
  14. Moroccan Spiced Lamb Meatballs
  15. Paleo Spaghetti Bolognese (Zoodles or Spaghetti Squash)
  16. 5-Ingredient Honey Mustard Salmon
  17. Stuffed Bell Peppers with Ground Beef
  18. Buffalo Chicken Lettuce Wraps
  19. Slow Cooker Salsa Verde Chicken
  20. Easy Italian Chicken Piccata
  21. Sun-Dried Tomato and Spinach Chicken Skillet
  22. Ginger-Turmeric Turkey Burgers
  23. Paleo Mongolian Beef
  24. Simple Pork Tenderloin with Apple Salsa
  25. Chili Lime Shrimp Fajitas (Sheet Pan)

[ingredients]
(All recipes use a base selection of paleo staples. Here’s a helpful list to stock your pantry for easy paleo dinners:)

– Chicken breasts or thighs
– Wild-caught salmon fillets
– Ground turkey or beef
– Fresh zucchini, sweet potatoes, bell peppers, broccoli
– Avocados, spinach, garlic, onions
– Cooking fats: extra-virgin olive oil, coconut oil, ghee
– Coconut aminos (soy sauce alternative)
– Canned coconut milk
– Cajun, Italian, taco seasonings (with no sugar or additives)
– Lemons, limes, fresh herbs (cilantro, parsley, basil)
– Lettuce heads (for wraps)
– Sea salt, black pepper, red pepper flakes
– Almond flour or coconut flour for dredging (optional)
– Apple cider vinegar, honey (for glazes or marinades)
[/ingredients]

💡Meal Planning Tip: Save these recipes to instantly create a master shopping list—organizing ingredients by store section for efficient grocery trips and making weeknight cooking a breeze.

CookifyAI meal planning interface

Instructions: How to Prep a Week of Paleo Dinners

  1. Pick Your Favorites: Choose 5-7 recipes from this list to plan your week.
  2. Create a Shopping List: Jot down protein, produce, and pantry items needed for all planned meals. (Or use CookifyAI for a smart, automated list!)
  3. Prep Ahead: Wash and chop veggies, marinate proteins, spiralize noodles, and cook sauces in advance to save time on weeknights.
  4. Weeknight Cooking: Most recipes are ready in 30 minutes. Simply cook protein, sauté or roast veggies, and assemble for a satisfying, paleo-approved meal.

Serving Suggestions for Easy Paleo Dinners

Serve dishes alongside a crisp side salad, cauliflower rice, or extra roasted vegetables. For a finishing touch, sprinkle with fresh herbs and a wedge of citrus—perfect for highlighting bright, natural flavors. Meals are easily portioned and packed for leftovers, ensuring healthy lunches, too.

Nutritional Information and Serving Size

These recipes are balanced in protein, fiber, and healthy fats, with most servings averaging 300-500 calories (dependent on dish and portion size). Each recipe typically yields 4 servings, making them family friendly or ideal for weekly batch cooking.

Easy Paleo Dinner Recap

With these 25 easy paleo dinner recipes, eating healthy is effortless. Every meal is crafted for maximum taste with minimal effort. Just follow the simple steps, shop smartly, and enjoy a week of delicious, nourishing dinners.

Weekly Meal Planning

This collection is tailor-made for meal prepping and organized weekly meals. Save and schedule these paleo recipes to have them automatically slotted into your week and generate an intelligent grocery list that covers all your cooking needs.

Planning Benefits:

  • Automatically totals ingredient amounts across chosen recipes
  • Consolidates and sorts ingredients by grocery section
  • Reduces forgotten purchases and accidental repeats
  • Simplifies meal prepping for healthier, stress-free weeks

Pro tip: When planning for the week, schedule your dinners to track ingredient overlap—like using coconut milk or protein across several dishes—helping reduce food waste and save money.

Cook and Prep Times

Prep Time: 10-20 minutes per meal
Cook Time: 15-30 minutes per meal
Total Time: 25-40 minutes per meal (most recipes)

Enjoy healthy, hassle-free weeknight dinners with these easy and tasty paleo recipes!

15 Savoury Vegan + Paleo Recipes for Effortless Meal Prep and Delicious Weeknight Dinners

15 Savoury Vegan + Paleo Diet Recipes You Need to Make

Introduction

If you’re looking for flavorful meals that align with both vegan and paleo diets, these 15 Savoury Vegan + Paleo Diet Recipes are a must-try. Each recipe is crafted to be hearty and satisfying—proof that plant-based, grain-free, and dairy-free meals can be incredibly delicious. Whether you’re meal prepping for the week or searching for a crowd-pleasing dinner, these dishes will keep you inspired and nourished without compromise.

Why You’ll Love These Vegan + Paleo Savoury Recipes

Every recipe on this list delivers maximum flavor using simple, wholesome ingredients. You’ll find creative takes on international cuisine, fresh salads, and comforting mains—proving that you don’t need grains, legumes, or animal products to enjoy satisfying, savory dishes. These recipes are perfect for anyone who wants to eat clean, cook efficiently, and explore the vibrant possibilities of a truly plant-centric paleo lifestyle.

Meal Prep Made Simple: Streamlining Your Week

These vegan and paleo recipes are ideal for batch cooking and smart weekly meal planning. Many use overlapping ingredients to cut down on prep time and waste, making them a favorite for those looking to simplify their healthy lifestyle.

15 Must-Make Savoury Vegan + Paleo Diet Recipes

  • Cauliflower Rice Buddha Bowls with Lemon-Tahini Dressing
  • Stuffed Sweet Potatoes with Avocado and Spiced Chickpeas
  • Creamy Zucchini Noodle Alfredo (with cashew sauce)
  • Sheet Pan Roasted Veggies with Garlic Herb Marinade
  • Crispy Cauliflower Tacos with Cabbage Slaw
  • Rainbow Vegetable Stir Fry with Coconut Aminos
  • Herbed Portobello Mushroom Steaks with Chimichurri
  • Paleo “Falafel” Balls (with almond flour and herbs)
  • Eggplant and Tomato Caponata (olive oil-based)
  • Curried Broccoli and Carrot Fritters
  • Thai-Inspired Coconut Soup with Veggies & Lime
  • Collard Green Wraps with Muhammara Spread
  • Mashed Cauliflower Shepherd’s Pie (vegan version)
  • Autumn Harvest Salad with Apple Cider Vinaigrette
  • Root Veggie “Fries” with Avocado Cream Dip

[ingredients]
The following staple ingredients appear across these recipes:
– Cauliflower (whole and riced)
– Sweet potatoes
– Zucchini and spiralized zucchini noodles
– Broccoli, carrots, and assorted vegetables
– Avocado
– Almond flour, coconut flour
– Tahini, olive oil, coconut aminos
– Fresh herbs (parsley, cilantro, basil)
– Garlic, onion, and spices (turmeric, cumin, paprika)
– Lemons and limes
– Cashews (for creamy sauces)
– Collard greens or lettuce leaves
– Portobello mushrooms
– Eggplant, tomatoes
[/ingredients]

💡Meal Planning Tip: Save this recipe list to automatically generate an organized shopping list with all ingredients sorted by grocery store section—perfect for efficient grocery runs and seamless meal planning.

CookifyAI meal planning interface

Instructions

  1. Choose your favorite recipes from the list above and check their individual instructions for detailed steps. (Pro tip: prep ingredients for multiple recipes at once to save time!)
  2. Roast, sauté, spiralize, or blend as required per recipe. Most can be batch-cooked and stored for easy reheating during the week.
  3. For sauces and dressings (like tahini, cashew alfredo, or chimichurri), prepare them in advance and refrigerate in airtight containers.
  4. Assemble bowls, salads, wraps, or mains just before serving to preserve texture and flavor.
  5. Enjoy as mix-and-match meals throughout the week for lunch, dinner, or even hearty snacks!

Weekly Meal Planning

These 15 vegan + paleo recipes are designed for flexible weekly planning. Save and schedule these recipes so you can plan meals for each day and generate a smart, consolidated shopping list.

Planning Benefits:

  • Automatically aggregates ingredient quantities across all your selected recipes
  • Groups your shopping list by produce, pantry, and other grocery sections
  • Reduces food waste by helping you use up similar ingredients in multiple dishes
  • Eliminates duplicate purchases and forgotten items for smooth grocery trips

Pro tip: When planning a week’s worth of meals, schedule your recipes to see where ingredients overlap—making it easy to buy just what you need and prep efficiently.

Cook and Prep Times

Average Prep Time Per Recipe: 15-20 minutes
Average Cook Time Per Recipe: 20-30 minutes
Total Time for Meal Prep: 1.5-2.5 hours for the week (for 4-5 selected recipes)

These 15 savoury vegan + paleo recipes showcase just how creative and satisfying plant-based, grain-free meals can be. With streamlined meal planning and shopping using CookifyAI, you’ll save time, reduce waste, and eat well all week long.

Behind the Hype: Uncovering the Hidden Pitfalls of the Paleo Diet

The Dark Side of the Paleo Diet No One Talks About

Introduction

The Paleo Diet promises a return to ancestral eating, with the allure of weight loss, better digestion, and a stronger, leaner body. However, beyond its popularity and well-marketed benefits, there’s a lesser-known side to this regimen. Exploring the dark side of the Paleo Diet can help you make more informed, balanced food choices—especially if you’re planning meals for yourself or your family.

What Makes the Paleo Diet Appeal to So Many?

The Paleo Diet stands out due to its focus on unprocessed, whole foods—lean meats, fish, fruits, vegetables, nuts, and seeds—excluding grains, dairy, legumes, and processed foods. Its simplicity and emphasis on “eating like a caveman” make it very appealing to those seeking straightforward guidelines for healthy eating.

But that very simplicity can be deceiving. What seems like a clear path to wellness may also have hidden pitfalls that many advocates gloss over.

The Lesser-Known Downsides of the Paleo Diet

1. Nutrient Deficiencies

By eliminating whole food groups such as grains, legumes, and dairy, the Paleo Diet can leave followers at risk of missing out on important nutrients. Calcium, vitamin D, certain B vitamins, and fiber are often lacking unless careful planning is involved. This can be especially problematic for those with higher nutritional needs—athletes, growing children, and pregnant individuals.

2. Expense and Accessibility

Paleo guidelines emphasize grass-fed meats, wild-caught fish, and organic produce, which can be significantly more expensive than conventional foods. For many families, sustaining a strict Paleo menu quickly becomes a financial challenge, making meal planning and shopping more stressful than helpful.

3. Sustainability Issues

Because the diet revolves around large quantities of animal protein, critics note that it’s harder on the environment and may not be a sustainable choice long term. Sourcing grass-fed beef and wild-caught fish for every meal isn’t just costly—it contributes to greater agricultural and environmental strain.

4. Social and Emotional Impacts

Strict dietary rules often create social barriers, making eating out or attending family gatherings challenging. The “all-or-nothing” mindset of the Paleo Diet can lead to shame or guilt when deviating from the plan, impacting mental well-being and relationship with food.

5. Lack of Customization for Individual Needs

Not all bodies and lifestyles thrive on the same foods. Some individuals do well with higher carb intake or need the gut benefits of legumes. The Paleo Diet doesn’t leave much room for personalization, and for some, this rigidity may cause digestive upsets or unmet energy needs.

Rethinking Meal Planning on the Paleo Diet

Planning your meals carefully is essential if you choose to follow a Paleo-inspired approach, especially to avoid the pitfalls of nutritional deficiency and social isolation. Making a thoughtful shopping list and keeping an eye on ingredient variety is key.

[ingredients]
– 6 ounces wild-caught salmon fillets
– 2 cups chopped organic spinach
– 1 cup sliced sweet potatoes
– 1 tablespoon olive oil
– 1 lemon, sliced
– Sea salt and pepper to taste
– Optional: Fresh chopped herbs for garnish
[/ingredients]

💡 Meal Planning Tip: Save this recipe to automatically generate an organized shopping list with all ingredients sorted by store section—perfect for efficient grocery trips, streamlined meal planning, and double-checking your pantry before you shop.

CookifyAI meal planning interface

Instructions

  1. Preheat oven to 400°F. Place salmon fillets on a lined baking sheet.
  2. Toss sweet potatoes in olive oil, sea salt, and pepper. Spread on the baking sheet alongside the salmon.
  3. Top salmon fillets with lemon slices and bake for 18-20 minutes, until fish flakes easily and potatoes are tender.
  4. Sauté the spinach in a pan with a drizzle of olive oil until wilted. Season as desired.
  5. Serve all components together, garnished with chopped fresh herbs if using.

Weekly Meal Planning

If you’re planning Paleo meals throughout the week, make nutrition and variety your priorities. Save and schedule this recipe to build a meal plan that considers both your macros and micronutrient balance. Smart meal planning helps you spot ingredients that may be missing from your diet—like calcium or fiber—so you can adjust accordingly, and see which fresh produce or proteins you’ll need without repeat purchases or forgotten grocery items.

Planning Benefits:

  • Generates consolidated ingredient lists across all your planned meals
  • Organizes groceries by store section for speed and simplicity
  • Prevents duplicate purchases and helps minimize food waste
  • Ensures greater nutritional variety so you don’t miss key vitamins or fiber

Pro tip: Scheduling your weekly meals in advance with CookifyAI makes it easy to see ingredient overlaps, while ensuring your Paleo plan doesn’t leave out any essential nutrients.

Cook and Prep Times

Prep Time: 10 minutes
Cook Time: 20 minutes
Total Time: 30 minutes

Recap: The Dark Side of the Paleo Diet

While the Paleo Diet offers clear guidelines and promises of improved health, it’s crucial to be aware of the potential downsides—from missing nutrients and increased grocery costs to social challenges and environmental concerns. Smart meal planning and balanced shopping lists are your best tools for navigating the “dark side” and making the most of whatever eating plan you choose. Using meal planning tools like CookifyAI can help you avoid common Paleo pitfalls and ensure every meal is nutritionally complete, satisfying, and stress-free.

Harvest Harmony: 11 Effortless Paleo Fall Dinners for a Cozy Autumn Feast

11 Easy Paleo Fall Dinner Recipes

Introduction

Embrace the comfort of autumn with these 11 Easy Paleo Fall Dinner Recipes. Each dish is crafted to deliver hearty flavors and wholesome ingredients while keeping your dinners grain-free, dairy-free, and refined sugar-free. Whether you’re looking to savor the taste of roasted root vegetables, tender meats, or warming spices, these recipes are perfect for meal prepping and enjoying cozy weeknight meals that align with paleo principles.

Why These Paleo Fall Dinners Belong on Your Table

Fall—a season marked by vibrant produce, earthy flavors, and a desire for satisfying, nourishing dinners. These easy paleo recipes are designed to help you celebrate autumn, providing scrumptious ways to fill your plate without compromise. With minimal prep and maximum flavor, they’re perfect for cooks seeking simple, weeknight-friendly solutions that keep your grocery list concise and your nutrition goals on track.

The 11 Easy Paleo Fall Dinner Recipes

1. **Butternut Squash and Apple Soup**
2. **Sheet Pan Maple Dijon Chicken with Brussels Sprouts**
3. **Paleo Beef and Sweet Potato Stew**
4. **Roasted Cauliflower and Sausage Bake**
5. **Pumpkin Chili with Ground Turkey**
6. **Garlic Rosemary Pork Tenderloin with Roasted Carrots**
7. **Balsamic Glazed Chicken Thighs with Root Vegetables**
8. **Spaghetti Squash with Bolognese Sauce**
9. **Lemon-Herb Salmon with Roasted Fennel**
10. **Crispy Sheet Pan Lemon Broccoli and Beef Stir Fry**
11. **Coconut Curry Chicken with Autumn Veggies**

[ingredients]
(varies by recipe; core ingredients include)
– Butternut squash
– Apples
– Chicken thighs and pork tenderloin
– Brussels sprouts and carrots
– Sweet potatoes, cauliflower, and broccoli
– Ground turkey and beef
– Pumpkin puree
– Sausage (nitrate/nitrite-free)
– Root vegetables: parsnips, turnips, beets
– Coconut milk
– Spaghetti squash
– Fennel
– Salmon fillets
– EVOO, garlic, fresh herbs (rosemary, thyme, parsley)
– Lemons
– Maple syrup (for occasional use)
– Paleo-compliant seasonings (chili powder, cumin, turmeric, curry powder)
[/ingredients]

💡Meal Planning Tip: Save these recipes to instantly generate a master shopping list organized by grocery store section—making fall meal prep seamless and saving you time on every grocery trip.

CookifyAI meal planning interface

Instructions

Each recipe in this collection includes simple, step-by-step instructions that fit any busy schedule. For example:

1. **Pick your protein and produce.** Most recipes come together with a single sheet pan, Dutch oven, or slow cooker.
2. **Prep your ingredients.** Chop veggies and portion proteins ahead to speed up weeknight dinners.
3. **Roast, sauté, or simmer.** Each meal uses classic fall methods like oven-roasting, stovetop simmering, or slow cooking to develop deep, savory flavors.
4. **Finish with fresh herbs or a squeeze of citrus.** This adds brightness and complexity to autumn’s coziest meals.

(For detailed instructions on each specific recipe, save and schedule in your meal planner.)

Serving Suggestions for Your Paleo Fall Dinners

Pair these dinners with a simple side salad of arugula, pomegranate seeds, and pumpkin seeds, or top stews with a dollop of paleo-approved pesto for extra flavor. Each recipe is designed to work as a stand-alone meal but can be doubled or tripled for batch cooking. Store leftovers for quick lunches and enjoy the remains with a drizzle of EVOO or a sprinkle of fresh herbs.

Nutritional Information and Serving Size

Each recipe yields 4 servings, focusing on lean proteins, healthy fats, and seasonal vegetables. Portions are balanced for about 350-500 calories per serving—ideal for whole-food clean eating.

Paleo Fall Dinner Recipes Recap

These 11 Paleo Fall Dinner Recipes celebrate the bounty and bold flavors of autumn while fitting perfectly into your healthy lifestyle. Effortless to prepare and endlessly adaptable, these dishes will keep your meal routine creative and nourishing.

Weekly Meal Planning

Autumn is the perfect time to simplify meal prep. Save and schedule these recipes to your personalized meal plan, so you know exactly what’s for dinner each night. CookifyAI combines all your weekly recipes into a single, smart shopping list—automatically tallying up total quantities and grouping items by produce, proteins, pantry, and more.

Planning Benefits:

– Calculates total ingredient quantities across selected recipes
– Consolidates duplicate ingredients for efficient shopping
– Organizes the list by grocery store section for fast, easy trips
– Reduces food waste by preventing overbuying
– Streamlines meal prep with tailored cooking and batch instructions

Pro Tip: Planning multiple meals? Use CookifyAI’s scheduler to see where your ingredients overlap and adjust the shopping list accordingly—saving you money and fridge space!

Cook and Prep Times

Prep Time: 15-25 minutes (per recipe)
Cook Time: 25-60 minutes, depending on dish
Total Time: Most recipes ready in about 45 minutes

Satisfy your autumn cravings and simplify your weeknights—you’re just a few meal plans away from a stress-free paleo fall!

Fluffy Paleo Dinner Rolls: Your Ultimate Grain-Free Comfort Bread Recipe

Paleo Dinner Rolls | Our Paleo Life

Introduction

Soft, fluffy, and deceptively simple, these Paleo Dinner Rolls from Our Paleo Life are the perfect grain-free addition to any meal. Whether you’re hosting a holiday feast or just want a warm, wholesome side, these dinner rolls invite everyone to the table—without grains, dairy, or refined sugars. Their tender crumb and satisfying crust make them irresistible for both Paleo and non-Paleo eaters alike.

Why You’ll Love These Paleo Dinner Rolls

Unlike most gluten-free or grain-free bread options, these dinner rolls are moist and pillowy with a mild, comforting flavor. The secret is a blend of almond flour and tapioca starch, delivering classic bread-like texture without the inflammatory ingredients. Whether slathered with ghee or enjoyed on their own, they’re a crowd-pleaser for family dinners, lunchboxes, or healthy snacking.

Choosing the Right Ingredients for Optimal Texture

The unique structure of these rolls comes from a fine balance of almond flour (for richness and softness) and tapioca or arrowroot starch (for elasticity and fluffiness). Eggs add lift, olive oil gives moisture, while a touch of apple cider vinegar helps them rise beautifully. Best of all, no yeast or special proofing times are needed—these rolls bake up quickly and consistently every time.

Baking the Perfect Paleo Dinner Rolls

To achieve a classic dinner roll shape, scoop the dough with damp hands and gently round it before placing on the baking tray. Allow a little space between each roll for even air circulation and beautiful browning. For a golden exterior, a light brush of olive oil works wonders.

Serving Suggestions to Complete Your Paleo Table

Serve these rolls warm from the oven with a spread of coconut oil, grass-fed butter substitute, or fresh herbs. Pair them with comforting soups, rich stews, or roasted meats for a satisfying Paleo dinner. They’re also ideal sliced for mini sandwiches or as a base for breakfast sliders.

Nutritional Information and Serving Size

This recipe yields about 8 standard-size rolls. Each roll contains roughly 130-150 calories, primarily from healthy fats (almond flour and olive oil) and protein, making it a filling and nutritious grain-free alternative.

Paleo Dinner Rolls (Recap)

These Paleo Dinner Rolls redefine grain-free bread—fluffy, tender, and versatile enough for any meal. With easy ingredients and minimal prep, they’ll quickly become a staple in your healthy meal rotation.

[ingredients]
2 cups almond flour (fine and blanched works best)
1 cup tapioca or arrowroot starch
1/2 teaspoon baking soda
1/2 teaspoon salt
2 large eggs
1/4 cup olive oil (plus extra for brushing)
1 tablespoon apple cider vinegar
Optional: fresh herbs, garlic powder, or rosemary for flavor variation
[/ingredients]

💡Meal Planning Tip: Save this recipe to automatically generate an organized shopping list with all ingredients sorted by store section—perfect for efficient grocery trips and weekly Paleo meal planning.

CookifyAI meal planning interface

Instructions

  1. Preheat your oven to 350°F (175°C) and line a baking sheet with parchment paper.
  2. In a large bowl, whisk together the almond flour, tapioca or arrowroot starch, baking soda, and salt.
  3. In a separate bowl, beat the eggs. Whisk in olive oil and apple cider vinegar until smooth.
  4. Add the wet mixture to the dry ingredients, stirring until a soft dough forms. Gently fold in any optional herbs or seasonings.
  5. With damp hands, scoop and shape the dough into 8 rolls, placing each on the prepared baking sheet. Leave some space between each for spreading.
  6. Brush the tops lightly with extra olive oil for a golden finish.
  7. Bake for 20-24 minutes, or until golden brown and firm to the touch.
  8. Let cool slightly before serving. Enjoy warm for best flavor and texture.

Weekly Meal Planning

These Paleo Dinner Rolls are easy to prep ahead—bake a batch on Sunday and enjoy fresh, grain-free bread throughout the week. Save and schedule this recipe to automatically add it to your meal plan, consolidate shopping lists, and adjust serving sizes for your family.

Planning Benefits:

– Automatically calculates total ingredient quantities for the week
– Combines similar items to avoid duplicate purchases
– Creates organized, sectioned shopping lists for speedier store trips
– Reduces overbuying and food waste

Pro tip: Batch-cook these rolls and freeze extras for emergency bread cravings. Schedule your batch-cooking days to keep your Paleo routine seamless!

Cook and Prep Times

Prep Time: 10 minutes
Cook Time: 20-24 minutes
Total Time: 30-35 minutes

Paleo Indian Naan: A Wholesome Twist on Classic Indian Bread

Paleo Indian Naan

Introduction

Paleo Indian Naan is a game changer for anyone looking to enjoy the classic flavors of Indian bread while sticking to a grain-free, dairy-free, and gluten-free lifestyle. This naan delivers on that unmistakable soft, chewy texture and subtle flavor that pairs beautifully with any curries, stews, or grilled dishes. Making Paleo Naan at home is surprisingly simple and satisfying, giving every meal that authentic restaurant experience without compromising your clean eating goals.

Why You’ll Love This Paleo Indian Naan

Classic naan can be off the table for those following paleo diets, but this recipe uses wholesome, nutrient-rich ingredients like almond flour and coconut milk to closely replicate the taste and feel of traditional naan. It’s perfect for scooping up creamy sauces, brushing with garlic oil, or enjoying as a versatile side for your favorite Indian-inspired meals. Plus, it’s quick to make and a guaranteed crowd pleaser for gluten-free and grain-free guests alike.

The Best Paleo Flours for Soft Naan

Almond flour and tapioca flour form the base of this recipe. Almond flour brings richness while tapioca flour keeps the naan flexible and fluffy. These two flours create a dough that’s easy to work with and delivers that signature naan chewiness—so you won’t miss the grains at all!

Sizzling Skillet Technique

A little oil and a hot skillet make all the difference, allowing the naan to puff up and get those tell-tale golden brown spots. This simple stovetop method lets you have warm, fresh naan in minutes. For extra flavor, brush with melted ghee or olive oil and top with chopped cilantro or even a sprinkle of nigella seeds, if you like.

Serving Suggestions

Paleo Indian Naan is a perfect match for paleo butter chicken, coconut curries, or spicy lentil stews. It’s also delicious as a base for wraps, flatbread pizzas, or as a side to any grilled entrée. Serve warm for the best texture and flavor!

Nutritional Information and Serving Size

This recipe yields about 4 naan breads. Each piece contains approximately 150–180 calories, depending on your oil choice, along with healthy fats and fiber from the almond flour. It’s a nourishing, satisfying way to keep your meals balanced and flavorful.

Paleo Indian Naan (Recap)

Wholesome, simple, and adaptable—this Paleo Indian Naan will become your go-to bread for all things saucy, spicy, and comforting. Enjoy classic naan flavor the smart, paleo way.

[ingredients]
1 cup almond flour
1/2 cup tapioca flour (or arrowroot starch)
1/4 cup coconut milk (full fat, canned)
1 large egg
1/2 teaspoon baking powder
1/2 teaspoon salt
2 tablespoons olive oil or avocado oil (for frying)
Optional toppings: chopped cilantro, melted ghee, garlic

[/ingredients]

💡Meal Planning Tip: Save this recipe to instantly generate an organized shopping list with all ingredients sorted by store section— making your paleo grocery trips fast and frustration-free.

CookifyAI meal planning interface

Instructions

  1. In a large bowl, whisk together the almond flour, tapioca flour, baking powder, and salt.
  2. In a separate small bowl, whisk the egg and coconut milk until smooth.
  3. Add the wet ingredients to the dry ingredients and mix until a smooth, thick batter forms.
  4. Heat 1 tablespoon oil in a nonstick skillet over medium heat.
  5. Scoop 1/4 of the batter into the skillet and use a spatula to shape it into a circle about 1/4-inch thick.
  6. Cook for 2–3 minutes, until bubbles appear and the bottom is golden. Flip and cook another 2 minutes until cooked through and slightly puffed.
  7. Repeat with remaining batter, adding more oil as needed.
  8. Brush the warm naan with melted ghee, sprinkle with chopped cilantro, or top with minced garlic, if desired. Serve warm.

Weekly Meal Planning

This recipe fits seamlessly into any weekly meal plan, whether you’re preparing Indian feasts, paleo lunches, or quick dinners. Save and schedule this recipe to keep your meal prep on track and generate a consolidated shopping list—CookifyAI automatically totals quantities across all your planned recipes and sorts them for easy, efficient shopping.

Meal Planning Benefits:

  • Combines ingredients from all your chosen recipes into one organized list
  • Sorts items by grocery store section for fast, hassle-free shopping
  • Prevents accidental repeat purchases or missing essentials
  • Simplifies Sunday prep and cuts down on last-minute market runs

Pro tip: Schedule your meals in advance for the week—CookifyAI will help maximize overlap in ingredients, so you buy just what you need and reduce waste.

Cook and Prep Times

Prep Time: 10 minutes
Cook Time: 15 minutes
Total Time: 25 minutes

7 Days to Vibrant Health: A Wholesome Paleo Meal Plan for Clean, Satisfying Eating

Wholesome Paleo Meal Plan (7 Days of Clean, Satisfying Recipes)

Introduction

Following a paleo lifestyle means fueling your body with unprocessed, nutrient-dense foods for optimal health. This Wholesome Paleo Meal Plan takes the guesswork out of clean eating, providing you with 7 days of balanced, mouth-watering recipes designed to keep you satisfied and energized. By focusing on lean proteins, fresh vegetables, fruits, nuts, and healthy fats, you’ll enjoy a variety of flavors without feeling restricted—all while supporting your wellness goals.

Why Choose a 7 Day Paleo Meal Plan?

A weeklong paleo meal plan offers structure and variety, which can be essential for sticking to your health commitments. These recipes are not only free from grains, legumes, refined sugars, and processed ingredients, but they’re also easy to prepare and crowd-pleasing—even for family members who may not be strictly paleo. Planning ahead ensures you have filling, wholesome meals at the ready, minimizing the temptation of less nutritious alternatives.

Sample 7 Day Wholesome Paleo Meal Plan

Each day provides a satisfying breakfast, lunch, dinner, and snack, ensuring you get ample protein, fiber, and fat for lasting energy. Here’s an example of a week of clean paleo eating:

Day 1:
– Breakfast: Sweet Potato Breakfast Hash with Eggs
– Lunch: Grilled Chicken Salad with Avocado and Citrus Vinaigrette
– Dinner: Sheet Pan Salmon with Roasted Broccoli and Carrots
– Snack: Apple slices with almond butter

Day 2:
– Breakfast: Paleo Banana Pancakes
– Lunch: Zucchini Noodle “Pasta” with Ground Turkey Tomato Sauce
– Dinner: Slow Cooker Lemon Garlic Chicken Thighs with Green Beans
– Snack: Handful of mixed nuts

Day 3:
– Breakfast: Spinach and Mushroom Omelet
– Lunch: Tuna Salad Lettuce Wraps
– Dinner: Beef Stir Fry with Bell Peppers and Cauliflower Rice
– Snack: Sliced cucumbers and guacamole

Day 4:
– Breakfast: Chia Seed Pudding with Berries
– Lunch: Grilled Shrimp and Mango Salad
– Dinner: Herb-Crusted Pork Tenderloin with Asparagus
– Snack: Hard boiled eggs

Day 5:
– Breakfast: Scrambled Eggs with Sauteed Kale and Tomatoes
– Lunch: Roasted Chicken and Vegetable Soup
– Dinner: Turkey-Stuffed Bell Peppers
– Snack: Fresh orange slices

Day 6:
– Breakfast: Coconut Yogurt with Walnuts and sliced banana
– Lunch: BLT Lettuce Wraps with Avocado
– Dinner: Garlic Rosemary Steak with Roasted Brussels Sprouts
– Snack: Raw trail mix (nuts and seeds)

Day 7:
– Breakfast: Veggie Frittata
– Lunch: Cobb Salad (chicken, eggs, avocado, bacon, tomatoes)
– Dinner: Baked Cod with Lemon and Olive Oil, served with sautéed spinach
– Snack: Sliced pears with cashew butter

[ingredients]
– Eggs (2 dozen)
– Sweet potatoes (5 medium)
– Skinless chicken breasts and thighs (2 lbs)
– Salmon fillets (4)
– Lean ground turkey (1 lb)
– Zucchinis (4)
– Fresh spinach (1 large bag)
– Mushrooms (8 oz)
– Avocados (6)
– Lemons (3)
– Carrots (1 lb)
– Broccoli (1 head)
– Bell peppers (6, mixed colors)
– Cauliflower (1 large head)
– Pork tenderloin (1–1.5 lbs)
– Shrimp (1 lb)
– Green beans (1 lb)
– Cucumber (2)
– Cherry tomatoes (2 pints)
– Asparagus (1 lb)
– Mango (1)
– Apples (3)
– Bananas (3)
– Coconut yogurt (1 large container)
– Berries (1 pint)
– Mixed nuts (1 bag)
– Almond butter (1 jar)
– Cashew butter (1 jar)
– Raw trail mix (1 bag)
– Olive oil, fresh herbs, garlic, spices to taste
[/ingredients]

💡 Meal Planning Tip: Save this meal plan to automatically generate a full shopping list with all ingredients sorted by grocery store section. CookifyAI simplifies your grocery trips—no more forgotten items or second-guessing what you need for the week!

CookifyAI meal planning interface

Instructions

  1. Review the meal plan and adjust recipes or servings to suit your needs.
  2. Prepare a shopping list with all ingredients. (Tip: Use a meal planning tool like CookifyAI to auto-organize the list by store section.)
  3. Meal prep breakfasts and snacks in advance for grab-and-go ease throughout the week.
  4. Plan to batch-cook proteins and veggies for multiple meals. For example, roast extra chicken or sweet potatoes for salads and wraps.
  5. Keep fresh produce washed and chopped for quick assembly.
  6. Store leftovers in airtight containers and label by day to keep your fridge organized.
  7. Enjoy a variety of flavors and textures while staying on track with nutritious, paleo-friendly meals!

Weekly Meal Planning

A 7-day paleo meal plan makes meal prep and clean eating seamless. Save and schedule this meal plan to unlock smart shopping lists that automatically calculate total ingredient amounts across all meals—reducing food waste and saving you money.

Planning Benefits:

  • Generates detailed shopping lists by grocery store section
  • Scales recipes for your household size
  • Tracks leftover ingredients to use in later recipes
  • Ensures you never forget a key meal component

Pro tip: When planning multiple meals, schedule all recipes and let CookifyAI consolidate your protein, produce, and pantry needs so you shop smarter—not harder.

Cook and Prep Times

Prep Time (daily): 20–30 minutes
Cook Time (daily): 20–35 minutes
Total Time (weekly): 5–7 hours (including meal prep and batch cooking)

This Wholesome Paleo Meal Plan offers variety, simplicity, and maximum flavor, making clean eating easy and delicious. With organized shopping lists and meal scheduling from CookifyAI, your weekly meal prep is more efficient—and your path to healthful, satisfying meals is smoother than ever.

Egg-Free AIP/Paleo Breakfast Meatballs: A Delicious, Allergen-Friendly Start to Your Day

Egg-Free AIP/Paleo Breakfast Meatballs • Heal Me Delicious

Introduction

Egg-free AIP/Paleo Breakfast Meatballs are a game changer for anyone searching for a nourishing, protein-packed breakfast that aligns with the Autoimmune Protocol or Paleo diets. These meatballs are flavorful, easy to make, and ideal for meal prepping—making your mornings less stressful and more delicious without sacrificing dietary needs.

Why These Egg-Free Breakfast Meatballs Stand Out

These breakfast meatballs are perfect for those avoiding eggs due to allergies or dietary preferences but still craving a savory, portable, and hearty morning meal. Combining ground protein (like turkey or pork) with naturally AIP-friendly herbs and veggies, each bite delivers satisfying flavor without any grains, dairy, or eggs—making them a crowd pleaser for all dietary needs at the table.

The Secret to Moist, Flavorful Meatballs Without Eggs

Many meatball recipes use eggs as binders, but this version relies on grated apple or sweet potato for moisture and structure, plus coconut flour to help hold everything together. Fresh herbs and a simple blend of AIP seasonings brighten up the taste, ensuring you never miss the eggs.

Batch Cooking and Storage Tips

One of the best parts of these breakfast meatballs is how easily they fit into your weekly meal prep: batch bake them, then store in the fridge or freezer for grab-and-go breakfasts or quick protein add-ins for lunch salads and dinners.

Serving Suggestions for AIP & Paleo Breakfast Meatballs

Serve these meatballs alongside roasted veggies, sautéed greens, or a warm root vegetable hash for a balanced breakfast. For an AIP-friendly dipping sauce, try a quick blend of avocado and olive oil or a spoonful of coconut yogurt with a squeeze of lemon.

Nutritional Information and Serving Size

This recipe yields about 18 meatballs, enough for 4–6 servings. Each serving is packed with approximately 18–20 grams of protein, minimal carbs, and healthy fats—perfect for fueling your morning or pairing with other AIP meals.

Egg-Free AIP/Paleo Breakfast Meatballs (Recap)

With their satisfying texture, bold flavor, and allergen-friendly ingredients, these egg-free meatballs are an easy, versatile breakfast solution that everyone at the table can enjoy.

[ingredients]
1 lb ground turkey or pork (AIP/paleo-friendly)
1 medium apple, peeled and grated (or 1/2 cup grated sweet potato)
2 tbsp coconut flour
2–3 tbsp green onion, finely chopped
2 tbsp fresh parsley or cilantro, finely chopped
1 tsp garlic powder
1 tsp onion powder
1/2 tsp dried thyme
1/2 tsp sea salt
1–2 tbsp olive oil or coconut oil (for baking or sautéing)
[/ingredients]

💡Meal Planning Tip: Save this recipe to automatically generate a detailed shopping list with all ingredients, smartly grouped by store section for fast, stress-free grocery trips.

CookifyAI meal planning interface

Instructions

  1. Preheat your oven to 400°F and line a baking sheet with parchment paper or lightly grease it with oil.
  2. In a large bowl, combine the ground turkey or pork, grated apple (or sweet potato), coconut flour, green onion, parsley/cilantro, garlic powder, onion powder, dried thyme, and sea salt. Mix until just combined; avoid overmixing for tender meatballs.
  3. With slightly damp hands, form the mixture into 1.5-inch meatballs and place them on the prepared baking sheet.
  4. Brush or spray the tops with olive or coconut oil.
  5. Bake for 18–22 minutes, until the meatballs are cooked through and lightly golden. Turn halfway for even browning, if desired.
  6. Let cool slightly, then serve warm. Store leftovers in an airtight container in the fridge for up to 4 days, or freeze for up to 2 months.

Weekly Meal Planning

These egg-free breakfast meatballs are ideal for prepping ahead, so you always have a protein-packed option ready in the fridge or freezer. Save and schedule this recipe to your weekly meal plan, and CookifyAI will calculate exactly how much ground meat, veggies, and other essentials you’ll need—automatically combining them with your other recipes for the week.

Planning Benefits:

  • Consolidated shopping lists that avoid duplicates
  • Ingredient quantities automatically adjusted for the number of servings or batch size
  • Grocery lists organized by store aisles for faster trips
  • Reduces food waste and meal prep overwhelm

Pro tip: When you plan multiple AIP or Paleo recipes, use CookifyAI’s scheduler to streamline your ingredient list—so you never overbuy and always have what you need for breakfasts, lunches, and dinners.

Cook and Prep Times

Prep Time: 15 minutes
Cook Time: 22 minutes
Total Time: 37 minutes

These Egg-Free AIP/Paleo Breakfast Meatballs make it easy to start your day strong, flavorfully, and allergen-friendly—meal planning and shopping have never been simpler!

Crispy Paleo Orange Chicken: A Flavorful, Gluten-Free, Soy-Free, and AIP-Friendly Twist on a Takeout Classic

Crispy Paleo Orange Chicken (Gluten-free, Soy-free, AIP Option) • Heal Me Delicious

Introduction

Crispy Paleo Orange Chicken offers all the bold, tangy flavors you love from the classic takeout dish—with none of the gluten, soy, or inflammatory ingredients. Instead, this recipe leans into whole-food ingredients that make every bite satisfyingly crunchy and perfectly sauced. Whether you’re seeking a healthier homemade alternative or catering to special dietary needs, this dish is a surefire way to delight friends and family without compromise.

Why You’ll Love This Crispy Paleo Orange Chicken

This recipe is a game-changer for anyone craving that sweet, citrusy orange chicken experience without the takeout guilt. The naturally gluten-free coating turns irresistibly crispy in the pan, then gets tossed in a sticky, zesty orange sauce that clings to every piece. With the option to make it strictly AIP (Autoimmune Protocol) compliant, this dish fits seamlessly into most dietary lifestyles—making it versatile enough for weeknight dinners or special occasions alike.

The Secret to Crispy, Grain-Free Coating

Achieving that restaurant-style crunch starts with a light coating of arrowroot or tapioca starch, paired with a quick pan-fry in avocado oil. The result: tender chicken pieces enveloped in a golden, crispy shell. Since this method uses no grains, gluten, or soy, it remains gentle on sensitive digestive systems while maintaining an authentic texture.

Bright, Flavorful Orange Sauce

The soul of orange chicken is its signature sauce—a perfect harmony of citrus, sweetness, and a hint of ginger warmth. Rather than reaching for bottled sauces packed with additives and soy, this recipe uses fresh orange juice, honey (or maple syrup for AIP), and coconut aminos. Simmered with garlic and ginger, the sauce thickens beautifully and provides a vibrant gloss over the chicken.

Flexible and Allergy-Friendly

This recipe is naturally gluten-free and soy-free. For those following AIP, simple swaps like maple syrup in place of honey and omitting black pepper make this dish fully compliant. Serve with cauliflower rice, steamed broccoli, or your favorite grain-free side for a complete meal everyone can enjoy.

[ingredients]
For the Chicken:
– 1.5 lbs boneless, skinless chicken thighs or breasts, cut into bite-sized pieces
– 1/3 cup arrowroot starch or tapioca starch (AIP-friendly)
– 1/2 tsp sea salt
– 1/4 tsp black pepper (omit for strict AIP)
– 2-3 tbsp avocado oil (or coconut oil)

For the Orange Sauce:
– 1/2 cup fresh orange juice (from about 1 large orange)
– Zest of 1 orange
– 2 tbsp coconut aminos
– 2 tbsp honey (or maple syrup for AIP)
– 1 tbsp apple cider vinegar
– 2-4 garlic cloves, minced
– 1 tsp fresh ginger, grated (or 1/2 tsp ground ginger)
– 1/4 tsp sea salt

Optional garnish:
– Sliced green onions
– Toasted sesame seeds (omit for AIP)
– Orange slices or extra zest
[/ingredients]

💡Meal Planning Tip: Save this recipe to automatically generate an organized shopping list with all ingredients sorted by store section—perfect for efficient grocery trips and seamless meal planning.

CookifyAI meal planning interface

Instructions

  1. In a shallow bowl, mix arrowroot starch (or tapioca), salt, and black pepper (if using). Toss chicken pieces in the mixture until well coated.
  2. Heat avocado oil in a large skillet over medium-high heat. Working in batches, add chicken pieces and cook 3-4 minutes per side until golden brown and crisp. Transfer cooked pieces to a plate and repeat as needed.
  3. Pour off excess oil, leaving about 1 teaspoon in the pan. Add garlic and ginger to the skillet, sautéing until fragrant (about 30 seconds).
  4. Whisk together orange juice, orange zest, coconut aminos, honey or maple syrup, apple cider vinegar, and salt. Pour sauce mixture into the skillet. Bring to a boil, then reduce heat and simmer 3-4 minutes, stirring until sauce thickens.
  5. Return the fried chicken pieces to the skillet, tossing to coat evenly in the sauce. Cook for another 2-3 minutes, allowing flavors to meld and the chicken to heat through.
  6. Serve hot, garnished with green onions, toasted sesame seeds, or extra orange zest as desired.

Serving Suggestions

Pair your crispy orange chicken with cauliflower rice, sautéed bok choy, or steamed broccoli—whichever fits your meal plan or family’s palate. For a meal prep option, portion chicken and sides into individual containers for tasty, ready-to-go lunches throughout the week.

Nutritional Information and Servings

This recipe yields approximately 4 servings. Per serving: around 300-350 calories, 25g protein, 10g healthy fats, and 24g carbohydrates (values may vary with sides and sweetener choice).

Summary: Crispy Paleo Orange Chicken in a Nutshell

This dish delivers on every front: irresistible crunch, bright citrus flavor, and easy, allergen-friendly ingredients. It’s a recipe you’ll return to again and again—great for impressing guests or adding zest to your weekly meal rotation.

Weekly Meal Planning

This recipe makes for a standout meal-prep superstar. Save and schedule this recipe with CookifyAI to plan your week, streamline shopping, and organize ingredient quantities across multiple recipes:

  • Smart shopping lists sorted by store section
  • Automatic total quantity calculations across all planned recipes
  • No duplicate ingredient purchases or forgotten staples
  • Effortless, efficient weekly meal prep and organization

Pro tip: If you’re prepping several grain-free recipes for the week, schedule them together—CookifyAI consolidates ingredients like coconut aminos or arrowroot so you buy exactly what you need. Less waste, more convenience!

Cook and Prep Times

Prep Time: 15 minutes
Cook Time: 20 minutes
Total Time: 35 minutes

Enjoy bright, flavorful, and totally gluten-free crispy orange chicken at your table—no takeout menu required!

Paleo Made Simple: Easy, Delicious Recipes to Kickstart Your Healthy Journey

Easy & Delicious Paleo Diet Recipes for Beginners

Introduction

Getting started with the paleo diet doesn’t have to be daunting! These Easy & Delicious Paleo Diet Recipes for Beginners focus on wholesome ingredients, bold flavors, and straightforward prep—perfect for busy lifestyles or anyone wanting a fresh, healthy meal. With simple steps and no processed ingredients, paleo recipes support both flavor and nutrition, making them a fantastic choice for anyone ready to eat clean without sacrificing taste.

Why Paleo Recipes are a Crowd Pleaser

Paleo meals emphasize real, unprocessed foods: lean proteins, fresh vegetables, nuts, and healthful fats. Their naturally gluten- and dairy-free approach makes them a hit for a variety of dietary preferences, so everyone at the table can enjoy. What’s more, these dishes often come together quickly—ideal for both health-conscious families and solo cooks looking for minimum fuss and maximum flavor.

Simple Paleo Breakfast: Veggie Egg Muffins

A favorite among paleo beginners, veggie egg muffins are portable, customizable, and satisfyingly savory. Just whisk eggs with your favorite fresh veggies and bake in a muffin tin—it’s a great make-ahead option for busy mornings.

Lunch Staple: Chicken & Avocado Salad

This hearty salad delivers protein, fiber, and healthy fats in every bite. Shred some cooked chicken, toss it with diced avocado, cherry tomatoes, cucumber, and a squeeze of fresh lemon juice. Simple, nourishing, and ready in minutes.

Easy Paleo Dinner: Sheet Pan Salmon & Veggies

Dinner can be on the table in about 30 minutes with this crowd-pleasing sheet pan meal. Place salmon fillets and assorted seasoned vegetables (like broccoli, carrots, and bell peppers) on a tray, drizzle with olive oil, and roast until cooked through. Fast, flavorful, and minimal cleanup!

Serving Suggestions for a Well-Balanced Paleo Plate

Pair your protein main with crisp salads, roasted root vegetables, or a side of cauliflower rice for a satisfying meal. Keep a small stash of mixed nuts or fresh fruit on hand for a quick snack or a naturally sweet dessert.

Nutritional Information and Serving Size

These recipes typically yield 4 servings each, featuring balanced amounts of protein, healthy fats, and fiber, while being lower in carbs and free from grain or dairy. Each serving of a veggie egg muffin or salad averages around 200 to 350 calories, while the sheet pan salmon dinner comes in at about 400 calories per serving, depending on portion size and vegetables used.

Easy & Delicious Paleo Diet Recipes for Beginners (Recap)

With bold, fresh flavors and simple instructions, these beginner-friendly paleo recipes make healthy eating accessible and enjoyable for everyone. They’re perfect for prepping ahead, feeding a family, or serving at your next casual dinner party.

[ingredients]
For Veggie Egg Muffins:
– 8 large eggs
– 1/2 cup diced bell peppers
– 1/2 cup chopped spinach
– 1/4 cup diced onion
– Salt and pepper to taste
– Olive oil, for greasing

For Chicken & Avocado Salad:
– 2 cooked chicken breasts, shredded
– 1 large ripe avocado, diced
– 1 cup cherry tomatoes, halved
– 1/2 cucumber, diced
– 2 tablespoons olive oil
– Juice of 1 lemon
– Salt and pepper to taste

For Sheet Pan Salmon & Veggies:
– 4 salmon fillets
– 2 cups mixed vegetables (broccoli, carrots, bell peppers)
– 2 tablespoons olive oil
– 1 teaspoon garlic powder
– 1 teaspoon dried oregano
– Salt and pepper to taste
[/ingredients]

💡Meal Planning Tip: Save this recipe collection to automatically generate a downloadable, organized shopping list sorted by grocery section. This way, you’ll buy exactly what you need—making healthy meal planning simpler and shopping runs more efficient!

CookifyAI meal planning interface

Instructions

  1. Veggie Egg Muffins

    1. Preheat the oven to 350°F and lightly grease a muffin tin with olive oil.
    2. In a large bowl, whisk the eggs, then add bell peppers, spinach, onion, salt, and pepper.
    3. Divide the mixture evenly between muffin cups. Bake 18–20 minutes or until set. Cool slightly before serving.
  2. Chicken & Avocado Salad

    1. Combine shredded chicken, avocado, tomatoes, cucumber, olive oil, and lemon juice in a large bowl.
    2. Season with salt and pepper. Toss gently and serve immediately.
  3. Sheet Pan Salmon & Veggies

    1. Preheat oven to 400°F. Line a baking sheet with parchment paper.
    2. Arrange salmon fillets and mixed veggies on the sheet. Drizzle with olive oil and sprinkle with garlic powder, oregano, salt, and pepper.
    3. Roast for 20–25 minutes, or until the salmon flakes easily and veggies are tender.

Weekly Meal Planning

Incorporating paleo recipes into your weekly routine is a smart move for healthy eating and hassle-free prep. Save and schedule these recipes to generate a unified shopping list and plan out your breakfasts, lunches, and dinners for the week—making the paleo diet easier to stick with.

Planning Benefits:

  • Automatically compiles ingredient totals across multiple recipes
  • Organizes your shopping list by grocery store sections
  • Reduces food waste by consolidating overlapping items
  • Keeps you on track with balanced, nutritious meal prep

Pro tip: Use CookifyAI’s scheduling to batch similar prep tasks—like chopping vegetables for several meals—saving you time and making paleo eating a breeze!

Cook and Prep Times

Prep Time: 15 minutes
Cook Time: 20–25 minutes
Total Time: 35–40 minutes

Ready to make paleo eating simple and delicious? Get cooking and let healthy eating become your new normal!

Paleo Perfection Unleashed: Effortless One-Pan Dinners for Wholesome Flavor

Delicious Paleo Sheet Pan Meals

Introduction

Delicious Paleo Sheet Pan Meals are a game-changer for anyone seeking flavorful, wholesome dinners with minimal cleanup. By combining lean proteins, crisp vegetables, and simple seasonings on a single pan, you’ll create vibrant meals that fit perfectly within a Paleo lifestyle. These dinners are ideal for busy weeknights or lazy Sundays—quick to prep, fuss-free to cook, and universally loved by adults and kids alike.

Why Paleo Sheet Pan Meals Are a Dinnertime Win

With their one-pan convenience, Paleo sheet pan meals strike the perfect balance between simplicity and bold flavors. These recipes feature natural, wholesome ingredients—think juicy chicken thighs, root vegetables, and loads of fresh herbs—all roasted together so the flavors meld beautifully. The result? Balanced, nutrient-rich meals with beautifully caramelized edges and tender centers—perfect for anyone looking to eat clean without sacrificing taste.

Choosing the Best Ingredients for Your Sheet Pan Meal

For the most delicious Paleo sheet pan meals, choose high-quality proteins like chicken, salmon, or pork tenderloin, paired with vegetables such as sweet potatoes, bell peppers, broccoli, and red onions. A flavorful marinade (olive oil, garlic, fresh herbs, and lemon juice) not only tenderizes the meat but also infuses your entire dish with mouthwatering aroma.
Add a handful of nuts or seeds for crunch, and finish with fresh herbs for a pop of color and flavor.

How to Assemble and Roast Your Paleo Sheet Pan Dinner

Start by preheating your oven and lining a large baking sheet with parchment paper for easy cleanup. Arrange your protein and vegetables in a single layer, ensuring even roasting. Drizzle everything with olive oil and season generously with salt, pepper, and your choice of spices (paprika, cumin, or rosemary). For best results, roast until the protein is cooked through and the vegetables are tender and caramelized—usually about 25–35 minutes, depending on your choices.

Serving Suggestions for Unforgettable Paleo Sheet Pan Meals

Enhance your meal with a squeeze of fresh lemon, a sprinkle of chopped parsley, or a dollop of homemade paleo-friendly sauce (like tahini or chimichurri). Serve straight from the pan for a rustic family-style meal, or transfer to plates for an elegant touch—either way, these vibrant meals are sure to wow your dinner table.

Nutritional Information and Serving Size

This basic sheet pan recipe serves 4 and delivers about 350–450 calories per serving, depending on your protein and vegetable choices. With zero added grains, dairy, or processed ingredients, it’s a filling, nutrient-dense option that aligns perfectly with Paleo principles.

Delicious Paleo Sheet Pan Meals (Recap)

This recipe showcases the magic of effortless sheet pan cooking—everything roasts together, soaking up seasonings and juices for maximum flavor. The result is a colorful, satisfying meal that appeals to every palate and keeps dinner stress to a minimum.

[ingredients]
1 lb boneless, skinless chicken thighs (or salmon fillets, pork tenderloin, or steak)
1 large sweet potato, cubed
1 red bell pepper, chopped
1 cup broccoli florets
1 red onion, sliced
2 tbsp olive oil
2 cloves garlic, minced
1 tbsp fresh rosemary or thyme (or 1 tsp dried)
1 tsp paprika
Salt and black pepper, to taste
Optional: ¼ cup chopped nuts or seeds, fresh parsley, lemon wedges
[/ingredients]

💡Meal Planning Tip: Save this recipe to automatically generate an organized shopping list with all ingredients sorted by store section—perfect for efficient grocery trips and meal planning.

CookifyAI meal planning interface

Instructions

  1. Preheat your oven to 425°F (220°C) and line a large baking sheet with parchment paper.
  2. In a large bowl, toss your protein and vegetables with olive oil, minced garlic, rosemary or thyme, paprika, salt, and black pepper until evenly coated.
  3. Spread everything in a single layer on the prepared baking sheet, keeping protein pieces separate from vegetables for even cooking.
  4. Roast for 25–35 minutes, flipping vegetables halfway through, until protein is cooked through and veggies are golden and tender.
  5. If using, sprinkle with chopped nuts or seeds in the final 5 minutes for extra crunch.
  6. Serve hot, garnished with fresh parsley and lemon wedges if desired.

Weekly Meal Planning

This Paleo sheet pan dinner is a meal prep dream. Save and schedule this recipe to meal plan for the week and auto-generate shopping lists that group ingredients from all your meals—making your grocery run streamlined and stress-free.

Planning Benefits:

  • Automatically calculates total ingredient amounts when planning multiple sheet pan dinners
  • Organizes your grocery list by store section so you shop efficiently
  • Prevents overbuying and forgotten items
  • Makes batch prepping and weekly menus healthier and easier

Pro tip: When planning lunches and dinners for the week, schedule all your recipes to see overlapping ingredients. For example, if two recipes need broccoli and lemon, your list reflects the precise amount for both!

Cook and Prep Times

Prep Time: 15 minutes
Cook Time: 30 minutes
Total Time: 45 minutes

Enjoy these delicious Paleo sheet pan meals for flavorful, fuss-free dinners that make healthy eating truly effortless!

30+ One-Pan Wonders: Quick & Healthy AIP and Paleo Sheet Pan Dinners

30+ AIP and Paleo Easy Sheet Pan Dinners

Introduction

If you’re seeking effortless, wholesome dinners that fit both AIP (Autoimmune Protocol) and Paleo lifestyles, these 30+ easy sheet pan dinners are the answer. Sheet pan meals offer a stress-free way to get dinner on the table—just assemble your protein and veggies, season, toss them on a tray, and let the oven do the work. Perfect for busy weeknights or meal prepping, these recipes are designed to be as nourishing as they are convenient.

Why Sheet Pan Dinners Are a Game Changer

Sheet pan dinners are beloved for their simplicity, minimal cleanup, and ability to pack bold flavors in every bite. They allow you to cook everything together, blending natural juices and seasonings for delicious, one-pan meals. With 30+ AIP and Paleo-friendly versions, you’ll never run out of inspiration or variety.

What Makes These Sheet Pan Recipes Special?

Every dinner on this list avoids grains, legumes, dairy, and processed ingredients—fully compliant with both AIP and Paleo guidelines. These recipes highlight lean proteins, fresh vegetables, and vibrant herbs and spices, creating satisfying and nutrient-dense dishes. With options ranging from zesty lemon-garlic chicken to savory herb-crusted fish and colorful veggie medleys, there’s a meal here for every palate.

Building the Ultimate AIP & Paleo Sheet Pan Dinner

The formula is simple: choose your protein (chicken, beef, fish, turkey, or even compliant sausages), pair with a mix of non-nightshade, seasonal veggies (think broccoli, carrots, asparagus, Brussels sprouts, or sweet potatoes), add healthy fats like olive oil or coconut oil, and season with fresh or dried herbs. Roast until everything is caramelized and juicy—the result is a balanced and flavorful meal with minimal effort.

Serving Ideas and Variations

These sheet pan dinners are endlessly adaptable. Serve over a bed of cauliflower rice, pair with a crisp salad, or simply enjoy as is. Vary the veggies and proteins to keep things interesting week after week. For extra flavor, finish with a drizzle of compliant homemade sauce or fresh herbs before serving.

Nutritional Information and Serving Size

Most sheet pan dinners from this collection serve 3–4 people and provide approximately 250–400 calories per serving, depending on the chosen protein and vegetables. All recipes keep carbs and sugars low, while offering ample fiber, vitamins, and healthy fats—making them a perfect fit for AIP and Paleo meal plans.

[ingredients]
Sample Sheet Pan Dinner (Lemon-Herb Chicken & Veggies)
– 4 boneless, skinless chicken thighs (AIP and Paleo compliant)
– 2 cups broccoli florets
– 1 cup sliced carrots
– 1 cup chopped sweet potato
– 3 tbsp olive oil or avocado oil
– 1 tbsp fresh rosemary and/or thyme, chopped
– 2 cloves garlic, minced
– 1 lemon, sliced
– ½ tsp sea salt
– ¼ tsp ground ginger or turmeric (AIP friendly)
– Black pepper (omit for AIP, optional for Paleo)
[/ingredients]

💡Meal Planning Tip: Save this recipe to instantly generate a categorized shopping list with all the ingredients organized by grocery aisle—making meal planning and healthy grocery shopping stress-free!

CookifyAI meal planning interface

Instructions

  1. Preheat the oven to 400°F (200°C). Line a large sheet pan with parchment paper.
  2. Arrange chicken thighs and vegetables evenly on the pan.
  3. In a small bowl, combine olive oil, chopped herbs, garlic, sea salt, ground ginger/turmeric, and the juice of half a lemon.
  4. Drizzle the mixture over the chicken and veggies, tossing gently to coat. Lay lemon slices on top of the chicken.
  5. Bake for 25–30 minutes or until chicken is cooked through (internal temp 165°F) and veggies are tender.
  6. Remove from oven, garnish with fresh herbs, and serve hot.

Weekly Meal Planning

Sheet pan dinners are ideal for prepping ahead—simply portion leftovers into containers for weekday lunches or freeze extras for future meals. Save and schedule these recipes for the week, and CookifyAI will consolidate all your ingredients, generate a smart shopping list, and organize everything by grocery section for ultra-efficient shopping.

**Planning Benefits:**

  • Automatically adds up ingredient quantities across your meal plan
  • Eliminates duplicate purchases and forgotten essentials
  • Saves time and reduces stress with streamlined grocery trips
  • Makes healthy eating effortless, even when meal prepping multiple dinners

Pro tip: Schedule your weekly recipes and watch as CookifyAI calculates how much of each vegetable, oil, or protein you need—helping you buy just the right amount while minimizing food waste.

Cook and Prep Times

Prep Time: 15 minutes
Cook Time: 30 minutes
Total Time: 45 minutes

Conclusion

With these 30+ AIP and Paleo easy sheet pan dinners, you’re armed with flavorful, nutritious meals that keep weeknight dinners quick and cleanup simple. Rely on this collection for meal prepping and variety, and make healthy eating an easy part of your routine.

Paleo Perfection: Golden Apple Bars for a Gluten-Free, Dairy-Free Delight

Paleo Apple Bars (Gluten Free, Dairy Free)

Introduction

Paleo Apple Bars are the ultimate treat for those seeking a healthy, wholesome snack that doesn’t sacrifice flavor for nutrition. Bursting with fresh apples, warming spices, and naturally sweetened with maple syrup or honey, these bars perfectly embody everything you want in an energizing snack or quick breakfast. Since they’re gluten free and dairy free, they’re a crowd-pleaser at gatherings or an ideal lunchbox addition for just about anyone.

Deliciously Unique Paleo Apple Bars

What sets these Paleo Apple Bars apart is their combination of simple, naturally sourced ingredients and bold fall-inspired flavors—all while being entirely grain free and dairy free. The base offers just the right amount of chewiness, while juicy bits of apple provide sweetness and moisture. They’re lightly spiced with cinnamon for comfort and depth, making these bars as perfect for cozy afternoons as they are for meal prepping healthier snacks in advance.

Preparing the Perfect Apple Filling

The apple filling is the star of these bars. Choose a crisp, tart apple variety such as Granny Smith for a naturally low-sugar result, or go sweeter with Gala or Fuji if you prefer. Dice the apples finely to ensure that every bite is juicy and tender. To enhance flavor, toss the apples with a dash of cinnamon, a squeeze of lemon juice, and a drizzle of maple syrup or honey. Letting the mixture rest for about 5 minutes allows the flavors to meld wonderfully before adding them to your batter.

Assembling Your Paleo Apple Bars

Creating these bars is simple and forgiving. Blend your dry ingredients, stir together the wet components, and then combine, folding in the spiced apple mixture last. Spread the batter evenly into a parchment-lined baking dish and sprinkle the top with a few extra apple pieces or a touch of cinnamon. Bake until golden and let them cool fully before slicing so the bars set with clean edges.

Serving Suggestions for Show Stopping Paleo Apple Bars

Enjoy these Paleo Apple Bars on their own, or elevate them with a dollop of coconut yogurt or a drizzle of almond butter. Pack them for on-the-go energy, serve at brunch with a side of fresh berries, or cut into small squares for a wholesome snack platter. Their inviting flavor means they’ll disappear quickly, whether at family picnics or friendly get-togethers.

Nutritional Information and Serving Size

This recipe yields about 12 bars. Each bar contains approximately 120–150 calories, primarily from fruit and healthy fats. Free from refined sugars, gluten, and dairy, these Paleo bars cater to a range of dietary needs and provide a naturally energizing snack or breakfast option.

[ingredients]
1 cup almond flour
1/4 cup coconut flour
1/2 teaspoon baking soda
1/2 teaspoon ground cinnamon (plus extra for sprinkling)
1/4 teaspoon fine sea salt
2 large eggs
1/3 cup maple syrup or raw honey
1/4 cup melted coconut oil
1 teaspoon vanilla extract
1 1/2 cups peeled, finely diced apples (about 2 apples)
1 tablespoon lemon juice
Optional: 1/4 cup chopped walnuts or pecans
Optional: 2 tablespoons unsweetened shredded coconut
[/ingredients]

💡Meal Planning Tip: Save this recipe to automatically generate an organized shopping list with all ingredients sorted by store section—perfect for efficient grocery trips and seamless meal planning.

CookifyAI meal planning interface

Instructions

  1. Preheat oven to 350°F (175°C). Line an 8×8 inch baking pan with parchment paper for easy removal.
  2. In a small bowl, toss diced apples with lemon juice and set aside.
  3. In a larger bowl, whisk together almond flour, coconut flour, baking soda, cinnamon, and sea salt.
  4. In a separate bowl, whisk eggs, maple syrup (or honey), melted coconut oil, and vanilla until smooth.
  5. Pour wet ingredients into the dry ingredients and stir until just combined.
  6. Fold in the diced apples (and optional nuts/shredded coconut, if using).
  7. Spread the batter evenly in your prepared pan. Sprinkle with extra cinnamon and optional nuts or coconut for garnish.
  8. Bake 25–28 minutes, or until golden and a toothpick inserted comes out clean.
  9. Let cool completely in the pan. Remove, slice into bars, and enjoy!

Weekly Meal Planning

This recipe is a fantastic choice for weekly meal prep—make a batch on Sunday and enjoy grab-and-go bars all week long. Save and schedule this recipe to plan your nourishment for the week, and generate smart shopping lists that consolidate ingredients for all your planned meals.

Planning Benefits:

– Automatically calculates total ingredient quantities across multiple recipes
– Organizes shopping lists by grocery store sections
– Prevents duplicate purchases and missed items
– Streamlines weekly meal prep for more time, less stress

Pro tip: When planning multiple recipes, schedule your meals to see ingredient overlap, making it easier to buy exactly what you need for your week’s nourishing creations and reduce waste.

Cook and Prep Times

Prep Time: 15 minutes
Cook Time: 25–28 minutes
Total Time: 40–45 minutes (plus cooling time)

Crispy Paleo Orange Chicken: A Delicious, Allergen-Friendly Takeout Twist

Crispy Paleo Orange Chicken (Gluten-free, Soy-free, AIP Option) • Heal Me Delicious

Introduction

Few dishes offer the irresistible combination of sweet, tangy, and crispy quite like Crispy Paleo Orange Chicken. This gluten-free and soy-free recipe delivers all the comforting flavors of takeout, but in a nourishing and allergen-friendly way. Whether you’re looking for a healthier dinner everyone can enjoy or need an Autoimmune Protocol (AIP) option, this recipe makes weeknight cooking fresh, flavorful, and totally satisfying.

Why Crispy Paleo Orange Chicken Is a Must-Try

Orange Chicken is a crowd-pleaser for good reason: it’s coated in a zesty, slightly caramelized citrus sauce that clings to crunchy, golden morsels of juicy chicken. This version skips the usual gluten and soy, relying instead on wholesome ingredients and a clever grain-free breading that delivers true crunch. The rich flavors and satisfying texture will have everyone—regardless of dietary needs—coming back for seconds.

Paleo, AIP-Friendly, and Gluten-Free Benefits

Every component is carefully selected: cassava or arrowroot flour replaces wheat flour, coconut aminos give depth without soy, and a touch of honey and orange juice brings the natural sweetness (skip the honey in strict AIP phase). By swapping out inflammatory oils for avocado or coconut oil, you get a lighter dish that tastes as delicious (if not better) than your favorite restaurant version.

Ingredients for Crispy Paleo Orange Chicken

[ingredients]
– 1.5 lbs boneless, skinless chicken thighs, cut into bite-sized pieces
– 3/4 cup arrowroot or cassava flour
– 2 large pastured eggs (omit for AIP, use coconut cream as a binder)
– 1/2 tsp sea salt
– 1/2 tsp garlic powder (omit for strict AIP)
– 1/4 tsp ground ginger (optional, and omit for strict AIP)
– 3-4 tbsp avocado oil or coconut oil (for pan-frying)

For the Orange Sauce:
– 1/2 cup fresh orange juice
– Zest from 1 orange
– 2-3 tbsp honey (omit for strict AIP, use apple juice concentrate instead)
– 2 tbsp coconut aminos
– 1 tbsp apple cider vinegar
– 1 tbsp arrowroot flour mixed with 1 tbsp water (for thickening)
– Pinch of salt
– Green onions and sesame seeds for garnish (omit sesame for AIP)
[/ingredients]

💡Meal Planning Tip: Save this recipe to CookifyAI and generate a sorted, organized shopping list in seconds. Shopping lists are automatically grouped by store section, helping you breeze through grocery trips and stay on top of all your meal planning.

CookifyAI meal planning interface

Instructions

  1. In a large bowl, whisk eggs (or coconut cream for AIP) with sea salt, garlic powder, and ginger. In a separate bowl, add the arrowroot or cassava flour.
  2. Dip each chicken piece into the egg mixture (or coconut cream), then dredge in the flour until well coated. Shake off excess.
  3. Heat avocado or coconut oil in a large skillet over medium-high. Working in batches, place the coated chicken in the pan, leaving space between each piece. Fry 4-5 minutes per side, or until crispy, golden brown, and cooked through. Drain on a paper towel–lined plate.
  4. While chicken is cooking, whisk together orange juice, zest, honey (or apple juice concentrate), coconut aminos, apple cider vinegar, and pinch of salt in a small saucepan. Simmer over medium heat for 3-5 minutes.
  5. Stir the arrowroot slurry into the sauce and cook, stirring, until thickened and glossy—1-2 minutes. Remove from heat.
  6. Toss the fried chicken in the warm orange sauce to coat evenly. Top with sliced green onions and sesame seeds (omit for AIP) if desired.

Serving and Nutrition

Serve hot over cauliflower rice, steamed broccoli, or a bed of zoodles. This recipe yields 4 servings, with approximately 350 calories per serving (sauce and chicken). It’s a healthy, naturally gluten-free and soy-free version that doesn’t sacrifice taste or indulgence.

Weekly Meal Planning

Crispy Paleo Orange Chicken is meal prep–friendly and holds up well for healthy lunches and dinners throughout the week. Save and schedule this recipe with CookifyAI to create a tailored plan and generate consolidated shopping lists that include all your weekly meals.

Planning Benefits:

  • Effortlessly calculates total ingredient quantities for multiple meals
  • Groups shopping lists by grocery section to save you time
  • Eliminates duplicate purchases and forgotten ingredients
  • Boosts organization for smoother weekly meal planning

Pro tip: Schedule this and other favorite recipes on CookifyAI—if you’re using eggs or orange juice in multiple dishes, your shopping list will automatically update for the exact amounts needed, minimizing food waste and extra trips to the store.

Cook and Prep Times

Prep Time: 20 minutes
Cook Time: 20 minutes
Total Time: 40 minutes

Recap: Unbeatable Paleo Orange Chicken

This Crispy Paleo Orange Chicken is a flavor-packed, family-friendly dinner that proves gluten-free, soy-free, and AIP-friendly meals can be just as delicious as the classics. Savor the tangy-sweet sauce and satisfy your craving for takeout—right from your own healthy kitchen!

Heal Me Delicious Cinnamon Rolls: A Wholesome Twist on a Classic Comfort Treat

Cinnamon Rolls • Heal Me Delicious

Introduction

Few treats can match the irresistible aroma and comforting flavor of homemade cinnamon rolls. With their pillowy-soft dough and cinnamon-sugar swirl, these cinnamon rolls—crafted with nourishing, thoughtful ingredients—pair indulgence with wellness. Ideal for breakfasts, brunches, or a delectable dessert that pleases every palate, this recipe is a go-to for anyone looking for a crowd-pleasing bake that’s as wholesome as it is delicious.

Why These Cinnamon Rolls Are Truly Special

What sets these cinnamon rolls apart is their focus on ingredients that both heal and delight. The recipe uses nutrient-rich, allergy-friendly options inspired by the Heal Me Delicious kitchen, making them accessible to more people—including those with gluten or dairy sensitivities. The rolls come out incredibly soft, with a rich flavor and cinnamon swirl that delivers pure comfort without compromise.

Perfecting the Cinnamon Swirl and Dough

The secret to fluffy cinnamon rolls is letting the dough rise properly for a light, tender crumb. Using coconut sugar and a wholesome dairy-free butter substitute ensures a naturally sweet and rich filling. The aromatic blend of cinnamon and vanilla ties together a flavor that’s warm and satisfying.

Easy Step-by-Step Assembly

After preparing the dough and generous cinnamon filling, simply roll out the dough, spread the filling, then roll and slice. A second rise ensures they bake up soft and tall. Finish with a drizzle of simple glaze or a dusting of powdered sugar for an extra touch of indulgence.

Serving Suggestions

Serve these cinnamon rolls warm from the oven with your favorite tea or coffee for an inviting breakfast or brunch. For dessert, add a scoop of dairy-free vanilla ice cream or a dollop of coconut whipped cream for a special twist. Their irresistible flavor and tender texture make them a guaranteed hit at any table.

Nutritional Information and Serving Size

This recipe yields 9 hearty cinnamon rolls. Each roll contains approximately 210-250 calories, depending on glaze and optional toppings. They offer sweetness and comfort balanced with thoughtfully selected, healing ingredients.

Wholesome Cinnamon Rolls Recap

Combining the nostalgic comfort of classic cinnamon rolls with allergy-friendly, healthful tweaks, this recipe delivers joy and healing in every swirl.

[ingredients]
2 cups gluten-free all purpose flour (or regular if not GF)
2 1/4 tsp instant yeast
1/2 cup unsweetened non-dairy milk (such as almond or oat)
1/3 cup coconut sugar
1/4 cup melted coconut oil or vegan butter
1/4 cup unsweetened applesauce
1 tsp vanilla extract
1/4 tsp sea salt

Filling:
1/3 cup coconut sugar
1 1/2 tbsp ground cinnamon
1/4 cup softened vegan butter or coconut oil

Optional glaze:
1/2 cup powdered sugar (sifted)
2-3 tsp non-dairy milk
1/4 tsp vanilla extract
[/ingredients]

💡Meal Planning Tip: Save this recipe to automatically create a categorized shopping list—making dietary swaps and ingredient organization a breeze throughout your week.

CookifyAI meal planning interface

Instructions

  1. In a bowl, gently warm the non-dairy milk to just warm (not hot), then stir in the yeast and 1 tbsp coconut sugar. Let sit for 5 minutes, until frothy.
  2. In a large mixing bowl, combine flour, remaining coconut sugar, melted coconut oil (or vegan butter), applesauce, vanilla, and salt. Add yeast mixture and mix until a soft dough forms.
  3. Knead dough for 2-3 minutes, adding a little extra flour as needed if sticky, then cover and allow to rise in a warm spot for 45-60 minutes, or until doubled in size.
  4. Preheat oven to 350°F (175°C). Grease or line a 9-inch baking dish.
  5. In a small bowl, stir together coconut sugar and cinnamon for the filling.
  6. On a floured surface, roll dough into a rectangle (about 1/4 inch thick). Spread softened butter/coconut oil over dough, then sprinkle cinnamon-sugar filling evenly across the surface.
  7. Roll up dough tightly from the long side, then cut into 9 even rolls. Place in the prepared baking dish. Cover and let rise for another 20-30 minutes.
  8. Bake for 22-28 minutes, until lightly golden.
  9. For glaze, whisk powdered sugar, non-dairy milk, and vanilla until smooth. Drizzle over warm rolls before serving.

Weekly Meal Planning

These cinnamon rolls are ideal for planning breakfast or a wholesome treat throughout the week—simply freeze extras and rewarm! Save and schedule this recipe with CookifyAI to seamlessly organize your meal rotation, build smart, consolidated shopping lists, and track your dietary preferences.

Planning Benefits:

  • Easily double or halve ingredient amounts for batch cooking or small households
  • Auto-generates master shopping lists sorted by store section
  • Integrates ingredients from this and other planned recipes—no repeats, no missed items
  • Makes meal prep stress-free and helps balance nutritious and indulgent recipes all week

Pro tip: When batch prepping, schedule multiple recipes to see ingredient overlaps (like non-dairy milk or gluten-free flour), so you’ll shop more efficiently and reduce food waste.

Cook and Prep Times

Prep Time: 25 minutes (plus rising time)
Cook Time: 25 minutes
Total Time: 1 hour 30 minutes

Asian Chicken Lettuce Wraps: A Fresh, Flavor-Packed Weeknight Delight

Asian Chicken Lettuce Wraps

Introduction

Asian Chicken Lettuce Wraps are a vibrant, flavor-packed option that’s quick enough for busy weeknights but impressive enough to serve as a starter at your next gathering. Featuring crisp lettuce leaves filled with savory minced chicken, crunchy vegetables, and an umami-rich sauce, this dish is a knockout for anyone craving something fresh, light, and satisfying.

Why These Asian Chicken Lettuce Wraps Are a Weeknight Winner

Minimal prep, versatile ingredients, and bold flavors make these lettuce wraps a favorite. The juicy, aromatic chicken pairs beautifully with crisp lettuce and a zingy sauce, making each bite both satisfying and refreshing. Plus, they’re naturally low-carb, gluten-free (with the right sauce), and totally customizable for family or guests.

The Savory Secret Sauce

A punchy sauce is what sets great Asian lettuce wraps apart. This recipe uses a blend of soy sauce, hoisin, rice vinegar, and sesame oil, providing that signature sweet-salty depth with every bite. For a bit of heat, a touch of chili garlic sauce or sriracha can be stirred in — perfect for spice lovers!

Easy Assembly for Stress-Free Dinners

Simply spoon the hot, aromatic chicken and veggie filling into individual lettuce cups just before serving. Top with extra green onions, crunchy chopped peanuts, or a sprinkle of sesame seeds for visual appeal and added texture. This meal is fuss-free yet feels special, inviting everyone to dig in DIY style.

Serving Suggestions to Impress

Serve atop a platter with lime wedges and extra sauce for drizzling. Pair with steamed rice or rice noodles for a heartier meal, or keep it carb-light as a fresh party appetizer. Any leftovers make excellent wraps the next day or can be tossed in a salad for a quick lunch.

Nutritional Information and Serving Size

This recipe serves about 4 people, with each wrap containing around 120–150 calories (depending on fillings and sauce quantity). It’s protein-rich, low in carbs, and high in freshness, making it an excellent choice for health-conscious families.

Irresistible Asian Chicken Lettuce Wraps (Recap)

A symphony of textures and flavors, these lettuce wraps fuse tender chicken with crisp greens and zesty sauce — a crowd-pleasing, healthy, and convenient choice for any meal.

[ingredients]
1 pound ground chicken (or finely chopped chicken breast)
1 tablespoon vegetable oil
1 red bell pepper, finely diced
1/2 cup water chestnuts, diced
2 green onions, thinly sliced
2 cloves garlic, minced
1 tablespoon fresh ginger, grated
1/4 cup hoisin sauce
2 tablespoons soy sauce (low sodium preferred)
1 tablespoon rice vinegar
1 teaspoon sesame oil
Optional: 1 teaspoon chili garlic sauce or sriracha
Bib, butter, or iceberg lettuce leaves, washed and separated
Garnishes: extra green onions, chopped peanuts, sesame seeds, lime wedges
[/ingredients]

💡Meal Planning Tip: Save this recipe to instantly generate a categorized shopping list. All your ingredients, sorted by section, make grocery trips faster and meal prep stress-free.

CookifyAI meal planning interface

Instructions

  1. Heat the vegetable oil in a large skillet or wok over medium-high heat. Add ground chicken, breaking it apart, and cook until lightly browned and no longer pink, about 4–5 minutes.
  2. Add garlic, ginger, and the white part of the green onions. Sauté for 1–2 minutes until fragrant.
  3. Stir in bell pepper and water chestnuts. Cook for another 2–3 minutes until veggies are just tender.
  4. In a small bowl, whisk together hoisin sauce, soy sauce, rice vinegar, sesame oil, and optional chili garlic sauce or sriracha. Pour over the chicken mixture; stir well to combine and simmer for 2 more minutes.
  5. Remove pan from heat. Spoon the warm mixture into lettuce leaves. Top with reserved green onion tops, chopped peanuts, sesame seeds, and a squeeze of lime juice if desired.
  6. Serve immediately and let everyone build their own wraps at the table!

Weekly Meal Planning

Asian Chicken Lettuce Wraps are ideal for meal preppers and busy families. Save and schedule this recipe with CookifyAI to plan it into your weekly rotation. CookifyAI consolidates ingredients from all your recipes, organizing them by store section automatically — streamlining supermarket runs and helping you avoid buying duplicates.

Planning Benefits:

– Generate precise, total ingredient quantities for all scheduled recipes
– Categorize items in your shopping list by grocery section for faster shopping
– Simplify weekly meal prep and reduce planning time
– Avoid overlooked ingredients and food waste

Pro tip: Planning several dinner recipes using chicken? Schedule your recipes so CookifyAI will total up exactly how much chicken to buy for the week — no math or last-minute trips needed.

Cook and Prep Times

Prep Time: 15 minutes
Cook Time: 12 minutes
Total Time: 27 minutes

Enjoy the fresh flavors, easy prep, and meal-planning magic of Asian Chicken Lettuce Wraps — soon to be your go-to healthy weeknight meal!

45 Clean & Delicious Paleo Recipes to Revitalize Your Meal Plan

45 Paleo Recipes Packed with Natural Goodness

Introduction

Eating clean has never been easier—or tastier—than with these 45 Paleo recipes packed with natural goodness. Free from grains, dairy, and processed ingredients, each dish harnesses whole foods and simple procedures, making it a breeze to enjoy feel-good meals every day. Whether you’re a die-hard Paleo devotee or just looking to incorporate more wholesome fare into your weekly routine, this collection is sure to inspire countless delicious, nutritious dinners, breakfasts, and snacks that everyone at the table will love.

Why These Paleo Recipes Stand Out

Unlike restrictive diets that feel like a chore, these recipes focus on the bold flavors and pure ingredients that make Paleo so satisfying. From one-pan suppers and slow cooker favorites to vibrant salads and hearty breakfast bowls, you’ll find easy options that deliver the perfect balance of taste and nutrition while keeping prep and cleanup to a minimum. Each dish is as nourishing as it is delicious—so you can eat with confidence and joy.

What Makes a Recipe Paleo?

Paleo recipes are built around naturally nutrient-dense foods, including lean meats, fish, eggs, fresh produce, nuts, and seeds. They exclude grains, dairy, refined sugars, and artificial additives, favoring real, whole ingredients that support wellness. This approach emphasizes sustainability and natural flavors, leaving you feeling energized and satisfied.

Weekly Meal Planning with 45 Paleo Recipes

Building your meals around Paleo principles not only promotes better health but also makes weekly meal planning simpler. Whether you want to prep family dinners in advance, streamline your shopping trips, or try new flavors, these 45 recipes serve as the perfect template for a better week in the kitchen.

  1. Paleo Sheet Pan Chicken & Veggies
  2. Slow Cooker Beef Stew
  3. Spaghetti Squash Bolognese
  4. Salmon with Citrus Salsa
  5. Egg Muffin Breakfast Cups
  6. Sweet Potato & Shrimp Skillet
  7. Paleo Zoodle Pad Thai
  8. Garlic Herb Pork Tenderloin
  9. Apple-Cinnamon Chia Pudding
  10. Cajun Cauliflower Rice Bowls
  11. Paleo Turkey Chili
  12. Lemon Pepper Grilled Fish
  13. Steak and Avocado Salad
  14. Butternut Squash Soup
  15. Paleo Chicken Piccata
  16. Moroccan Lamb Meatballs
  17. Mushroom & Spinach Omelet
  18. Tex-Mex Stuffed Peppers
  19. Mango-Lime Chicken Stir Fry
  20. Eggplant Lasagna
  21. Thai Coconut Curry Shrimp
  22. Paleo Granola Clusters
  23. Rosemary Garlic Roasted Chicken
  24. Sun-dried Tomato Zucchini Noodles
  25. Cilantro Lime Cauliflower Rice
  26. Buffalo Chicken Lettuce Wraps
  27. Paleo Banana Pancakes
  28. Sweet Potato Hash with Eggs
  29. Ginger-Turmeric Salmon Cakes
  30. Harvest Veggie & Bacon Skillet
  31. Paleo Pesto Chicken Bake
  32. Carrot Parsnip Fries
  33. Orange Glazed Pork Chops
  34. Paleo Broccoli Cheese Soup (Dairy-Free)
  35. Sheet Pan Fajita Bowls
  36. Crab & Avocado Salad Boats
  37. Sesame Chicken Stir Fry
  38. Balsamic Glazed Steak Bites
  39. Roasted Garlic Brussels Sprouts
  40. Paleo Chicken Enchiladas
  41. Tropical Fruit Salad with Lime
  42. Coconut Almond Energy Balls
  43. Turkey Zucchini Burgers
  44. Spiced Pumpkin Soup
  45. Paleo Brownie Bites

[ingredients]
Due to the nature of this roundup, ingredients will vary by recipe. However, having pantry staples like coconut oil, olive oil, fresh herbs, citrus, eggs, various vegetables, chicken breasts, ground beef or turkey, salmon fillets, nuts, seeds, and Paleo-approved flours (e.g., almond or coconut) will get you started on most dishes above.
[/ingredients]

💡Meal Planning Tip: Save these recipes to instantly generate an organized shopping list—grouped by produce, proteins, and pantry staples—for a seamless grocery experience and streamlined meal planning.

CookifyAI meal planning interface

How to Make the Most of Your Paleo Menu

1. **Batch Cooking**: Select a few recipes to double and portion out for portable lunches or quick weeknight dinners.
2. **Ingredient Overlap**: Choose recipes that share similar ingredients (like using cauliflower rice in different dishes) to minimize waste and maximize efficiency.
3. **Prep-Ahead Staples**: Pre-chop veggies, marinate proteins, and prep breakfast options in advance to save time on busy mornings and nights.
4. **Flavor Boosters**: Invest in high-quality olive oil, fresh herbs, and citrus for easy finishing touches that brighten any meal.

Weekly Meal Planning

These 45 Paleo recipes are your ticket to a healthy, satisfying week—without ever feeling repetitive or deprived. Save and schedule your meals with CookifyAI to build a complete, organized shopping list that combines overlapping ingredients, eliminates duplicates, and ensures you never forget an essential item.

**Planning Benefits:**
– Calculates total ingredient needs across multiple meals
– Organizes shopping lists by store section
– Prevents food waste with smarter portion control
– Simplifies weekly prep so you can focus on flavor and nutrition

**Pro Tip:** Planning 4–5 dinners in advance and leveraging leftovers for lunch is a game-changer for busy weeks. Get started with CookifyAI for an even smoother meal planning experience!

Cook and Prep Times

Prep Time: Varies by recipe (average 15–20 minutes per meal)
Cook Time: Varies by recipe (average 20–30 minutes per meal)
Total Time: Most recipes ready in 45 minutes or less

Paleo Recipes Recap

With these 45 Paleo recipes packed with natural goodness, eating healthfully can be delicious, diverse, and truly convenient. Use them to kickstart a meal planning habit that keeps you nourished and satisfied—all week long.

Paleo Indian Naan: Soft, Grain-Free Flatbread for Flavorful Indian Meals

Paleo Indian Naan

Introduction

Paleo Indian Naan is the perfect answer for anyone craving the soft, pillowy flatbread that’s essential to Indian cuisine—without the grains, dairy, or gluten. This recipe masterfully recreates naan’s signature chew and subtle tang using wholesome paleo-friendly ingredients. The result: a bread that’s not only satisfying and flavorful, but also compatible with clean eating goals and many dietary preferences.

Deliciously Unique Paleo Indian Naan

What makes this Paleo Indian Naan stand out is its simplicity and adaptability. Combining almond flour, tapioca flour, and coconut milk produces a delicately crisp exterior and a soft, pull-apart center—everything you love in traditional naan. This bread pairs beautifully with curries, tikka masala, or simply brushed with ghee and sprinkled with fresh herbs.

Preparing the Perfect Paleo Naan Dough

The secret to perfect Paleo Naan is in balancing moistness and structure. Almond flour brings nutty depth, while tapioca flour gives essential stretch. Coconut milk keeps the bread tender, and a splash of apple cider vinegar offers a very slight tang reminiscent of classic naan. Carefully mixing and letting the batter rest for a few minutes ensures you get a cohesive, spreadable dough.

Cooking Your Paleo Indian Naan

Instead of baking, this naan cooks quickly in a skillet. Spoon portions of the batter onto a hot, lightly oiled pan, smoothing it into small rounds. Cook until bubbles form on top and golden spots develop underneath, then flip and finish cooking. The process is fast, so you can have fresh naan on the table in under 30 minutes—no proofing or rising required.

Serving Suggestions for Show-Stopping Paleo Indian Naan

Serve your naan warm and garnish with melted ghee, chopped cilantro, or a sprinkle of flaky sea salt for a truly authentic experience. It’s perfect for scooping sauces, accompanying grilled kebabs, or serving as a wrap for leftovers. For added flavor, stir minced garlic and parsley into the dough before cooking.

Nutritional Information and Serving Size

This recipe yields 4–6 naan breads, depending on the size. Each serving contains approximately 140 calories, 6g fat, 15g carbohydrates, and 3g protein. Fortified with healthy fats and without refined grains, it’s a bread you can enjoy as part of a balanced paleo meal plan.

Deliciously Unique Paleo Indian Naan (Recap)

Grain-free, gluten-free, and dairy-free, this Paleo Indian Naan is an absolute crowd pleaser. Its soft, chewy texture and mild flavor make it the ultimate sidekick for your favorite Indian dishes or as a show-stopping standalone bread.

[ingredients]
1 cup almond flour
1/2 cup tapioca flour (or arrowroot starch)
1/2 teaspoon baking powder
1/4 teaspoon fine sea salt
1/2 cup canned coconut milk, full fat
1 teaspoon apple cider vinegar
2 teaspoons olive oil or ghee (for cooking)
Optional: Chopped cilantro, garlic, or sea salt for garnish
[/ingredients]

💡Meal Planning Tip: Save this recipe to automatically generate an organized shopping list with all ingredients sorted by store section—perfect for efficient grocery trips and meal planning.

CookifyAI meal planning interface

Instructions

  1. In a medium bowl, whisk together almond flour, tapioca flour, baking powder, and salt.
  2. Add the coconut milk and apple cider vinegar. Stir until a thick, smooth batter forms. Let the batter rest for 5 minutes (this helps the flours hydrate).
  3. Heat a nonstick skillet or cast iron pan over medium heat. Add a small amount of olive oil or ghee.
  4. Scoop 1/4 cup portions of batter onto the skillet. Use the back of a spoon to gently spread into a 5–6 inch round.
  5. Cook for 2–3 minutes, until bubbles appear and the edges start to set. Carefully flip and cook for another 2–3 minutes until golden and cooked through.
  6. Remove to a plate and repeat with remaining batter, adding more oil to the skillet as needed.
  7. Brush the warm naan with ghee and sprinkle with optional toppings like cilantro, garlic, or sea salt. Serve immediately.

Weekly Meal Planning

This easy Paleo Indian Naan recipe is ideal for prepping ahead and pairing throughout your week. Save and schedule this recipe with CookifyAI to seamlessly integrate it into your weekly meal plan, generating a smart, consolidated shopping list for all planned recipes.

Planning Benefits:

  • Automatically calculates ingredient quantities for multiple recipes
  • Organizes shopping lists by store section for quicker trips
  • Avoids duplicate purchases and ensures nothing is forgotten
  • Makes weekly meal prep organized and stress-free

Pro Tip: When planning multiple dinners—like curries or grilled proteins—schedule your recipes to have CookifyAI sum overlapping ingredients (e.g., coconut milk for both the naan and curry), minimizing waste and saving you time!

Cook and Prep Times

Prep Time: 10 minutes
Cook Time: 15 minutes
Total Time: 25 minutes

Enjoy soft, pillowy Paleo Indian Naan as a wholesome, delicious addition to your meal rotation!

Fall in Love with Flavor: 11 Paleo Sheet Pan Dinners for a Cozy Autumn Feast

11 Paleo Sheet Pan Fall Dinners

Introduction

When chilly evenings arrive, there’s nothing quite like a hearty, flavor-packed dinner that delivers all the comfort of fall—without a sink full of dishes. These 11 Paleo Sheet Pan Fall Dinners offer vibrant, seasonal vegetables and succulent proteins all on a single pan, maximizing flavor and minimizing cleanup. Simple, wholesome, and crowd-pleasing, these recipes are perfect for busy weeknights or when you want an impressive and nutritious meal with minimal fuss.

Why You’ll Love These Paleo Sheet Pan Fall Dinners

Each recipe takes advantage of fall’s best produce—think sweet potatoes, Brussels sprouts, apples, and squash—and pairs them with satisfying Paleo proteins like chicken, wild-caught fish, or grass-fed beef. Sheet pan dinners not only simplify prep and cleanup, but also allow flavors to mingle as everything roasts together, creating tender, caramelized veggies and perfectly cooked proteins in every bite.

Paleo Sheet Pan Dinner Ideas for Fall

1. **Apple-Glazed Pork Chops with Sweet Potato and Onions**
Juicy pork chops are paired with crisp apples and roasted sweet potatoes, all in a tangy apple cider glaze.
2. **Harvest Chicken with Brussels Sprouts and Delicata Squash**
Chicken thighs, squash rings, and Brussels sprouts are tossed in rosemary and garlic—a quintessential fall combo.
3. **Maple Mustard Salmon with Roasted Broccoli and Red Onion**
Sweet and tangy maple mustard coats flaky salmon fillets, while broccoli and onions roast to golden perfection.
4. **Sausage, Cauliflower, and Pear Sheet Pan Supper**
Savory Paleo sausage mingles with cauliflower florets and pears, offering a fantastic balance of sweet and savory.
5. **Autumn Veggie and Steak Fajita Sheet Pan**
Strips of steak, peppers, and onions get a smoky seasoning, wrapped in big lettuce leaves for a grain-free feast.
6. **Herb Roasted Chicken Breast with Butternut Squash and Cranberries**
Bright cranberries and butternut squash roast alongside herb-crusted chicken for an added pop of color and taste.
7. **Mustard Balsamic Lamb Chops with Rainbow Carrots and Shallots**
Earthy lamb and sweet rainbow carrots make a stunning cold-weather sheet pan dinner.
8. **Buffalo Chicken Thighs with Carrot and Celery Medley**
Spicy baked chicken and roasted veggies, finished with a sprinkle of green onions.
9. **Ginger-Tamari Shrimp with Fall Roasted Vegetables**
Wild shrimp, tamari, and fresh ginger elevate a medley of root veggies.
10. **Stuffed Portobellos with Sausage, Kale, and Pumpkin**
Portobello caps filled with Paleo sausage, kale, and pumpkin for an autumnal twist.
11. **Turmeric Roasted Chicken Drumsticks with Parsnips and Apples**
Warming spices make this a standout, with parsnips adding sweetness and apples lending extra moisture.

[ingredients]
1 lb boneless skinless chicken thighs
1 lb pork chops
1 lb grass-fed steak
1 lb wild-caught salmon fillets
8 chicken drumsticks
1 lb Paleo-friendly sausage (no sugar, no gluten)
1 lb wild-caught shrimp, peeled
6 cups assorted fall vegetables (sweet potatoes, butternut squash, Brussels sprouts, carrots, parsnips, cauliflower)
2 apples, sliced
2 pears, sliced
1 red onion, sliced
1 shallot, sliced
1 bunch kale
4 portobello mushroom caps
1 cup cubed pumpkin or canned pumpkin (no additives)
1/2 cup dried cranberries (unsweetened)
1/4 cup fresh rosemary, chopped
1/4 cup fresh thyme
1/4 cup olive oil or avocado oil
2 tbsp coconut aminos or tamari (for Whole30)
2 tbsp Dijon mustard (sugar free)
2 tbsp apple cider vinegar
2 tbsp pure maple syrup (optional, for Paleo)
2 tbsp balsamic vinegar
1 tbsp ground turmeric
2 tbsp fresh grated ginger
Sea salt and black pepper, to taste
Garlic powder, to taste
Optional: lettuce leaves (for fajitas)
[/ingredients]

💡Meal Planning Tip: Save these recipes to instantly generate a sorted shopping list for all 11 dinners—making grocery trips easier and guaranteeing you’ll never forget a key ingredient!

CookifyAI meal planning interface

Instructions

  1. Preheat your oven to 425°F. Line your sheet pan with parchment paper or a silicone mat for easy cleanup.
  2. Choose your dinner recipe. For chicken or pork, lightly coat protein and veggies with olive or avocado oil and sprinkle with herbs, salt, and pepper.
  3. Arrange proteins and vegetables in a single layer on the parchment-lined sheet pan—you want space for roasting, not steaming.
  4. For recipes using glazes (such as maple mustard or apple cider), whisk ingredients together and brush over protein and/or veggies before baking.
  5. Roast proteins and vegetables for 20–30 minutes, stirring halfway, or until meat is just cooked through and vegetables are caramelized and tender.
  6. Garnish with fresh herbs, a squeeze of lemon, or a sprinkle of dried cranberries, depending on the recipe.
  7. Serve hot, straight from the pan for the ultimate in rustic, no-fuss comfort food.

Weekly Meal Planning

With 11 Paleo sheet pan recipes at your fingertips, meal planning for fall is seamless. Save and schedule these dinners to map out your week and automatically generate precise, consolidated shopping lists—no more stress or forgotten items.

**Planning Benefits:**

  • Automatically tallies total amounts so you buy just what you need
  • Keeps your shopping lists organized by store section for speedier trips
  • Prevents over-buying and reduces food waste
  • Makes meal variety easy by letting you drag and drop recipes into your week

Pro tip: When planning multiple sheet pan dinners for the week, schedule all your meals at once—CookifyAI will update ingredient totals so you know exactly how many pounds of veggies or protein to purchase.

Cook and Prep Times

Prep Time: 15 minutes per recipe
Cook Time: 20–30 minutes per recipe
Total Time: 35–45 minutes per dinner

These 11 Paleo Sheet Pan Fall Dinners combine autumn’s best flavors and ease, making them perfect for families, entertaining, or anyone craving healthy whole-food meals with minimal cleanup. Embrace the season and streamline your evenings—one pan at a time!

Quick Paleo Dinners: Wholesome One-Pan Meals for Busy Nights

Quick Paleo Dinner Recipes

Introduction

Fast-paced evenings shouldn’t mean sacrificing nutrition or flavor. These Quick Paleo Dinner Recipes deliver full-bodied taste and wholesome ingredients, all while staying true to Paleolithic principles: focusing on lean proteins, vibrant veggies, and healthy fats. Whether you’re following a paleo lifestyle or looking to add simple, unprocessed meals to your weeknight menu, these dinner ideas make healthy eating approachable—even on the busiest nights.

Why Quick Paleo Dinners Work for Busy Schedules

What sets quick paleo dinners apart is their natural simplicity—think one-pan meals, rapid grilling, or stovetop sautés. The reliance on fresh produce and quality protein means dinner comes together fast, tastes fresh, and leaves you satisfied without heavy carbs or processed additives. These recipes are perfect for households seeking both health and convenience.

Essentials of a Quick Paleo Dinner

The building blocks are straightforward: protein (like chicken, seafood, beef, or eggs), colorful vegetables (such as bell peppers, broccoli, spinach), and a dash of healthy fats (olive oil, coconut oil, avocado). Herbs and spices do the heavy lifting for flavor, making each meal unique and vibrant. Prep work is minimal and cook times are short, making these meals truly weeknight-friendly.

Sample Recipe: One-Pan Garlic Herb Chicken and Veggies

This quick paleo meal features chicken breasts seared with garlic and herbs, paired with a medley of seasonal vegetables that roast together on one sheet pan. It’s easy to customize with what you have in the fridge and can be on the table in under 30 minutes.

[ingredients]
2 boneless, skinless chicken breasts
2 tablespoons olive oil or avocado oil
1 teaspoon garlic powder
1/2 teaspoon smoked paprika
1 teaspoon dried Italian herbs (or a mix of thyme, oregano, basil)
Salt and pepper to taste
2 cups broccoli florets
1 red bell pepper, sliced
1 small zucchini, sliced
1 small red onion, sliced
Lemon wedges, for serving
[/ingredients]

💡Meal Planning Tip: Save this recipe to automatically generate an organized shopping list with all ingredients sorted by store section—making paleo shopping efficient while ensuring you never miss a key ingredient.

CookifyAI meal planning interface

Instructions

  1. Preheat oven to 425°F. Line a large baking sheet with parchment paper for easy cleanup.
  2. In a small bowl, mix olive oil, garlic powder, smoked paprika, dried herbs, salt, and pepper.
  3. Pat chicken breasts dry. Toss chicken with half of the oil and spice mixture, and arrange on the baking sheet.
  4. In a separate bowl, toss all vegetables with the remaining oil and spice blend. Spread evenly around the chicken.
  5. Roast for 18-22 minutes, or until chicken is cooked through (internal temperature 165°F) and veggies are tender.
  6. Squeeze fresh lemon over everything and serve immediately.

Weekly Meal Planning

Quick paleo dinner recipes are ideal for meal prepping and planning, as most need just a handful of familiar ingredients and cook in under 30 minutes. Save and schedule your paleo meals to create a week’s worth of nourishing dinners and generate one smart grocery list, automatically combining quantities and sorting ingredients by category.

Planning Benefits:

– Calculate total ingredient quantities for all your scheduled paleo recipes
– Organize your shopping list by produce, meat, and pantry, saving you time in-store
– Prevent overbuying or forgetting essential paleo ingredients
– Streamline your week—less stress, healthier dinners, and less waste

Pro tip: When planning your week, schedule recipes so recurring ingredients (like chicken, olive oil, and greens) are tallied together. That way, you know exactly how much to buy—even if you’re prepping multiple quick paleo dinners.

Cook and Prep Times

Prep Time: 8 minutes
Cook Time: 20 minutes
Total Time: 28 minutes

Quick Paleo Dinner Recipe Recap

Quick paleo dinner recipes offer the trifecta of speed, nutrition, and satisfying flavor. With minimal effort and whole ingredients, you can enjoy nourishing meals that keep you on track—even on the busiest evenings. Let your next meal be deliciously simple and stress-free!

Savor the Season: 11 Effortless Paleo Fall Dinner Recipes

11 Easy Paleo Fall Dinner Recipes

Introduction

As autumn brings cooler nights and a vibrant harvest, these 11 Easy Paleo Fall Dinner Recipes make the most of cozy flavors and wholesome ingredients. Each dish is streamlined for simplicity, focusing on seasonal produce, hearty proteins, and satisfying spices—without any dairy, grains, or processed ingredients. Whether you’re meal prepping for busy weeknights or planning comforting dinners to share with family, these recipes guarantee both nourishing nutrition and crowd-pleasing flavors.

Why You’ll Love These 11 Paleo Fall Dinners

What sets these dinner ideas apart is their focus on fall’s best produce—think sweet potatoes, squash, apples, and leafy greens—paired with robust proteins like chicken, beef, and fish. The combination promises bold, comforting flavors and satisfying meals, all with the convenience of straightforward prep. From one-pan roasts to quick skillet meals and savory soups, each recipe is crafted to minimize hassle and maximize taste.

Creating Satisfying and Simple Paleo Fall Meals

Paleo cooking often calls for creative ingredient swaps, but these fall recipes keep things easy and accessible. By using fresh herbs, warming spices, and smart cooking techniques like roasting and braising, you’ll develop deeply flavorful meals with minimal hands-on time. For even quicker weeknight dinners, prep veggies ahead or use pre-chopped options.

11 Easy Paleo Fall Dinner Recipes

  • Sheet Pan Maple Dijon Chicken with Root Vegetables
  • Paleo Pumpkin Beef Chili
  • Butternut Squash & Sausage Skillet
  • Apple Cider Balsamic Pork Chops
  • Roasted Sweet Potato & Kale Salad with Grilled Chicken
  • Creamy Coconut Cauliflower Soup
  • Herbed Turkey Meatballs with Spaghetti Squash
  • Pan-Seared Salmon with Garlic Brussels Sprouts
  • Stuffed Acorn Squash with Ground Turkey & Cranberries
  • Balsamic Glazed Beef and Mushroom Skillet
  • Cinnamon-Spiced Slow Cooker Pulled Pork

[ingredients]
For all 11 recipes, common paleo-friendly ingredients include:
– 2 lbs boneless, skinless chicken thighs or breasts
– 1 lb grass-fed ground beef
– 1 lb ground turkey
– 1 lb pork chops or pork shoulder
– 1 lb wild-caught salmon fillets
– 1 large butternut squash
– 2 sweet potatoes
– 1 acorn squash
– 3 cups kale or spinach
– 2 apples
– 1 small pumpkin or canned pure pumpkin (no sugar added)
– 1 head cauliflower
– 2 cups Brussels sprouts
– 1 large onion
– 3 cloves garlic
– 1 cup fresh cranberries or dried unsweetened cranberries
– 1/2 cup coconut milk
– 1/2 cup chicken or beef broth
– Olive oil, coconut oil, or avocado oil for cooking
– Assorted fresh herbs: rosemary, thyme, parsley, sage
– Pantry spices: cinnamon, smoked paprika, cumin, chili powder
– Salt and black pepper
– Balsamic vinegar, Dijon mustard, pure maple syrup (optional: for Whole30 omit)
[/ingredients]

💡Meal Planning Tip: Save this collection of recipes on CookifyAI to instantly generate a sorted shopping list—all ingredients organized by store section for fast, efficient shopping and stress-free meal planning!

CookifyAI meal planning interface

Instructions

  1. Choose your recipe: Pick one or more from the list to match your weeknight needs or cravings.
  2. Prep your protein and veggies: Wash, peel, chop, and portion according to each recipe’s instructions.
  3. Season generously: Use fresh herbs, spices, and healthy oils to enhance those fall flavors.
  4. Cook with ease: For sheet pan and skillet meals, roast or sauté until proteins are cooked through and veggies are tender. Soups and stews simmer until rich and flavorful.
  5. Serve and enjoy: Pair your fall dinner with a fresh salad or a side of roasted seasonal vegetables for a complete, satisfying paleo meal.

Serving Suggestions and Variations

– Add toasted pumpkin seeds or walnuts for crunch in salads and roasted dishes.
– Top soups or chilis with sliced avocado and chopped herbs.
– Use bone broth in place of water for soups and braises for a flavor and nutrient boost.
– Swap proteins as needed (chicken for turkey, beef for pork, salmon for white fish).

Nutritional Information and Serving Size

Each recipe serves about 4 and is packed with lean protein, fresh veggies, and healthy fats, averaging 350–500 calories per serving (varies by recipe). All are gluten-free, grain-free, and dairy-free—ideal for the paleo lifestyle.

11 Easy Paleo Fall Dinner Recipes (Recap)

Fall’s harvest never tasted so good—or felt so effortless. With these 11 quick paleo dinners, you’ll enjoy hearty, nourishing meals with minimal prep and maximum seasonal flavor. Perfect for busy households and crisp, cozy evenings.

Weekly Meal Planning

Batch cooking or rotating through these 11 dinners throughout the week is a simple way to stay on track and avoid last-minute meals. Save and schedule your fall recipes in CookifyAI to plan cooking days and automatically consolidate all required ingredients into one smart, categorized shopping list.

Planning Benefits:

  • View ingredient overlaps to buy only what you need
  • Combine multiple recipes to calculate total ingredient amounts
  • Effortlessly organize groceries by store section
  • Streamline meal prep and reduce weekly stress

Pro tip: Schedule your week’s meals in advance—CookifyAI will track everything for you, so you’re always prepared and never over-buy or forget an ingredient.

Cook and Prep Times

Prep Time: 15–25 minutes per recipe
Cook Time: 20–40 minutes per recipe
Total Time: 35–60 minutes per recipe
Batch prep for 2–3 meals can save even more time!

Enjoy a deliciously healthy, autumn-inspired week—meal planning and shopping made easy!
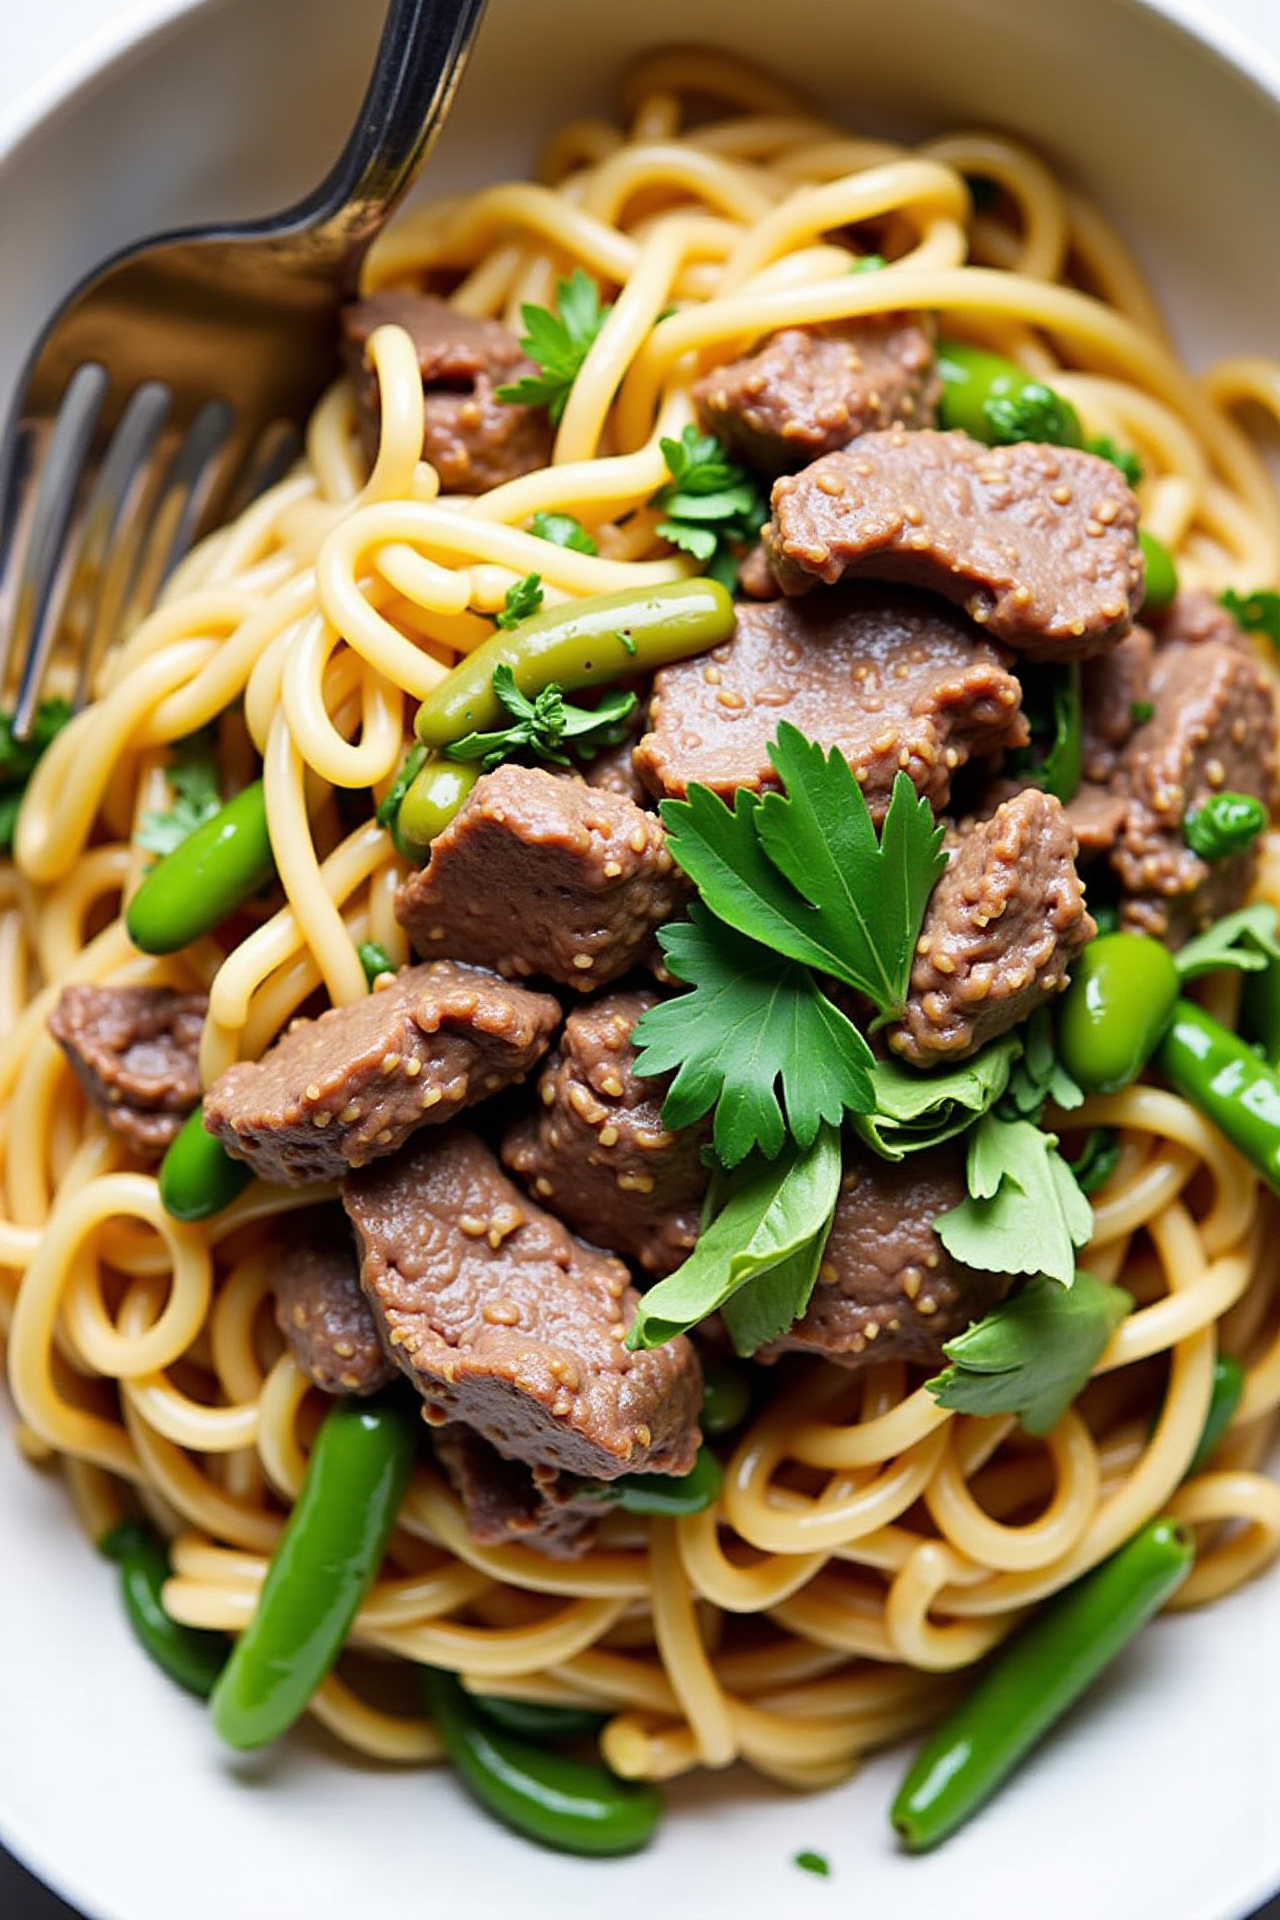
Paleo Indian Naan: Soft, Grain-Free Flatbread for Flavorful Indian Meals

Paleo Indian Naan

Introduction

Paleo Indian Naan is the perfect answer for anyone craving the soft, pillowy flatbread that’s essential to Indian cuisine—without the grains, dairy, or gluten. This recipe masterfully recreates naan’s signature chew and subtle tang using wholesome paleo-friendly ingredients. The result: a bread that’s not only satisfying and flavorful, but also compatible with clean eating goals and many dietary preferences.

Deliciously Unique Paleo Indian Naan

What makes this Paleo Indian Naan stand out is its simplicity and adaptability. Combining almond flour, tapioca flour, and coconut milk produces a delicately crisp exterior and a soft, pull-apart center—everything you love in traditional naan. This bread pairs beautifully with curries, tikka masala, or simply brushed with ghee and sprinkled with fresh herbs.

Preparing the Perfect Paleo Naan Dough

The secret to perfect Paleo Naan is in balancing moistness and structure. Almond flour brings nutty depth, while tapioca flour gives essential stretch. Coconut milk keeps the bread tender, and a splash of apple cider vinegar offers a very slight tang reminiscent of classic naan. Carefully mixing and letting the batter rest for a few minutes ensures you get a cohesive, spreadable dough.

Cooking Your Paleo Indian Naan

Instead of baking, this naan cooks quickly in a skillet. Spoon portions of the batter onto a hot, lightly oiled pan, smoothing it into small rounds. Cook until bubbles form on top and golden spots develop underneath, then flip and finish cooking. The process is fast, so you can have fresh naan on the table in under 30 minutes—no proofing or rising required.

Serving Suggestions for Show-Stopping Paleo Indian Naan

Serve your naan warm and garnish with melted ghee, chopped cilantro, or a sprinkle of flaky sea salt for a truly authentic experience. It’s perfect for scooping sauces, accompanying grilled kebabs, or serving as a wrap for leftovers. For added flavor, stir minced garlic and parsley into the dough before cooking.

Nutritional Information and Serving Size

This recipe yields 4–6 naan breads, depending on the size. Each serving contains approximately 140 calories, 6g fat, 15g carbohydrates, and 3g protein. Fortified with healthy fats and without refined grains, it’s a bread you can enjoy as part of a balanced paleo meal plan.

Deliciously Unique Paleo Indian Naan (Recap)

Grain-free, gluten-free, and dairy-free, this Paleo Indian Naan is an absolute crowd pleaser. Its soft, chewy texture and mild flavor make it the ultimate sidekick for your favorite Indian dishes or as a show-stopping standalone bread.

[ingredients]
1 cup almond flour
1/2 cup tapioca flour (or arrowroot starch)
1/2 teaspoon baking powder
1/4 teaspoon fine sea salt
1/2 cup canned coconut milk, full fat
1 teaspoon apple cider vinegar
2 teaspoons olive oil or ghee (for cooking)
Optional: Chopped cilantro, garlic, or sea salt for garnish
[/ingredients]

💡Meal Planning Tip: Save this recipe to automatically generate an organized shopping list with all ingredients sorted by store section—perfect for efficient grocery trips and meal planning.

CookifyAI meal planning interface

Instructions

  1. In a medium bowl, whisk together almond flour, tapioca flour, baking powder, and salt.
  2. Add the coconut milk and apple cider vinegar. Stir until a thick, smooth batter forms. Let the batter rest for 5 minutes (this helps the flours hydrate).
  3. Heat a nonstick skillet or cast iron pan over medium heat. Add a small amount of olive oil or ghee.
  4. Scoop 1/4 cup portions of batter onto the skillet. Use the back of a spoon to gently spread into a 5–6 inch round.
  5. Cook for 2–3 minutes, until bubbles appear and the edges start to set. Carefully flip and cook for another 2–3 minutes until golden and cooked through.
  6. Remove to a plate and repeat with remaining batter, adding more oil to the skillet as needed.
  7. Brush the warm naan with ghee and sprinkle with optional toppings like cilantro, garlic, or sea salt. Serve immediately.

Weekly Meal Planning

This easy Paleo Indian Naan recipe is ideal for prepping ahead and pairing throughout your week. Save and schedule this recipe with CookifyAI to seamlessly integrate it into your weekly meal plan, generating a smart, consolidated shopping list for all planned recipes.

Planning Benefits:

  • Automatically calculates ingredient quantities for multiple recipes
  • Organizes shopping lists by store section for quicker trips
  • Avoids duplicate purchases and ensures nothing is forgotten
  • Makes weekly meal prep organized and stress-free

Pro Tip: When planning multiple dinners—like curries or grilled proteins—schedule your recipes to have CookifyAI sum overlapping ingredients (e.g., coconut milk for both the naan and curry), minimizing waste and saving you time!

Cook and Prep Times

Prep Time: 10 minutes
Cook Time: 15 minutes
Total Time: 25 minutes

Enjoy soft, pillowy Paleo Indian Naan as a wholesome, delicious addition to your meal rotation!

Citrus Burst: Discover the Bright, Chewy Delight of Zesty Paleo Lemon Cookies

Zesty Paleo Lemon Cookies

Introduction

Zesty Paleo Lemon Cookies are a refreshing treat that channel the vibrant, sunny flavors of fresh lemon into a soft, chewy, and wholesome cookie. Perfect for those who crave something sweet yet want to keep their baking grain-free and refined sugar-free, these cookies are ideal for family gatherings, lunchbox snacks, or a unique dessert at your next potluck.

Why Zesty Paleo Lemon Cookies are a Must-Try

What makes these cookies stand out is their balance of bright, tangy citrus and subtle sweetness—all wrapped up in a gluten-free, dairy-free package. Almond flour gives these cookies a tender crumb, while natural sweeteners and a burst of lemon zest ensure big flavor in every bite. They’re simple to make but always impress, making them a stellar crowd-pleaser for paleo eaters and non-paleo friends alike.

The Secret to Bright, Citrusy Flavor

The key to maximum lemon flavor is using both freshly grated lemon zest and the juice. The zest delivers fragrant oils, while the juice amps up that signature zesty zing. A touch of honey sweetens the deal without overpowering, and coconut oil brings everything together for the perfect chewy bite. If you want to boost the flavor even further, a pinch of sea salt enhances the citrus notes.

How to Make the Chewiest Zesty Paleo Lemon Cookies

Mix all the wet ingredients—coconut oil, honey, egg, lemon juice, and zest—then incorporate them into the almond flour base. Chill the dough briefly before baking to prevent spreading. Bake until just turning golden, and let them cool completely for the best texture. Garnish with an extra sprinkle of lemon zest for a bakery-worthy finish.

Tasty Serving Suggestions

These cookies are delightful on their own or paired with fresh berries for a pop of color and natural sweetness. Serve alongside hot herbal tea or iced green tea for a refreshing afternoon treat. For extra indulgence, sandwich a spoonful of coconut yogurt between two cookies for a creamy, paleo-friendly dessert.

Nutritional Information and Serving Size

This recipe makes about 16 cookies. Each serving (one cookie) is approximately 90 to 100 calories, depending on the size and amount of honey used. They’re a treat that can fit into most paleo meal plans with ease.

Zesty Paleo Lemon Cookies (Recap)

Zesty Paleo Lemon Cookies are the answer when you want a treat that is fresh, allergen-friendly, and bursting with natural flavors. With just the right amount of citrus and chewy texture, they’re sure to brighten up any occasion.

[ingredients]
2 cups almond flour
1/4 teaspoon baking soda
Pinch of sea salt
1/4 cup coconut oil, melted
1/4 cup honey (or maple syrup for vegan option)
1 large egg
2 tablespoons fresh lemon juice
1 tablespoon fresh lemon zest (about 1 large lemon)
1 teaspoon vanilla extract
Optional: Extra lemon zest for topping
[/ingredients]

💡Meal Planning Tip: Save this recipe to automatically generate an organized shopping list with all ingredients sorted by store section—perfect for efficient grocery trips and meal planning.

CookifyAI meal planning interface

Instructions

  1. Preheat the oven to 350°F (175°C). Line a baking sheet with parchment paper.
  2. In a medium bowl, whisk together almond flour, baking soda, and a pinch of sea salt.
  3. In another bowl, whisk melted coconut oil, honey, egg, lemon juice, lemon zest, and vanilla extract until smooth and well-combined.
  4. Pour the wet ingredients into the dry ingredients. Stir until a dough forms.
  5. Chill the dough in the refrigerator for 15–20 minutes to make it easier to handle.
  6. Scoop tablespoon-sized amounts of dough onto the baking sheet, spacing them about 2 inches apart. Flatten each slightly with your fingers or the back of a spoon.
  7. Bake for 10–12 minutes, or until the edges are just turning golden.
  8. Let cookies cool on the baking sheet for 5 minutes, then transfer to a wire rack to cool completely. Top with extra lemon zest if desired.

Weekly Meal Planning

These Zesty Paleo Lemon Cookies are fantastic for prepping in advance, sliding into lunchboxes, or enjoying as quick snacks throughout the week. Save and schedule this recipe to seamlessly plan your week’s treats and automatically consolidate all your needed ingredients into a single grocery list.

Benefits for your weekly planning:

  • Automatically calculates total quantities for recipes planned in the week
  • Sorts your grocery list by store aisle for efficient shopping
  • Eliminates forgotten ingredients and duplicate purchases
  • Simplifies meal prep and snack planning

Pro tip: When scheduling multiple snacks and meals, plan recipes together to see overlapping ingredients (like eggs or lemons!). This keeps shopping efficient and helps reduce food waste.

Cook and Prep Times

Prep Time: 15 minutes (plus 15–20 minutes chilling)
Cook Time: 10–12 minutes
Total Time: 35–40 minutes

Kickstart Your Paleo Journey: Simple & Flavorful Recipes for Beginners

Easy & Delicious Paleo Diet Recipes for Beginners

Introduction

Starting the Paleo diet doesn’t have to be overwhelming—with the right recipes, you’ll discover just how flavorful and satisfying eating real, whole foods can be. These easy & delicious Paleo diet recipes for beginners are crafted with simplicity in mind, highlighting the natural tastes of fresh ingredients and helping you build confidence in your kitchen. Whether you’re prepping lunch or dinner, each recipe is designed to get you started on a nourishing, hassle-free Paleo journey.

Compelling Paleo Eating for Beginners

These beginner-friendly recipes stand out because they deliver bold flavors with minimal effort. With a focus on healthy proteins, vibrant vegetables, and nourishing fats—without grains, dairy, or processed foods—you’ll love how the Paleo diet brings energy and satisfaction to every meal. These dishes are sure to please friends and family, even if they aren’t following Paleo!

Building a Balanced Paleo Plate

A well-balanced Paleo plate features lean proteins, a variety of colorful vegetables, and heart-healthy fats. Think juicy roasted chicken, crisp-tender veggies, and a drizzle of olive oil or a scoop of creamy avocado. When planning your meals, choose simple recipes with clear steps—like sheet pan dinners, salads loaded with texture, and one-pan skillets—to keep your routine both easy and exciting.

Paleo Recipe Ideas for Fast and Flavorful Meals

Popular options for Paleo beginners include dishes like zucchini noodles with marinara and ground turkey, sheet pan salmon with roasted sweet potatoes and broccoli, and chicken stir-fry with crisp bell peppers and coconut aminos. These meals are quick to assemble, packed with nutrients, and adaptable to your favorite flavors and seasonal produce.

Easy Paleo Meal Prep for Success

Batch cooking is a Paleo beginner’s best friend. Prep proteins and veggies in advance so you can toss together different meals throughout the week—a rotisserie chicken can become chicken lettuce wraps, a hearty salad, or a breakfast hash. Keeping Paleo-friendly snacks like hard-boiled eggs, apple slices with almond butter, or roasted nuts on hand will help keep your energy up and your cravings in check.

Nutritional Information and Serving Size

Most Paleo diet recipes are naturally nutrient-dense while being moderate in calories. A typical serving, such as a chicken and vegetable stir-fry, provides lean protein, fiber from veggies, and healthy fats—averaging between 350 to 500 calories per meal. Portions are easily adjusted based on your personal needs.

[ingredients]
Here’s a sample grocery list for a week of easy & delicious Paleo diet recipes for beginners:
– Chicken breasts (3)
– Salmon fillets (2)
– Eggs (1 dozen)
– Ground turkey (1 lb)
– Sweet potatoes (3)
– Zucchini (3)
– Broccoli (1 head)
– Bell peppers (2)
– Leafy greens (spinach, kale, or arugula)
– Avocados (2)
– Apples (4)
– Almond butter
– Olive oil
– Coconut aminos
– Sea salt, pepper, garlic powder, smoked paprika
[/ingredients]

💡Meal Planning Tip: Save this recipe pack to generate an organized shopping list with all ingredients sorted by store section—making your Paleo grocery trip efficient and stress free.

CookifyAI meal planning interface

Instructions

  1. Sheet Pan Salmon and Veggies: Preheat oven to 400°F. Arrange salmon, broccoli florets, and sliced sweet potatoes on a lined baking sheet. Drizzle with olive oil and sprinkle with sea salt, pepper, and smoked paprika. Bake 15–20 minutes until salmon flakes and veggies are tender.
  2. Quick Zucchini Noodle Stir Fry: Spiralize zucchini. In a skillet, sauté ground turkey with garlic powder and coconut aminos until browned. Add zucchini noodles and bell pepper strips; stir-fry 3–4 minutes until veggies are crisp-tender.
  3. Paleo Breakfast Scramble: In a pan, sauté spinach and diced sweet potato in olive oil. Add two eggs and scramble until set. Top with sliced avocado and a pinch of sea salt.

Weekly Meal Planning

Making Paleo eating a habit is simple with a meal planner. Save and schedule your favorite Paleo recipes inside CookifyAI to plan out your week, automatically generate smart shopping lists, and streamline your meal prep.

Planning Benefits:

– Calculates total ingredient quantities, so you buy just what you need
– Groups grocery lists by section for faster shopping
– Helps prevent forgotten ingredients and duplicate purchases
– Simplifies meal variety and consistency for new Paleo beginners

Pro tip: Schedule meals for the week to see how overlapping ingredients reduce cost and waste—especially when planning similar protein or veggie-based recipes.

Cook and Prep Times

Prep Time: 10–15 minutes per recipe
Cook Time: 10–25 minutes per recipe
Total Time: 20–35 minutes

With these easy & delicious Paleo diet recipes for beginners, healthy eating is approachable and exciting. Let meal planning tools like CookifyAI help you stay on track and make your Paleo lifestyle effortless!

Paleo Indian Naan: Soft, Grain-Free Flatbread for Flavorful Indian Meals

Paleo Indian Naan

Introduction

Paleo Indian Naan is the perfect answer for anyone craving the soft, pillowy flatbread that’s essential to Indian cuisine—without the grains, dairy, or gluten. This recipe masterfully recreates naan’s signature chew and subtle tang using wholesome paleo-friendly ingredients. The result: a bread that’s not only satisfying and flavorful, but also compatible with clean eating goals and many dietary preferences.

Deliciously Unique Paleo Indian Naan

What makes this Paleo Indian Naan stand out is its simplicity and adaptability. Combining almond flour, tapioca flour, and coconut milk produces a delicately crisp exterior and a soft, pull-apart center—everything you love in traditional naan. This bread pairs beautifully with curries, tikka masala, or simply brushed with ghee and sprinkled with fresh herbs.

Preparing the Perfect Paleo Naan Dough

The secret to perfect Paleo Naan is in balancing moistness and structure. Almond flour brings nutty depth, while tapioca flour gives essential stretch. Coconut milk keeps the bread tender, and a splash of apple cider vinegar offers a very slight tang reminiscent of classic naan. Carefully mixing and letting the batter rest for a few minutes ensures you get a cohesive, spreadable dough.

Cooking Your Paleo Indian Naan

Instead of baking, this naan cooks quickly in a skillet. Spoon portions of the batter onto a hot, lightly oiled pan, smoothing it into small rounds. Cook until bubbles form on top and golden spots develop underneath, then flip and finish cooking. The process is fast, so you can have fresh naan on the table in under 30 minutes—no proofing or rising required.

Serving Suggestions for Show-Stopping Paleo Indian Naan

Serve your naan warm and garnish with melted ghee, chopped cilantro, or a sprinkle of flaky sea salt for a truly authentic experience. It’s perfect for scooping sauces, accompanying grilled kebabs, or serving as a wrap for leftovers. For added flavor, stir minced garlic and parsley into the dough before cooking.

Nutritional Information and Serving Size

This recipe yields 4–6 naan breads, depending on the size. Each serving contains approximately 140 calories, 6g fat, 15g carbohydrates, and 3g protein. Fortified with healthy fats and without refined grains, it’s a bread you can enjoy as part of a balanced paleo meal plan.

Deliciously Unique Paleo Indian Naan (Recap)

Grain-free, gluten-free, and dairy-free, this Paleo Indian Naan is an absolute crowd pleaser. Its soft, chewy texture and mild flavor make it the ultimate sidekick for your favorite Indian dishes or as a show-stopping standalone bread.

[ingredients]
1 cup almond flour
1/2 cup tapioca flour (or arrowroot starch)
1/2 teaspoon baking powder
1/4 teaspoon fine sea salt
1/2 cup canned coconut milk, full fat
1 teaspoon apple cider vinegar
2 teaspoons olive oil or ghee (for cooking)
Optional: Chopped cilantro, garlic, or sea salt for garnish
[/ingredients]

💡Meal Planning Tip: Save this recipe to automatically generate an organized shopping list with all ingredients sorted by store section—perfect for efficient grocery trips and meal planning.

CookifyAI meal planning interface

Instructions

  1. In a medium bowl, whisk together almond flour, tapioca flour, baking powder, and salt.
  2. Add the coconut milk and apple cider vinegar. Stir until a thick, smooth batter forms. Let the batter rest for 5 minutes (this helps the flours hydrate).
  3. Heat a nonstick skillet or cast iron pan over medium heat. Add a small amount of olive oil or ghee.
  4. Scoop 1/4 cup portions of batter onto the skillet. Use the back of a spoon to gently spread into a 5–6 inch round.
  5. Cook for 2–3 minutes, until bubbles appear and the edges start to set. Carefully flip and cook for another 2–3 minutes until golden and cooked through.
  6. Remove to a plate and repeat with remaining batter, adding more oil to the skillet as needed.
  7. Brush the warm naan with ghee and sprinkle with optional toppings like cilantro, garlic, or sea salt. Serve immediately.

Weekly Meal Planning

This easy Paleo Indian Naan recipe is ideal for prepping ahead and pairing throughout your week. Save and schedule this recipe with CookifyAI to seamlessly integrate it into your weekly meal plan, generating a smart, consolidated shopping list for all planned recipes.

Planning Benefits:

  • Automatically calculates ingredient quantities for multiple recipes
  • Organizes shopping lists by store section for quicker trips
  • Avoids duplicate purchases and ensures nothing is forgotten
  • Makes weekly meal prep organized and stress-free

Pro Tip: When planning multiple dinners—like curries or grilled proteins—schedule your recipes to have CookifyAI sum overlapping ingredients (e.g., coconut milk for both the naan and curry), minimizing waste and saving you time!

Cook and Prep Times

Prep Time: 10 minutes
Cook Time: 15 minutes
Total Time: 25 minutes

Enjoy soft, pillowy Paleo Indian Naan as a wholesome, delicious addition to your meal rotation!

Egg-Free AIP & Paleo Breakfast Meatballs: A Protein-Packed Start to Your Day!

Egg-Free AIP/Paleo Breakfast Meatballs

Introduction

Finding a nourishing, protein-packed breakfast that fits both AIP and Paleo guidelines without eggs can be a challenge. These Egg-Free AIP/Paleo Breakfast Meatballs offer a flavorful solution that’s easy to prepare, versatile, and satisfying. They’re perfect for anyone looking to enjoy a delicious, allergen-friendly breakfast that’s equally great for meal prepping or feeding a hungry crowd.

Deliciously Unique Egg-Free AIP/Paleo Breakfast Meatballs

What makes these breakfast meatballs special is their blend of ground meat with fresh vegetables and herbs, resulting in juicy bites packed with flavor—no eggs, grains, or dairy needed. The addition of finely grated sweet potato brings natural sweetness and moisture, while herbs like sage and thyme echo classic breakfast sausage flavors for a comforting, crowd-pleasing meal.

Constructing Flavorful, Moist Meatballs Without Eggs

Eggs are often used in meatballs for binding and moisture, but this recipe uses grated sweet potato and a touch of olive oil as natural binders, keeping the texture tender. With the addition of garlic, onion, and savory herbs, these meatballs are delightfully flavorful and hold together beautifully. Be sure to finely grate your sweet potato and squeeze out excess moisture to help the meatballs keep their shape.

Cooking and Serving Egg-Free Breakfast Meatballs

To ensure even browning and juiciness, bake the meatballs on a lined baking sheet, then finish under the broiler for a crisp exterior if desired. They’re perfect served alongside sautéed greens, roasted veggies, or tucked into lettuce wraps. For a complete breakfast spread, add a side of avocado or a handful of berries.

Serving Suggestions for a Show-Stopping Egg-Free AIP/Paleo Breakfast

These meatballs are versatile—enjoy them warm with a root veggie hash, or make them ahead and reheat for busy mornings. They’re great for family brunch, school lunches, or grab-and-go fuel. For an extra boost, sprinkle with chopped fresh parsley before serving or pair with a compliant dipping sauce like homemade guacamole.

Nutritional Information and Serving Size

This recipe yields approximately 18 medium meatballs—enough for four hearty breakfasts or several snack portions. Each serving (about 4–5 meatballs) provides protein, healthy fats, and fiber-rich veggies, all with zero grains, dairy, or eggs. Total calories per serving will vary based on meat choice but generally fall around 250–320 calories.

Deliciously Unique Egg-Free AIP/Paleo Breakfast Meatballs (Recap)

These breakfast meatballs transform simple, allergen-friendly ingredients into a flavorful, filling dish that can jump-start your morning, fuel workouts, or satisfy snack cravings. Egg-free, AIP and Paleo compliant, they hit the mark for both taste and nutrition.

[ingredients]
1 pound ground pork (or turkey or chicken)
1 cup sweet potato, finely grated and moisture squeezed out
1/4 cup finely minced onion
2 cloves garlic, minced
2 tablespoons fresh parsley, chopped
1 teaspoon dried sage
1 teaspoon dried thyme
1/2 teaspoon sea salt
1/2 teaspoon black pepper (omit for strict AIP)
1 tablespoon olive oil or coconut oil
Optional: Pinch of crushed red pepper or 1 tablespoon finely chopped apple for extra flavor
[/ingredients]

💡Meal Planning Tip: Save this recipe to automatically generate a streamlined shopping list—with everything sorted by store section for stress-free and allergy-conscious grocery trips.

CookifyAI meal planning interface

Instructions

  1. Preheat your oven to 400°F (200°C). Line a large baking sheet with parchment paper for easy cleanup.
  2. Combine all ingredients in a large bowl: ground meat, grated sweet potato, onion, garlic, parsley, herbs, sea salt, pepper (if using), oil, and optional add-ins. Mix gently until just combined.
  3. Using damp hands, form the mixture into 18 small meatballs (about 1–1.5 inches in diameter) and arrange them evenly on the baking sheet.
  4. Bake for 20–22 minutes, or until the meatballs are cooked through and lightly golden. If you like a crispier exterior, finish under the broiler for 2–3 minutes.
  5. Let cool slightly before serving. Store leftovers in an airtight container in the refrigerator for up to 4 days, or freeze for longer storage.

Weekly Meal Planning

Egg-Free AIP/Paleo Breakfast Meatballs are an ideal candidate for meal prep! Save and schedule this recipe into your breakfast routine to quickly generate smart shopping lists, optimized by grocery section and free of gluten, dairy, and egg products.

Benefits for Weekly Prep:

– Cook once, enjoy multiple breakfasts or snacks
– Consolidates ingredients with other recipes—reducing time and waste
– Customizes portions and serving sizes to your weekly needs
– Prevents forgotten ingredients and duplicate purchases

Pro tip: Use CookifyAI’s meal planner to overlap similar ingredients (like ground meats or fresh herbs) between recipes—this streamlines your planning and makes your prep sessions easier and more cost-effective. Schedule your recipes now and experience effortless, allergy-friendly meal planning!

Cook and Prep Times

Prep Time: 15 minutes
Cook Time: 22 minutes
Total Time: 37 minutes

Revitalize and Thrive in 2025: The Ultimate Paleo Guide for Self Healing and Optimal Health

Paleo Basics: Best Diet Foods for Self Healing in 2025

Introduction

Prioritizing self healing through nutrition is increasingly popular, and the Paleo diet continues to be a trusted approach for those seeking vibrant health and sustainable well being. With a focus on whole, unprocessed foods, this diet mimics what our ancestors ate, promoting natural healing, reducing inflammation, and supporting overall well being. This Paleo Basics recipe is perfect if you crave simple meal planning with real ingredients and want to harness the best diet foods for optimal health in 2025.

The Paleo Difference: Why This Diet Supports Self Healing

The appeal of Paleo lies in its return to foundational nutrition: lean proteins, fresh fruits, vegetables, nuts, and healthy fats. By eliminating grains, dairy, and refined sugars, you minimize processed additives that can hinder your body’s ability to heal. These best diet foods are nutrient dense, anti inflammatory, and naturally satisfying—making the Paleo plan one of the best diets for lasting health changes this year.

Essential Paleo Ingredients for 2025

A balanced Paleo menu begins with lean meats (like chicken, turkey, or grass fed beef), lots of colorful vegetables, fruit, and healthy fats from nuts, seeds, avocados, and olive oil. These foods are rich in antioxidants, vitamins, and minerals, all critical for accelerating self healing and feeling energized every day.

[ingredients]
2 boneless, skinless chicken breasts (or wild caught salmon)
1 tbsp olive oil
2 cups broccoli florets
1 red bell pepper, sliced
1 small zucchini, sliced
1 cup cherry tomatoes
1/2 cup raw almonds or walnuts
Salt and pepper, to taste
1/2 tsp garlic powder
1/2 tsp smoked paprika
Juice of 1/2 lemon
Optional: Fresh chopped parsley, for garnish
[/ingredients]

💡Meal Planning Tip: Save this recipe to instantly create a neatly organized shopping list with all Paleo basics ready for your next grocery run. CookifyAI sorts each ingredient by store section for fast, hassle free shopping.

CookifyAI meal planning interface

Instructions

  1. Preheat your oven to 400°F (200°C). Line a sheet pan with parchment paper.
  2. Arrange chicken breasts (or salmon) on one side of the pan. Drizzle with half the olive oil, season with salt, pepper, smoked paprika, and half the garlic powder.
  3. Toss broccoli, bell pepper, zucchini, and cherry tomatoes with remaining olive oil, garlic powder, salt, and pepper. Scatter veggies around the protein, keeping an even layer.
  4. Sprinkle raw almonds or walnuts over the vegetables for a crunchy texture boost.
  5. Roast in the preheated oven for 20 25 minutes (chicken) or 12 15 minutes (salmon) until protein is cooked through and vegetables are tender and caramelized.
  6. Remove from oven and squeeze fresh lemon juice over everything. Top with optional parsley and serve warm.

Weekly Meal Planning

Incorporating self healing Paleo meals into your weekly meal plan is the simplest way to stay consistent and energized. Schedule and save this recipe in CookifyAI to generate an all-in-one shopping list that combines ingredients across all your best diet foods for the week—no more missed items, duplicated ingredients, or midweek store runs.

Planning Benefits:

  • Auto-calculates ingredient totals across multiple recipes
  • Sorts your shopping list by grocery aisle for quick trips
  • Makes meal prep efficient so you can focus on self healing
  • Reduces food waste by avoiding duplicate purchases

Pro tip: Batch schedule Paleo recipes for the week to optimize shopping and prep time—especially helpful when following the best diets for health.

Cook and Prep Times

Prep Time: 10 minutes
Cook Time: 20–25 minutes
Total Time: 30–35 minutes

Recap: Paleo, Self Healing & Best Diet Foods for 2025

By embracing Paleo basics and prioritizing best diet foods in your meal planning, you empower your body’s natural self healing abilities. With the right tools, like CookifyAI for weekly planning and shopping list creation, nourishing yourself in 2025 has never been more practical, efficient, or delicious.

Heal Me Delicious Cinnamon Rolls: A Wholesome Twist on a Classic Comfort Treat

Cinnamon Rolls • Heal Me Delicious

Introduction

Few treats can match the irresistible aroma and comforting flavor of homemade cinnamon rolls. With their pillowy-soft dough and cinnamon-sugar swirl, these cinnamon rolls—crafted with nourishing, thoughtful ingredients—pair indulgence with wellness. Ideal for breakfasts, brunches, or a delectable dessert that pleases every palate, this recipe is a go-to for anyone looking for a crowd-pleasing bake that’s as wholesome as it is delicious.

Why These Cinnamon Rolls Are Truly Special

What sets these cinnamon rolls apart is their focus on ingredients that both heal and delight. The recipe uses nutrient-rich, allergy-friendly options inspired by the Heal Me Delicious kitchen, making them accessible to more people—including those with gluten or dairy sensitivities. The rolls come out incredibly soft, with a rich flavor and cinnamon swirl that delivers pure comfort without compromise.

Perfecting the Cinnamon Swirl and Dough

The secret to fluffy cinnamon rolls is letting the dough rise properly for a light, tender crumb. Using coconut sugar and a wholesome dairy-free butter substitute ensures a naturally sweet and rich filling. The aromatic blend of cinnamon and vanilla ties together a flavor that’s warm and satisfying.

Easy Step-by-Step Assembly

After preparing the dough and generous cinnamon filling, simply roll out the dough, spread the filling, then roll and slice. A second rise ensures they bake up soft and tall. Finish with a drizzle of simple glaze or a dusting of powdered sugar for an extra touch of indulgence.

Serving Suggestions

Serve these cinnamon rolls warm from the oven with your favorite tea or coffee for an inviting breakfast or brunch. For dessert, add a scoop of dairy-free vanilla ice cream or a dollop of coconut whipped cream for a special twist. Their irresistible flavor and tender texture make them a guaranteed hit at any table.

Nutritional Information and Serving Size

This recipe yields 9 hearty cinnamon rolls. Each roll contains approximately 210-250 calories, depending on glaze and optional toppings. They offer sweetness and comfort balanced with thoughtfully selected, healing ingredients.

Wholesome Cinnamon Rolls Recap

Combining the nostalgic comfort of classic cinnamon rolls with allergy-friendly, healthful tweaks, this recipe delivers joy and healing in every swirl.

[ingredients]
2 cups gluten-free all purpose flour (or regular if not GF)
2 1/4 tsp instant yeast
1/2 cup unsweetened non-dairy milk (such as almond or oat)
1/3 cup coconut sugar
1/4 cup melted coconut oil or vegan butter
1/4 cup unsweetened applesauce
1 tsp vanilla extract
1/4 tsp sea salt

Filling:
1/3 cup coconut sugar
1 1/2 tbsp ground cinnamon
1/4 cup softened vegan butter or coconut oil

Optional glaze:
1/2 cup powdered sugar (sifted)
2-3 tsp non-dairy milk
1/4 tsp vanilla extract
[/ingredients]

💡Meal Planning Tip: Save this recipe to automatically create a categorized shopping list—making dietary swaps and ingredient organization a breeze throughout your week.

CookifyAI meal planning interface

Instructions

  1. In a bowl, gently warm the non-dairy milk to just warm (not hot), then stir in the yeast and 1 tbsp coconut sugar. Let sit for 5 minutes, until frothy.
  2. In a large mixing bowl, combine flour, remaining coconut sugar, melted coconut oil (or vegan butter), applesauce, vanilla, and salt. Add yeast mixture and mix until a soft dough forms.
  3. Knead dough for 2-3 minutes, adding a little extra flour as needed if sticky, then cover and allow to rise in a warm spot for 45-60 minutes, or until doubled in size.
  4. Preheat oven to 350°F (175°C). Grease or line a 9-inch baking dish.
  5. In a small bowl, stir together coconut sugar and cinnamon for the filling.
  6. On a floured surface, roll dough into a rectangle (about 1/4 inch thick). Spread softened butter/coconut oil over dough, then sprinkle cinnamon-sugar filling evenly across the surface.
  7. Roll up dough tightly from the long side, then cut into 9 even rolls. Place in the prepared baking dish. Cover and let rise for another 20-30 minutes.
  8. Bake for 22-28 minutes, until lightly golden.
  9. For glaze, whisk powdered sugar, non-dairy milk, and vanilla until smooth. Drizzle over warm rolls before serving.

Weekly Meal Planning

These cinnamon rolls are ideal for planning breakfast or a wholesome treat throughout the week—simply freeze extras and rewarm! Save and schedule this recipe with CookifyAI to seamlessly organize your meal rotation, build smart, consolidated shopping lists, and track your dietary preferences.

Planning Benefits:

  • Easily double or halve ingredient amounts for batch cooking or small households
  • Auto-generates master shopping lists sorted by store section
  • Integrates ingredients from this and other planned recipes—no repeats, no missed items
  • Makes meal prep stress-free and helps balance nutritious and indulgent recipes all week

Pro tip: When batch prepping, schedule multiple recipes to see ingredient overlaps (like non-dairy milk or gluten-free flour), so you’ll shop more efficiently and reduce food waste.

Cook and Prep Times

Prep Time: 25 minutes (plus rising time)
Cook Time: 25 minutes
Total Time: 1 hour 30 minutes

Quick Paleo Dinners: Wholesome One-Pan Meals for Busy Nights

Quick Paleo Dinner Recipes

Introduction

Fast-paced evenings shouldn’t mean sacrificing nutrition or flavor. These Quick Paleo Dinner Recipes deliver full-bodied taste and wholesome ingredients, all while staying true to Paleolithic principles: focusing on lean proteins, vibrant veggies, and healthy fats. Whether you’re following a paleo lifestyle or looking to add simple, unprocessed meals to your weeknight menu, these dinner ideas make healthy eating approachable—even on the busiest nights.

Why Quick Paleo Dinners Work for Busy Schedules

What sets quick paleo dinners apart is their natural simplicity—think one-pan meals, rapid grilling, or stovetop sautés. The reliance on fresh produce and quality protein means dinner comes together fast, tastes fresh, and leaves you satisfied without heavy carbs or processed additives. These recipes are perfect for households seeking both health and convenience.

Essentials of a Quick Paleo Dinner

The building blocks are straightforward: protein (like chicken, seafood, beef, or eggs), colorful vegetables (such as bell peppers, broccoli, spinach), and a dash of healthy fats (olive oil, coconut oil, avocado). Herbs and spices do the heavy lifting for flavor, making each meal unique and vibrant. Prep work is minimal and cook times are short, making these meals truly weeknight-friendly.

Sample Recipe: One-Pan Garlic Herb Chicken and Veggies

This quick paleo meal features chicken breasts seared with garlic and herbs, paired with a medley of seasonal vegetables that roast together on one sheet pan. It’s easy to customize with what you have in the fridge and can be on the table in under 30 minutes.

[ingredients]
2 boneless, skinless chicken breasts
2 tablespoons olive oil or avocado oil
1 teaspoon garlic powder
1/2 teaspoon smoked paprika
1 teaspoon dried Italian herbs (or a mix of thyme, oregano, basil)
Salt and pepper to taste
2 cups broccoli florets
1 red bell pepper, sliced
1 small zucchini, sliced
1 small red onion, sliced
Lemon wedges, for serving
[/ingredients]

💡Meal Planning Tip: Save this recipe to automatically generate an organized shopping list with all ingredients sorted by store section—making paleo shopping efficient while ensuring you never miss a key ingredient.

CookifyAI meal planning interface

Instructions

  1. Preheat oven to 425°F. Line a large baking sheet with parchment paper for easy cleanup.
  2. In a small bowl, mix olive oil, garlic powder, smoked paprika, dried herbs, salt, and pepper.
  3. Pat chicken breasts dry. Toss chicken with half of the oil and spice mixture, and arrange on the baking sheet.
  4. In a separate bowl, toss all vegetables with the remaining oil and spice blend. Spread evenly around the chicken.
  5. Roast for 18-22 minutes, or until chicken is cooked through (internal temperature 165°F) and veggies are tender.
  6. Squeeze fresh lemon over everything and serve immediately.

Weekly Meal Planning

Quick paleo dinner recipes are ideal for meal prepping and planning, as most need just a handful of familiar ingredients and cook in under 30 minutes. Save and schedule your paleo meals to create a week’s worth of nourishing dinners and generate one smart grocery list, automatically combining quantities and sorting ingredients by category.

Planning Benefits:

– Calculate total ingredient quantities for all your scheduled paleo recipes
– Organize your shopping list by produce, meat, and pantry, saving you time in-store
– Prevent overbuying or forgetting essential paleo ingredients
– Streamline your week—less stress, healthier dinners, and less waste

Pro tip: When planning your week, schedule recipes so recurring ingredients (like chicken, olive oil, and greens) are tallied together. That way, you know exactly how much to buy—even if you’re prepping multiple quick paleo dinners.

Cook and Prep Times

Prep Time: 8 minutes
Cook Time: 20 minutes
Total Time: 28 minutes

Quick Paleo Dinner Recipe Recap

Quick paleo dinner recipes offer the trifecta of speed, nutrition, and satisfying flavor. With minimal effort and whole ingredients, you can enjoy nourishing meals that keep you on track—even on the busiest evenings. Let your next meal be deliciously simple and stress-free!

Beyond Caveman Cuisine: Exposing the Hidden Flaws of the Paleo Diet

The Dark Side of the Paleo Diet No One Talks About

Introduction

The Paleo Diet has taken the wellness world by storm, praised for its simplicity and “back-to-basics” approach to eating. Rooted in the concept of consuming foods that our ancestors might have eaten, it promises weight loss, better digestion, and improved energy. Yet, beneath its wholesome exterior lurks a set of challenges and potential pitfalls that few people discuss. Understanding both the benefits and the drawbacks is crucial for anyone considering this popular lifestyle change.

The Allure and Potential Risks of the Paleo Diet

On the surface, the Paleo Diet seems like the ultimate plan for wholesome living: accentuate fruits, vegetables, lean meats, nuts, and seeds while shunning processed foods, grains, dairy, and legumes. For many, this switch leads to initial weight loss and higher energy. However, the restrictive nature of Paleo can come with nutritional imbalances, social limitations, and even potential long-term health risks—realities often overlooked in mainstream conversations.

What Gets Left Out: Key Nutritional Deficits

Eliminating entire food groups, such as dairy, grains, and legumes, can create significant nutritional gaps. The Paleo Diet usually falls short in calcium, fiber, and certain B vitamins. Over time, these deficiencies can impact bone health, digestion, and energy levels. Even with strategic planning, replicating the benefits of these excluded foods can be a daily struggle.

Social and Lifestyle Hurdles

Living Paleo can unintentionally lead to social isolation. Navigating dinners, family gatherings, or even workplace lunches becomes challenging when so many staple foods are off-limits. This can result in stress, increased food anxiety, or losing out on shared experiences, especially for those who thrive on social connections.

Economic and Practical Considerations

Another challenge rarely addressed is the increased cost and effort associated with sourcing high-quality meats, fresh produce, and specialty flours. The Paleo Diet often requires more meal prep time and planning than the average lifestyle. Shopping lists can become both lengthy and expensive—with efficiency being a must for budget-friendly and realistic weekly meal planning.

Nutritional Information and Serving Size

While Paleo meals are often promoted as nutrient dense and satiating, many lack dietary fiber and certain minerals generally provided by whole grains and dairy products. Each serving’s nutritional stats vary widely depending on food choices, but followers should pay close attention to calcium, Vitamin D, and B vitamin intake, as well as long-term gastrointestinal health.

The Unspoken Side of the Paleo Diet (Recap)

It’s easy to be captivated by the benefits of “eating like a caveman,” but understanding the dark side—from nutritional deficits to lifestyle hurdles and budget strains—is essential to making an informed choice. Success comes from strategic planning, supplementation as needed, and a willingness to adapt when challenges arise.

[ingredients]
Sample Paleo Day:

Breakfast: Scrambled eggs with spinach and avocado
Lunch: Grilled chicken salad with mixed leafy greens, nuts, and olive oil
Snack: Raw almonds and carrot sticks
Dinner: Grass-fed steak, roasted sweet potatoes, steamed broccoli

Be prepared:
Eggs (1 dozen)
Avocado (3)
Fresh spinach (1 bag)
Chicken breast (1 lb)
Mixed greens (1 bag)
Raw nuts (1 cup)
Olive oil (1 bottle)
Steak (1 lb)
Sweet potatoes (2 large)
Broccoli (1 head)
Carrots (4 large)
Salt and pepper
[/ingredients]

💡Meal Planning Tip: Save this Paleo meal plan to automatically generate an organized shopping list with all ingredients sorted by store section. This makes planning—and navigating Paleo’s complexities—a breeze!

CookifyAI meal planning interface

Instructions

  1. Prepare breakfast by scrambling eggs with spinach and topping with fresh avocado slices.
  2. For lunch, grill chicken breast and toss with mixed leafy greens, raw nuts, and a drizzle of olive oil.
  3. Keep raw almonds and carrot sticks handy for a quick snack.
  4. Dinner is a simple grass-fed steak served with roasted sweet potatoes and steamed broccoli.
  5. Season all meals to taste with salt and pepper, avoiding processed seasonings to stay Paleo-compliant.

Weekly Meal Planning

Adhering to the Paleo Diet requires significant forethought and organization. Save and schedule this meal plan for easy weekly prep: consolidate all your Paleo-friendly ingredients, calculate exact amounts, and avoid running out of essentials mid-week.

Planning Benefits:

– Calculates total ingredient needs for customized weekly shopping
– Sorts items by grocery store section for quicker, more efficient trips
– Helps avoid forgotten staples or accidental non-Paleo purchases
– Allows for more variety and nutritional balance over time

Pro tip: Schedule your weekly Paleo menu alongside other household meals to maximize overlap and reduce waste (e.g., buying one larger bag of greens for salads and breakfast scrambles).

Cook and Prep Times

Prep Time: 20 minutes
Cook Time: 35 minutes
Total Time: 55 minutes

Whether you’re fully committed to Paleo or just experimenting, knowing both the upsides and the dark side prepares you for long-term success, smarter meal planning, and a healthier, more balanced life.

Fluffy Paleo Dinner Rolls: Your Go-To Gluten-Free, Grain-Free Sidekick for Every Meal

Paleo Dinner Rolls | Our Paleo Life

Introduction

Bring a touch of comfort and warmth to your table with these Paleo Dinner Rolls. Gluten-free, grain-free, and dairy-free, these soft rolls are the perfect side to any meal, making them a go-to for holiday feasts, family dinners, or weeknight suppers. Because they’re simple to make and full of flavor, they’re an instant crowd-pleaser for anyone following a paleo lifestyle—or anyone who loves fresh bread!

Why Make Paleo Dinner Rolls?

Unlike many gluten-free breads that can be dry or dense, these paleo rolls have a soft, fluffy interior and a deliciously golden crust, thanks to a clever blend of almond and tapioca flours. Whether served warm with a bowl of soup, alongside roasted meats, or as the base for mini sandwiches, their flavor and versatility set them apart from store-bought alternatives.

How to Achieve the Best Texture

Getting the right consistency for paleo rolls means combining moist ingredients like eggs and olive oil with the elasticity of tapioca starch. Whisking the dough thoroughly and letting it rest briefly before baking results in beautifully risen rolls with a tender bite. If desired, you can add a sprinkle of sea salt or fresh herbs on top before baking for a unique finish.

Serving Suggestions for Paleo Dinner Rolls

These rolls are delicious fresh out of the oven or lightly toasted the next day. Enjoy them simply with ghee or grass-fed butter, or split them and fill with your favorite paleo sandwich fixings. For special occasions, brush the tops with olive oil and sprinkle with fresh rosemary or garlic for a gourmet touch.

Nutritional Information and Serving Size

This recipe makes about 8 medium-sized rolls. Each roll contains approximately 120 calories, 6g fat, 3g protein, and 16g carbohydrates, depending on exact ingredient choices. They fit perfectly into a paleo-friendly meal plan and help keep everyone at the table satisfied—no breadbasket FOMO required!

[ingredients]
1 1/2 cups almond flour
1/2 cup tapioca flour (starch)
1 tsp baking powder (grain-free if desired)
1/2 tsp fine sea salt
2 large eggs
1/3 cup unsweetened almond milk (or other non-dairy milk)
2 tbsp olive oil
1 tsp apple cider vinegar
Optional: chopped fresh herbs for topping
[/ingredients]

💡Meal Planning Tip: Save this recipe to automatically generate an organized shopping list with all ingredients sorted by store section—perfect for efficient grocery trips and meal planning!

CookifyAI meal planning interface

Instructions

  1. Preheat your oven to 350°F and line a baking sheet with parchment paper.
  2. In a large bowl, whisk together the almond flour, tapioca flour, baking powder, and salt.
  3. In a separate bowl, whisk the eggs, almond milk, olive oil, and apple cider vinegar until well blended.
  4. Pour the wet ingredients into the dry ingredients and mix until a sticky dough forms. Let the dough rest for 5 minutes to allow the flours to hydrate.
  5. With damp hands, divide the dough into 8 pieces and shape each into a ball. Place on the prepared baking sheet, leaving space between each roll.
  6. If using, brush tops with a little olive oil and sprinkle with chopped fresh herbs.
  7. Bake for 23–25 minutes or until the tops are lightly golden and the rolls smell fragrant.
  8. Cool for 5 minutes before serving warm.

Weekly Meal Planning

These Paleo Dinner Rolls are an excellent addition to your weekly meal prep—perfect for stuffing in lunchboxes, pairing with stews, or using as snacks. Save and schedule this recipe to plan out your meals for the week and generate a smart shopping list that consolidates all your ingredients.

Planning Benefits:

– Instantly calculates your total amounts of almond and tapioca flour needed for multiple recipes
– Organizes shopping lists by store section for faster grocery runs
– Prevents duplicate purchases and missed ingredients
– Streamlines weekly meal prep so you always have healthy sides on hand

Pro tip: Schedule your planned meals to see ingredient overlaps—for example, if you’re making paleo rolls and paleo pancakes, your list will tally the total almond flour needed, preventing both overbuying and underbuying.

Cook and Prep Times

Prep Time: 10 minutes
Cook Time: 25 minutes
Total Time: 35 minutes

Enjoy these flavorful, fluffy Paleo Dinner Rolls—an easy, healthy addition to any meal!

Keto Philly Cheesesteak Rolls: Ultimate Low-Carb Delights for Any Meal Prep Plan

Keto Philly Cheesesteak Rolls

Introduction

Craving the iconic flavors of a Philly cheesesteak but want to stick to your low-carb lifestyle? These Keto Philly Cheesesteak Rolls deliver all the savoriness of the classic sandwich, minus the bread and excess carbs. Perfect for meal prepping, family dinners, or a protein-packed snack, these rolls satisfy both your hunger and your macros with every cheesy, beefy bite.

Deliciously Unique Keto Philly Cheesesteak Rolls

This recipe takes thinly sliced steak, gooey provolone, and sautéed peppers and onions, wrapping them together in a low-carb, grain-free roll. The result is a hand-held, portable meal brimming with flavor and texture. Forget about boring keto lunches—these rolls are hearty, melty, and sure to please even non-keto friends and family.

Preparing the Perfect Philly Cheesesteak Filling

Start by selecting thinly shaved ribeye or sirloin steak, then sauté with colorful bell peppers, onions, and mushrooms until just tender. Season generously for that authentic Philly flavor. Layer the meat and veggies with creamy provolone or mozzarella, then roll all that goodness up in a keto-friendly dough or cheese wrap. Let it bake until the exterior is golden and the inside is irresistibly gooey.

Assembling Your Keto Philly Cheesesteak Rolls

To assemble, simply lay out your dough or cheese wraps, add a line of the meat and veggie filling, top each with a slice of cheese, and roll up tightly. Arrange seam side down on a parchment-lined baking sheet and bake until the cheese bubbles and the rolls are golden. Let them rest briefly before slicing to keep all the delicious fillings inside.

Serving Suggestions for Show-Stopping Keto Philly Cheesesteak Rolls

Serve these rolls piping hot, alongside a crisp green salad or roasted vegetables for a complete keto meal. For dipping, consider a side of sugar-free marinara or a creamy horseradish sauce. These rolls also make an excellent game day appetizer or quick lunch on the go.

Nutritional Information and Serving Size

This recipe yields about 6 cheesesteak rolls. Each roll comes in at roughly 240 to 280 calories, 20g of protein, 17g of fat, and just 3 to 4g net carbs, depending on the dough or wrap used. Packed with protein and flavor, they’re ideal for keto meal plans or satisfying weeknight dinners.

Deliciously Unique Keto Philly Cheesesteak Rolls (Recap)

Bringing together classic Philly steak, melted cheese, and crisp veggies—all neatly wrapped in a keto-friendly package—these rolls are a must for anyone seeking full flavor and healthy, low-carb eating.

[ingredients]
– 1 lb thinly sliced ribeye or sirloin steak
– 1 small green bell pepper, thinly sliced
– 1 small onion, thinly sliced
– 1/2 cup mushrooms, thinly sliced (optional)
– 1 tbsp olive oil
– 1 tsp garlic powder
– 1/2 tsp salt
– 1/2 tsp black pepper
– 6 slices provolone cheese (or mozzarella)
– 6 large keto-friendly wraps (such as cheese wraps or low-carb tortillas)
– Optional: Sugar-free marinara or creamy horseradish for serving
[/ingredients]

💡Meal Planning Tip: Save this recipe to automatically generate an organized shopping list. All ingredients will be sorted by store section, making it easy to shop and plan your keto meals.

CookifyAI meal planning interface

Instructions

  1. Preheat oven to 375°F. Line a baking sheet with parchment paper.
  2. Heat olive oil in a large skillet over medium-high heat. Sauté onions, peppers, and mushrooms (if using) for 3-4 minutes until softened and lightly browned. Remove from skillet.
  3. In the same skillet, cook the sliced steak for 2-3 minutes, seasoning with garlic powder, salt, and black pepper. Stir until just browned, then remove from heat.
  4. Lay out your keto wraps or cheese wraps on a clean surface. Arrange a portion of the steak and vegetable mixture in a line down the center of each. Lay a slice of provolone over the filling.
  5. Roll each wrap tightly around the filling, place seam-side down on the prepared sheet. If using cheese wraps, roll carefully as they are delicate.
  6. Bake for 7-10 minutes, or until wraps are golden and the cheese is melted. Let cool for a couple minutes, then slice and serve.

Weekly Meal Planning

These Keto Philly Cheesesteak Rolls hold up well for meal prepping and can be enjoyed throughout the week. Save and schedule this recipe in your weekly plan to automatically create a consolidated shopping list and prep calendar that sync with your other meals.

Planning Benefits:

– Easily calculate total quantities needed for meal prep
– Streamline your grocery list (no duplicate purchases!)
– Organize all ingredients by store section for fast shopping
– Reduce food waste by syncing overlapping ingredients across recipes

Pro tip: When prepping several recipes, schedule them together to see how egg, cheese, or veggie needs add up—no more accidental shortages or overbuying.

Cook and Prep Times

Prep Time: 15 minutes
Cook Time: 15 minutes
Total Time: 30 minutes

Enjoy the big flavor of Philly, fully keto and meal prep-ready!

Paleo Banana Bread Muffins: A Guilt-Free, Grab-and-Go Delight

Paleo Banana Bread Muffins

Introduction

Paleo Banana Bread Muffins deliver all the nostalgic comfort of classic banana bread but in a grab-and-go, naturally sweetened, and gluten-free package. Packed with wholesome ingredients, these muffins are moist, fluffy, and bursting with banana flavor, making them an excellent choice for breakfast, snacks, or even a guilt-free dessert. Perfect for busy mornings or meal prep, they’re sure to satisfy cravings without compromising on health.

Deliciously Unique Paleo Banana Bread Muffins

What sets these muffins apart is their commitment to the paleo diet—no grains, dairy, or refined sugars. Almond and coconut flours create a tender crumb while ripe bananas keep them perfectly sweet and moist. Whether you’re following a paleo lifestyle or simply seeking a healthier baking option, these muffins always impress with flavor and texture.

How to Choose and Prep Your Bananas

For maximum sweetness and banana flavor, use overripe bananas with plenty of brown spots. This ensures the muffins stay moist and need less added sweetener. Simply mash the bananas until smooth—a few small lumps are fine. If you want even more banana flavor, let your mashed bananas sit for 5 minutes before mixing them in.

Baking the Perfect Paleo Muffins

To achieve the ideal paleo muffin rise, blend your wet and dry ingredients separately and then combine just until mixed. Don’t overmix—this helps preserve a tender crumb. Fill muffin liners about three-quarters full to leave room for the perfect dome.

Serving Suggestions for Paleo Banana Bread Muffins

Enjoy these muffins warm, topped with almond butter, coconut yogurt, or a sprinkle of chopped walnuts. Pair them with cold brew coffee or a green smoothie for a wholesome breakfast, or pack them in lunchboxes for a fuss-free, nourishing snack.

Nutritional Information and Serving Size

This recipe yields 10 to 12 muffins, depending on size. Each muffin typically contains around 150–170 calories, 4g protein, and 10g healthy fats (varies based on chosen mix-ins). They’re naturally sweetened, filling, and free of grains, dairy, and refined sugar.

Deliciously Unique Paleo Banana Bread Muffins (Recap)

With no added grains or dairy, and all the familiar, cozy banana bread flavor, these muffins are a nutritious, crowd-pleasing option ready in under 30 minutes.

[ingredients]
3 large ripe bananas, mashed
3 large eggs
1/4 cup coconut oil, melted
1/4 cup maple syrup or honey
1 tsp vanilla extract
1 1/2 cups almond flour
1/4 cup coconut flour
1 tsp baking soda
1 tsp cinnamon
1/4 tsp salt
Optional: 1/3 cup chopped walnuts or dark chocolate chips (paleo-friendly)
[/ingredients]

💡Meal Planning Tip: Save this recipe to automatically generate an organized shopping list with all ingredients sorted by store section—perfect for efficient grocery trips and meal planning.

CookifyAI meal planning interface

Instructions

  1. Preheat your oven to 350°F (175°C) and line a muffin tin with paper liners, or grease with coconut oil.
  2. In a large bowl, whisk the mashed bananas, eggs, melted coconut oil, maple syrup (or honey), and vanilla extract until smooth.
  3. In a separate bowl, combine almond flour, coconut flour, baking soda, cinnamon, and salt.
  4. Add dry ingredients to the wet mixture, stirring gently until just combined. Don’t overmix. Fold in optional nuts or chocolate chips if desired.
  5. Spoon batter evenly into muffin liners, filling each about three-quarters full.
  6. Bake for 18–22 minutes, or until a toothpick inserted in the center comes out clean and the tops are golden.
  7. Let muffins cool in the pan for 5 minutes, then transfer to a wire rack to cool completely before serving.

Weekly Meal Planning

This recipe is a meal prep superstar—they freeze and reheat beautifully! Save and schedule this recipe to easily plan healthy breakfasts or snacks for the week and generate a smart shopping list that merges all ingredients for efficient grocery runs.

Planning Benefits:

  • Automatically calculates ingredient quantities across all planned recipes
  • Keeps your shopping list organized by grocery department
  • Prevents duplicate purchases and forgotten items
  • Streamlines nutritious weekly meal prep—especially helpful for busy households or special diets

Pro tip: Schedule recipes together and see overlapping ingredients for optimized shopping and zero waste—for example, these muffins and paleo pancakes both use bananas and eggs, so you only buy what you need!

Cook and Prep Times

Prep Time: 10 minutes
Cook Time: 18–22 minutes
Total Time: 28–32 minutes

Asian Chicken Lettuce Wraps: A Fresh, Flavor-Packed Weeknight Delight

Asian Chicken Lettuce Wraps

Introduction

Asian Chicken Lettuce Wraps are a vibrant, flavor-packed option that’s quick enough for busy weeknights but impressive enough to serve as a starter at your next gathering. Featuring crisp lettuce leaves filled with savory minced chicken, crunchy vegetables, and an umami-rich sauce, this dish is a knockout for anyone craving something fresh, light, and satisfying.

Why These Asian Chicken Lettuce Wraps Are a Weeknight Winner

Minimal prep, versatile ingredients, and bold flavors make these lettuce wraps a favorite. The juicy, aromatic chicken pairs beautifully with crisp lettuce and a zingy sauce, making each bite both satisfying and refreshing. Plus, they’re naturally low-carb, gluten-free (with the right sauce), and totally customizable for family or guests.

The Savory Secret Sauce

A punchy sauce is what sets great Asian lettuce wraps apart. This recipe uses a blend of soy sauce, hoisin, rice vinegar, and sesame oil, providing that signature sweet-salty depth with every bite. For a bit of heat, a touch of chili garlic sauce or sriracha can be stirred in — perfect for spice lovers!

Easy Assembly for Stress-Free Dinners

Simply spoon the hot, aromatic chicken and veggie filling into individual lettuce cups just before serving. Top with extra green onions, crunchy chopped peanuts, or a sprinkle of sesame seeds for visual appeal and added texture. This meal is fuss-free yet feels special, inviting everyone to dig in DIY style.

Serving Suggestions to Impress

Serve atop a platter with lime wedges and extra sauce for drizzling. Pair with steamed rice or rice noodles for a heartier meal, or keep it carb-light as a fresh party appetizer. Any leftovers make excellent wraps the next day or can be tossed in a salad for a quick lunch.

Nutritional Information and Serving Size

This recipe serves about 4 people, with each wrap containing around 120–150 calories (depending on fillings and sauce quantity). It’s protein-rich, low in carbs, and high in freshness, making it an excellent choice for health-conscious families.

Irresistible Asian Chicken Lettuce Wraps (Recap)

A symphony of textures and flavors, these lettuce wraps fuse tender chicken with crisp greens and zesty sauce — a crowd-pleasing, healthy, and convenient choice for any meal.

[ingredients]
1 pound ground chicken (or finely chopped chicken breast)
1 tablespoon vegetable oil
1 red bell pepper, finely diced
1/2 cup water chestnuts, diced
2 green onions, thinly sliced
2 cloves garlic, minced
1 tablespoon fresh ginger, grated
1/4 cup hoisin sauce
2 tablespoons soy sauce (low sodium preferred)
1 tablespoon rice vinegar
1 teaspoon sesame oil
Optional: 1 teaspoon chili garlic sauce or sriracha
Bib, butter, or iceberg lettuce leaves, washed and separated
Garnishes: extra green onions, chopped peanuts, sesame seeds, lime wedges
[/ingredients]

💡Meal Planning Tip: Save this recipe to instantly generate a categorized shopping list. All your ingredients, sorted by section, make grocery trips faster and meal prep stress-free.

CookifyAI meal planning interface

Instructions

  1. Heat the vegetable oil in a large skillet or wok over medium-high heat. Add ground chicken, breaking it apart, and cook until lightly browned and no longer pink, about 4–5 minutes.
  2. Add garlic, ginger, and the white part of the green onions. Sauté for 1–2 minutes until fragrant.
  3. Stir in bell pepper and water chestnuts. Cook for another 2–3 minutes until veggies are just tender.
  4. In a small bowl, whisk together hoisin sauce, soy sauce, rice vinegar, sesame oil, and optional chili garlic sauce or sriracha. Pour over the chicken mixture; stir well to combine and simmer for 2 more minutes.
  5. Remove pan from heat. Spoon the warm mixture into lettuce leaves. Top with reserved green onion tops, chopped peanuts, sesame seeds, and a squeeze of lime juice if desired.
  6. Serve immediately and let everyone build their own wraps at the table!

Weekly Meal Planning

Asian Chicken Lettuce Wraps are ideal for meal preppers and busy families. Save and schedule this recipe with CookifyAI to plan it into your weekly rotation. CookifyAI consolidates ingredients from all your recipes, organizing them by store section automatically — streamlining supermarket runs and helping you avoid buying duplicates.

Planning Benefits:

– Generate precise, total ingredient quantities for all scheduled recipes
– Categorize items in your shopping list by grocery section for faster shopping
– Simplify weekly meal prep and reduce planning time
– Avoid overlooked ingredients and food waste

Pro tip: Planning several dinner recipes using chicken? Schedule your recipes so CookifyAI will total up exactly how much chicken to buy for the week — no math or last-minute trips needed.

Cook and Prep Times

Prep Time: 15 minutes
Cook Time: 12 minutes
Total Time: 27 minutes

Enjoy the fresh flavors, easy prep, and meal-planning magic of Asian Chicken Lettuce Wraps — soon to be your go-to healthy weeknight meal!

Paleo Carne Asada Bowl: Bold Flavors, Easy Prep, and Healthy Goodness

Paleo Carne Asada Bowl

Introduction

Bring bold flavors and satisfying textures to your table with this Paleo Carne Asada Bowl—a vibrant, nutrient-rich meal that’s as filling as it is delicious. Featuring marinated steak, crisp veggies, and a punchy, zesty dressing, this bowl makes eating both healthy and enjoyable. It’s the perfect choice for quick weeknight dinners, lively gatherings, or meal prepping for flavorful lunches throughout the week.

Flavorful Simplicity with the Paleo Carne Asada Bowl

What makes this bowl a standout is its combination of smoky, citrus-marinated steak and crisp, colorful veggies—all layered over a bed of greens or cauliflower rice. Each component brings big flavor but requires minimal effort, so you don’t have to sacrifice taste for convenience. Plus, this naturally grain-free and dairy-free recipe fits right into a paleo lifestyle while being a true crowd-pleaser.

Crafting the Perfect Carne Asada Marinade

The heart of any great carne asada is the marinade. Whisk together olive oil, lime juice, orange juice, garlic, cumin, and just the right amount of chili powder for a steak that’s tender, juicy, and bursting with zesty flavor. Marinate your steak for at least 30 minutes or up to 8 hours for maximum depth.

Building Your Paleo Carne Asada Bowl

Once the steak is grilled to perfection and sliced, layer it over your base (choose from cauliflower rice or a fresh greens mix). Top with crunchy bell peppers, juicy cherry tomatoes, creamy avocado, and your favorite salsa or pico de gallo. Add lime wedges for an extra kick. The variety of textures and vivid colors make this bowl not just a meal, but a feast for the senses.

Serving Suggestions for a Show-Stopping Paleo Carne Asada Bowl

For a little extra contrast and flavor, garnish with chopped fresh cilantro and diced red onion. Serve alongside roasted plantains or sweet potato rounds if you want more carbs—still paleo-friendly! Each bowl is fully customizable, so everyone at the table can make their perfect plate.

Nutritional Information and Serving Size

This recipe yields 4 generous carne asada bowls. Each serving contains approximately 440–480 calories, packed with protein, healthy fats, and fiber-rich veggies—making it ideal for a satisfying lunch or dinner that fits a paleo plan.

Paleo Carne Asada Bowl (Recap)

Fast, fresh, and endlessly customizable, the Paleo Carne Asada Bowl is your ticket to big flavor without the fuss. It’s a nourishing, crowd-pleasing meal that’s just as perfect for meal prep as it is for sharing with friends and family.

[ingredients]
1 pound flank or skirt steak
2 tablespoons olive oil
2 limes, juiced
1 orange, juiced
3 garlic cloves, minced
1 teaspoon ground cumin
1 teaspoon chili powder
1 teaspoon sea salt
1/2 teaspoon black pepper
4 cups cauliflower rice (or greens mix)
1 red bell pepper, thinly sliced
1 yellow bell pepper, thinly sliced
1 cup cherry tomatoes, halved
1 avocado, sliced
1/2 small red onion, thinly sliced
Fresh cilantro, for garnish
Lime wedges, for serving
Salsa or pico de gallo, for topping
[/ingredients]

💡Meal Planning Tip: Save this recipe to effortlessly generate a detailed shopping list. CookifyAI organizes your ingredients by grocery section, making shopping for your paleo meals efficient and stress-free.

CookifyAI meal planning interface

Instructions

  1. In a bowl, whisk together olive oil, lime juice, orange juice, minced garlic, cumin, chili powder, sea salt, and black pepper. Pour the marinade over the steak in a sealable container or bag, turning to coat. Marinate for at least 30 minutes (or up to 8 hours in the refrigerator).
  2. Preheat a grill or grill pan over medium-high heat. Remove steak from marinade, shaking off excess. Grill for 3–4 minutes per side for medium-rare, or until desired doneness. Let rest for 5–10 minutes before slicing thinly against the grain.
  3. Meanwhile, sauté cauliflower rice in a skillet with a splash of olive oil and a pinch of salt for 3–4 minutes, until just tender. Divide equally among 4 bowls (or use fresh greens as your base).
  4. Arrange sliced steak, bell peppers, cherry tomatoes, avocado, and red onion on top of each bowl of cauliflower rice or greens.
  5. Finish with fresh cilantro, a squeeze of lime, and your favorite salsa or pico de gallo.

Weekly Meal Planning

This Paleo Carne Asada Bowl is ideal for meal prepping—ingredients keep well and components can be assembled in advance. Save and schedule this recipe using CookifyAI to add it to your weekly meal planner. Instantly generate smart, consolidated shopping lists for all your planned recipes to save time and skip duplicate purchases.

Planning Benefits:

  • Efficiently calculate total ingredient quantities when planning multiple recipes
  • Shopping lists organized by grocery store section
  • Minimize food waste by using overlapping ingredients
  • Streamline your meal prep game—all your recipes and lists in one place

Pro tip: With CookifyAI, you can schedule recipes for the week and never worry about counting ingredients or missing something at the store. Have eggs or peppers in several meals? Your shopping list will calculate precisely what you need—no more guesswork.

Cook and Prep Times

Prep Time: 15 minutes (+30 minutes marinating time)
Cook Time: 15 minutes
Total Time: 30 minutes (plus marinating)

Hearty Paleo Shepherd’s Pie: A Nutritious Twist on a Comfort Classic

Hearty and Healthy Paleo Shepherd’s Pie

Introduction

If you’re seeking a wholesome, satisfying meal that doesn’t skimp on comfort or nutrition, this Hearty and Healthy Paleo Shepherd’s Pie is the recipe to try. With its rich, savory filling and creamy root vegetable topping, it captures all the best flavors of the traditional dish—without grains, dairy, or legumes. It’s a fantastic choice for family dinners or weekend meal prep, ensuring everyone leaves the table happy and nourished.

Why This Paleo Shepherd’s Pie is Unbeatable

What sets this recipe apart is its robust flavor and the clever, nutrient-dense swaps. Swapping out white potatoes for a combination of cauliflower and sweet potatoes makes the topping creamy and light, while ground meat and plenty of veggies create a hearty filling. Every spoonful is packed with color, flavor, and a balance of protein, healthy fats, and veggies—making it a true crowd-pleaser.

Building a Nutritious Paleo Shepherd’s Pie Filling

This shepherd’s pie starts with a base of lean ground beef (or lamb or turkey for variety) sautéed with onions, garlic, carrots, and celery. Seasonal vegetables like mushrooms or zucchini can boost the flavor and nutrition even further. Instead of flour, arrowroot starch thickens the sauce naturally, while tomato paste and a splash of broth ensure a luscious, savory gravy. Fresh herbs like thyme and rosemary infuse the dish with warmth and depth.

The Ultimate Creamy Topping (Without Dairy or Grains!)

The secret to a mouthwatering paleo shepherd’s pie is the topping. Steamed cauliflower and sweet potatoes are blended together with a bit of olive oil, sea salt, and black pepper for a silky-smooth, creamy texture. Spread generously over the meaty filling and bake until just golden for a beautiful and naturally sweet finish.

Serving Ideas for a Classic Comfort Food Experience

Serve this shepherd’s pie hot out of the oven, garnished with fresh herbs or a sprinkle of cracked pepper. Pair it with a simple green salad or roasted Brussels sprouts for a complete, balanced meal. The dish reheats well, making it perfect for leftovers, lunchboxes, or make-ahead dinners.

Nutritional Information and Serving Size

This recipe yields about 6 generous servings. Each serving offers approximately 380-420 calories depending on your chosen meat, and packs in plenty of protein, vitamins from root veggies, and healthy fats, all while remaining gluten-free, grain-free, and dairy-free.

[ingredients]
1 1/2 lbs ground beef, lamb, or turkey
2 tablespoons olive oil or avocado oil, divided
1 yellow onion, diced
2 garlic cloves, minced
2 medium carrots, peeled and diced
2 celery stalks, diced
1 cup mushrooms, chopped (optional)
2 tablespoons tomato paste
1 tablespoon arrowroot starch (or tapioca starch)
1 cup beef or chicken broth
1 teaspoon dried thyme (or 1 tablespoon fresh)
1 teaspoon dried rosemary (or 1 tablespoon fresh)
Salt and black pepper, to taste

Topping:
1 large head cauliflower, cut into florets
1 medium sweet potato, peeled and chopped
2 tablespoons olive oil or ghee
Salt and pepper, to taste
Chopped fresh parsley, for garnish (optional)
[/ingredients]

💡Meal Planning Tip: Save this recipe to instantly generate an organized shopping list with everything sorted by grocery section—making healthy meal planning and grocery runs a breeze!

CookifyAI meal planning interface

Instructions

  1. Start with the vegetables: Steam cauliflower florets and sweet potato chunks until fork-tender (about 10–12 minutes). Drain well.
  2. Make the topping: In a food processor or with a potato masher, blend the steamed cauliflower and sweet potatoes with olive oil or ghee. Season with salt and pepper. Set aside.
  3. Prepare the filling: Heat 1 tablespoon oil in a large skillet over medium heat. Add diced onion, garlic, carrots, and celery. Sauté for 4–5 minutes until softened. Stir in mushrooms, if using, and cook 2 minutes more.
  4. Add the ground meat to the skillet. Cook until browned, breaking it up with a spoon.
  5. Stir in tomato paste, thyme, and rosemary. Sprinkle with arrowroot starch and mix well. Pour in broth and simmer for 2-3 minutes until slightly thickened. Season to taste with salt and pepper.
  6. Preheat oven to 400°F (200°C). Spread the meat and veggie filling evenly in a baking dish. Top with the cauliflower-sweet potato mash, smoothing to cover completely.
  7. Bake for 20–25 minutes, until the topping is lightly golden and filling is bubbling at the edges. Garnish with fresh parsley before serving, if desired.

Weekly Meal Planning

This Hearty and Healthy Paleo Shepherd’s Pie is a meal prep powerhouse. Save and schedule the recipe so you can add it to your week’s menu, and CookifyAI will automatically consolidate ingredients and optimize your shopping list for the whole week.

Planning Benefits:

  • Automatically adds all ingredients from all your planned recipes, organized by grocery section
  • Prevents duplicate purchases and minimizes food waste
  • Makes weekend meal prepping and busy weeknights much smoother

Pro tip: When scheduling multiple meals, CookifyAI calculates your total ingredient needs, so you buy exactly what you need—no more last-minute store runs!

Cook and Prep Times

Prep Time: 20 minutes
Cook Time: 35 minutes
Total Time: 55 minutes

Enjoy a healthy version of classic comfort food, and make meal planning effortless with CookifyAI!

30+ Easy AIP & Paleo Sheet Pan Dinners: Delicious, Stress-Free Meals for Every Weeknight!

30+ AIP and Paleo Easy Sheet Pan Dinners – Eat Beautiful

Introduction

If you’re looking for stress-free, delicious dinners that support your wellness journey, these 30+ AIP and Paleo Easy Sheet Pan Dinners are your secret weapon. With one-pan prep and minimal cleanup, these meals pack in bold flavor while supporting an anti-inflammatory, gut-friendly, or simply whole-food lifestyle. They’re the perfect solution for busy weeknights or anytime you crave satisfying flavors with minimal fuss!

Why Sheet Pan Dinners Are an AIP & Paleo Game Changer

Sheet pan dinners are beloved not just for their convenience, but also for how they turn simple ingredients into something magnificent. Each meal combines protein, seasonal veggies, and crave-worthy spices—delivering comforting, nourishing results with every batch. For anyone following the Autoimmune Protocol (AIP) or Paleo diet, these one-pan wonders take the guesswork out of mealtime without sacrificing taste or variety.

AIP & Paleo Sheet Pan Dinner Essentials

The core of any great sheet pan dinner is smart ingredient selection. Think lean meats or fish, sweet potatoes, cruciferous veggies, root vegetables, and AIP-compliant oils and seasonings. By varying your proteins (like chicken, beef, salmon, or shrimp) and mixing up vegetables, you keep things interesting week after week. Plus, everything roasts together for beautiful caramelization and depth of flavor.

Preparing and Customizing Your Sheet Pan Meal

To build your perfect AIP or Paleo sheet pan dinner, start by arranging your protein and chopped veggies in a single layer on a large baking sheet. Drizzle with olive or avocado oil, sprinkle with your favorite healing herbs (think rosemary, thyme, or garlic powder), and toss gently to coat. For extra flavor, add lemon slices or AIP-safe sauces before roasting. The key is cutting veggies evenly and timing their addition to avoid over- or under-cooking.

Flavorful Sheet Pan Pairings

Some irresistible AIP and Paleo-friendly combinations include:

  • Chicken thighs, broccoli, and sweet potato with rosemary and garlic
  • Salmon fillets with asparagus, fennel, and lemon
  • Beef strips, Brussels sprouts, and carrots with thyme
  • Shrimp, zucchini, and red onion with olive oil and parsley

Sheet pan planning is all about flexibility—swap in what’s seasonal or on-hand to create endless meal variety.

Serving Suggestions and Finishing Touches

Garnish your cooked meals with fresh herbs, a splash of citrus, or avocado slices. Serve over a bed of greens or with a side of cauliflower rice for extra texture. These dishes are hearty enough on their own, but also easy to pair with simple AIP- or Paleo-friendly sauces for even more flavor.

Nutritional Information & Portioning

Each sheet pan meal typically serves 3–4 people and is loaded with vitamins, fiber, and lean protein. Calories and macros depend on the specific protein and veggies used but expect nutritionally dense, filling plates great for the whole family or meal prepping for the week.

[ingredients]
Example Core Ingredients List:
1 pound boneless, skinless chicken breasts or thighs (or salmon/steak/shrimp)
3 cups assorted chopped veggies (sweet potato, carrots, broccoli, zucchini, Brussels sprouts)
2 tablespoons olive or avocado oil
1 teaspoon sea salt
1/2 teaspoon garlic powder
1/2 teaspoon dried thyme or rosemary
Optional: lemon slices, avocado, fresh herbs for garnish
[/ingredients]

💡Meal Planning Tip: Save this recipe with CookifyAI to turn your meal inspiration into an organized shopping list. Instantly sort all your ingredients by grocery section, streamline meal prep, and never miss a critical item when shopping.

CookifyAI meal planning interface

Instructions

  1. Preheat your oven to 425°F. Line a large sheet pan with parchment paper for easy cleanup.
  2. Chop your chosen vegetables and arrange them in an even layer on the sheet pan.
  3. Add your protein of choice (chicken, beef, salmon, or shrimp) alongside the veggies.
  4. Drizzle with oil, then sprinkle with sea salt, garlic powder, and dried herbs. Toss everything to coat well. Top with lemon slices, if desired.
  5. Roast for 25–35 minutes (chicken and beef) or 15–20 minutes (fish and shrimp), or until protein is cooked through and veggies are golden and tender, flipping or stirring once halfway through. Adjust cooking time based on protein thickness.
  6. Remove from the oven, garnish with fresh herbs or avocado, and serve immediately!

Weekly Meal Planning

Sheet pan dinners make weekly meal planning a breeze—batch cook one or two pans and enjoy leftovers for lunch or quick repeat dinners. Save and schedule all your favorite AIP and Paleo sheet pan recipes in CookifyAI to auto-generate shopping lists that combine and organize ingredients across meals.

Planning Benefits:

  • Easily scales up for meal prep and large families
  • Aggregates all pantry, produce, and protein needs into a single list
  • Eliminates duplicate purchases and forgotten ingredients
  • Lets you visually plan busy weeks for less stress and healthier eating

Pro tip: CookifyAI consolidates overlapping ingredients (e.g., multiple recipes using olive oil), so you buy just what you need—saving time, money, and reducing food waste.

Cook and Prep Times

Prep Time: 10–15 minutes
Cook Time: 20–35 minutes
Total Time: 35–50 minutes

Enjoy AIP and Paleo sheet pan dinners with ease, convenience, and bold flavor—all week long!

Hearty Paleo Chicken Casserole: A Flavor-Packed Comfort Dish for Every Meal

Flavorful Paleo Chicken Casserole

Introduction

The Flavorful Paleo Chicken Casserole is a robust, all-in-one meal that’s designed for maximum flavor without sacrificing nutrition. With tender chicken, hearty vegetables, and aromatic herbs, this casserole offers a satisfying and comforting dinner option that aligns with paleo guidelines. Perfect for family dinners or make-ahead lunches, it’s a hands-off meal that makes weeknight cooking effortless yet delicious.

Why This Casserole is a Must-Try

This paleo-friendly casserole shines because of its simplicity and bold flavors. A mixture of savory spices, garlic, and fresh herbs blends beautifully with juicy chicken and colorful vegetables, creating a dish that’s both nourishing and comforting. The best part? It’s entirely grain-free, dairy-free, and free from processed ingredients, making it suitable for many dietary preferences and easy to customize.

Building Bold Flavors the Paleo Way

Using coconut milk for creaminess and a mix of fresh or frozen vegetables, this casserole packs in flavor without heavy sauces or cheese. Garlic, smoked paprika, and thyme infuse every bite with warmth and depth. A quick sauté of onions and garlic at the start lays a foundation of flavor that persists through every spoonful.

Assembling the Perfect Casserole

Once the chicken and vegetables are prepped and seasoned, simply layer them in a casserole dish and add the coconut milk mixture. The oven does the rest, melding all the flavors together and yielding a bubbling, golden-topped dish ready to be enjoyed. This hands-off approach means you have more time to relax (or tackle other tasks) while your dinner cooks itself.

Serving Suggestions for Flavorful Paleo Chicken Casserole

This casserole pairs well with a simple side salad or roasted root vegetables. Garnish with chopped parsley or fresh thyme for a fresh pop of color and flavor. Leftovers reheat beautifully, making this recipe an excellent candidate for meal prep or busy nights.

Nutritional Information and Serving Size

This recipe yields approximately 6 hearty servings. Per serving, expect around 350-400 calories (depending on vegetables and coconut milk used), plenty of lean protein from chicken, and a nutrient boost from the veggies—making it a healthy, balanced meal.

Flavorful Paleo Chicken Casserole (Recap)

This recipe is a standout for anyone seeking a hassle-free, deeply satisfying, and paleo-friendly casserole. Its rich flavor and wholesome ingredients make it a crowd pleaser—perfect for busy families or anyone wanting an easy, healthy weeknight meal.

[ingredients]
1.5 lbs boneless, skinless chicken thighs (or breasts), cut into bite-size pieces
1 large onion, diced
3 cloves garlic, minced
1 red bell pepper, chopped
2 carrots, sliced
1 cup broccoli florets
1 cup cauliflower florets
1 (13.5 oz) can full-fat coconut milk
2 tablespoons olive oil or avocado oil
1 tablespoon arrowroot powder (or tapioca flour)
1 teaspoon smoked paprika
1 teaspoon dried thyme
1/2 teaspoon dried oregano
1/2 teaspoon salt (or to taste)
1/2 teaspoon black pepper
Fresh parsley or extra thyme, for garnish
[/ingredients]

💡Meal Planning Tip: Save this recipe to automatically generate an organized shopping list with all ingredients sorted by store section—perfect for efficient grocery trips and meal planning.

CookifyAI meal planning interface

Instructions

  1. Preheat your oven to 400°F (200°C). Lightly grease a 9×13-inch casserole dish.
  2. Heat the olive oil in a large skillet over medium heat. Add diced onion and sauté 3-4 minutes, until softened. Stir in garlic, red bell pepper, carrots, broccoli, and cauliflower. Cook for 5 minutes, stirring often.
  3. Add the chicken pieces to the skillet and season with smoked paprika, dried thyme, oregano, salt, and black pepper. Cook until the chicken is mostly cooked through, about 5 minutes (it will finish in the oven).
  4. In a small bowl, whisk the arrowroot powder with a few tablespoons of the coconut milk until smooth. Pour the remaining coconut milk into the pan with the chicken and veggies, then add the arrowroot slurry. Stir all together until well combined and just starting to thicken.
  5. Transfer the mixture to the prepared casserole dish. Spread evenly and bake uncovered for 25-30 minutes, until bubbling and golden on top.
  6. Remove from oven, garnish with freshly chopped parsley or thyme, and let rest for 5 minutes before serving.

Weekly Meal Planning

This casserole is a fantastic addition to your weekly meal plan—it reheats well and can be made ahead. Save and schedule this recipe to plan your cooking days and generate smart shopping lists that seamlessly consolidate ingredients for all your scheduled meals.

Planning Benefits:

  • Automatically calculates total ingredient quantities for multiple recipes
  • Organizes shopping lists by grocery store section for speedy shopping
  • Prevents duplicate purchases and lost ingredients
  • Makes weekly meal prep and planning simple and stress-free

Pro tip: When you schedule recipes together, CookifyAI ensures you buy exactly what you need—no more or less—streamlining your grocery run and preventing food waste.

Cook and Prep Times

Prep Time: 20 minutes
Cook Time: 35 minutes
Total Time: 55 minutes

This Flavorful Paleo Chicken Casserole brings wholesome comfort, convenience, and mouthwatering taste—all while being paleo-approved and perfect for meal planning. Try it once, and it’s sure to become a staple on your table!

Paleo Stuffed Peppers: Your Ultimate Guide to a Flavor-Packed, Grain-Free Meal Prep Marvel

Paleo Stuffed Peppers Recipes

Introduction

Paleo Stuffed Peppers are a satisfying, flavor-packed meal that turns humble bell peppers into vibrant vessels filled with seasoned meat and vegetables. Bursting with color and nutrition, they make a wholesome, grain-free alternative to classic stuffed peppers and are perfect for dinner parties or easy weeknight meals. These peppers appeal to both Paleo eaters and anyone seeking a fresh, healthy twist on a comforting classic.

Why Paleo Stuffed Peppers Are a Meal Planning Superstar

What makes these Paleo Stuffed Peppers stand out is their versatility and robust flavor. By skipping the grains (no rice or breadcrumbs here!) and loading up on lean protein and vegetables, this dish delivers a full meal in one beautiful package. The filling is juicy and satisfying, the peppers tender-but-still-sweet, and the seasoning is balanced for diner appeal—making this recipe equally fit for meal prep or family gatherings.

Crafting the Perfect Paleo Filling

For the filling, ground turkey or beef is cooked with onions, garlic, diced tomatoes, and a selection of paleo-friendly spices. Chopped cauliflower rice adds texture and nutrition, absorbing the bold flavors while keeping the dish low in carbs. For extra freshness, chopped spinach or kale works beautifully. The absence of dairy and grains means every bite adheres to Paleo principles—without sacrificing taste or satisfaction.

Assembling and Baking Paleo Stuffed Peppers

Once the meat-and-veggie filling is prepped, it’s spooned into halved bell peppers. Baking the peppers until just tender ensures each serving holds its shape and provides a fun, edible ‘bowl’ for the savory mixture. A quick broil at the end lends a slightly caramelized finish—making every bite irresistible.

Serving Suggestions for Show-Stopping Paleo Stuffed Peppers

Serve these stuffed peppers hot from the oven with a green salad or roasted vegetables. Fresh cilantro or parsley sprinkled on top adds color and a burst of flavor. These peppers are just as good reheated the next day for lunch, making them perfect for meal prep and busy weeks.

Nutritional Information and Serving Size

This recipe yields about 4 sizable servings. Each serving is packed with protein, fiber, abundant vitamins, and healthy fats—while staying low in carbs and completely grain and dairy free. Depending on the type of meat used, each stuffed pepper has roughly 270–350 calories.

Paleo Stuffed Peppers Recipes (Recap)

Paleo Stuffed Peppers are colorful, nourishing, and adaptable—a perfect main dish for serving guests, satisfying meal prep, or nourishing weeknight dinners. Their simplicity and bold flavors make them a recurring favorite for Paleo and non-Paleo eaters alike.

[ingredients]
4 large bell peppers (any color), halved and seeded
1 lb ground turkey, chicken, or beef
1 small onion, diced
2 cloves garlic, minced
1 cup cauliflower rice (fresh or frozen)
1 cup diced tomatoes (no sugar added)
1 cup spinach or kale, chopped
2 tablespoons olive oil
1 teaspoon smoked paprika
1/2 teaspoon dried oregano
1/2 teaspoon cumin
Salt and pepper, to taste
Optional: fresh cilantro or parsley for garnish
[/ingredients]

💡Meal Planning Tip: Save this recipe to automatically generate a shopping list with all ingredients sorted by store section—streamlining grocery trips and weekly meal planning.

CookifyAI meal planning interface

Instructions

  1. Preheat your oven to 375°F (190°C). Lightly oil a large baking dish.
  2. Arrange the bell pepper halves, cut side up, in the dish.
  3. Heat the olive oil in a large skillet over medium heat. Add onion and garlic; sauté until fragrant, about 2–3 minutes.
  4. Add the ground turkey (or other protein) and cook until browned, breaking apart with a spoon.
  5. Stir in cauliflower rice, diced tomatoes, spinach/kale, smoked paprika, oregano, cumin, salt, and pepper. Cook for 3–4 minutes, until the greens are wilted and the mixture is heated through.
  6. Spoon the filling into the bell pepper halves, packing it in gently.
  7. Cover the baking dish with foil and bake for 25 minutes. Remove foil and bake another 10–15 minutes, or until peppers are tender and filling is slightly browned. Optionally, broil for 2–3 minutes for extra caramelization.
  8. Garnish with fresh herbs and serve hot.

Weekly Meal Planning

These Paleo Stuffed Peppers are made for efficient meal prep—easy to double, portion, and enjoy throughout the week. Save and schedule this recipe to plan exactly when to make it and generate a smart shopping list that consolidates all your recipes.

Planning Benefits:

  • Auto-calculates ingredient quantities across your full week of meals
  • Sorts shopping lists by department for faster trips
  • Reduces duplicate purchases and helps prevent missing ingredients
  • Streamlines meal prep and helps keep your week organized

Pro tip: When planning several recipes, use CookifyAI’s schedule feature to see overlapping ingredients (like fresh spinach or proteins), so your list reflects exactly what you need—cutting down on waste and extra store visits.

Cook and Prep Times

Prep Time: 20 minutes
Cook Time: 35 minutes
Total Time: 55 minutes

Crispy Paleo Orange Chicken: A Delicious, Allergy-Friendly Twist on Chinese Takeout

Crispy Paleo Orange Chicken (Gluten-free, Soy-free, AIP Option)

Introduction

If you’re searching for a weeknight dinner that brings restaurant-level flavor to your kitchen while staying health-conscious, this Crispy Paleo Orange Chicken is a must-try. Bursting with zesty orange flavor and a perfectly crispy coating, this dish satisfies your Chinese takeout cravings with none of the gluten, soy, or gut-irritating ingredients. It’s easy to customize for the Autoimmune Protocol (AIP) diet, making it a family-friendly staple you’ll want to keep in your regular rotation!

Why Crispy Paleo Orange Chicken is a Game Changer

What makes this orange chicken recipe special is its use of wholesome, allergy-friendly ingredients. Instead of using flour or cornstarch, you’ll achieve that irresistible crispiness using arrowroot powder and coconut flour. The homemade orange sauce is both tangy and sweet, free from refined sugars and soy, making it a win for your taste buds AND your wellness goals. Plus, it’s naturally gluten-free and easy to adapt for those avoiding eggs or nightshades.

The Secret to a Flavorful, Crispy Paleo Orange Chicken

The magic of this recipe comes from a blend of simple techniques: dredging the chicken in a seasoned starch mix, quickly pan-frying to golden perfection, and then tossing it in an aromatic orange sauce. The sauce relies on fresh orange juice, a splash of coconut aminos (for that umami without soy), and honey to create a sticky, glossy finish. For the AIP version, simply swap out the pepper flakes and use a compliant thickener.

Serving Suggestions and Pairings

Serve your crispy orange chicken over a bed of cauliflower rice, steamed broccoli, or roasted vegetables for a rounded, nutrient-dense meal. Garnish with sesame seeds or chopped scallions for extra freshness (omit for strict AIP). A side of sautéed greens or a simple carrot slaw complements the sweet-spicy orange sauce and keeps your meal light and energizing.

Nutritional Information and Serving Size

This recipe makes about 4 hearty servings. Each serving contains approximately 330–360 calories, featuring a healthy balance of protein and carbs without unhealthy fats or added sugars. Perfect for meal preppers, those managing food sensitivities, or anyone looking to eat clean without sacrificing flavor!

[ingredients]
1 lb boneless, skinless chicken breast or thighs, cut into bite-sized pieces
1/2 cup arrowroot starch (or tapioca starch)
2 tbsp coconut flour
1/2 tsp sea salt
1/4 tsp cracked black pepper (omit for AIP)
2 tbsp avocado oil (for frying)

For the Orange Sauce:
1/2 cup fresh orange juice (about 2 oranges)
1 tsp orange zest
2 tbsp coconut aminos (soy-free)
1–2 tbsp honey (to taste)
2 cloves garlic, minced
1 tsp fresh grated ginger
1 tbsp arrowroot starch + 2 tbsp water (for slurry)
Pinch red pepper flakes (omit for AIP)
Sea salt to taste

Optional Garnishes:
Sliced green onions (omit for AIP)
Sesame seeds (omit for AIP)
[/ingredients]

💡Meal Planning Tip: Save this recipe to automatically generate an organized shopping list with all ingredients sorted by store section—perfect for efficient grocery trips and streamlined meal planning!

CookifyAI meal planning interface

Instructions

  1. In a shallow bowl, whisk together the arrowroot starch, coconut flour, sea salt, and pepper.
  2. Toss chicken pieces in the mixture until evenly coated, shaking off excess.
  3. Heat avocado oil in a large skillet over medium heat. Fry chicken in batches until crispy and golden (about 3–4 minutes per side). Remove and let drain on a paper towel-lined plate.
  4. Meanwhile, in a small bowl, whisk together orange juice, zest, coconut aminos, honey, garlic, and ginger.
  5. Pour sauce ingredients into a clean skillet. Bring to a simmer and cook for 2–3 minutes.
  6. Stir arrowroot starch and water together to form a slurry. Add to the sauce and stir until thickened, about 1 minute. Add pepper flakes if using.
  7. Add crispy chicken to the skillet and toss to coat in the sauce.
  8. Serve immediately, garnished as desired.

Weekly Meal Planning

Crispy Paleo Orange Chicken is an ideal candidate for your weekly meal prep—it keeps well in the fridge and reheats beautifully, making it a smart choice for lunches or quick dinners. Save and schedule this recipe in CookifyAI to plan exactly when you’ll enjoy it, generate smart shopping lists, and consolidate ingredients across all your planned meals for the week.

Planning Benefits:

– Automatically calculates total ingredient quantities across multiple recipes
– Organizes shopping lists by grocery store sections
– Helps avoid duplicate purchases and forgotten ingredients
– Makes weekly meal prep straightforward and efficient

Pro tip: Schedule your week to see where your ingredients overlap with other meals—saving on both time and your grocery bill!

Cook and Prep Times

Prep Time: 20 minutes
Cook Time: 15 minutes
Total Time: 35 minutes

Crispy Paleo Orange Chicken delivers bold flavor and crowd-pleasing texture in a healthful, allergy-friendly format. Your future meal prep—and your taste buds—will thank you!

One-Pan Flavor Explosion: Hearty Beef, Broccoli & Mushrooms for Effortless Weeknight Dinners

Sheet Pan Beef and Broccoli with Mushrooms – Heal Me Delicious

Introduction

When you crave a flavorful dinner that comes together in minutes and uses just one pan, Sheet Pan Beef and Broccoli with Mushrooms is your answer. A symphony of juicy beef, roasted broccoli florets, and tender mushrooms, this dish brings restaurant-quality flavor to your table—without the time or hassle of stir-frying or juggling multiple pots. Effortless to prep and even easier to clean up, this meal is ideal for busy weeknights and anyone looking to eat well without sacrificing flavor or nutrition.

Why You’ll Love Sheet Pan Beef and Broccoli with Mushrooms

What sets this recipe apart is its savory, umami-rich sauce that lightly caramelizes in a hot oven, coating every bite with mouthwatering flavor. The combination of beef, vibrant broccoli, and earthy mushrooms delivers a meal that’s hearty, wholesome, and loaded with nutrients. Even better, the entire process happens on one sheet pan, making both cooking and cleanup a breeze. It’s a crowd-pleaser that satisfies cravings while fitting neatly into any meal plan.

Building Layers of Flavor

A good sheet pan meal relies on a well-balanced marinade. For this recipe, simple ingredients like coconut aminos, garlic, ginger, and a hint of honey create depth without requiring soy or gluten, making the dish “Heal Me Delicious”–approved. Slicing your beef thin ensures tenderness and allows it to soak up the marinade, while roasting at a high temperature seals in flavor and juiciness. The mushrooms absorb all those delicious juices, rounding out the dish with a satisfying bite.

Effortless Assembly and Roasting

Toss your marinated beef, broccoli, and mushrooms right on the sheet pan, spread it out evenly, and let your oven do the rest. Everything cooks at once, ensuring the vegetables roast to golden perfection and the beef remains juicy. No stirring or standing at the stove—just set it and let the magic happen.

Serving Suggestions for Sheet Pan Beef and Broccoli with Mushrooms

This dish is delicious on its own but also fantastic served over a bowl of fluffy white rice, cauliflower rice, or quinoa. Garnish with sliced green onions or a sprinkle of sesame seeds for extra crunch and freshness. Make it a full meal by pairing with a crisp Asian-style slaw or a simple cucumber salad.

Nutritional Information and Serving Size

This balanced dinner serves 4 and is brimming with protein, fiber, and vitamins from the fresh veggies. It’s naturally gluten-free and dairy-free, fitting most “heal me delicious” and clean eating lifestyles seamlessly—providing around 340–400 calories per serving (depending on cut of beef and sauce).

Recap: A Weeknight Winner

Sheet Pan Beef and Broccoli with Mushrooms is a weeknight hero: bold in flavor, nourishing, easy to prep, and even easier to clean. Bring the goodness of a classic takeout favorite to your table—with healthier ingredients and no fuss.

[ingredients]
1 lb flank steak or sirloin, thinly sliced against the grain
1 large head of broccoli, cut into florets
8 oz mushrooms, quartered
2 tbsp olive oil
1/4 cup coconut aminos (or low-sodium soy sauce if not following AIP)
2 tbsp honey or maple syrup
2 cloves garlic, minced
2 tsp fresh ginger, grated
1 tsp sesame oil (optional)
1/2 tsp salt (adjust to taste)
1/4 tsp black pepper (omit for strict AIP)
Sliced green onions and sesame seeds, for garnish (optional)
[/ingredients]

💡Meal Planning Tip: Save this recipe to instantly generate a well-organized shopping list with every ingredient sorted by store aisle. This saves you time and ensures you never miss a key item for your meals.

CookifyAI meal planning interface

Instructions

  1. Preheat oven to 425°F (218°C). Line a large rimmed sheet pan with parchment paper for easy cleanup.
  2. In a large bowl, whisk together coconut aminos, honey/maple syrup, minced garlic, grated ginger, and sesame oil (if using).
  3. Add thinly sliced beef to the marinade, stirring well to coat, and let sit while you prepare vegetables.
  4. In a separate bowl, toss broccoli florets and mushrooms with olive oil, salt, and pepper.
  5. Spread vegetables evenly on the prepared baking sheet. Nestle marinated beef slices among the veggies, pouring any extra marinade over everything.
  6. Roast for 15–18 minutes, tossing once halfway, until beef is just cooked through and vegetables are golden and tender-crisp.
  7. Remove from oven, garnish with green onions and sesame seeds if desired. Serve hot over your favorite base.

Weekly Meal Planning

Want to enjoy this healthy sheet pan dinner and simplify your week’s menu? Save and schedule this recipe in your CookifyAI meal planner to organize meals and generate a master shopping list for the entire week.

Planning Benefits:

– Automatically calculates ingredient totals for every planned meal
– Groups your grocery list by section for streamlined shopping
– Prevents overbuying and ensures you get exactly what you need
– Makes prepping healthy meals like this sheet pan dish both simple and sustainable

Pro tip: Plan multiple sheet pan meals or recipes using broccoli and mushrooms to cut down on prep time and maximize ingredient use.

Cook and Prep Times

Prep Time: 15 minutes
Cook Time: 18 minutes
Total Time: 33 minutes

Enjoy the simplicity and bold flavors of Sheet Pan Beef and Broccoli with Mushrooms—healthy home-cooked dinners have never been this easy!
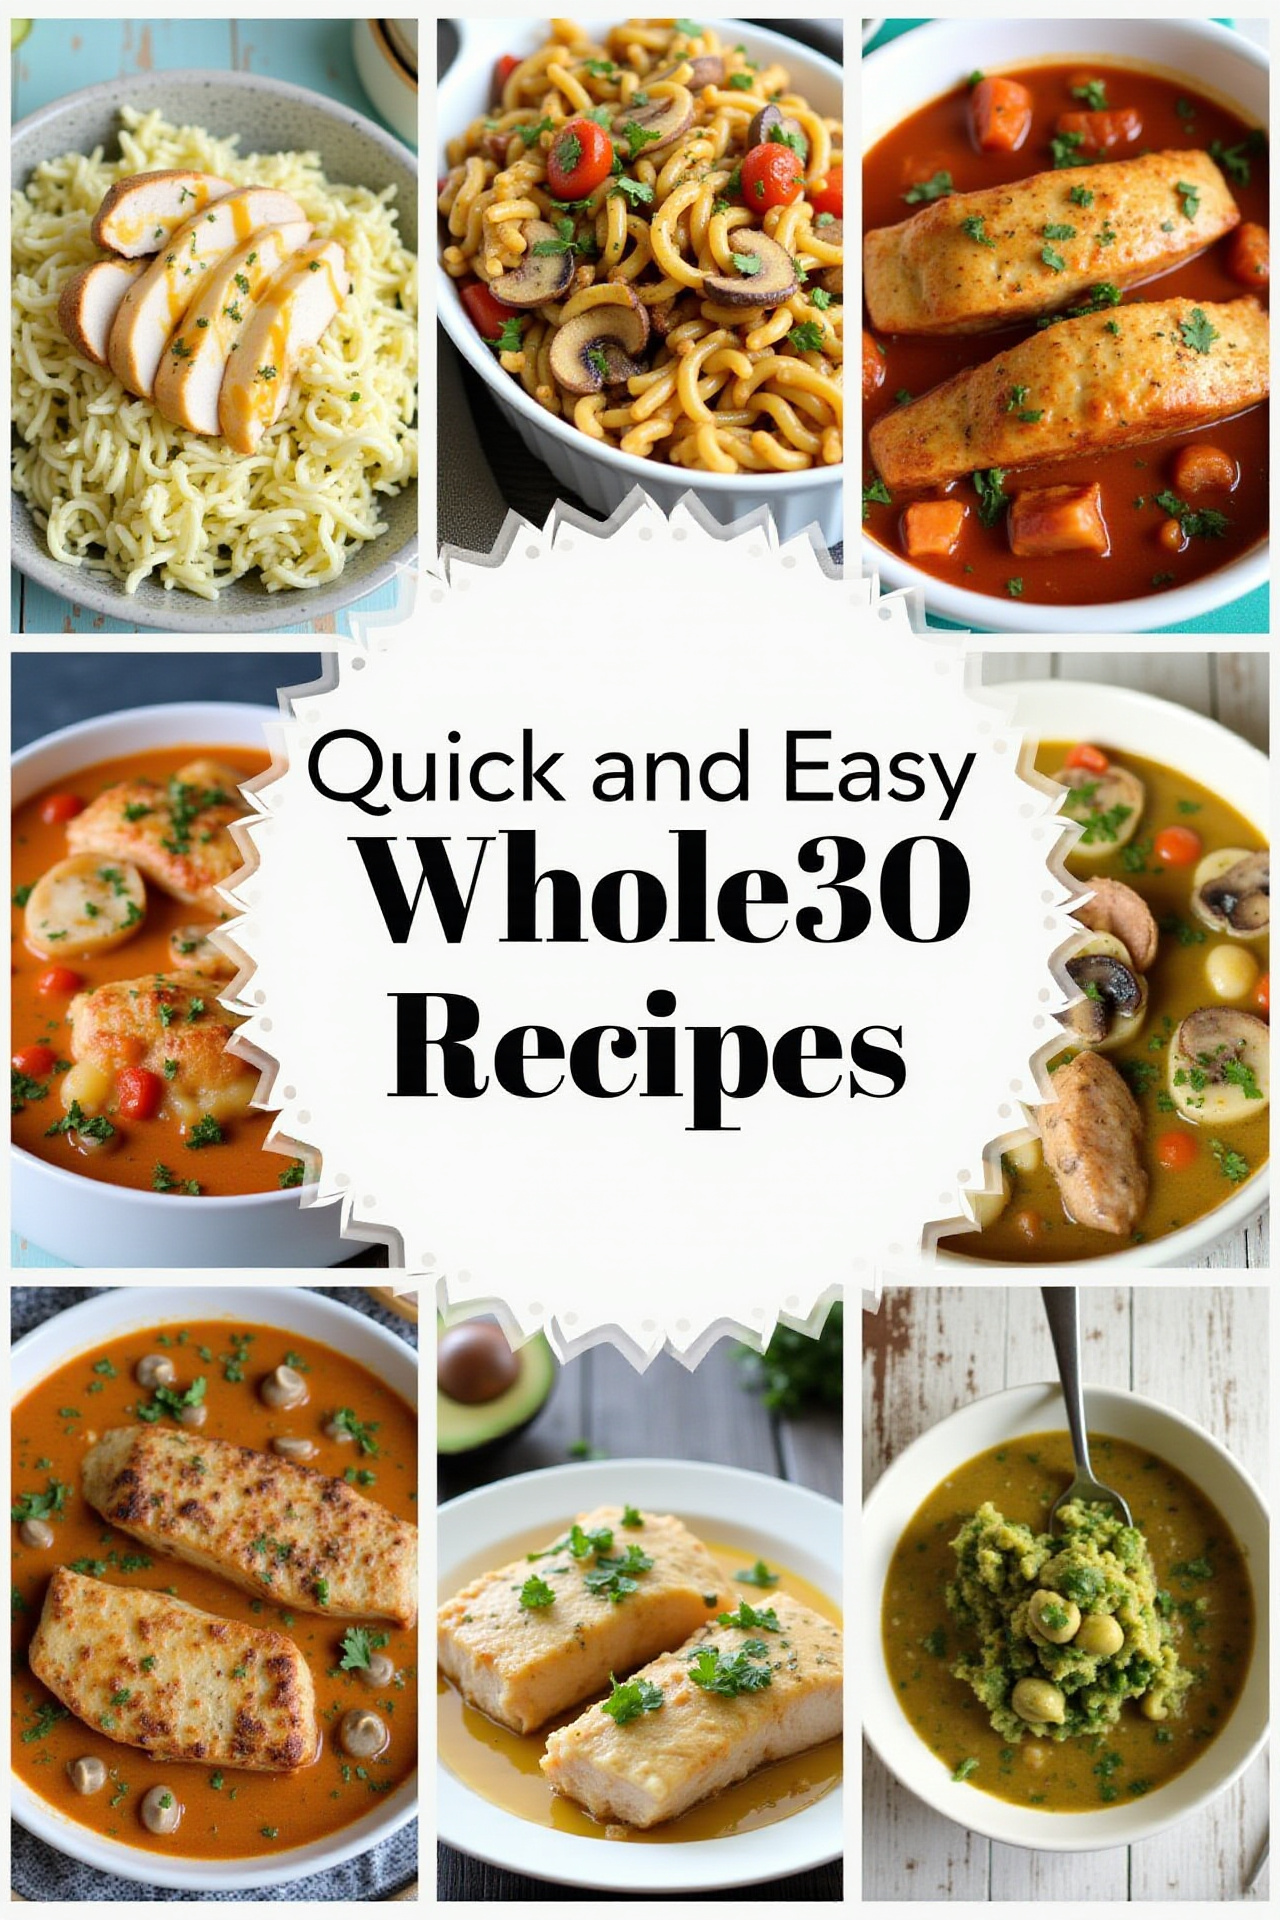
Crispy & Wholesome: The Ultimate Grain-Free Chicken Taquitos Recipe

Grain Free Chicken Taquitos

Introduction

Grain Free Chicken Taquitos offer all the crispy, savory flavor you crave—without the grains. Whether you’re following a gluten-free diet or simply want a lighter, wholesome spin on a classic comfort, these taquitos deliver irresistible crunch and a juicy chicken filling. They’re perfect as a crowd-pleasing appetizer, a fun family meal, or a make-ahead lunch box option.

Why Grain Free Chicken Taquitos Are a Must-Try

This recipe stands out for its simplicity and wide appeal. Instead of traditional tortillas, you’ll use grain-free wraps or homemade alternatives, making these taquitos naturally gluten-free and suitable for many eating styles. The savory shredded chicken filling, seasoned just right and baked until crispy, wins over kids and adults alike—great for weeknight dinners or easy party eats.

Building That Mouthwatering Chicken Filling

A flavorful filling is what sets these taquitos apart. Use cooked, shredded chicken (leftovers are perfect!) tossed with a blend of smoky spices, a touch of cream cheese for creaminess, and a sprinkling of cheese. For extra flavor, a bit of salsa or diced green chiles can be mixed in, creating a hearty, perfectly spiced filling.

How to Assemble and Bake Grain Free Chicken Taquitos

Lay out your grain-free wraps and add a generous spoonful of the chicken mixture to each. Tightly roll them up, secure with a toothpick if needed, and arrange seam-side down on a baking sheet. A light brush of oil on top encourages that signature crispy exterior. Bake until golden and crisp. For extra crunch, you can use an air fryer!

Serving Ideas for Crowd-Pleasing Chicken Taquitos

Serve your chicken taquitos hot from the oven with dips like guacamole, fresh salsa, or a creamy cilantro sauce. They pair well with a side salad or a bowl of Mexican-style rice for a complete meal. For gatherings, cut them in half, add a bowl of queso, and watch them disappear.

Nutritional Information and Serving Size

This recipe yields about 10 taquitos (serves approximately 4 people at 2-3 taquitos each). Each taquito is typically around 140–180 calories, depending on the cheese and wrap used. They are high in protein, low in carbs, and naturally gluten- and grain-free.

Why You’ll Love Grain Free Chicken Taquitos (Recap)

These baked taquitos deliver the satisfying crunch and zesty flavor you love, minus the grains. They’re quick, customizable, and perfect for meal prepping, weeknight dinners, or parties—guaranteed to be a hit every time.

[ingredients]
2 cups cooked, shredded chicken (rotisserie chicken works great)
1/3 cup cream cheese, softened
1/2 cup shredded cheese (cheddar, Monterey Jack, or dairy-free alternative)
1/3 cup salsa or drained, diced green chiles
1 teaspoon chili powder
1/2 teaspoon garlic powder
1/2 teaspoon cumin
Salt and pepper to taste
8–10 grain-free tortillas (such as Siete, almond flour, or coconut flour wraps)
1–2 tablespoons avocado or olive oil (for brushing)
Optional: chopped cilantro, diced jalapeños, or lime wedges for garnish
[/ingredients]

💡Meal Planning Tip: Save this recipe to automatically generate an organized shopping list with all ingredients sorted by store section—perfect for efficient grocery trips and meal planning.

CookifyAI meal planning interface

Instructions

  1. Preheat oven to 425°F. Line a baking sheet with parchment paper.
  2. In a bowl, combine shredded chicken, cream cheese, shredded cheese, salsa or green chiles, chili powder, garlic powder, cumin, salt, and pepper. Mix until evenly combined.
  3. Warm grain-free tortillas for 10–15 seconds in the microwave if needed to make them pliable.
  4. Spoon 2–3 tablespoons of filling onto each tortilla. Roll tightly. Place seam-side down on the baking sheet. Repeat until all filling/tortillas are used.
  5. Lightly brush each taquito with avocado or olive oil.
  6. Bake for 15–18 minutes, or until golden brown and crisp (or air fry at 400°F for 8–10 minutes).
  7. Let cool slightly, garnish as desired, and serve with your favorite dips.

Weekly Meal Planning

These Grain Free Chicken Taquitos are a meal prep superstar. Save and schedule this recipe to efficiently plan your week’s dinners or lunches—CookifyAI organizes your shopping list, combining ingredients from every planned meal to streamline grocery trips.

Planning Benefits:

– Total up all ingredients needed across recipes for the week
– Group shopping items by store section for faster, less stressful trips
– Eliminate last-minute runs for forgotten ingredients
– Minimize food waste by avoiding duplicate purchases

Pro tip: Schedule your meals and watch how your ingredient list is automatically adjusted—if two recipes use shredded chicken, you’ll see one total needed. This makes planning for lunchboxes and family dinners a breeze.

Cook and Prep Times

Prep Time: 15 minutes
Cook Time: 18 minutes
Total Time: 33 minutes

Enjoy these crispy, grain-free taquitos fresh, or freeze them for a quick, satisfying meal anytime!

Hearty Whole30 One-Pan Meatloaf: A Wholesome Paleo & AIP Dinner Delight

Whole30 One-Pan Meatloaf Dinner (Paleo, AIP) – Unbound Wellness

Introduction

Nothing brings more ease and comfort to a weeknight dinner than a hearty, wholesome one-pan meal. This Whole30 One-Pan Meatloaf Dinner, inspired by Unbound Wellness, ticks all the boxes for simplicity, bold flavor, and allergen-friendly eating. Not only is it free from grains, dairy, and eggs, but it’s also designed to suit Paleo and Autoimmune Protocol (AIP) lifestyles, making it an inclusive option for families or gatherings.

A Meal Everyone Will Love

The beauty of this Whole30 One-Pan Meatloaf Dinner lies in its perfectly seasoned, tender meatloaf surrounded by a bounty of roasted vegetables—all baked together on a single sheet pan. This streamlined approach infuses the veggies with savory juices while making cleanup a breeze. It’s a robust, feel-good dinner that appeals to both paleo enthusiasts and anyone looking to enjoy whole food recipes that satisfy.

Flavorful, Allergen-Friendly Meatloaf

The meatloaf is crafted from ground beef (or turkey, if you prefer), seasoned with herbs, vegetables, and binder alternatives like coconut flour and coconut aminos, keeping the meal free from grains, gluten, eggs, and soy. This means you get incredible taste and texture using only real food, safe for those with common allergies or following specialized diets.

One-Pan Magic for Effortless Cooking

Layer your favorite seasonal vegetables alongside the meatloaf to soak up its savory drippings. Common picks like carrots, sweet potatoes, Brussels sprouts, and parsnips roast beautifully in the oven, becoming flavorful and caramelized. This one-pan wonder speeds up both prep and cleanup, while making it easy to prepare lunches for the week or a crowd-pleasing family dinner.

Serving Suggestions for Whole30 Meatloaf Dinner

Slice the meatloaf and serve it hot with the roasted veggies straight from the oven. For extra freshness and color, top with chopped parsley or chives. If you’d like a tangy Paleo/AIP-friendly “ketchup,” puree roasted red peppers with apple cider vinegar and a pinch of sea salt as a dipping side.

Nutritional Information and Serving Size

This recipe makes 4 hearty servings and is naturally rich in protein, fiber, vitamins, and healthy fats. Each plate typically contains around 350–400 calories, making it nourishing and deeply satisfying while in line with Whole30 and Paleo/AIP nutritional principles.

Whole30 One-Pan Meatloaf Dinner (Recap)

Bringing together classic comfort and whole foods simplicity, this meatloaf dinner is a winning choice for anyone on Paleo, AIP, or Whole30. Its crowd-pleasing taste and minimal prep are guaranteed to make it a new staple in your meal rotation.

[ingredients]
For the Meatloaf:
1 lb ground beef (grass-fed, if possible), or ground turkey
1/2 cup finely grated zucchini
1/4 cup finely diced onion
2 tbsp coconut flour (or cassava flour, for AIP)
2 tbsp coconut aminos
1 tbsp olive oil
1 tsp dried Italian herbs (thyme, oregano, basil)
1/2 tsp garlic powder
1/4 tsp sea salt

Vegetables:
2 cups baby carrots, halved if large
1 large sweet potato, peeled and cubed
1 cup Brussels sprouts, trimmed and halved
1 tbsp olive oil
1/2 tsp sea salt
1/2 tsp dried thyme (optional)
[/ingredients]

💡Meal Planning Tip: Save this recipe to instantly create a shopping list with every ingredient, sorted by category—perfect for streamlined grocery trips and easy meal planning!

CookifyAI meal planning interface

Instructions

  1. Preheat your oven to 400°F (200°C). Line a large baking sheet with parchment paper for easy cleanup.
  2. In a large bowl, combine all meatloaf ingredients: ground meat, zucchini, onion, coconut flour, coconut aminos, olive oil, Italian herbs, garlic powder, and sea salt. Mix until well incorporated.
  3. Shape the mixture into a loaf (about 8” by 4”) and place it on one side of your prepared sheet pan.
  4. In a separate bowl, toss the carrots, sweet potatoes, and Brussels sprouts with olive oil, sea salt, and thyme. Arrange the vegetables in a single layer around the meatloaf on the sheet pan.
  5. Bake for 30–35 minutes, or until the meatloaf is cooked through (internal temperature should reach 160°F) and the veggies are tender and golden. If needed, broil for 2–3 minutes for extra color on top.
  6. Let the meatloaf rest for 5 minutes before slicing. Serve hot with the roasted vegetables.

Weekly Meal Planning

This Whole30 One-Pan Meatloaf Dinner is a lifesaver for weekly meal prep—make it ahead, portion it out, and reheat for quick lunches or dinners. Save and schedule this recipe to add it to your meal calendar and generate a smart, consolidated shopping list with all the ingredients you’ll need for an organized week.

Benefits:

  • Compiles the total amount of each ingredient needed for all recipes on your plan
  • Categories items by grocery section—no more doubling back to the produce aisle
  • Reduces waste and saves money by preventing duplicate buys
  • Makes prepping Paleo, AIP, or Whole30 meals as straightforward as possible

Pro tip: When planning your week, schedule several meals at once to let CookifyAI calculate overlapping ingredients, saving you time and headaches at the grocery store.

Cook and Prep Times

Prep Time: 15 minutes
Cook Time: 35 minutes
Total Time: 50 minutes

Enjoy the ease and flavor of this Whole30 One-Pan Meatloaf Dinner—and see how it transforms your weekly meal planning routine!

Crispy Paleo Orange Chicken: Bold, Allergy-Friendly Takeout at Home

Crispy Paleo Orange Chicken (Gluten-free, Soy-free, AIP Option)

Introduction

If you’re looking for a takeout-inspired dish that delivers bold flavor and satisfying crunch without any of the gluten, soy, or refined sugars, this Crispy Paleo Orange Chicken is a must-try! The combination of crisp chicken bites and a naturally sweet-tart orange sauce makes this recipe a family-friendly favorite that’s both nourishing and completely allergy-friendly—with an easy Autoimmune Protocol (AIP) modification included.

Why You’ll Love Crispy Paleo Orange Chicken

The beauty of this recipe lies in achieving restaurant-worthy texture and flavor using wholesome, pantry-friendly ingredients. Arrowroot or tapioca flour coats juicy chicken pieces, creating an irresistible crispy crust, while the sauce balances fresh citrus with a hint of ginger. It’s perfect for weeknight dinners, meal prep, or impressing guests—all while supporting gut health and avoiding common allergens.

How to Get That Perfect Gluten-Free, Soy-Free Crunch

The secret to crispiness is a light batter made from grain-free flours such as arrowroot or tapioca, and coconut flour for extra crunch. A pan-fry in avocado or coconut oil gives you satisfying golden bites without deep-frying or gluten! This method ensures every piece is crispy on the outside and juicy on the inside.

Homemade Orange Sauce: Naturally Delicious

Wave goodbye to store-bought sauces loaded with sugar and soy. Making your own orange sauce is simple: real orange juice, a touch of honey (or maple syrup for AIP), fresh ginger, and coconut aminos for umami (or balsamic vinegar for stricter AIP). This results in a glossy, sticky sauce that clings perfectly to the chicken.

Irresistible Serving Ideas

Serve your crispy orange chicken over cauliflower rice, steamed broccoli, or a bed of mixed greens. Garnish with green onions and a sprinkle of sesame seeds (omit for AIP) to complete the dish. This recipe pairs well with roasted vegetables or a fresh cucumber salad for a balanced, crowd-pleasing meal.

Nutritional Information and Serving Size

Each batch makes about 4 generous servings. Expect approximately 350–400 calories per serving, depending on your oil and sweetener choices. With plenty of protein and healthy fats—and no grains, soy, or refined sugars—this meal satisfies without a blood sugar spike.

[ingredients]
For the chicken:
– 1.5 lbs boneless skinless chicken breasts or thighs, cut into 1-inch pieces
– 1/3 cup arrowroot starch (or tapioca flour)
– 2 tbsp coconut flour
– 2 large eggs (or 1/4 cup coconut milk for AIP/egg-free)
– 1/2 tsp sea salt
– 1/4 tsp black pepper (omit for AIP)
– 2–3 tbsp avocado or coconut oil, for frying

For the orange sauce:
– 1/2 cup fresh orange juice
– Zest of 1 orange
– 2 tbsp coconut aminos (or 1 tbsp balsamic vinegar for strict AIP)
– 2 tbsp honey (or maple syrup for AIP)
– 1 tbsp apple cider vinegar
– 1 garlic clove, minced (omit for AIP)
– 1 tsp grated fresh ginger
– 1 tsp arrowroot or tapioca starch mixed with 1 tbsp water (for thickening)
– Pinch of salt

Garnishes (optional):
– Green onions, sliced
– Toasted sesame seeds (omit for AIP)
– Orange zest

[/ingredients]

💡 Meal Planning Tip: Save this recipe to automatically generate an organized shopping list with all ingredients sorted by store section—perfect for efficient grocery trips and meal planning.

CookifyAI meal planning interface

Instructions

  1. In a shallow bowl, whisk eggs (or coconut milk). In a separate bowl, combine arrowroot starch, coconut flour, sea salt, and pepper (if using).
  2. Dip chicken pieces into the egg mixture, then dredge in the flour mixture to coat evenly. Shake off excess and set aside on a plate.
  3. Heat 2–3 tbsp of avocado or coconut oil in a large skillet over medium-high heat. Once hot, add chicken pieces in a single layer (work in batches if needed). Fry for 3–4 minutes per side, until golden brown and crispy. Remove to a paper towel-lined plate.
  4. In a small saucepan, combine orange juice, zest, coconut aminos (or balsamic vinegar), honey or maple syrup, apple cider vinegar, ginger, garlic (if using), and a pinch of salt. Bring to a simmer over medium heat.
  5. Mix arrowroot/tapioca starch with water to form a slurry, then whisk into the sauce. Simmer for 1–2 minutes until thick and glossy.
  6. Toss crispy chicken in the orange sauce until coated. Serve immediately over your base of choice, garnished with green onions and orange zest.

Weekly Meal Planning

This recipe is ideal for prepping ahead and streamlining your healthy eating routine. Save and schedule this recipe in your meal planner so you know exactly which days to make it—and effortlessly generate smart shopping lists for the week.

Planning Benefits:

  • Consolidate ingredients across all your planned meals — no overbuying or missed staples
  • Generate a tidy, store-sectioned shopping list for quick trips
  • Track your recipes and meals for better week-to-week variety
  • Effortlessly customize for dietary needs (AIP, Paleo, gluten-free, and more)

Pro tip: Plan your whole week and see where your ingredients overlap—CookifyAI tracks quantities, helping you reduce food waste and shop smarter!

Cook and Prep Times

Prep Time: 20 minutes
Cook Time: 15 minutes
Total Time: 35 minutes

Recap: Why Make Crispy Paleo Orange Chicken?

This homemade, allergy-friendly orange chicken is proof that you can enjoy comfort food favorites without gluten, soy, or processed ingredients. It’s fast, full of flavor, adaptable for AIP, and sure to become a go-to crowd pleaser in your meal rotation!

Effortless Whole 30 Sheet Pan Dinners: Your Ultimate Weeknight Guide

Whole 30 Sheet Pan Dinner Recipes

Introduction

Whole 30 Sheet Pan Dinner Recipes are the ultimate answer to a busy weeknight meal: they’re fast, flavorful, and require just one pan for effortless cleanup. By combining wholesome proteins and vibrant vegetables with bold seasonings, you can create dishes that fit seamlessly into your Whole 30 plan—without spending hours in the kitchen. These sheet pan meals are designed to keep mealtime simple while delivering a satisfying, crowd-pleasing result every time.

Why Choose Whole 30 Sheet Pan Dinners?

The magic of a Whole 30 sheet pan dinner lies in its simplicity: everything bakes together, allowing flavors to mingle and intensify. With endless combinations of seasonal vegetables, lean proteins, and aromatic spices, you never have to worry about mealtime monotony. Plus, these recipes help you stay on track with Whole 30 guidelines by focusing on real, unprocessed ingredients that leave you feeling nourished and energized.

Flavorful Whole 30 Chicken & Veggie Sheet Pan Dinner

Here’s a favorite Whole 30 sheet pan recipe that showcases tender chicken thighs, smoky spices, and a rainbow of crisp-roasted veggies. Sweet potatoes, broccolini, and bell peppers create a beautiful, nutrient-rich base while a zesty garlic paprika marinade brings everything together. The result is a naturally gluten-free, dairy-free, and satisfying meal perfect for busy weeknights or next-day lunches.

Easy Preparation and Cleanup

Start by tossing your prepped vegetables and bone-in, skinless chicken thighs in an olive oil-based marinade. Lay everything out in a single layer on a parchment-lined sheet pan, ensuring the chicken is nestled among the veggies for maximum flavor infusion. After roasting, cleanup is as simple as tossing the used parchment—no mountains of dishes or pots to scrub.

Serving Suggestions for a Complete Whole 30 Meal

Serve your sheet pan dinner with a simple side such as cauliflower rice or a citrusy herb salad for extra freshness. For added flavor, drizzle with a homemade Whole 30-approved chimichurri or a squeeze of fresh lemon juice just before serving.

Nutritional Information and Serving Size

This Whole 30 sheet pan recipe yields roughly 4 servings. Each portion is balanced to provide lean protein, a bounty of colorful veggies, healthy fats, and a rich spectrum of vitamins and minerals. Exact calorie counts depend on specific ingredients, but expect a hearty serving to be around 350–400 calories.

Whole 30 Chicken & Veggie Sheet Pan Dinner (Recap)

This meal offers unmatched convenience and bold, satisfying flavors. With just minutes of prep and virtually no cleanup, it’s the perfect go-to for anyone seeking a nutritious and compliant Whole 30 dinner solution.

[ingredients]
1.5 lbs bone-in, skinless chicken thighs
2 medium sweet potatoes, peeled and cubed
1 bunch broccolini or broccoli, trimmed
2 bell peppers, sliced
1 red onion, cut into wedges
3 tbsp olive oil (Whole 30 compliant)
3 cloves garlic, minced
1.5 tsp smoked paprika
1 tsp dried oregano
1/2 tsp crushed red pepper (optional)
Salt and freshly ground black pepper, to taste
Juice of 1 lemon
Fresh parsley, chopped (for garnish)
[/ingredients]

💡Meal Planning Tip: Save this recipe to automatically generate an organized, Whole 30-compliant shopping list. CookifyAI sorts ingredients by store section for your convenience, making meal planning—and sticking to your Whole 30 goals—easier than ever.

CookifyAI meal planning interface

Instructions

  1. Preheat the oven to 425°F and line a large rimmed sheet pan with parchment paper for easy cleanup.
  2. In a small bowl, whisk together olive oil, garlic, smoked paprika, oregano, crushed red pepper, salt, pepper, and lemon juice.
  3. Add chicken thighs to a large bowl and toss with half the marinade. In another bowl, toss sweet potatoes, broccolini, bell peppers, and red onion with remaining marinade.
  4. Spread vegetables evenly over the sheet pan. Nestle marinated chicken thighs among the vegetables, ensuring they’re not crowded.
  5. Roast for 30–35 minutes, or until chicken reaches 165°F internally and vegetables are tender with golden edges. (Stir vegetables halfway for even roasting.)
  6. Remove from oven and let rest 3 minutes. Garnish with fresh parsley and serve hot.

Weekly Meal Planning

This recipe shines as a meal prep MVP—make a double batch and enjoy healthy leftovers for days. Save and schedule this recipe using CookifyAI to effortlessly plan your dinners, automatically tally up total ingredient needs, and generate organized grocery lists that combine all the meals on your plan.

Planning Benefits:

– Smartly sums up the total ingredients required for all your scheduled recipes
– Categorizes your shopping list by grocery section for local store efficiency
– Reduces duplicate purchases and helps you avoid leaving out key Whole 30 items
– Makes weeklong meal prep streamlined and stress-free

Pro tip: By scheduling your Whole 30 recipes, you’ll optimize your ingredient usage—for example, if multiple meals need sweet potatoes or lemon, CookifyAI will consolidate totals so you only buy what you need, helping reduce food waste and save money.

Cook and Prep Times

Prep Time: 15 minutes
Cook Time: 35 minutes
Total Time: 50 minutes

Enjoy the ease, flavor, and health benefits of Whole 30 Sheet Pan Dinners—perfect for your next meal plan!

Zesty Japanese Ginger Salad Dressing: A Gluten-Free, Paleo & AIP Delight

Japanese Ginger Salad Dressing (Gluten-free, Paleo, AIP)

Introduction

Elevate your salads with this vibrant Japanese Ginger Salad Dressing that’s not only bursting with zingy, fresh flavors but is also completely gluten-free, paleo, and AIP-friendly. Ginger’s lively kick, mellowed by naturally sweet carrot and a touch of apple cider vinegar, creates an irresistible balance that complements everything from leafy greens to grilled proteins. With no refined sugars, soy, or grains, this recipe is ideal for anyone seeking a flavorful, wholesome dressing that fits a range of dietary lifestyles.

Why This Japanese Ginger Salad Dressing is a Must-Try

Japanese Ginger Salad Dressing stands out for its bold flavors and versatility—it livens up simple greens, acts as a tasty marinade, and even makes a stellar veggie dip. Quick to blend and free from allergens commonly found in restaurant versions, it’s a weeknight hero for busy households and health-conscious meal preppers alike.

How to Achieve the Perfect Texture and Flavor

Getting the best texture and taste is all about blending just the right ingredients until creamy and pourable. Use fresh ginger and carrot for depth and a bright hue. Coconut aminos replace traditional soy sauce, ensuring savory umami notes without gluten, soy, or nightshades. If following AIP strictly, opt for avocado or light olive oil as the base for a smooth, neutral profile that lets the ginger shine.

Serving Suggestions for Your Japanese Ginger Salad Dressing

This dressing isn’t just for salads—it’s fantastic drizzled over grilled chicken, wild salmon, or tossed with crisp cabbage slaw. Try using it as a marinade for pork, or as a bold dip for steamed veggies. The fresh ginger notes bring a restaurant-quality flavor to home-cooked meals, pleasing family and guests alike.

Nutritional Information and Serving Size

One batch yields about 1 cup (approximately 8 servings). Each serving is low in calories—with around 50-60, depending on your oil choice—offering a nutrient-dense, antioxidant-rich addition to any meal. With no added sugars, gluten, soy, or dairy, this is a healthy staple you’ll want to keep on hand.

[ingredients]
2 medium carrots, peeled and roughly chopped
2 tablespoons fresh ginger, peeled and chopped
2 tablespoons coconut aminos
1/4 cup apple cider vinegar
1/4 cup avocado oil (or light-tasting olive oil for AIP)
2 tablespoons water
1 clove garlic (omit for strict AIP)
1 teaspoon sea salt
1 teaspoon honey or maple syrup (omit for Whole30 or strict AIP)
[/ingredients]

💡Meal Planning Tip: Save this recipe to instantly generate a categorized, easy-to-follow shopping list—plus, track all ingredients across meals for streamlined meal prep and stress-free grocery trips!

CookifyAI meal planning interface

Instructions

  1. Add all ingredients to a high-powered blender or food processor.
  2. Blend on high until the mixture is completely smooth and creamy, pausing to scrape down sides as needed (about 60 seconds).
  3. Taste and adjust for salt, sweetness, or extra ginger, blending again if necessary.
  4. Pour dressing into a jar or bottle and store in the refrigerator until ready to use. Shake well before each use as natural separation may occur.
  5. Dressing will keep for up to 1 week in the fridge.

Weekly Meal Planning

This dressing isn’t just for salads—it’s a meal-prepping powerhouse. Save and schedule this recipe in your meal plan to build shopping lists that account for all ingredients across your planned meals, ensuring you always buy just what you need.

Planning Benefits:

  • Smartly calculates total ingredient quantities for your weekly recipes.
  • Categories groceries by store aisle for efficient shopping.
  • Prevents food waste and accidental double-buys.
  • Keeps your paleo, AIP, or gluten-free eating on track effortlessly.

Pro tip: When prepping for the week, schedule your recipes to consolidate all shared ingredients—from carrots and ginger to oils and vinegar—so you only buy what’s needed.

Cook and Prep Times

Prep Time: 10 minutes
Cook Time: 0 minutes
Total Time: 10 minutes

Enjoy the fresh, lively flavors of this Japanese Ginger Salad Dressing whenever you need a tasty, healthy boost to your meals!

Crispy & Wholesome: The Ultimate Grain-Free Chicken Taquitos Recipe

Grain Free Chicken Taquitos

Introduction

Grain Free Chicken Taquitos offer all the crispy, savory flavor you crave—without the grains. Whether you’re following a gluten-free diet or simply want a lighter, wholesome spin on a classic comfort, these taquitos deliver irresistible crunch and a juicy chicken filling. They’re perfect as a crowd-pleasing appetizer, a fun family meal, or a make-ahead lunch box option.

Why Grain Free Chicken Taquitos Are a Must-Try

This recipe stands out for its simplicity and wide appeal. Instead of traditional tortillas, you’ll use grain-free wraps or homemade alternatives, making these taquitos naturally gluten-free and suitable for many eating styles. The savory shredded chicken filling, seasoned just right and baked until crispy, wins over kids and adults alike—great for weeknight dinners or easy party eats.

Building That Mouthwatering Chicken Filling

A flavorful filling is what sets these taquitos apart. Use cooked, shredded chicken (leftovers are perfect!) tossed with a blend of smoky spices, a touch of cream cheese for creaminess, and a sprinkling of cheese. For extra flavor, a bit of salsa or diced green chiles can be mixed in, creating a hearty, perfectly spiced filling.

How to Assemble and Bake Grain Free Chicken Taquitos

Lay out your grain-free wraps and add a generous spoonful of the chicken mixture to each. Tightly roll them up, secure with a toothpick if needed, and arrange seam-side down on a baking sheet. A light brush of oil on top encourages that signature crispy exterior. Bake until golden and crisp. For extra crunch, you can use an air fryer!

Serving Ideas for Crowd-Pleasing Chicken Taquitos

Serve your chicken taquitos hot from the oven with dips like guacamole, fresh salsa, or a creamy cilantro sauce. They pair well with a side salad or a bowl of Mexican-style rice for a complete meal. For gatherings, cut them in half, add a bowl of queso, and watch them disappear.

Nutritional Information and Serving Size

This recipe yields about 10 taquitos (serves approximately 4 people at 2-3 taquitos each). Each taquito is typically around 140–180 calories, depending on the cheese and wrap used. They are high in protein, low in carbs, and naturally gluten- and grain-free.

Why You’ll Love Grain Free Chicken Taquitos (Recap)

These baked taquitos deliver the satisfying crunch and zesty flavor you love, minus the grains. They’re quick, customizable, and perfect for meal prepping, weeknight dinners, or parties—guaranteed to be a hit every time.

[ingredients]
2 cups cooked, shredded chicken (rotisserie chicken works great)
1/3 cup cream cheese, softened
1/2 cup shredded cheese (cheddar, Monterey Jack, or dairy-free alternative)
1/3 cup salsa or drained, diced green chiles
1 teaspoon chili powder
1/2 teaspoon garlic powder
1/2 teaspoon cumin
Salt and pepper to taste
8–10 grain-free tortillas (such as Siete, almond flour, or coconut flour wraps)
1–2 tablespoons avocado or olive oil (for brushing)
Optional: chopped cilantro, diced jalapeños, or lime wedges for garnish
[/ingredients]

💡Meal Planning Tip: Save this recipe to automatically generate an organized shopping list with all ingredients sorted by store section—perfect for efficient grocery trips and meal planning.

CookifyAI meal planning interface

Instructions

  1. Preheat oven to 425°F. Line a baking sheet with parchment paper.
  2. In a bowl, combine shredded chicken, cream cheese, shredded cheese, salsa or green chiles, chili powder, garlic powder, cumin, salt, and pepper. Mix until evenly combined.
  3. Warm grain-free tortillas for 10–15 seconds in the microwave if needed to make them pliable.
  4. Spoon 2–3 tablespoons of filling onto each tortilla. Roll tightly. Place seam-side down on the baking sheet. Repeat until all filling/tortillas are used.
  5. Lightly brush each taquito with avocado or olive oil.
  6. Bake for 15–18 minutes, or until golden brown and crisp (or air fry at 400°F for 8–10 minutes).
  7. Let cool slightly, garnish as desired, and serve with your favorite dips.

Weekly Meal Planning

These Grain Free Chicken Taquitos are a meal prep superstar. Save and schedule this recipe to efficiently plan your week’s dinners or lunches—CookifyAI organizes your shopping list, combining ingredients from every planned meal to streamline grocery trips.

Planning Benefits:

– Total up all ingredients needed across recipes for the week
– Group shopping items by store section for faster, less stressful trips
– Eliminate last-minute runs for forgotten ingredients
– Minimize food waste by avoiding duplicate purchases

Pro tip: Schedule your meals and watch how your ingredient list is automatically adjusted—if two recipes use shredded chicken, you’ll see one total needed. This makes planning for lunchboxes and family dinners a breeze.

Cook and Prep Times

Prep Time: 15 minutes
Cook Time: 18 minutes
Total Time: 33 minutes

Enjoy these crispy, grain-free taquitos fresh, or freeze them for a quick, satisfying meal anytime!

Paleo AIP Thai Beef Drunken Noodles: A Bold, Allergy-Friendly Twist on a Thai Classic

Paleo AIP Thai Beef Drunken Noodles (Keto, Gluten-free)

Introduction

Paleo AIP Thai Beef Drunken Noodles deliver bold, restaurant-style Thai flavor without the grain, gluten, or nightshade triggers. With tender beef, crisp veggies, and aromatic herbs, this dish transforms a takeout classic into an allergy-friendly, deeply satisfying meal. Perfect for weeknight dinners or when you crave a comfort food favorite, it’s deliciously simple and sure to impress the whole family.

Deliciously Unique Thai Beef Drunken Noodles

What makes this version truly special? It keeps the spirit of the beloved Thai dish, featuring umami-rich beef and chewy grain-free noodles, but swaps in coconut aminos for soy sauce and skips peppers for AIP compliance. Each forkful is brimming with garlic, fresh herbs, and satisfying textures—with none of the common allergens or excess carbs.

Crafting the Perfect Paleo AIP Sauce

The signature flavor of drunken noodles lies in the savory, slightly sweet, and herb-forward sauce. To fit Paleo, AIP, and Keto guidelines, combine coconut aminos, a splash of fish sauce (look for AIP-friendly varieties), a hint of honey or coconut syrup (optional for Keto), and fresh garlic. This base infuses the beef and noodles, harmonizing the dish without any soy, sugar, or inflammatory ingredients. Simply whisk the sauce before cooking to ensure every component gets coated with flavorful goodness.

Choosing the Best Noodles and Vegetables

For Paleo and Keto, use shirataki or spaghetti squash noodles—they soak up the sauce beautifully and offer a satisfying bite. For AIP, stick with spaghetti squash, zucchini, or cassava-based noodles. Crisp bok choy, carrots (omit for strict Keto), and mushrooms round out the veggies for crunch and color. Always slice vegetables thinly, so they stir-fry quickly and stay tender-crisp.

Serving Suggestions for Show-Stopping Drunken Noodles

Serve your Thai Beef Drunken Noodles hot from the pan, garnished with a generous handful of fresh Thai basil or cilantro. For more zing, add a squeeze of lime or a sprinkle of coconut flakes. Pair with a light cucumber salad or enjoy as a standalone, filling entrée. The vibrant flavors and healthy ingredients make this dish a meal-planning favorite with no regrets.

Nutritional Information and Serving Size

This recipe makes 4 hearty servings, each with approximately 320-370 calories (depending on noodle and sauce choices). It’s naturally low in carbs, gluten-free, and packed with protein and micronutrients—a guilt-free way to enjoy Thai takeout at home.

Paleo AIP Thai Beef Drunken Noodles (Recap)

This recipe captures everything you love about beefy, saucy noodles but transforms it into a wholesome, allergy-friendly meal. It’s bold, satisfying, and ready to anchor your health-driven meal prep for the week.

[ingredients]
1 lb flank steak or sirloin, thinly sliced
1 spaghetti squash (or 2 packs shirataki noodles, drained/rinsed), or AIP-friendly noodle alternative
2 cups bok choy, chopped
1 cup mushrooms, thinly sliced
1/2 cup carrots, julienned (omit for strict Keto)
3 green onions, sliced (white and green parts separated)
3 garlic cloves, minced
2 tablespoons coconut aminos
1 tablespoon fish sauce (AIP/Keto approved)
1 teaspoon honey or coconut syrup (optional, omit for strict Keto)
1 tablespoon avocado oil (or coconut oil)
1/2 cup fresh Thai basil or cilantro
Juice of 1 lime
Salt, to taste
[/ingredients]

💡Meal Planning Tip: Save this recipe to automatically generate an organized shopping list with all ingredients sorted by store section—perfect for efficient grocery trips and meal planning.

CookifyAI meal planning interface

Instructions

  1. Prepare the noodles: If using spaghetti squash, cut in half, scoop seeds, and roast cut side down at 400°F for 30-35 minutes until fork-tender. Scrape out strands with a fork. If using shirataki or other noodles, rinse and drain well; set aside.
  2. Make the sauce: In a bowl, whisk together coconut aminos, fish sauce, honey or syrup (if using), and lime juice.
  3. Sear the beef: Heat 1/2 tablespoon oil in a large skillet or wok over medium-high. Add sliced beef and a pinch of salt. Cook for 2–3 minutes per side, just until browned. Remove and set aside.
  4. Sauté aromatics: Add remaining oil, then toss in garlic and white parts of green onions. Stir-fry 30 seconds until fragrant.
  5. Add veggies: Stir in mushrooms, carrots, and bok choy. Sauté 2–4 minutes until slightly wilted but still crisp.
  6. Combine: Return beef to the pan. Add noodles/spaghetti squash and sauce. Toss to combine, letting the flavors absorb for 2–3 minutes.
  7. Finish: Stir in fresh basil or cilantro and green onion tops. Taste and adjust salt/lime juice as desired. Serve hot, optionally garnished with more herbs.

Weekly Meal Planning

This recipe is a wonderful contender for batch cooking and streamlined meal prep. Save and schedule this recipe to organize your week—CookifyAI will consolidate all your ingredients into a smart grocery list, avoiding repeats and forgotten items.

Planning Benefits:

– Calculates total ingredient quantities for all meals you plan
– Sorts your list by grocery sections for fast shopping
– Prevents accidental purchase repeats or missing key items
– Makes weekly meal prep stress-free and efficient

Pro Tip: When prepping for the week, schedule this meal and others to line up ingredients and skip food waste—so every grocery run supports your health goals!

Cook and Prep Times

Prep Time: 20 minutes
Cook Time: 20 minutes
Total Time: 35–55 minutes (depending on noodle choice)

One-Pan Flavor Explosion: Hearty Beef, Broccoli & Mushrooms for Effortless Weeknight Dinners

Sheet Pan Beef and Broccoli with Mushrooms – Heal Me Delicious

Introduction

When you crave a flavorful dinner that comes together in minutes and uses just one pan, Sheet Pan Beef and Broccoli with Mushrooms is your answer. A symphony of juicy beef, roasted broccoli florets, and tender mushrooms, this dish brings restaurant-quality flavor to your table—without the time or hassle of stir-frying or juggling multiple pots. Effortless to prep and even easier to clean up, this meal is ideal for busy weeknights and anyone looking to eat well without sacrificing flavor or nutrition.

Why You’ll Love Sheet Pan Beef and Broccoli with Mushrooms

What sets this recipe apart is its savory, umami-rich sauce that lightly caramelizes in a hot oven, coating every bite with mouthwatering flavor. The combination of beef, vibrant broccoli, and earthy mushrooms delivers a meal that’s hearty, wholesome, and loaded with nutrients. Even better, the entire process happens on one sheet pan, making both cooking and cleanup a breeze. It’s a crowd-pleaser that satisfies cravings while fitting neatly into any meal plan.

Building Layers of Flavor

A good sheet pan meal relies on a well-balanced marinade. For this recipe, simple ingredients like coconut aminos, garlic, ginger, and a hint of honey create depth without requiring soy or gluten, making the dish “Heal Me Delicious”–approved. Slicing your beef thin ensures tenderness and allows it to soak up the marinade, while roasting at a high temperature seals in flavor and juiciness. The mushrooms absorb all those delicious juices, rounding out the dish with a satisfying bite.

Effortless Assembly and Roasting

Toss your marinated beef, broccoli, and mushrooms right on the sheet pan, spread it out evenly, and let your oven do the rest. Everything cooks at once, ensuring the vegetables roast to golden perfection and the beef remains juicy. No stirring or standing at the stove—just set it and let the magic happen.

Serving Suggestions for Sheet Pan Beef and Broccoli with Mushrooms

This dish is delicious on its own but also fantastic served over a bowl of fluffy white rice, cauliflower rice, or quinoa. Garnish with sliced green onions or a sprinkle of sesame seeds for extra crunch and freshness. Make it a full meal by pairing with a crisp Asian-style slaw or a simple cucumber salad.

Nutritional Information and Serving Size

This balanced dinner serves 4 and is brimming with protein, fiber, and vitamins from the fresh veggies. It’s naturally gluten-free and dairy-free, fitting most “heal me delicious” and clean eating lifestyles seamlessly—providing around 340–400 calories per serving (depending on cut of beef and sauce).

Recap: A Weeknight Winner

Sheet Pan Beef and Broccoli with Mushrooms is a weeknight hero: bold in flavor, nourishing, easy to prep, and even easier to clean. Bring the goodness of a classic takeout favorite to your table—with healthier ingredients and no fuss.

[ingredients]
1 lb flank steak or sirloin, thinly sliced against the grain
1 large head of broccoli, cut into florets
8 oz mushrooms, quartered
2 tbsp olive oil
1/4 cup coconut aminos (or low-sodium soy sauce if not following AIP)
2 tbsp honey or maple syrup
2 cloves garlic, minced
2 tsp fresh ginger, grated
1 tsp sesame oil (optional)
1/2 tsp salt (adjust to taste)
1/4 tsp black pepper (omit for strict AIP)
Sliced green onions and sesame seeds, for garnish (optional)
[/ingredients]

💡Meal Planning Tip: Save this recipe to instantly generate a well-organized shopping list with every ingredient sorted by store aisle. This saves you time and ensures you never miss a key item for your meals.

CookifyAI meal planning interface

Instructions

  1. Preheat oven to 425°F (218°C). Line a large rimmed sheet pan with parchment paper for easy cleanup.
  2. In a large bowl, whisk together coconut aminos, honey/maple syrup, minced garlic, grated ginger, and sesame oil (if using).
  3. Add thinly sliced beef to the marinade, stirring well to coat, and let sit while you prepare vegetables.
  4. In a separate bowl, toss broccoli florets and mushrooms with olive oil, salt, and pepper.
  5. Spread vegetables evenly on the prepared baking sheet. Nestle marinated beef slices among the veggies, pouring any extra marinade over everything.
  6. Roast for 15–18 minutes, tossing once halfway, until beef is just cooked through and vegetables are golden and tender-crisp.
  7. Remove from oven, garnish with green onions and sesame seeds if desired. Serve hot over your favorite base.

Weekly Meal Planning

Want to enjoy this healthy sheet pan dinner and simplify your week’s menu? Save and schedule this recipe in your CookifyAI meal planner to organize meals and generate a master shopping list for the entire week.

Planning Benefits:

– Automatically calculates ingredient totals for every planned meal
– Groups your grocery list by section for streamlined shopping
– Prevents overbuying and ensures you get exactly what you need
– Makes prepping healthy meals like this sheet pan dish both simple and sustainable

Pro tip: Plan multiple sheet pan meals or recipes using broccoli and mushrooms to cut down on prep time and maximize ingredient use.

Cook and Prep Times

Prep Time: 15 minutes
Cook Time: 18 minutes
Total Time: 33 minutes

Enjoy the simplicity and bold flavors of Sheet Pan Beef and Broccoli with Mushrooms—healthy home-cooked dinners have never been this easy!
One-Pan Paleo Perfection: Quick, Flavor-Packed Meals for Healthy Living

Delicious Paleo Sheet Pan Meals

Introduction

Sheet pan meals have gained a devoted following for good reason: they combine maximum flavor with ultimate convenience. For those following a Paleo lifestyle, these one-pan wonders allow you to create balanced, nutrient-rich meals that nourish your body and delight your taste buds—without spending the entire evening in the kitchen or piling up dirty dishes. This recipe for Delicious Paleo Sheet Pan Meals is ideal for busy weeknights, meal prep enthusiasts, or anyone craving a wholesome, fuss-free dinner with minimal cleanup.

Why These Paleo Sheet Pan Meals Stand Out

This recipe highlights lean proteins, vibrant seasonal vegetables, and classic Paleo-friendly seasonings, all roasted to caramelized perfection. The beauty of sheet pan cooking is the even roasting, which deepens flavors, preserves nutrients, and keeps everything tender and juicy. Thanks to the blend of garlic, lemon, smoked paprika, and fresh herbs, each bite is bursting with satisfying flavor. Plus, everything cooks at once, making it an easy crowd pleaser or meal prep staple.

Perfecting the Paleo Marinade

For optimal taste and tender protein, toss your ingredients in a quick marinade made from olive oil, lemon juice, garlic, and a sprinkle of aromatic spices. Even a 15-minute rest in the marinade allows flavors to seep in and ensures juicy, delicious chicken or fish. If using shrimp or salmon, reduce marinating time to avoid over-curing.

Assembly Tips for Your Paleo Sheet Pan Meal

Arrange proteins and vegetables in an even layer on a large parchment-lined sheet pan. Pair denser vegetables (like sweet potatoes or carrots) with those that cook faster (like bell peppers and zucchini) by cutting the former into smaller pieces for uniform roasting. Drizzle any leftover marinade over the top, and don’t crowd the pan—this maximizes caramelization and prevents steaming.

Serving Suggestions for Show-Stopping Sheet Pan Meals

Serve your paleo sheet pan meal as-is for a simple supper, or spoon everything over a bed of cauliflower rice or leafy greens for an added nutrition boost. Garnish with chopped fresh herbs or a drizzle of tahini-lemon sauce for extra flavor. Leftovers make an excellent lunch and are just as tasty enjoyed cold or reheated.

Nutritional Information and Serving Size

This recipe yields 4 hearty portions, each offering an ideal balance of protein, fiber, and healthy fats while remaining grain-, dairy-, and refined sugar-free. Each serving contains roughly 350–400 calories, depending on your choice of protein and vegetables—perfect for energizing dinners that keep you full and satisfied.

Delicious Paleo Sheet Pan Meals (Recap)

Quick, flavor-packed, and cleanup-friendly, these Paleo Sheet Pan Meals make nutritious eating enjoyable and sustainable. Flexible ingredients let you customize protein and vegetables based on what’s in season or available in your fridge, so this meal never gets boring.

[ingredients]
1.5 lbs chicken breast or thighs (or wild-caught salmon fillets/shrimp)
2 tablespoons olive oil
Juice of 1 lemon
3 garlic cloves, minced
1 teaspoon smoked paprika
1/2 teaspoon dried thyme or Italian seasoning
Salt and black pepper, to taste
2 cups broccoli florets
2 large carrots, peeled and sliced
1 red bell pepper, sliced
1 zucchini, sliced
1 small sweet potato, diced
Fresh parsley or cilantro for garnish
Optional: pinch of red pepper flakes, lemon wedges for serving
[/ingredients]

💡Meal Planning Tip: Save this recipe to automatically generate an organized shopping list with all ingredients sorted by store section—perfect for efficient grocery trips and meal planning.

CookifyAI meal planning interface

Instructions

  1. Preheat your oven to 425°F (220°C). Line a large rimmed sheet pan with parchment paper.
  2. In a large bowl, whisk together olive oil, lemon juice, garlic, smoked paprika, thyme, salt, and pepper.
  3. Add the chicken (or fish/shrimp) and all chopped vegetables to the bowl. Toss to coat evenly. Marinate for at least 15 minutes if time allows.
  4. Spread the protein and vegetables evenly on the sheet pan. If needed, use two pans to avoid overcrowding.
  5. Roast for 20–25 minutes (15–20 minutes for shrimp or fish), stirring vegetables halfway through, until the chicken is cooked through and veggies are tender and caramelized.
  6. Garnish with fresh chopped parsley or cilantro and serve with a lemon wedge. Enjoy!
Weekly Meal Planning

This sheet pan meal is a meal prep hero—prep everything ahead and enjoy ready-to-reheat lunches or dinners throughout your week. Save and schedule this recipe to add it to your weekly meal plan. With CookifyAI, you’ll get:

  • Automatic calculation of total ingredient quantities across all your planned meals
  • Organized shopping lists sorted by grocery store section for quicker trips
  • Prevention of duplicate purchases and forgotten items
  • Streamlined weekly meal prep for stress-free healthy eating

Pro tip: When planning several meals, schedule your recipes to see how similar ingredients overlap—no more guessing how many lemons or chicken breasts you need. This reduces food waste and ensures you’ll always have the right ingredients on hand.

Cook and Prep Times

Prep Time: 20 minutes
Cook Time: 25 minutes
Total Time: 45 minutes

Enjoy your flavorful, easy, and nourishing Delicious Paleo Sheet Pan Meal—your future self (and your kitchen cleanup routine) will thank you!
Sizzling Tex-Mex Twist: The Ultimate Whole30 Enchiladas Recipe

Best Whole30 Enchiladas

Introduction

Whole30 enchiladas are a wonderful way to satisfy Tex-Mex cravings while sticking to clean, wholesome ingredients. These Best Whole30 Enchiladas are bursting with robust flavor, featuring a rich homemade enchilada sauce and tender fillings—all without dairy, grains, or added sugar. Perfect for family dinners, meal prep, or as a nourishing comfort food, this recipe is bound to impress even those not on Whole30!

Why These Are the Best Whole30 Enchiladas

These enchiladas are a crowd-pleaser because they cleverly swap traditional tortillas and cheese for grain-free wraps and a creamy cashew-based sauce, keeping the dish deeply satisfying and flavorful. Every bite delivers a punch of smoky, zesty spices, juicy chicken or beef, and a medley of sautéed veggies, making it a hearty and guilt-free choice for any occasion.

Homemade Whole30 Enchilada Sauce

To create a compliant enchilada sauce, blend tomato paste, unsweetened broth, and spices like chili powder, cumin, garlic, and smoked paprika. Simmer gently to allow the flavors to meld. For added creaminess, a splash of coconut milk or a swirl of blended cashews offers a silkiness reminiscent of classic enchilada sauce, all Whole30 approved.

Preparing the Filling & Assembling the Enchiladas

Use shredded rotisserie chicken (no additives) or browned ground beef as the protein base. Sauté with onion, bell pepper, garlic, and zucchini for vibrant filling. Spoon the mixture into grain-free tortillas (like Siete or homemade cassava wraps), roll them up, and arrange seam-side down in a baking dish. Generously pour over the enchilada sauce and add dollops of cashew ‘cheese’ on top for a creamy, baked finish.

Serving Suggestions for an Unforgettable Whole30 Enchilada Night

Garnish enchiladas with fresh cilantro, finely diced red onion, and sliced avocado. Serve alongside a crisp cucumber-jicama slaw or Mexican cauliflower rice for a well-rounded Whole30 meal. These enchiladas hold up well for leftovers and pair perfectly with lime wedges or a light, compliant salsa.

Nutritional Information and Serving Size

This recipe makes about 6 enchiladas, each loaded with vegetables and lean protein. Depending on your wrap and protein choices, each serving typically ranges from 320 to 380 calories. Packed with fiber and healthy fats, this dish is a balanced addition to your Whole30 rotation.

The Best Whole30 Enchiladas (Recap)

By combining a homemade smoky enchilada sauce with grain-free tortillas and a bright, veggie-loaded filling, this recipe offers all the beloved Tex-Mex flavors—while keeping everything Whole30 compliant, simple, and truly satisfying.

[ingredients]
For the Enchiladas:
– 6 grain-free tortillas (Siete or homemade cassava tortillas)
– 2 cups cooked, shredded chicken (or ground beef)
– 1 tablespoon avocado oil
– 1 small onion, diced
– 2 garlic cloves, minced
– 1 red bell pepper, diced
– 1 small zucchini, diced
– 1 teaspoon ground cumin
– 1 teaspoon smoked paprika
– 1 teaspoon chili powder
– Salt and pepper to taste

For the Enchilada Sauce:
– 1 cup tomato sauce (no sugar added)
– 1/2 cup chicken or vegetable broth (compliant)
– 2 tablespoons tomato paste
– 1 tablespoon chili powder
– 1 teaspoon cumin
– 1 teaspoon garlic powder
– 1/2 teaspoon onion powder
– 1/2 teaspoon smoked paprika
– 1/4 teaspoon salt
– 2 tablespoons coconut milk (optional, for creaminess)

For the Cashew ‘Cheese’ (optional):
– 1/2 cup raw cashews, soaked
– 1/4 cup coconut milk
– 1 tablespoon lemon juice
– Salt to taste

Toppings:
– Fresh cilantro, red onion, avocado slices, lime wedges
[/ingredients]

💡Meal Planning Tip: Save this recipe to automatically generate an organized shopping list with all ingredients sorted by store section—perfect for efficient grocery trips and meal planning.

CookifyAI meal planning interface

Instructions

  1. Preheat oven to 375°F (190°C). Lightly grease a baking dish.
  2. Make the enchilada sauce: In a saucepan, combine tomato sauce, broth, tomato paste, and all listed spices. Bring to a simmer for 5 minutes. Stir in coconut milk if using and set aside.
  3. Prepare the filling: Heat avocado oil in a skillet over medium. Add onion, sauté until translucent. Stir in garlic, bell pepper, and zucchini; cook until just tender. Add shredded chicken (or cooked ground beef), cumin, paprika, chili powder, salt, and pepper. Stir until well combined and heated through.
  4. Assemble the enchiladas: Lay out the tortillas. Fill each with the chicken-veggie mixture, roll up, and arrange seam-side down in the baking dish.
  5. Pour enchilada sauce over the filled tortillas. For extra creaminess, dollop or spread cashew ‘cheese’ across the top.
  6. Bake uncovered for 18-20 minutes, or until bubbling and heated through.
  7. Garnish with cilantro, diced red onion, and avocado. Serve with lime wedges and your favorite compliant sides.

Weekly Meal Planning

This Best Whole30 Enchiladas recipe is perfect for meal planning and batch cooking. Save and schedule this recipe to efficiently plan your week and generate a unified shopping list for all your meals.

Planning Benefits:

– Automatically calculates total ingredient quantities across multiple recipes
– Organizes your shopping list by grocery store section
– Cuts down on duplicate purchases and forgotten items
– Streamlines meal prep for a less stressful, more enjoyable Whole30 experience

Pro tip: When planning for the week, schedule multiple recipes and see which ingredients overlap—CookifyAI will add everything up so you shop smart and reduce food waste.

Cook and Prep Times

Prep Time: 25 minutes
Cook Time: 20 minutes
Total Time: 45 minutes

Enjoy flavorful, satisfying enchiladas—all while staying Whole30 compliant and keeping your meal planning on track!

Crispy Paleo Orange Chicken: Bold, Allergy-Friendly Takeout at Home

Crispy Paleo Orange Chicken (Gluten-free, Soy-free, AIP Option)

Introduction

If you’re looking for a takeout-inspired dish that delivers bold flavor and satisfying crunch without any of the gluten, soy, or refined sugars, this Crispy Paleo Orange Chicken is a must-try! The combination of crisp chicken bites and a naturally sweet-tart orange sauce makes this recipe a family-friendly favorite that’s both nourishing and completely allergy-friendly—with an easy Autoimmune Protocol (AIP) modification included.
Why You’ll Love Crispy Paleo Orange Chicken

The beauty of this recipe lies in achieving restaurant-worthy texture and flavor using wholesome, pantry-friendly ingredients. Arrowroot or tapioca flour coats juicy chicken pieces, creating an irresistible crispy crust, while the sauce balances fresh citrus with a hint of ginger. It’s perfect for weeknight dinners, meal prep, or impressing guests—all while supporting gut health and avoiding common allergens.

How to Get That Perfect Gluten-Free, Soy-Free Crunch

The secret to crispiness is a light batter made from grain-free flours such as arrowroot or tapioca, and coconut flour for extra crunch. A pan-fry in avocado or coconut oil gives you satisfying golden bites without deep-frying or gluten! This method ensures every piece is crispy on the outside and juicy on the inside.
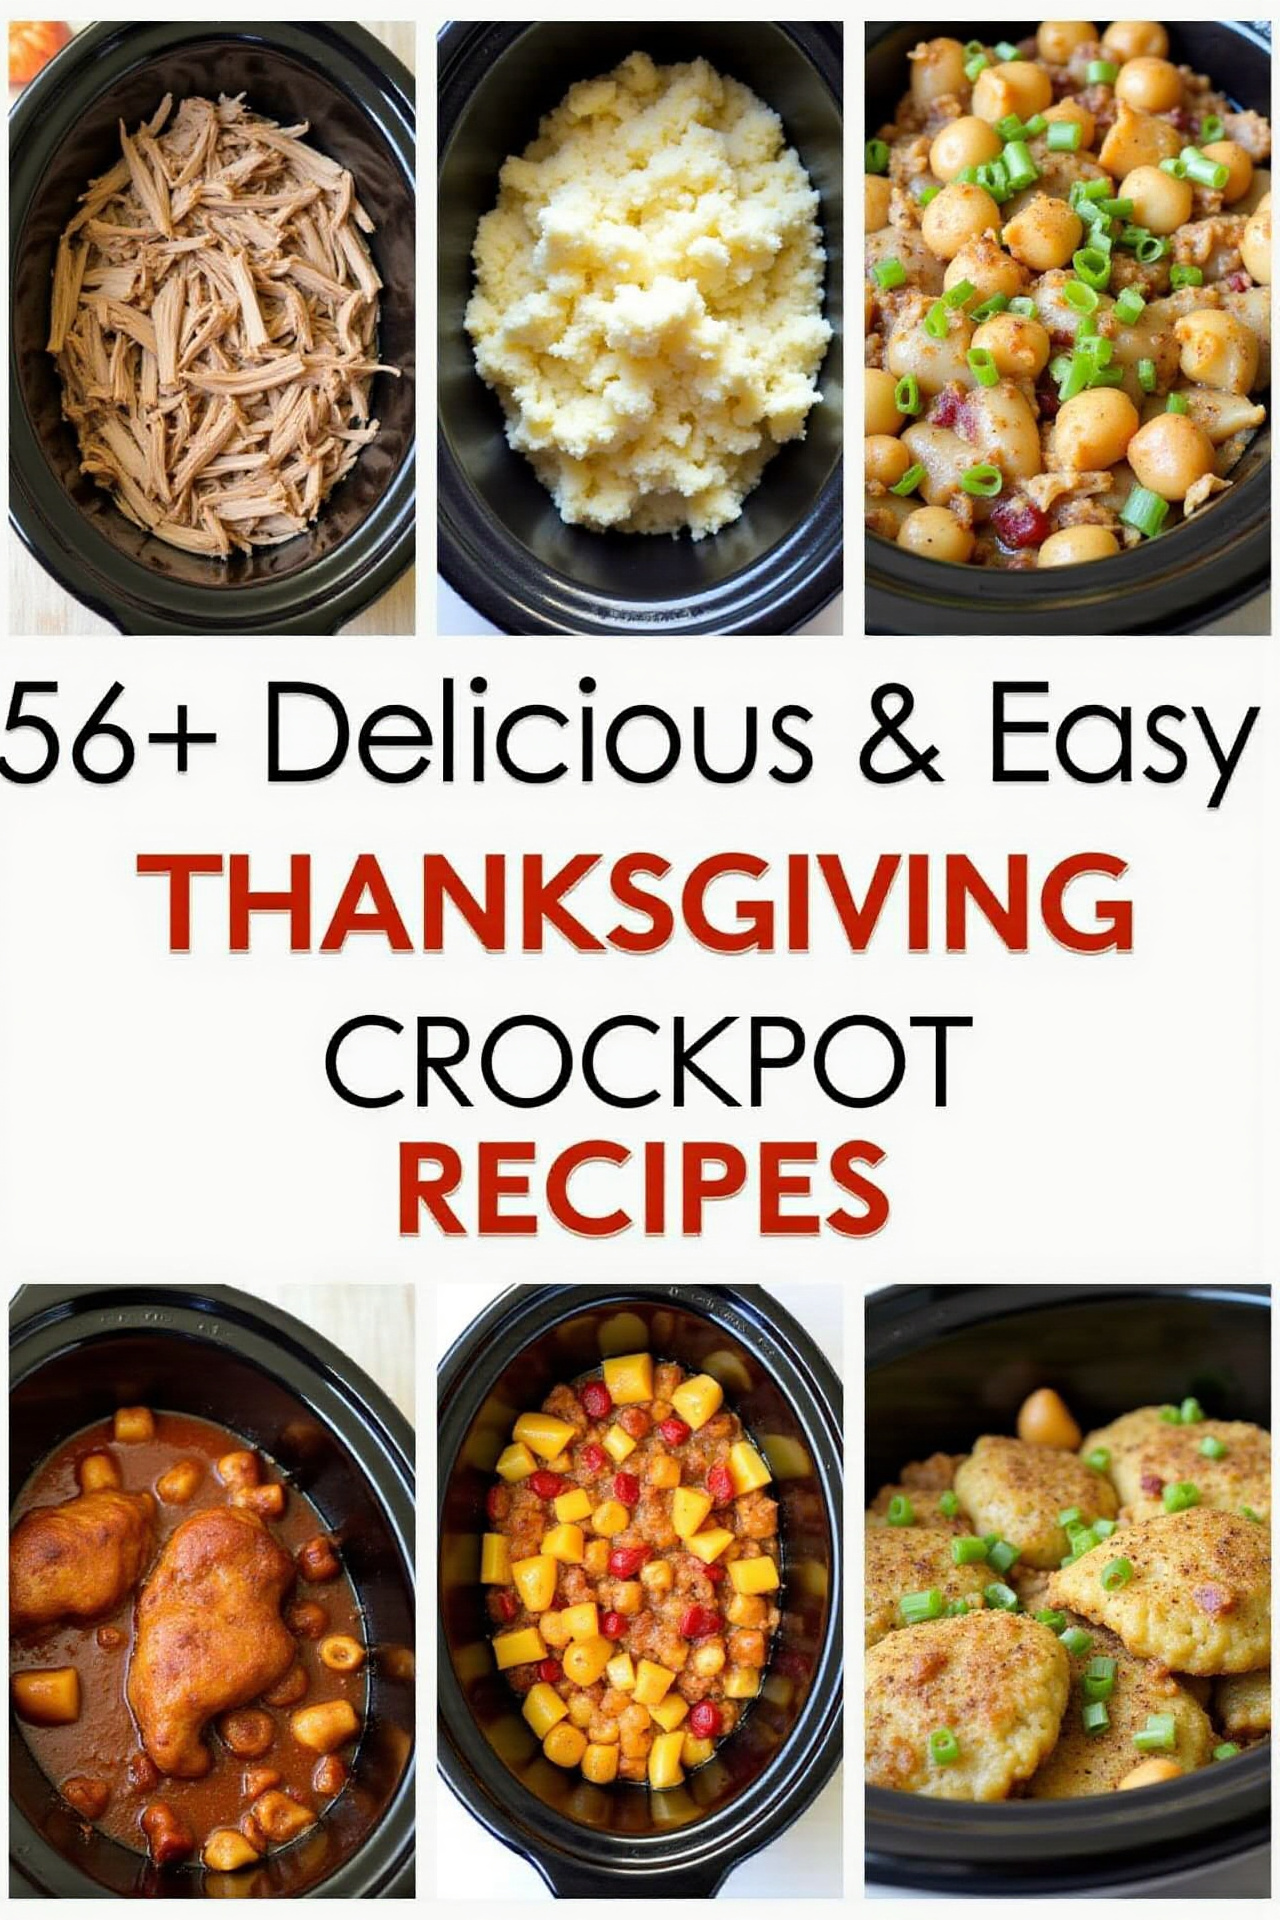
Homemade Orange Sauce: Naturally Delicious

Wave goodbye to store-bought sauces loaded with sugar and soy. Making your own orange sauce is simple: real orange juice, a touch of honey (or maple syrup for AIP), fresh ginger, and coconut aminos for umami (or balsamic vinegar for stricter AIP). This results in a glossy, sticky sauce that clings perfectly to the chicken.

Irresistible Serving Ideas

Serve your crispy orange chicken over cauliflower rice, steamed broccoli, or a bed of mixed greens. Garnish with green onions and a sprinkle of sesame seeds (omit for AIP) to complete the dish. This recipe pairs well with roasted vegetables or a fresh cucumber salad for a balanced, crowd-pleasing meal.

Nutritional Information and Serving Size

Each batch makes about 4 generous servings. Expect approximately 350–400 calories per serving, depending on your oil and sweetener choices. With plenty of protein and healthy fats—and no grains, soy, or refined sugars—this meal satisfies without a blood sugar spike.

[ingredients]
For the chicken:
– 1.5 lbs boneless skinless chicken breasts or thighs, cut into 1-inch pieces
– 1/3 cup arrowroot starch (or tapioca flour)
– 2 tbsp coconut flour
– 2 large eggs (or 1/4 cup coconut milk for AIP/egg-free)
– 1/2 tsp sea salt
– 1/4 tsp black pepper (omit for AIP)
– 2–3 tbsp avocado or coconut oil, for frying

For the orange sauce:
– 1/2 cup fresh orange juice
– Zest of 1 orange
– 2 tbsp coconut aminos (or 1 tbsp balsamic vinegar for strict AIP)
– 2 tbsp honey (or maple syrup for AIP)
– 1 tbsp apple cider vinegar
– 1 garlic clove, minced (omit for AIP)
– 1 tsp grated fresh ginger
– 1 tsp arrowroot or tapioca starch mixed with 1 tbsp water (for thickening)
– Pinch of salt

Garnishes (optional):
– Green onions, sliced
– Toasted sesame seeds (omit for AIP)
– Orange zest

[/ingredients]

💡 Meal Planning Tip: Save this recipe to automatically generate an organized shopping list with all ingredients sorted by store section—perfect for efficient grocery trips and meal planning.

CookifyAI meal planning interface

Instructions

  1. In a shallow bowl, whisk eggs (or coconut milk). In a separate bowl, combine arrowroot starch, coconut flour, sea salt, and pepper (if using).
  2. Dip chicken pieces into the egg mixture, then dredge in the flour mixture to coat evenly. Shake off excess and set aside on a plate.
  3. Heat 2–3 tbsp of avocado or coconut oil in a large skillet over medium-high heat. Once hot, add chicken pieces in a single layer (work in batches if needed). Fry for 3–4 minutes per side, until golden brown and crispy. Remove to a paper towel-lined plate.
  4. In a small saucepan, combine orange juice, zest, coconut aminos (or balsamic vinegar), honey or maple syrup, apple cider vinegar, ginger, garlic (if using), and a pinch of salt. Bring to a simmer over medium heat.
  5. Mix arrowroot/tapioca starch with water to form a slurry, then whisk into the sauce. Simmer for 1–2 minutes until thick and glossy.
  6. Toss crispy chicken in the orange sauce until coated. Serve immediately over your base of choice, garnished with green onions and orange zest.

Weekly Meal Planning

This recipe is ideal for prepping ahead and streamlining your healthy eating routine. Save and schedule this recipe in your meal planner so you know exactly which days to make it—and effortlessly generate smart shopping lists for the week.

Planning Benefits:

  • Consolidate ingredients across all your planned meals — no overbuying or missed staples
  • Generate a tidy, store-sectioned shopping list for quick trips
  • Track your recipes and meals for better week-to-week variety
  • Effortlessly customize for dietary needs (AIP, Paleo, gluten-free, and more)

Pro tip: Plan your whole week and see where your ingredients overlap—CookifyAI tracks quantities, helping you reduce food waste and shop smarter!

Cook and Prep Times

Prep Time: 20 minutes
Cook Time: 15 minutes
Total Time: 35 minutes

Recap: Why Make Crispy Paleo Orange Chicken?

This homemade, allergy-friendly orange chicken is proof that you can enjoy comfort food favorites without gluten, soy, or processed ingredients. It’s fast, full of flavor, adaptable for AIP, and sure to become a go-to crowd pleaser in your meal rotation!

Vibrant Paleo Spring Rolls with Sunflower “Peanut” Sauce: A Whole30 & Keto Delight

Paleo Spring Rolls with “Peanut” Sauce (Whole30, Keto)

Introduction

Paleo Spring Rolls with “Peanut” Sauce (Whole30, Keto) offer a vibrant, fresh twist on a classic favorite—without any grains, legumes, or added sugars. Crisp veggies and savory protein are bundled in a refreshing wrapper, then paired with a nutty, peanut-free dipping sauce. These are perfect for anyone seeking a satisfying, flavor-packed appetizer or light lunch that fits a paleo, Whole30, or keto lifestyle.

Why These Paleo Spring Rolls Are a Flavorful Game-Changer

This recipe delivers an irresistible crunch and burst of flavor in every bite, thanks to naturally sweet carrots, cooling cucumber, fresh herbs, and a luscious, umami-rich sunflower seed “peanut” sauce. Free from grains, dairy, and legumes, these spring rolls prove you don’t have to sacrifice taste or fun when eating clean. Plus, they’re entirely customizable, so you can swap in your favorite proteins or low-carb veggies.

How to Make the Perfect “Peanut” Dipping Sauce

Instead of peanuts, which aren’t paleo-friendly, this sauce relies on creamy sunflower seed butter. With coconut aminos, lime juice, ginger, and a splash of sesame oil, the result is a rich, tangy, and slightly sweet dipping sauce that rivals the real thing. To give it an extra zing, add a pinch of chili flakes or a dash of coconut vinegar. The sauce can be thinned with a little water as needed for your preferred consistency.

Assembling Your Paleo Spring Rolls

For the wrappers, use large collard green leaves or softened rice paper alternatives (check for grain-free versions if paleo strict). Fill each leaf with thinly sliced veggies, pre-cooked chicken, shrimp, or tofu, and a medley of fresh herbs. Rolling the leaves tightly and slicing them diagonally not only enhances presentation but also makes them easy to dip and eat. A sprinkle of sesame seeds or extra herbs takes these rolls to the next level.

Serving Suggestions for Show-Stopping Spring Rolls

Serve your spring rolls chilled with plenty of “peanut” sauce on the side. Add a vibrant salad or a bowl of broth for a more robust meal. For parties or meal prep, arrange them on a platter with lime wedges and extra fresh herbs for a colorful, inviting look.

Nutritional Information and Serving Size

This recipe yields approximately 8 spring rolls, depending on the size of your leaves and how full you pack them. Each roll is roughly 100–140 calories, low in carbohydrates, moderate in protein, and packed with fiber, making them perfect for keto, paleo, and Whole30 plans.

Paleo Spring Rolls with “Peanut” Sauce (Recap)

These clever spring rolls capture everything you crave—crunchy, colorful veggies and creamy, nutty sauce—while staying entirely paleo-friendly, Whole30, and keto. They’re the ideal balance of clean ingredients and bold flavor, ready to brighten up any meal or snack time.

[ingredients]
For the Spring Rolls:
– 8 large collard green leaves (or paleo/keto-friendly rice paper alternatives)
– 1 cup shredded carrots
– 1 cup cucumber strips
– 1 cup sliced bell peppers
– 1 cup shredded cooked chicken, shrimp, or tofu
– 1/4 cup fresh mint leaves
– 1/4 cup fresh cilantro leaves

For the “Peanut” Sauce:
– 1/3 cup unsweetened sunflower seed butter
– 2 tablespoons coconut aminos
– 1 tablespoon lime juice
– 1 tablespoon sesame oil
– 1 teaspoon grated fresh ginger
– 1 teaspoon coconut vinegar or apple cider vinegar
– Pinch of chili flakes (optional)
– Water, to thin as needed

[/ingredients]

💡Meal Planning Tip: Save this recipe to automatically generate an organized shopping list with all ingredients sorted by store section—perfect for efficient grocery trips and seamless meal planning.

CookifyAI meal planning interface

Instructions

  1. Prepare the collard green leaves by trimming the thick stems and blanching them in boiling water for about 30 seconds, then immediately plunging into ice water to soften and make them pliable. Pat dry.
  2. Lay a collard leaf flat, shiny side down. Place a small amount of carrots, cucumber, bell pepper, protein, mint, and cilantro in a row across the lower third of the leaf.
  3. Fold the sides over the filling, then roll tightly (like a burrito). Slice in half on the diagonal for a neat presentation.
  4. Repeat with the remaining leaves and fillings.
  5. For the “peanut” sauce, whisk together sunflower seed butter, coconut aminos, lime juice, sesame oil, ginger, vinegar, and chili flakes. Add water 1 tablespoon at a time until desired consistency is reached.
  6. Serve the spring rolls chilled or at room temperature, with plenty of sauce for dipping.

Weekly Meal Planning

These paleo spring rolls are meal prep superstars—they store beautifully, are easy to transport, and keep your meals interesting all week long. Save and schedule this recipe to effortlessly plan when to enjoy them during the week and generate a smart shopping list that combines ingredients for all your planned meals.

Planning Benefits:

  • Automatically calculates total ingredient quantities across multiple recipes
  • Organizes shopping lists by grocery store section, making grocery runs smooth and efficient
  • Prevents overbuying and missed ingredients
  • Makes meal prep streamlined, especially when prepping for dietary plans like Whole30 or keto

Pro tip: If you’re making multiple meals featuring overlapping ingredients (like carrots or herbs), schedule your recipes and CookifyAI will optimize your list—no more guesswork, no more duplicate buys.

Cook and Prep Times

Prep Time: 20 minutes
Cook Time: 5 minutes (for blanching leaves)
Total Time: 25 minutes

Enjoy the vibrant, healthful flavors of Paleo Spring Rolls with “Peanut” Sauce—a fresh, energizing meal you’ll want on repeat!

Cozy Comfort Meets Clean Eating: Paleo Shepherd’s Pie with Creamy Cauliflower Mash

Hearty and Healthy Paleo Shepherd’s Pie

Introduction

If you’re searching for a nourishing comfort food that fits a paleo lifestyle, this Hearty and Healthy Paleo Shepherd’s Pie delivers robust flavor and guilt-free satisfaction. This wholesome twist on a classic favorite replaces starchy potatoes with creamy cauliflower mash and skips dairy and grains without sacrificing taste. It’s the perfect cozy dinner to please a crowd—ideal for family meals, guests, or prepping satisfying lunches in advance.

What Makes This Paleo Shepherd’s Pie Special?

This Paleo Shepherd’s Pie stands out thanks to its savory base of seasoned ground meat, loads of colorful vegetables, and a luscious cauliflower mash topping. Every bite delivers depth, heartiness, and nutrition—without processed ingredients. The natural sweetness of carrots and peas, the rich flavor of beef (or chosen meat), and a golden, dairy-free topping create a meal that feels indulgent, yet supports healthy eating goals.

Crafting a Delicious Cauliflower Mash Topping

Cauliflower is the star of this paleo-friendly swap. Steam or boil florets until tender, then blend with a splash of olive oil, garlic, and a hint of nutmeg to achieve a velvety texture. For extra creaminess, you can incorporate coconut milk or ghee (if tolerated). The mash browns beautifully in the oven, providing that iconic shepherd’s pie appeal.

Building a Satisfying Paleo Filling

Start with grass-fed ground beef, lamb, or turkey and sauté with onions, garlic, and flavorful herbs like rosemary, thyme, and parsley. Add carrots, celery, and mushrooms for bulk and nutrition. Tomato paste deepens the flavor and coconut aminos provide a paleo-friendly savory note. Peas are optional, as some paleo followers omit legumes. Simmer until thickened, then layer in your baking dish.

Serving Suggestions for a Crowd-Pleasing Shepherd’s Pie

Serve this dish hot, straight from the oven, with a simple side salad or roasted vegetables. For a dinner party, portion into individual ramekins for an impressive presentation. Leftovers reheat well, making this shepherd’s pie a fantastic candidate for batch cooking and weekly meal prep.

Nutritional Information and Serving Size

A typical dish yields 6 generous servings. Each serving averages around 350–400 calories, brimming with protein, fiber-rich vegetables, and healthy fats—without refined carbs or dairy. It’s a deeply satisfying centerpiece for anyone following paleo, gluten-free, or clean eating plans.

Hearty and Healthy Paleo Shepherd’s Pie (Recap)

This paleo shepherd’s pie delivers all the comfort and satisfaction of the classic while supporting your wellness goals. Creamy cauliflower mash, vibrant vegetables, and herb-infused meat make it a surefire hit at any table—no grains or dairy required!

[ingredients]
For the cauliflower mash topping:
1 large head cauliflower, cut into florets
2 tablespoons olive oil or ghee
1–2 cloves garlic, minced
1/4 cup canned coconut milk (optional, for creaminess)
1/4 teaspoon ground nutmeg (optional)
Salt and black pepper, to taste

For the filling:
1 lb ground beef, lamb, or turkey
1 medium onion, diced
2 carrots, peeled and diced
2 celery stalks, diced
1 cup mushrooms, chopped
2 cloves garlic, minced
2 tablespoons tomato paste
2 teaspoons coconut aminos (optional)
1 teaspoon dried thyme
1 teaspoon dried rosemary
1/2 teaspoon dried parsley
Salt and pepper, to taste
1/2 cup frozen peas (omit for strict paleo)
Fresh parsley for garnish
[/ingredients]

💡 Meal Planning Tip: Save this recipe to generate a smart shopping list, organized by store section—making trips easier and meal planning effortless.

CookifyAI meal planning interface

Instructions

  1. Prepare the Cauliflower Mash:
    Steam or boil cauliflower florets until soft, about 10 minutes. Drain well and transfer to a food processor. Add olive oil or ghee, garlic, coconut milk (if using), nutmeg, salt, and pepper. Blend until smooth and creamy. Taste and adjust seasoning. Set aside.
  2. Cook the Filling:
    In a large skillet, heat a tablespoon of olive oil. Sauté onion until translucent. Add ground meat and cook until browned. Stir in garlic, carrots, celery, mushrooms, tomato paste, coconut aminos, and herbs. Season with salt and pepper. Cook until vegetables are tender and mixture is thickened, about 10 minutes. Stir in peas, if using.
  3. Assemble the Pie:
    Preheat oven to 400°F (200°C). Spread the meat and vegetable filling in the bottom of a casserole dish. Spoon cauliflower mash evenly over the top and smooth with a spatula.
  4. Bake:
    Bake uncovered for 20–25 minutes, or until the topping is slightly golden. For added color, broil for 2–3 minutes at the end.
  5. Garnish and Serve:
    Sprinkle with fresh parsley and serve warm.

Weekly Meal Planning

Thanks to its reheating ease and balanced nutrition, this dish is ideal for batch cooking and organizing healthy meals all week long. Save and schedule this recipe on CookifyAI to plan your meal days and consolidate shopping lists across all recipes—making healthy meal prep achievable and organized.

Planning Benefits:

  • Auto-calculates ingredient totals for all planned meals
  • Sorts shopping lists by grocery store aisle—no more zig-zagging
  • Reduces duplicate purchases and forgotten items
  • Keeps your weekly meal prep streamlined and efficient

Pro tip: Planning recipes with overlapping ingredients (like carrots or herbs) means CookifyAI will tally your needs automatically, saving time and minimizing food waste.

Cook and Prep Times

Prep Time: 20 minutes
Cook Time: 40 minutes
Total Time: 1 hour

Enjoy the comfort of a traditional shepherd’s pie, made perfectly paleo and perfectly delicious!

Nourishing Meets Delicious: The Ultimate Flavorful Paleo Chicken Casserole

Flavorful Paleo Chicken Casserole

Introduction

Packed with wholesome, fresh ingredients and bursting with savory flavors, this Flavorful Paleo Chicken Casserole is the answer to your weeknight dinner dilemmas. Free from grains, dairy, and processed ingredients, it’s a nourishing, one-pan meal you can feel good about serving to the whole family. The combination of tender chicken, vibrant vegetables, and aromatic seasonings makes this casserole a satisfying and healthy crowd-pleaser.

Why This Paleo Chicken Casserole Is a Game-Changer

Unlike many casseroles that rely on cheese or heavy creams, this paleo version gets its rich, comforting taste from a clever blend of roasted vegetables, herbs, and homemade chicken broth. The result is a dish that’s hearty and flavorful while aligning perfectly with clean eating and allergy-friendly diets—making it both a weeknight staple and a special occasion standout.

The Secret to a Rich, Flavorful Filling

This casserole uses a combination of coconut milk and chicken broth to create a creamy base, while sautéed garlic, onions, and herbs infuse the dish with aromatic depth. Roasted sweet potatoes and carrots add natural sweetness, and chopped spinach brings freshness and color. Baking the casserole allows all the flavors to meld, resulting in a mouth-watering, satisfying meal from oven to table in under an hour.

Easy Assembly and Baking Instructions

Start by quickly cooking your chicken pieces and sautéing your vegetables on the stovetop—no need for hours of prep! Layer everything in a casserole dish, pour over the creamy broth mixture, and bake until golden brown and bubbling. With minimal effort, you’ll have a complete meal ready to go, perfect for making ahead or serving straight from the oven.

Serving Suggestions for Paleo Chicken Casserole

Pair this casserole with a crisp green salad or a side of roasted Brussels sprouts for a fresh contrast. It also makes fantastic leftovers—simply reheat and enjoy for a healthy lunch. To impress at gatherings, sprinkle with chopped fresh herbs or a dash of smoked paprika before serving.

Nutritional Information and Serving Size

This recipe serves 6 generous portions. Each serving contains approximately 320 calories, 13g healthy fat, 28g protein, and only 16g net carbs. As a balanced, protein-rich meal, it satisfies hunger while keeping you energized.

Flavorful Paleo Chicken Casserole (Recap)

Warm, comforting, and loaded with fresh veggies and lean protein, this casserole redefines healthy comfort food. Prepare it for your family or meal prep for the week—a delicious, paleo-friendly meal is only minutes away!

[ingredients]
1.5 lbs boneless, skinless chicken breasts or thighs, cut into bite-sized pieces
2 medium sweet potatoes, peeled and diced
2 large carrots, peeled and sliced
1 yellow onion, diced
2 cups fresh spinach, roughly chopped
3 cloves garlic, minced
1 cup full-fat coconut milk (from a can)
1 cup chicken broth
2 tablespoons olive oil or avocado oil
1 teaspoon dried thyme
1 teaspoon dried oregano
1/2 teaspoon paprika
1/2 teaspoon salt (or to taste)
1/4 teaspoon cracked black pepper
Fresh parsley, chopped (for garnish, optional)
[/ingredients]

💡Meal Planning Tip: Save this recipe to automatically generate an organized shopping list with all ingredients sorted by store section—perfect for efficient grocery trips and hassle-free meal planning.

CookifyAI meal planning interface

Instructions

  1. Preheat your oven to 400°F (200°C). Lightly grease a 9×13-inch casserole dish.
  2. In a large skillet over medium heat, add 1 tablespoon oil. Sauté chicken pieces until just cooked through (about 5-7 minutes). Transfer to a plate and set aside.
  3. Add remaining oil to the skillet. Sauté onion, carrot, and sweet potato for 5 minutes, until they start to soften. Stir in garlic, dried thyme, oregano, paprika, salt, and pepper. Cook for 1 minute until fragrant.
  4. Add spinach and toss until just wilted. Remove from heat.
  5. In a small bowl, whisk together coconut milk and chicken broth.
  6. Layer half of the veggie mixture in the casserole dish, top with cooked chicken, then pour half of the coconut milk mixture over. Repeat with the remaining veggies and pour over the rest of the coconut milk mixture.
  7. Cover with foil and bake for 20 minutes. Remove foil and bake for another 10-15 minutes, until bubbly and golden.
  8. Let rest for 5 minutes before serving. Garnish with fresh parsley if desired.

Weekly Meal Planning

This hearty casserole is ideal for meal prep—make it ahead and enjoy healthy, satisfying lunches or dinners all week. Save and schedule this recipe in your meal plan to generate streamlined shopping lists and ensure you don’t forget any ingredients.

Planning Benefits:

  • Efficiently calculates ingredient totals for your entire week’s meals
  • Groups items by category for faster grocery shopping
  • Helps reduce food waste by preventing unnecessary purchases
  • Makes it easy to plan variety into your paleo meal routine

Pro tip: If your weekly meal plan includes other paleo recipes using similar veggies or proteins, add and schedule them to consolidate your shopping and streamline meal prep—your future self will thank you!

Cook and Prep Times

Prep Time: 20 minutes
Cook Time: 35 minutes
Total Time: 55 minutes

Mediterranean Made Simple: Quick & Healthy Recipes for Everyday Cooking

Easy Mediterranean Diet Recipes: Simple and Healthy Meals

Introduction

The Mediterranean diet is celebrated for its vibrant flavors, wholesome ingredients, and impressive health benefits. Emphasizing vegetables, fruits, whole grains, lean proteins, and heart-healthy fats, Easy Mediterranean Diet Recipes offer a way to enjoy delicious meals while supporting your well-being. Whether you’re seeking a quick weeknight dinner or wholesome lunches, these recipes simplify Mediterranean cooking without compromising on taste.

Why Mediterranean Recipes Are a Crowd Pleaser

Mediterranean diet meals are renowned for their vibrant colors, bold flavors, and versatility. The harmonious blend of herbs, olive oil, and fresh produce brings a burst of flavor to every bite—making these recipes a hit with both adventurous eaters and picky eaters alike. Plus, they’re naturally packed with nutrients and perfect for family meals or entertaining.

Recipe Spotlight: Mediterranean Chickpea Salad

This Mediterranean Chickpea Salad captures the essence of the region: crisp cucumbers, ripe tomatoes, creamy feta cheese, and a zesty olive oil dressing—all tossed together with protein-rich chickpeas. It’s light yet filling, quick to prepare, and perfect for make-ahead lunches or dinners.

Prepping Fresh Ingredients for Maximum Flavor

The key to a flavorful Mediterranean salad is using the freshest ingredients you can find. Dice your cucumbers and tomatoes just before serving to keep them crisp. Let the chickpeas soak in the lemony dressing for a few minutes so they soak up the tangy goodness, and crumble your feta cheese from a block for optimal creaminess.

Simple Assembly, Stunning Results

Creating this Mediterranean salad couldn’t be easier: toss your vegetables, chickpeas, and dressing in a single bowl, let the flavors meld, then add feta and fresh herbs just before serving. This one-bowl method minimizes cleanup and delivers beautiful results every time.

Serving Suggestions for Mediterranean Meals

Serve this salad as a hearty lunch, a satisfying dinner side, or pair it with grilled chicken or fish for a complete meal. Add a side of whole grain pita bread and a dollop of hummus for an authentic Mediterranean experience.

Nutritional Information and Serving Size

This salad yields 4 hearty servings, with approximately 350 calories per serving. With a healthy balance of complex carbohydrates, protein, and good fats, it’s a well-rounded option suitable for any meal of the day.

Delicious Mediterranean Chickpea Salad (Recap)

This recipe embodies what makes the Mediterranean diet so appealing: it’s quick, fresh, packed with nutrients, and bursting with flavor. Healthy eating has never tasted so good or been so simple to prepare.

[ingredients]
1 can (15 oz) chickpeas, drained and rinsed
1 cup cherry tomatoes, halved
1 cucumber, diced
1/4 cup red onion, finely chopped
1/4 cup Kalamata olives, sliced
1/4 cup feta cheese, crumbled
2 tablespoons extra virgin olive oil
2 tablespoons fresh lemon juice
1 teaspoon dried oregano
Salt and black pepper, to taste
2 tablespoons fresh parsley (optional)
[/ingredients]

💡Meal Planning Tip: Save this recipe to CookifyAI to automatically generate a sorted shopping list—making your grocery trips quicker and your meal prep more organized.

CookifyAI meal planning interface

Instructions

  1. In a large mixing bowl, combine the chickpeas, cherry tomatoes, cucumber, red onion, and Kalamata olives.
  2. In a small bowl, whisk together the olive oil, lemon juice, oregano, salt, and black pepper to make a simple dressing.
  3. Pour the dressing over the salad and toss well to coat all the ingredients thoroughly.
  4. Let the salad sit for 10 minutes to allow the flavors to meld.
  5. Just before serving, add crumbled feta cheese and fresh parsley (if using). Toss gently.
  6. Serve chilled or at room temperature. This salad can be stored in the fridge for up to 3 days.

Weekly Meal Planning

Mediterranean diet recipes like this Chickpea Salad make weekly meal prep a breeze. Save and schedule this recipe using CookifyAI to plan your meals for the week—automatically generating a consolidated shopping list and streamlining meal prep.

Planning Benefits:

  • Automatically adds up ingredients for all planned recipes
  • Sorts your shopping list by store section for easy trips
  • Reduces duplicate purchases and helps prevent food waste
  • Keeps your weekly meal plan efficient and stress-free

Pro tip: Schedule your Mediterranean recipes to track how shared ingredients like olive oil or fresh herbs appear in your shopping list—making it easier to shop and meal prep for the week ahead.

Cook and Prep Times

Prep Time: 15 minutes
Cook Time: 0 minutes
Total Time: 15 minutes

Enjoy these Easy Mediterranean Diet Recipes for Simple and Healthy Meals—perfect for anyone looking to eat better without sacrificing flavor or convenience!

Primal Kitchen Revolution: 50 Bold Recipes for Effortless Health and Flavor

50 Primal Recipes: Ultimate Flavor, Simplicity, and Meal-Prep Ease

Introduction

Embracing a primal lifestyle means focusing on whole, minimally processed foods—lean proteins, fresh fruits and veggies, healthy fats, and nuts—while skipping grains, legumes, and highly processed ingredients. These 50 primal recipes make it easy to stick to your nutrition goals while delighting your taste buds. Whether you’re after simple breakfasts, protein-packed lunches, flavorful mains, or guilt-free treats, this collection ensures you never feel deprived.

Why 50 Primal Recipes Belong in Your Meal Rotation

What sets these primal recipes apart is their combination of bold flavors with straightforward ingredients. You’ll find family favorites and creative new twists, each requiring minimal prep and cook time. Impress your guests at a gathering or meal-prep a week’s worth of nourishing meals that taste just as good as they look.

How to Build Delicious Primal Meals

Primal meals focus on nutrient-dense, satiating foods. For each recipe, pair high-quality proteins—like grass-fed beef, wild-caught fish, or organic poultry—with an abundance of colorful vegetables and healthy fats. The result: satisfying, filling dishes that support health without sacrificing enjoyment.

50 Must-Try Primal Recipes (Sample Selections)

Here’s a snapshot of the variety and simplicity these primal meals offer:

1. **Sunrise Veggie Omelet**
2. **Sweet Potato Hash with Chorizo**
3. **Grilled Lemon Herb Chicken Thighs**
4. **Seared Salmon with Avocado Salsa**
5. **Zucchini Noodle Bolognese**
6. **Crispy Coconut Shrimp**
7. **Moroccan-Spiced Lamb Meatballs**
8. **Primal Chili (no beans!)**
9. **Stuffed Bell Peppers with Cauliflower Rice**
10. **Roasted Veggie Sheet Pan Dinner**
11. **Spicy Mango Chicken Skewers**
12. **Pistachio-Crusted Cod**
13. **Herb Crusted Pork Tenderloin**
14. **Asian-Inspired Lettuce Wraps**
15. **Garlic Roasted Brussels Sprouts**
16. **Prime Ribeye with Gremolata**
17. **Eggplant Lasagna (Grain-Free)**
18. **Buffalo Cauliflower Bites**
19. **Grilled Portobello Steaks**
20. **Sesame Ginger Broccoli Slaw**
…and 30 more, including primal sides, snacks, and desserts!

[ingredients]
Ingredients vary by recipe but focus on:
– Lean proteins: chicken, beef, turkey, fish, eggs
– Fresh vegetables: spinach, broccoli, peppers, mushrooms, zucchini
– Healthy fats: olive oil, avocado, coconut oil, nuts, seeds
– Flavor boosters: fresh herbs, garlic, citrus, spices
– No grains, legumes, refined sugars, or processed oils
[/ingredients]

💡 Meal Planning Tip: Save these recipes to instantly generate a shopping list organized by ingredient and store section. Cooking primal is easy and efficient when meal planning and shopping are streamlined!

CookifyAI meal planning interface

Instructions (Sample: Grilled Lemon Herb Chicken Thighs)

  1. Marinate 1 lb chicken thighs in juice of 1 lemon, 2 tbsp olive oil, 2 minced garlic cloves, and a handful of chopped fresh herbs (thyme, rosemary, parsley) for at least 30 mins.
  2. Heat grill to medium-high. Grill chicken thighs 6–8 minutes per side, until juices run clear.
  3. Serve with roasted veggies or fresh salad greens. Enjoy!

Repeat similar simple instructions for each recipe—prepping meat, seasoning, roasting, grilling, or sautéing alongside your favorite primal-friendly sides.

Serving Suggestions and Pairings

Mix and match mains with bright veggie salads, simple roasted roots, or sautéed greens. Finish meals with a handful of berries or primal-friendly smoothies. These recipes make home-cooked, nutrient-dense eating a pleasure—whether serving a crowd or portioning for the week.

Nutritional Information and Serving Size

Most recipes serve 2–4 and are rich in protein, vitamins, minerals, and healthy fats, while remaining grain- and sugar-free. Calorie counts vary by recipe, ensuring flexibility for different appetites and goals.

50 Primal Recipes (Recap)

This collection makes the primal lifestyle practical and mouthwatering. Fresh, flavorful, and stress-free—these dishes keep your body fueled and your taste buds happy.

Weekly Meal Planning

Make primal living even easier! Save and schedule this recipe collection for the week ahead. CookifyAI compiles ingredients across all your planned meals and sorts them by store section—no more duplicate shopping, missed ingredients, or meal prep chaos.

**Planning Benefits:**
– Consolidates ingredients across all recipes for precise shopping
– Organizes grocery lists by category and store section
– Reduces waste and prevents over-buying
– Makes weekly meal prep smooth, especially with batch cooking and leftovers

Pro tip: Planning several primal dinners together will help you see where proteins or veggies overlap—making bulk prep and smart grocery shopping a breeze. Start planning now for ultimate primal efficiency!

Cook and Prep Times

Average Prep Time: 15–20 minutes per dish
Average Cook Time: 20–30 minutes per dish
Total Time: 30–50 minutes per meal (varies by recipe, most under one hour!)

Discover the full list of 50 primal recipes, automate your shopping list, and eat your way to a healthier, more flavorful week!

Primal Kitchen Revolution: 50 Bold Recipes for Effortless Health and Flavor

50 Primal Recipes: Ultimate Flavor, Simplicity, and Meal-Prep Ease

Introduction

Embracing a primal lifestyle means focusing on whole, minimally processed foods—lean proteins, fresh fruits and veggies, healthy fats, and nuts—while skipping grains, legumes, and highly processed ingredients. These 50 primal recipes make it easy to stick to your nutrition goals while delighting your taste buds. Whether you’re after simple breakfasts, protein-packed lunches, flavorful mains, or guilt-free treats, this collection ensures you never feel deprived.

Why 50 Primal Recipes Belong in Your Meal Rotation

What sets these primal recipes apart is their combination of bold flavors with straightforward ingredients. You’ll find family favorites and creative new twists, each requiring minimal prep and cook time. Impress your guests at a gathering or meal-prep a week’s worth of nourishing meals that taste just as good as they look.

How to Build Delicious Primal Meals

Primal meals focus on nutrient-dense, satiating foods. For each recipe, pair high-quality proteins—like grass-fed beef, wild-caught fish, or organic poultry—with an abundance of colorful vegetables and healthy fats. The result: satisfying, filling dishes that support health without sacrificing enjoyment.

50 Must-Try Primal Recipes (Sample Selections)

Here’s a snapshot of the variety and simplicity these primal meals offer:

1. **Sunrise Veggie Omelet**
2. **Sweet Potato Hash with Chorizo**
3. **Grilled Lemon Herb Chicken Thighs**
4. **Seared Salmon with Avocado Salsa**
5. **Zucchini Noodle Bolognese**
6. **Crispy Coconut Shrimp**
7. **Moroccan-Spiced Lamb Meatballs**
8. **Primal Chili (no beans!)**
9. **Stuffed Bell Peppers with Cauliflower Rice**
10. **Roasted Veggie Sheet Pan Dinner**
11. **Spicy Mango Chicken Skewers**
12. **Pistachio-Crusted Cod**
13. **Herb Crusted Pork Tenderloin**
14. **Asian-Inspired Lettuce Wraps**
15. **Garlic Roasted Brussels Sprouts**
16. **Prime Ribeye with Gremolata**
17. **Eggplant Lasagna (Grain-Free)**
18. **Buffalo Cauliflower Bites**
19. **Grilled Portobello Steaks**
20. **Sesame Ginger Broccoli Slaw**
…and 30 more, including primal sides, snacks, and desserts!

[ingredients]
Ingredients vary by recipe but focus on:
– Lean proteins: chicken, beef, turkey, fish, eggs
– Fresh vegetables: spinach, broccoli, peppers, mushrooms, zucchini
– Healthy fats: olive oil, avocado, coconut oil, nuts, seeds
– Flavor boosters: fresh herbs, garlic, citrus, spices
– No grains, legumes, refined sugars, or processed oils
[/ingredients]

💡 Meal Planning Tip: Save these recipes to instantly generate a shopping list organized by ingredient and store section. Cooking primal is easy and efficient when meal planning and shopping are streamlined!

CookifyAI meal planning interface

Instructions (Sample: Grilled Lemon Herb Chicken Thighs)

  1. Marinate 1 lb chicken thighs in juice of 1 lemon, 2 tbsp olive oil, 2 minced garlic cloves, and a handful of chopped fresh herbs (thyme, rosemary, parsley) for at least 30 mins.
  2. Heat grill to medium-high. Grill chicken thighs 6–8 minutes per side, until juices run clear.
  3. Serve with roasted veggies or fresh salad greens. Enjoy!

Repeat similar simple instructions for each recipe—prepping meat, seasoning, roasting, grilling, or sautéing alongside your favorite primal-friendly sides.

Serving Suggestions and Pairings

Mix and match mains with bright veggie salads, simple roasted roots, or sautéed greens. Finish meals with a handful of berries or primal-friendly smoothies. These recipes make home-cooked, nutrient-dense eating a pleasure—whether serving a crowd or portioning for the week.

Nutritional Information and Serving Size

Most recipes serve 2–4 and are rich in protein, vitamins, minerals, and healthy fats, while remaining grain- and sugar-free. Calorie counts vary by recipe, ensuring flexibility for different appetites and goals.

50 Primal Recipes (Recap)

This collection makes the primal lifestyle practical and mouthwatering. Fresh, flavorful, and stress-free—these dishes keep your body fueled and your taste buds happy.

Weekly Meal Planning

Make primal living even easier! Save and schedule this recipe collection for the week ahead. CookifyAI compiles ingredients across all your planned meals and sorts them by store section—no more duplicate shopping, missed ingredients, or meal prep chaos.

**Planning Benefits:**
– Consolidates ingredients across all recipes for precise shopping
– Organizes grocery lists by category and store section
– Reduces waste and prevents over-buying
– Makes weekly meal prep smooth, especially with batch cooking and leftovers

Pro tip: Planning several primal dinners together will help you see where proteins or veggies overlap—making bulk prep and smart grocery shopping a breeze. Start planning now for ultimate primal efficiency!

Cook and Prep Times

Average Prep Time: 15–20 minutes per dish
Average Cook Time: 20–30 minutes per dish
Total Time: 30–50 minutes per meal (varies by recipe, most under one hour!)

Discover the full list of 50 primal recipes, automate your shopping list, and eat your way to a healthier, more flavorful week!

DHA-Powered Primal Lamb: A Delicious Recipe for Brain and Body Fuel

Primal Bod Lamb Recipe: Maximize DHA with Primal-Inspired Meals

Introduction

When it comes to the primal diet, few ingredients are as rich in flavor and nutrition as lamb. Not only is lamb an excellent source of high-quality protein, but it’s also celebrated for its significant DHA (docosahexaenoic acid) content, an omega-3 fatty acid that supports brain health and overall wellness. This primal lamb recipe is a perfect example of how simple, clean ingredients can come together for a deeply satisfying and nutrient-dense meal.

Why Choose Lamb for Your Primal Diet?

Lamb is a staple in primal diets thanks to its robust flavor and nutrient profile. Unlike leaner meats, grass-fed lamb offers an impressive dose of omega-3s—especially DHA, which is essential for cognitive function and heart health. This recipe is not only delicious, but it harnesses the full nutritional potential of lamb, making it an ideal addition to your primal lifestyle.

Flavorful Primal-Inspired Lamb: A Recipe That Delivers

This dish pairs tender, juicy lamb with aromatic herbs, garlic, and olive oil, allowing the natural flavors of the meat to shine. A squeeze of fresh lemon adds brightness, while a sprinkling of sea salt brings balance. With minimal processing and real, whole-food ingredients, this recipe is designed for both simplicity and nutritional integrity.

Perfecting Your Primal Lamb Dish

Marinade is key: Let your lamb marinate in olive oil, minced garlic, chopped rosemary, and a touch of lemon zest for at least 30 minutes to lock in moisture and enhance flavor. You can grill, pan-sear, or roast the lamb chops—just be sure not to overcook, as lamb is best enjoyed medium-rare for maximum tenderness.

Nourishing Pairings for a Complete Meal

Serve your primal lamb with a medley of roasted root vegetables or a crisp salad tossed in extra-virgin olive oil. This combination aligns perfectly with primal eating principles while offering a hearty meal that satisfies and fuels your body.

Nutritional Information and Serving Size

This primal lamb recipe yields 4 generous servings. Each portion provides approximately 280–330 calories, 24g protein, and a healthy dose of omega-3s, making it a powerhouse of both satisfaction and primal nutrition.

Primal Lamb DHA Powerhouse (Recap)

This recipe delivers bold flavor and clean nutrition. Thanks to the natural richness of lamb—especially DHA—this dish is a shining example of primal eating at its best: simple, elegant, and incredibly nourishing.

[ingredients]
1.5 lbs grass-fed lamb chops (or leg of lamb, cut into portions)
3 tablespoons extra-virgin olive oil
3 garlic cloves, minced
2 tablespoons fresh rosemary, chopped
1 lemon, zest and juice
1 teaspoon sea salt
1/2 teaspoon freshly ground black pepper
Optional: 1 teaspoon smoked paprika or cumin for added flavor
Assorted primal-friendly side vegetables (broccoli, carrots, or squash)
[/ingredients]

💡Meal Planning Tip: Save this recipe to instantly generate a shopping list with all ingredients, sorted by section for quick and efficient grocery trips.

CookifyAI meal planning interface

Instructions

  1. Pat lamb chops dry and place in a shallow dish. In a bowl, combine olive oil, garlic, rosemary, lemon zest, salt, pepper, and optional spices. Pour marinade over lamb, turning to coat evenly. Cover and let marinate for 30 minutes (or up to overnight in the fridge).
  2. Preheat grill or skillet to medium-high heat. Remove lamb from marinade and let excess oil drip off.
  3. Sear lamb for 3–4 minutes per side for medium-rare (or to your preferred doneness). Rest for 5 minutes before serving. If using leg of lamb, roast at 400°F for 20–25 minutes or until a thermometer reads 135°F (for medium-rare), adjusting time as needed for larger pieces.
  4. While the lamb rests, steam or roast your favorite primal-friendly veggies, drizzling with olive oil and a sprinkle of salt.
  5. Finish the lamb with a squeeze of lemon juice before serving. Plate with vegetables and any pan juices drizzled on top.

Weekly Meal Planning

Including primal-focused lamb recipes in your meal rotation provides both variety and a powerful nutrient boost. Save and schedule this recipe in CookifyAI to efficiently plan weekly meals, organize shopping lists by grocery store section, and coordinate ingredient quantities across different recipes.

Planning Benefits:

  • Auto-calculates total ingredients needed for all scheduled meals
  • Prevents under- or overbuying (especially useful with specialty proteins like lamb!)
  • Groups shopping lists by store section, making grocery trips faster
  • Eliminates guesswork and minimizes food waste

Pro tip: Use CookifyAI’s scheduling feature to plan when fresh proteins like lamb fit best in your week, ensuring each meal is prepped at its peak for flavor and nutrition.

Cook and Prep Times

Prep Time: 10 minutes (plus marinating: 30 minutes)
Cook Time: 10 minutes
Total Time: 50 minutes (including marinating)

15 Hearty AIP Dinner Recipes: Flavorful Healing Made Easy

15 Easy Autoimmune Protocol (AIP) Dinner Recipes • Heal Me Delicious

Introduction

Embracing the Autoimmune Protocol (AIP) diet doesn’t have to mean giving up flavor or simplicity. These 15 easy AIP dinner recipes from Heal Me Delicious bring together nutrient-rich ingredients and approachable techniques, offering satisfying, wholesome meals that keep both food sensitivity and delight in mind. Whether you’re managing an autoimmune condition or simply looking for smart, paleo-friendly dinner ideas, these recipes make balancing nourishment and taste easier than ever.

Diverse and Flavorful AIP Dinner Ideas

What sets these recipes apart is their ability to transform simple paleo ingredients into crowd-pleasing meals that don’t feel restrictive. Each dish balances savory, sweet, and herbaceous flavors—think comforting broths, perfectly roasted proteins, and creative veggie-packed mains. With clear steps and readily available ingredients, even beginners can enjoy a delicious, healing dinner every night.

Why These Meals Are Perfect for AIP and Paleo Lifestyles

Autoimmune Protocol recipes prioritize gut health by excluding common allergens like grains, dairy, nuts, seeds, eggs, and nightshades. But instead of focusing on what’s excluded, these dishes highlight all the vibrant flavors you can add with herbs, coconut, quality proteins, and a rainbow of vegetables. Each meal supports healing without sacrificing comfort or variety.

Weekly Dinner Lineup: AIP-Approved Inspiration

From one-pot meals to satisfying bowls to family-friendly favorites, here are a few ideas from Heal Me Delicious’s collection to spark your meal rotation:

  • AIP Chicken and Bacon “Ranch” Casserole – Creamy, hearty, and loaded with veggies.
  • Sweet Potato Shepherd’s Pie – A comforting classic with an AIP twist.
  • Ginger-Garlic Salmon – Zesty and quick for weeknights.
  • Tender Slow-Cooked Beef Stew – Richly flavored, perfect for make-ahead.
  • Lemon-Herb Turkey Meatballs – Juicy and adaptable for meal prep.

Nourishing Ingredients for Healing Dinners

[ingredients]
– Chicken breasts or thighs
– Fresh wild-caught salmon fillets
– Lean ground turkey or beef
– Uncured AIP-compliant bacon
– Sweet potatoes and Japanese yams
– Fresh leafy greens (kale, spinach, arugula)
– Cruciferous veggies (broccoli, cauliflower)
– Zucchini and carrots
– Coconut cream, coconut aminos
– Bone broth (homemade or AIP-compliant)
– Garlic, ginger, fresh herbs (rosemary, thyme, basil)
– Avocado oil, olive oil
– Lemons and limes
– Sea salt and AIP-friendly seasonings
[/ingredients]

💡Meal Planning Tip: Save this recipe collection to instantly generate an organized shopping list, sorted by grocery store section—making AIP meal planning and shopping seamless and stress-free.

CookifyAI meal planning interface

Instructions (General Process for Stress-Free AIP Dinners)

  1. Pick your proteins (such as chicken, salmon, turkey, or beef) and select your favorite AIP recipe from the list above.
  2. Prep vegetables and herbs, dicing, slicing, and washing as needed. Many recipes are one-pan or sheet pan for quick assembly and cleanup.
  3. Prepare healing flavor bases: Sauté garlic, ginger, and fresh herbs in olive or avocado oil before adding proteins or liquids.
  4. Follow the recipe instructions for combining proteins, vegetables, bone broth, and coconut-based sauces. Season generously with sea salt and herbs.
  5. Simmer, roast, bake, or slow cook until flavors meld and proteins are cooked through. Most recipes are complete in 30–45 minutes.
  6. Serve garnished with fresh herbs or a squeeze of lemon for brightness.

Serving Suggestions & Pairings

Pair protein mains with simple sides like roasted root veggies, fresh sautéed greens, or a crisp salad with olive oil. For an extra boost of flavor, offer homemade AIP “ranch” or coconut yogurt sauces. These dinners are versatile—double recipes for leftovers or freeze for easy future meals.

Nutritional Information and Serving Size

Serving sizes vary—most recipes provide 3–4 portions with generous amounts of vegetables and protein. Each dish is macronutrient-balanced, free from grains and dairy, and tailored to support gut health, making them ideal for those on an AIP or paleo meal plan.

Diverse and Flavorful AIP Dinners (Recap)

These 15 easy Autoimmune Protocol dinner recipes prove that eating for healing can be just as satisfying as any other dinner routine. Bold flavors, nutrient-dense produce, and flexible prep make them perfect for anyone seeking wholesome and delicious meals.

Weekly Meal Planning

Take the guesswork out of healthy eating with smart weekly meal planning. Save and schedule these AIP recipes to your meal plan for effortless shopping and dinner prep.

Planning Benefits:

  • Automatically tallies ingredient totals for all meals on your plan
  • Sorts your shopping list by store sections (produce, meat, pantry)
  • Reduces duplicate purchases and forgotten items
  • Streamlines meal prep—prep batch ingredients and cook once, eat twice

Pro tip: When you schedule multiple AIP recipes, see exactly how many sweet potatoes or proteins you’ll need across your week, saving money and minimizing food waste.

Cook and Prep Times

Prep Time: 15–20 minutes per dish
Cook Time: 25–40 minutes per dish
Total Time: 40–60 minutes per meal (many dishes scale up or freeze for easy future dinners)

Enjoy discovering new favorites and nutritious comfort with these easy AIP-friendly dinners!

25 Effortless Paleo Dinners: Quick, Healthy Recipes for Every Night

25 Easy Paleo Dinner Recipes (Quick, Simple & Healthy!)

Introduction

Planning flavorful, satisfying dinners while sticking to a paleo lifestyle can be effortless with the right recipes on hand. These 25 easy paleo dinner recipes are crafted to deliver maximum taste with minimal fuss, making them perfect for busy weeknights, meal prep, or impressing guests with wholesome, nutrient-rich cuisine.

Why These 25 Paleo Dinner Recipes are Absolutely Essential

These dishes showcase the very best of paleo cooking: fresh seasonal produce, lean proteins, and healthy fats—all without refined sugars, grains, or dairy. Each recipe is designed to be quick to prepare and uses straightforward, easy-to-find ingredients, ensuring healthier meals for you and your household without sacrificing flavor or variety.

What to Expect from These Quick & Healthy Dinners

Expect a colorful variety: zesty one-pan chicken and veggies, hearty beef stir fries, savory seafood, and lighter plant-powered entrees. The selection spans global cuisines, turning everyday ingredients into crave-worthy dishes full of bold spices and enticing textures—all while keeping your meal routine energizing and on track.

Paleo Dinner Recipes to Streamline Your Week

The following paleo-friendly dinners are categorized by protein and prep style (skillet, sheet pan, grill, slow cooker, and more). Whether you’re craving a juicy steak, a simple seafood bake, or a vibrant, veggie-forward skillet, finding something to suit your palate and schedule is easy.

Sample Paleo Dinner Recipe: Lemon Garlic Chicken and Veggies Skillet

[ingredients]
– 2 large boneless, skinless chicken breasts, cut into cubes
– 2 cups broccoli florets
– 1 red bell pepper, sliced
– 1 zucchini, sliced
– 2 tablespoons olive oil
– 3 cloves garlic, minced
– Juice of 1 lemon
– 1 teaspoon dried Italian herbs (oregano, basil, thyme)
– Salt and freshly ground pepper to taste
– Fresh parsley for garnish
[/ingredients]

💡Meal Planning Tip: Save this recipe to instantly generate a structured shopping list—sorted by category—for quicker, more organized grocery trips. You’ll never forget a key ingredient again!

CookifyAI meal planning interface

Instructions

  1. Heat 1 tablespoon olive oil in a large skillet over medium-high heat. Add chicken cubes, seasoning with salt, pepper, and half the Italian herbs. Sauté for 5-7 minutes or until golden and cooked through. Transfer to a plate, cover, and set aside.
  2. Add remaining oil and all vegetables to the skillet. Sprinkle with the rest of the herbs and more salt and pepper as needed. Sauté for 5 minutes until veggies are just tender, stirring frequently.
  3. Return chicken to the skillet. Add garlic and cook for 1 minute until fragrant.
  4. Squeeze fresh lemon juice over everything. Stir well, garnish with fresh parsley, and serve hot.

25 Easy Paleo Dinner Recipes (Selection Highlights)

  • One-Pan Herb Roasted Salmon & Veggies
  • 5-Ingredient Balsamic Chicken Bake
  • Beef & Broccoli Stir-Fry
  • Sweet Potato and Ground Turkey Skillet
  • Spicy Shrimp Lettuce Wraps
  • Coconut Curry Chicken Thighs
  • Garlic Rosemary Pork Chops with Asparagus
  • Homemade Paleo Meatballs with Zucchini Noodles
  • Egg Roll in a Bowl
  • Sheet Pan Lemon Dill Cod
  • Chipotle Chicken Cauliflower Rice Bowls
  • Turkey Avocado Burger Patties
  • Pesto Grilled Steak with Tomato Salad
  • Paleo Thai Basil Beef
  • Roasted Vegetable and Sausage Sheet Pan Dinner
  • Simple Baked Chicken Drumsticks
  • Ginger-Lime Mahi Mahi Fillets
  • Paleo Greek Chicken Skewers
  • Sun-Dried Tomato & Spinach Chicken Bake
  • Pulled Pork Stuffed Sweet Potatoes
  • Zesty Lemon-Garlic Shrimp and Zoodles
  • Spaghetti Squash Bolognese Boats
  • Buffalo Cauliflower and Chicken Bake
  • Moroccan Lamb Chops with Roasted Vegetables
  • Easy Skillet Turkey Picadillo

Serving Suggestions

These dinners pair beautifully with a side of roasted root vegetables, a fresh mixed-greens salad, or a simple cauliflower mash. For added heft, consider doubling veggie portions and prepping servings in glass containers for grab-and-go lunches throughout the week.

Nutritional Information and Portioning

Most of these recipes yield 4 servings and are packed with lean protein and fiber. Calories per serving range from 250 to 500, depending on the dish and serving size. These meals will support your health goals and keep you satisfied without added sugars or processed ingredients.

25 Easy Paleo Dinner Recipes (Recap)

With this variety of easy, healthy, and mouthwatering paleo dinner ideas, your weekly menu will always feel fresh, never boring. Flavorful proteins, crisp veggies, and clean ingredients—dinner time just became the best part of your day.

Weekly Meal Planning

Incorporate these paleo recipes into your weekly meal prep for effortless, nutritious dinners. Save and schedule these recipes to your weekly planner on CookifyAI. The app will tally up ingredients across your chosen recipes, organize them by store section, and help you batch-cook when possible.

**Planning Benefits:**

  • Creates one master shopping list, sorted for maximum efficiency
  • Finds overlapping ingredients—so you buy just what you need
  • Prevents duplicate or forgotten items
  • Streamlines weeknight cooking and meal prep

Pro tip: Use CookifyAI’s scheduling feature to lay out your dinners and see total quantities of staples like eggs, chicken, or herbs—no more wasted groceries or last-minute store runs!

Cook and Prep Times

Prep Time (average per recipe): 10-15 minutes
Cook Time (average per recipe): 15-25 minutes
Total Time (average per recipe): 25-40 minutes

With these 25 easy paleo dinner recipes, healthy eating is both simple and satisfying—from swift weeknight fixes to meal-preppable favorites. Enjoy effortless dinners and delicious variety every night of the week!

Cozy Comfort Meets Clean Eating: Paleo Shepherd’s Pie with Creamy Cauliflower Mash

Hearty and Healthy Paleo Shepherd’s Pie

Introduction

If you’re searching for a nourishing comfort food that fits a paleo lifestyle, this Hearty and Healthy Paleo Shepherd’s Pie delivers robust flavor and guilt-free satisfaction. This wholesome twist on a classic favorite replaces starchy potatoes with creamy cauliflower mash and skips dairy and grains without sacrificing taste. It’s the perfect cozy dinner to please a crowd—ideal for family meals, guests, or prepping satisfying lunches in advance.

What Makes This Paleo Shepherd’s Pie Special?

This Paleo Shepherd’s Pie stands out thanks to its savory base of seasoned ground meat, loads of colorful vegetables, and a luscious cauliflower mash topping. Every bite delivers depth, heartiness, and nutrition—without processed ingredients. The natural sweetness of carrots and peas, the rich flavor of beef (or chosen meat), and a golden, dairy-free topping create a meal that feels indulgent, yet supports healthy eating goals.

Crafting a Delicious Cauliflower Mash Topping

Cauliflower is the star of this paleo-friendly swap. Steam or boil florets until tender, then blend with a splash of olive oil, garlic, and a hint of nutmeg to achieve a velvety texture. For extra creaminess, you can incorporate coconut milk or ghee (if tolerated). The mash browns beautifully in the oven, providing that iconic shepherd’s pie appeal.

Building a Satisfying Paleo Filling

Start with grass-fed ground beef, lamb, or turkey and sauté with onions, garlic, and flavorful herbs like rosemary, thyme, and parsley. Add carrots, celery, and mushrooms for bulk and nutrition. Tomato paste deepens the flavor and coconut aminos provide a paleo-friendly savory note. Peas are optional, as some paleo followers omit legumes. Simmer until thickened, then layer in your baking dish.

Serving Suggestions for a Crowd-Pleasing Shepherd’s Pie

Serve this dish hot, straight from the oven, with a simple side salad or roasted vegetables. For a dinner party, portion into individual ramekins for an impressive presentation. Leftovers reheat well, making this shepherd’s pie a fantastic candidate for batch cooking and weekly meal prep.

Nutritional Information and Serving Size

A typical dish yields 6 generous servings. Each serving averages around 350–400 calories, brimming with protein, fiber-rich vegetables, and healthy fats—without refined carbs or dairy. It’s a deeply satisfying centerpiece for anyone following paleo, gluten-free, or clean eating plans.

Hearty and Healthy Paleo Shepherd’s Pie (Recap)

This paleo shepherd’s pie delivers all the comfort and satisfaction of the classic while supporting your wellness goals. Creamy cauliflower mash, vibrant vegetables, and herb-infused meat make it a surefire hit at any table—no grains or dairy required!

[ingredients]
For the cauliflower mash topping:
1 large head cauliflower, cut into florets
2 tablespoons olive oil or ghee
1–2 cloves garlic, minced
1/4 cup canned coconut milk (optional, for creaminess)
1/4 teaspoon ground nutmeg (optional)
Salt and black pepper, to taste

For the filling:
1 lb ground beef, lamb, or turkey
1 medium onion, diced
2 carrots, peeled and diced
2 celery stalks, diced
1 cup mushrooms, chopped
2 cloves garlic, minced
2 tablespoons tomato paste
2 teaspoons coconut aminos (optional)
1 teaspoon dried thyme
1 teaspoon dried rosemary
1/2 teaspoon dried parsley
Salt and pepper, to taste
1/2 cup frozen peas (omit for strict paleo)
Fresh parsley for garnish
[/ingredients]

💡 Meal Planning Tip: Save this recipe to generate a smart shopping list, organized by store section—making trips easier and meal planning effortless.

CookifyAI meal planning interface

Instructions

  1. Prepare the Cauliflower Mash:
    Steam or boil cauliflower florets until soft, about 10 minutes. Drain well and transfer to a food processor. Add olive oil or ghee, garlic, coconut milk (if using), nutmeg, salt, and pepper. Blend until smooth and creamy. Taste and adjust seasoning. Set aside.
  2. Cook the Filling:
    In a large skillet, heat a tablespoon of olive oil. Sauté onion until translucent. Add ground meat and cook until browned. Stir in garlic, carrots, celery, mushrooms, tomato paste, coconut aminos, and herbs. Season with salt and pepper. Cook until vegetables are tender and mixture is thickened, about 10 minutes. Stir in peas, if using.
  3. Assemble the Pie:
    Preheat oven to 400°F (200°C). Spread the meat and vegetable filling in the bottom of a casserole dish. Spoon cauliflower mash evenly over the top and smooth with a spatula.
  4. Bake:
    Bake uncovered for 20–25 minutes, or until the topping is slightly golden. For added color, broil for 2–3 minutes at the end.
  5. Garnish and Serve:
    Sprinkle with fresh parsley and serve warm.

Weekly Meal Planning

Thanks to its reheating ease and balanced nutrition, this dish is ideal for batch cooking and organizing healthy meals all week long. Save and schedule this recipe on CookifyAI to plan your meal days and consolidate shopping lists across all recipes—making healthy meal prep achievable and organized.

Planning Benefits:

  • Auto-calculates ingredient totals for all planned meals
  • Sorts shopping lists by grocery store aisle—no more zig-zagging
  • Reduces duplicate purchases and forgotten items
  • Keeps your weekly meal prep streamlined and efficient

Pro tip: Planning recipes with overlapping ingredients (like carrots or herbs) means CookifyAI will tally your needs automatically, saving time and minimizing food waste.

Cook and Prep Times

Prep Time: 20 minutes
Cook Time: 40 minutes
Total Time: 1 hour

Enjoy the comfort of a traditional shepherd’s pie, made perfectly paleo and perfectly delicious!

Nourishing Meets Delicious: The Ultimate Flavorful Paleo Chicken Casserole

Flavorful Paleo Chicken Casserole

Introduction

Packed with wholesome, fresh ingredients and bursting with savory flavors, this Flavorful Paleo Chicken Casserole is the answer to your weeknight dinner dilemmas. Free from grains, dairy, and processed ingredients, it’s a nourishing, one-pan meal you can feel good about serving to the whole family. The combination of tender chicken, vibrant vegetables, and aromatic seasonings makes this casserole a satisfying and healthy crowd-pleaser.

Why This Paleo Chicken Casserole Is a Game-Changer

Unlike many casseroles that rely on cheese or heavy creams, this paleo version gets its rich, comforting taste from a clever blend of roasted vegetables, herbs, and homemade chicken broth. The result is a dish that’s hearty and flavorful while aligning perfectly with clean eating and allergy-friendly diets—making it both a weeknight staple and a special occasion standout.

The Secret to a Rich, Flavorful Filling

This casserole uses a combination of coconut milk and chicken broth to create a creamy base, while sautéed garlic, onions, and herbs infuse the dish with aromatic depth. Roasted sweet potatoes and carrots add natural sweetness, and chopped spinach brings freshness and color. Baking the casserole allows all the flavors to meld, resulting in a mouth-watering, satisfying meal from oven to table in under an hour.

Easy Assembly and Baking Instructions

Start by quickly cooking your chicken pieces and sautéing your vegetables on the stovetop—no need for hours of prep! Layer everything in a casserole dish, pour over the creamy broth mixture, and bake until golden brown and bubbling. With minimal effort, you’ll have a complete meal ready to go, perfect for making ahead or serving straight from the oven.

Serving Suggestions for Paleo Chicken Casserole

Pair this casserole with a crisp green salad or a side of roasted Brussels sprouts for a fresh contrast. It also makes fantastic leftovers—simply reheat and enjoy for a healthy lunch. To impress at gatherings, sprinkle with chopped fresh herbs or a dash of smoked paprika before serving.

Nutritional Information and Serving Size

This recipe serves 6 generous portions. Each serving contains approximately 320 calories, 13g healthy fat, 28g protein, and only 16g net carbs. As a balanced, protein-rich meal, it satisfies hunger while keeping you energized.

Flavorful Paleo Chicken Casserole (Recap)

Warm, comforting, and loaded with fresh veggies and lean protein, this casserole redefines healthy comfort food. Prepare it for your family or meal prep for the week—a delicious, paleo-friendly meal is only minutes away!

[ingredients]
1.5 lbs boneless, skinless chicken breasts or thighs, cut into bite-sized pieces
2 medium sweet potatoes, peeled and diced
2 large carrots, peeled and sliced
1 yellow onion, diced
2 cups fresh spinach, roughly chopped
3 cloves garlic, minced
1 cup full-fat coconut milk (from a can)
1 cup chicken broth
2 tablespoons olive oil or avocado oil
1 teaspoon dried thyme
1 teaspoon dried oregano
1/2 teaspoon paprika
1/2 teaspoon salt (or to taste)
1/4 teaspoon cracked black pepper
Fresh parsley, chopped (for garnish, optional)
[/ingredients]

💡Meal Planning Tip: Save this recipe to automatically generate an organized shopping list with all ingredients sorted by store section—perfect for efficient grocery trips and hassle-free meal planning.

CookifyAI meal planning interface

Instructions

  1. Preheat your oven to 400°F (200°C). Lightly grease a 9×13-inch casserole dish.
  2. In a large skillet over medium heat, add 1 tablespoon oil. Sauté chicken pieces until just cooked through (about 5-7 minutes). Transfer to a plate and set aside.
  3. Add remaining oil to the skillet. Sauté onion, carrot, and sweet potato for 5 minutes, until they start to soften. Stir in garlic, dried thyme, oregano, paprika, salt, and pepper. Cook for 1 minute until fragrant.
  4. Add spinach and toss until just wilted. Remove from heat.
  5. In a small bowl, whisk together coconut milk and chicken broth.
  6. Layer half of the veggie mixture in the casserole dish, top with cooked chicken, then pour half of the coconut milk mixture over. Repeat with the remaining veggies and pour over the rest of the coconut milk mixture.
  7. Cover with foil and bake for 20 minutes. Remove foil and bake for another 10-15 minutes, until bubbly and golden.
  8. Let rest for 5 minutes before serving. Garnish with fresh parsley if desired.

Weekly Meal Planning

This hearty casserole is ideal for meal prep—make it ahead and enjoy healthy, satisfying lunches or dinners all week. Save and schedule this recipe in your meal plan to generate streamlined shopping lists and ensure you don’t forget any ingredients.

Planning Benefits:

  • Efficiently calculates ingredient totals for your entire week’s meals
  • Groups items by category for faster grocery shopping
  • Helps reduce food waste by preventing unnecessary purchases
  • Makes it easy to plan variety into your paleo meal routine

Pro tip: If your weekly meal plan includes other paleo recipes using similar veggies or proteins, add and schedule them to consolidate your shopping and streamline meal prep—your future self will thank you!

Cook and Prep Times

Prep Time: 20 minutes
Cook Time: 35 minutes
Total Time: 55 minutes

Hearty & Healthy Paleo Shepherd’s Pie: A Wholesome Twist on a Classic Comfort Dish

Hearty and Healthy Paleo Shepherd’s Pie

Introduction

Few comfort meals rival the satisfaction of a piping hot Shepherd’s Pie. This Hearty and Healthy Paleo Shepherd’s Pie puts a fresh spin on the classic, featuring wholesome ingredients and grain-free, dairy-free goodness. Perfect for busy weeknights or family dinners, this recipe brings rich, savory flavors together in a meal that’s both nourishing and deeply satisfying.

Deliciously Unique Paleo Shepherd’s Pie

What sets this Shepherd’s Pie apart is its use of a luscious cauliflower mash instead of traditional potatoes and a flavorful filling made with lean ground meat, plenty of veggies, and savory herbs. The result is a dish that captures the essence of hearty comfort food while remaining paleo, gluten-free, and loaded with nutrients—a crowd-pleaser you can feel great serving.

Paleo-Friendly Filling Bursting with Flavor

The filling forms the backbone of this dish, combining ground beef or lamb with classic mirepoix (carrots, celery, and onion), green beans, and mushrooms. Seasoned with garlic, herbs like thyme and rosemary, and a splash of tomato paste, each bite is hearty and robust—a perfect base for the creamy cauliflower topping.

Luscious Cauliflower Mash Topping

Steam or boil cauliflower florets until fork-tender, then blend with olive oil and a dash of coconut milk for creaminess. The result? A silky mash that bakes to golden perfection, offering the same comfort as traditional potatoes with far fewer carbs and a boost of fiber.

Serving Suggestions for a Crowd-Pleasing Paleo Shepherd’s Pie

Pair generous squares of Shepherd’s Pie with a simple green salad or roasted seasonal vegetables for a balanced paleo meal. For gatherings, serve it family-style straight from the baking dish for a rustic presentation that encourages seconds.

Nutritional Information and Serving Size

This recipe yields about 6 ample servings. Each serving is packed with protein and vegetables, typically containing around 320 to 360 calories, depending on your meat and veggie ratios. It’s free from grains, legumes, and dairy, making it a nourishing weeknight staple.

Hearty and Healthy Paleo Shepherd’s Pie (Recap)

With its rich, herbaceous filling and silky cauliflower topping, this Paleo Shepherd’s Pie is a wholesome comfort food favorite that fits perfectly into healthy meal plans. Its crowd-pleasing flavors and nourishing ingredients ensure it will be a hit at any table.

[ingredients]
For the Filling:
1 lb ground beef or lamb
2 tbsp olive oil
1 large onion, diced
2 cloves garlic, minced
2 carrots, diced
2 celery stalks, diced
1 cup green beans, chopped
8 oz mushrooms, sliced
2 tbsp tomato paste
1 cup beef or chicken broth
1 tsp dried thyme
1 tsp dried rosemary
Salt and black pepper to taste

For the Cauliflower Mash:
1 large head cauliflower, cut into florets
2 tbsp olive oil
1/4 cup coconut milk (unsweetened)
Salt and pepper to taste
Optional: Chopped fresh parsley for garnish
[/ingredients]

💡Meal Planning Tip: Save this recipe to automatically generate an organized shopping list with all ingredients sorted by store section—perfect for efficient grocery trips and streamlined paleo meal planning!

CookifyAI meal planning interface

Instructions

  1. Preheat your oven to 400°F (200°C).
  2. Steam or boil cauliflower florets until very tender, about 10 minutes. Drain well and set aside.
  3. While cauliflower cooks, heat olive oil in a large skillet over medium-high heat. Add the onion, garlic, carrots, and celery. Sauté for 5 minutes until vegetables begin to soften.
  4. Add the ground meat and cook, breaking up with a spoon, until browned and cooked through.
  5. Stir in green beans and mushrooms. Sauté for 3 minutes, then add tomato paste, broth, thyme, rosemary, salt, and pepper. Simmer for 8–10 minutes until slightly thickened. Remove from heat.
  6. In a food processor or with a potato masher, blend cooked cauliflower with olive oil and coconut milk until smooth. Season with salt and pepper.
  7. Spread the meat and vegetable filling evenly in a 9×13-inch baking dish. Top with the cauliflower mash, smoothing with a spatula.
  8. Bake for 20–25 minutes, until the top is slightly golden and the dish is bubbling at the edges. Garnish with chopped fresh parsley, if desired.

Weekly Meal Planning

This paleo Shepherd’s Pie is a fantastic make-ahead meal that stores and reheats well—ideal for batch cooking or meal prep. Save and schedule this recipe to plan your paleo meals and automatically generate a smart grocery list with accurate ingredient quantities across all your weekly recipes.

Planning Benefits:

  • Consolidates all shopping needs so you never miss an ingredient
  • Organizes grocery lists by store section, saving shopping time
  • Reduces food waste by accurately calculating total ingredient needs
  • Makes it easy to prep multiple healthy meals for the week

Pro tip: Schedule your recipes so you see exactly how much of each ingredient, like coconut milk or ground beef, you’ll need for all planned meals—helping you shop smarter and prep with confidence.

Cook and Prep Times

Prep Time: 20 minutes
Cook Time: 40 minutes
Total Time: 1 hour

Enjoy a slice of homemade, hearty, and healthy Paleo Shepherd’s Pie—a meal-planner’s comfort food essential!

Primal Kitchen Revolution: 50 Bold Recipes for Effortless Health and Flavor

50 Primal Recipes: Ultimate Flavor, Simplicity, and Meal-Prep Ease

Introduction

Embracing a primal lifestyle means focusing on whole, minimally processed foods—lean proteins, fresh fruits and veggies, healthy fats, and nuts—while skipping grains, legumes, and highly processed ingredients. These 50 primal recipes make it easy to stick to your nutrition goals while delighting your taste buds. Whether you’re after simple breakfasts, protein-packed lunches, flavorful mains, or guilt-free treats, this collection ensures you never feel deprived.

Why 50 Primal Recipes Belong in Your Meal Rotation

What sets these primal recipes apart is their combination of bold flavors with straightforward ingredients. You’ll find family favorites and creative new twists, each requiring minimal prep and cook time. Impress your guests at a gathering or meal-prep a week’s worth of nourishing meals that taste just as good as they look.

How to Build Delicious Primal Meals

Primal meals focus on nutrient-dense, satiating foods. For each recipe, pair high-quality proteins—like grass-fed beef, wild-caught fish, or organic poultry—with an abundance of colorful vegetables and healthy fats. The result: satisfying, filling dishes that support health without sacrificing enjoyment.

50 Must-Try Primal Recipes (Sample Selections)

Here’s a snapshot of the variety and simplicity these primal meals offer:

1. **Sunrise Veggie Omelet**
2. **Sweet Potato Hash with Chorizo**
3. **Grilled Lemon Herb Chicken Thighs**
4. **Seared Salmon with Avocado Salsa**
5. **Zucchini Noodle Bolognese**
6. **Crispy Coconut Shrimp**
7. **Moroccan-Spiced Lamb Meatballs**
8. **Primal Chili (no beans!)**
9. **Stuffed Bell Peppers with Cauliflower Rice**
10. **Roasted Veggie Sheet Pan Dinner**
11. **Spicy Mango Chicken Skewers**
12. **Pistachio-Crusted Cod**
13. **Herb Crusted Pork Tenderloin**
14. **Asian-Inspired Lettuce Wraps**
15. **Garlic Roasted Brussels Sprouts**
16. **Prime Ribeye with Gremolata**
17. **Eggplant Lasagna (Grain-Free)**
18. **Buffalo Cauliflower Bites**
19. **Grilled Portobello Steaks**
20. **Sesame Ginger Broccoli Slaw**
…and 30 more, including primal sides, snacks, and desserts!

[ingredients]
Ingredients vary by recipe but focus on:
– Lean proteins: chicken, beef, turkey, fish, eggs
– Fresh vegetables: spinach, broccoli, peppers, mushrooms, zucchini
– Healthy fats: olive oil, avocado, coconut oil, nuts, seeds
– Flavor boosters: fresh herbs, garlic, citrus, spices
– No grains, legumes, refined sugars, or processed oils
[/ingredients]

💡 Meal Planning Tip: Save these recipes to instantly generate a shopping list organized by ingredient and store section. Cooking primal is easy and efficient when meal planning and shopping are streamlined!

CookifyAI meal planning interface

Instructions (Sample: Grilled Lemon Herb Chicken Thighs)

  1. Marinate 1 lb chicken thighs in juice of 1 lemon, 2 tbsp olive oil, 2 minced garlic cloves, and a handful of chopped fresh herbs (thyme, rosemary, parsley) for at least 30 mins.
  2. Heat grill to medium-high. Grill chicken thighs 6–8 minutes per side, until juices run clear.
  3. Serve with roasted veggies or fresh salad greens. Enjoy!

Repeat similar simple instructions for each recipe—prepping meat, seasoning, roasting, grilling, or sautéing alongside your favorite primal-friendly sides.

Serving Suggestions and Pairings

Mix and match mains with bright veggie salads, simple roasted roots, or sautéed greens. Finish meals with a handful of berries or primal-friendly smoothies. These recipes make home-cooked, nutrient-dense eating a pleasure—whether serving a crowd or portioning for the week.

Nutritional Information and Serving Size

Most recipes serve 2–4 and are rich in protein, vitamins, minerals, and healthy fats, while remaining grain- and sugar-free. Calorie counts vary by recipe, ensuring flexibility for different appetites and goals.

50 Primal Recipes (Recap)

This collection makes the primal lifestyle practical and mouthwatering. Fresh, flavorful, and stress-free—these dishes keep your body fueled and your taste buds happy.

Weekly Meal Planning

Make primal living even easier! Save and schedule this recipe collection for the week ahead. CookifyAI compiles ingredients across all your planned meals and sorts them by store section—no more duplicate shopping, missed ingredients, or meal prep chaos.

**Planning Benefits:**
– Consolidates ingredients across all recipes for precise shopping
– Organizes grocery lists by category and store section
– Reduces waste and prevents over-buying
– Makes weekly meal prep smooth, especially with batch cooking and leftovers

Pro tip: Planning several primal dinners together will help you see where proteins or veggies overlap—making bulk prep and smart grocery shopping a breeze. Start planning now for ultimate primal efficiency!

Cook and Prep Times

Average Prep Time: 15–20 minutes per dish
Average Cook Time: 20–30 minutes per dish
Total Time: 30–50 minutes per meal (varies by recipe, most under one hour!)

Discover the full list of 50 primal recipes, automate your shopping list, and eat your way to a healthier, more flavorful week!

Paleo Made Easy: 10 Flavor-Packed Dinner Recipes for Busy Weeknights

10 Easy Paleo Dinner Recipes You’ll Love

Introduction

Following a paleo diet doesn’t mean sacrificing flavor or spending hours in the kitchen. These 10 Easy Paleo Dinner Recipes You’ll Love are designed for busy weeknights, delivering bold flavors and wholesome, nutrient-dense ingredients the whole family can enjoy. With easy prep and accessible ingredients, you’ll discover that paleo meals can be both simple and exciting, making it easier than ever to stick to your healthy lifestyle.

10 Flavor-Packed Paleo Dinners to Try This Week

These recipes stand out not just for their clean ingredient lists but for their crowd-pleasing appeal and versatility. Each meal is built around high-quality protein and a generous helping of fresh veggies, featuring global flavors and comforting classics. Paleo cooking is all about letting ingredients shine, and these dinners are proof that simplicity can equal serious satisfaction.

What Is the Paleo Diet?

The paleo diet centers on eating foods that our ancestors could hunt or gather meats, fish, vegetables, fruits, nuts, and seeds while avoiding processed foods, grains, legumes, and dairy. This approach emphasizes whole, natural ingredients and healthy fats, encouraging well-rounded nutrition and easy meal planning.

The Delicious Paleo Dinner Lineup

Whether you’re new to paleo or a seasoned pro, these recipes provide variety and ease without skimping on taste. Here are 10 easy paleo dinners:

  1. Sheet Pan Lemon Garlic Chicken & Broccoli: Juicy chicken thighs roasted with broccoli, tossed in olive oil, garlic, and fresh lemon juice.
  2. Beef & Sweet Potato Skillet: Ground beef sautéed with sweet potatoes, bell peppers, and onions, finished with cumin and smoked paprika.
  3. Salmon with Avocado Salsa: Pan-seared salmon fillets topped with zesty avocado, tomato, and cilantro salsa.
  4. Turkey Zucchini Boats: Zucchinis stuffed with spiced ground turkey, tomatoes, and fresh herbs.
  5. Indian-Inspired Chicken Curry: Chicken simmered in coconut milk, curry spices, and vegetables.
  6. Ginger Garlic Shrimp Stir Fry: Shrimp sautéed with broccoli, snap peas, and carrots in a ginger-garlic sauce.
  7. Paleo Chili: Hearty ground beef, tomatoes, peppers, and spices—no beans needed!
  8. Pork Chops with Roasted Apples & Onions: Bone-in pork chops seared and finished in the oven with sweet, caramelized apples and onions.
  9. Stuffed Bell Peppers: Peppers filled with ground chicken, cauliflower rice, and fire-roasted tomatoes.
  10. Egg Roll in a Bowl: Ground pork sautéed with shredded cabbage, carrots, and scallions, seasoned with coconut aminos and ginger.

[ingredients]
Sheet Pan Lemon Garlic Chicken & Broccoli
– 4 bone-in chicken thighs
– 2 cups broccoli florets
– 2 tbsp olive oil
– 3 cloves garlic, minced
– Juice of 1 lemon
– Sea salt & pepper

Beef & Sweet Potato Skillet
– 1 lb ground beef
– 2 medium sweet potatoes, diced
– 1 red bell pepper, chopped
– 1 yellow onion, diced
– 1 tsp cumin
– 1 tsp smoked paprika

Salmon with Avocado Salsa
– 4 salmon fillets
– 1 avocado, diced
– 1 tomato, diced
– 2 tbsp cilantro, chopped
– Juice of 1 lime

Turkey Zucchini Boats
– 4 medium zucchinis
– 1 lb ground turkey
– 1/2 cup diced tomatoes
– 1 tbsp fresh herbs

Indian-Inspired Chicken Curry
– 1 lb chicken breast, diced
– 1 cup coconut milk
– 1 tbsp curry powder
– Your choice of veggies

Ginger Garlic Shrimp Stir Fry
– 1 lb large shrimp, peeled
– 2 cups mixed vegetables (e.g., broccoli, snap peas, carrots)
– 2 tbsp coconut aminos
– 1 tbsp grated ginger
– 2 cloves garlic, minced

Paleo Chili
– 1 lb ground beef
– 1 onion, diced
– 2 cups diced tomatoes
– 1 bell pepper, chopped
– 2 tbsp chili powder

Pork Chops with Roasted Apples & Onions
– 4 bone-in pork chops
– 2 apples, thinly sliced
– 1 large onion, sliced
– 2 tbsp olive oil

Stuffed Bell Peppers
– 4 bell peppers
– 1 lb ground chicken
– 1 cup cauliflower rice
– 1/2 cup fire-roasted tomatoes

Egg Roll in a Bowl
– 1 lb ground pork
– 4 cups shredded cabbage
– 1 cup shredded carrots
– 2 green onions, sliced
– 2 tbsp coconut aminos
– 1 tbsp fresh ginger, grated
[/ingredients]

💡Meal Planning Tip: Save all these recipes to automatically generate a well-organized shopping list, sorted by store section, for your week’s worth of paleo dinners. This makes planning and grocery shopping a breeze!

CookifyAI meal planning interface

Instructions

Because these recipes are designed for simplicity, each follows a streamlined preparation process. Here’s a general guide:

  1. Prep Ingredients: Wash, chop, and measure out all vegetables, fruits, and proteins as listed above.
  2. Cook Protein First: In most recipes, start by browning your meat (chicken, beef, pork, or turkey) in a skillet with a little olive oil or coconut oil, seasoning with sea salt and pepper, and any spices indicated.
  3. Add Veggies: Add in the chopped vegetables or greens and continue cooking, stirring often, until everything is tender and well combined.
  4. Bring It Together: For sheet pan or oven meals, combine all ingredients on a lined baking sheet and roast as directed (usually 20–30 minutes at 400°F). For skillets and stir-fries, keep heat on medium-high, tossing regularly.
  5. Finish & Garnish: Taste for seasoning, finish with fresh herbs or citrus juice, and serve hot.

Each individual recipe may require slight adjustments (e.g., stuffing peppers or assembling avocado salsa), but these steps cover the basics for a week of healthy paleo dinners.

Weekly Meal Planning

These paleo dinner recipes are ideal for prepping ahead and making healthy eating seamless all week. Save and schedule these recipes in CookifyAI to create a complete meal plan that aligns with your goals and automatically generates the total shopping list for the week.

Planning Benefits:

  • Eliminate duplicated ingredients for maximum efficiency and minimal waste
  • Organize your list by store section for faster and less stressful shopping
  • Save time by grouping tasks—like batch-cooking sweet potatoes or pre-cutting veggies
  • Stay on track with your paleo diet through structured meal planning

Pro tip: Schedule your paleo dinners and see how ingredients overlap between meals. For example, sweet potatoes and ground meats feature in several recipes, making bulk purchases cost-effective and prep faster.

Cook and Prep Times

Prep Time: 15–20 minutes per recipe
Cook Time: 20–35 minutes per recipe
Total Time: 35–55 minutes per meal (with many recipes ready in under 40 minutes)

10 Paleo Dinner Recap

These 10 Easy Paleo Dinner Recipes You’ll Love deliver the satisfying flavors and variety needed to keep your meals exciting and on track. With quick prep, nourishing ingredients, and meal planning made simple, you’ll look forward to dinnertime all week long!

30+ AIP & Paleo Sheet Pan Dinners: Your Ultimate Guide to Quick, Healthy, and Delicious Meals

30+ AIP and Paleo Easy Sheet Pan Dinners

Introduction

When you’re seeking quick, flavorful, and health-conscious dinner solutions, sheet pan dinners deliver unmatched convenience—especially when following AIP (Autoimmune Protocol) or Paleo diets. With just a handful of ingredients, minimal prep time, and even less cleanup, these 30+ AIP and Paleo Easy Sheet Pan Dinners will become your go-to for stress-free weeknights. Each meal brings together protein, veggies, and bold herbs and spices to nourish and satisfy the whole family.

Why Sheet Pan Dinners Are a Game Changer for AIP and Paleo Diets

Sheet pan meals are a standout because they combine simplicity and full-bodied flavor into one smart cooking technique. Roasting mellow vegetables and protein together intensifies their natural sweetness and locks in moisture, making every bite as delicious as it is nutritious. Plus, with one pan, there’s less fuss, less cleanup, and more time to enjoy a wholesome meal that fits your dietary needs.

How to Build the Perfect AIP and Paleo Sheet Pan Dinner

The key to a satisfying sheet pan meal is balance: Select a hearty protein (chicken, salmon, turkey, or pork), pair it with a rainbow variety of AIP/Paleo-approved veggies (think broccoli, cauliflower, sweet potato, or zucchini), and toss with healthy fats (olive oil, avocado oil) and seasonings (fresh herbs, garlic, sea salt). Layer everything on a sheet pan and roast until the edges are golden and the aromas fill your kitchen.

Flavor Ideas to Keep Dinner Exciting

To keep sheet pan dinners fresh week after week, switch up your combinations:

– Lemon-Garlic Chicken Thighs with Brussels Sprouts and Carrots
– Wild Salmon with Fennel, Lemon, and Asparagus
– Herbed Pork Tenderloin with Roasted Sweet Potatoes and Green Beans
– Turmeric Chicken with Cauliflower, Zucchini, and Red Onion
– Shrimp with Rainbow Bell Peppers and Parsnips

Batch-prepping sauces like AIP pesto or Paleo chimichurri is a great way to add layers of flavor without extra effort.

Serving Suggestions for Maximum Enjoyment

Serve each sheet pan dinner directly from the pan for that rustic family-style feel. If you want to make it extra hearty, pair with a simple side salad of mixed greens and a splash of olive oil. Garnish with fresh chopped herbs or a squeeze of citrus for an added burst of flavor. These meals store well for leftovers and make excellent next-day lunches.

Nutritional Information and Serving Size

Each sheet pan dinner yields 3 to 4 generous portions and is naturally free from grains, dairy, legumes, and nightshades (for AIP). Based on your protein and vegetable choices, a serving typically ranges between 300–450 calories. These meals are a nutrition-packed way to support your health and wellness routines.

[ingredients]
2 lbs preferred protein (e.g., boneless skinless chicken thighs, wild salmon fillets, pork tenderloin, turkey breast, shrimp)
4–6 cups assorted AIP/Paleo-approved vegetables (broccoli, zucchini, carrots, cauliflower, sweet potato)
3 tablespoons olive oil or avocado oil
1 tablespoon fresh herbs (rosemary, thyme, oregano, dill) or 2 teaspoons dried
2 teaspoons sea salt
1 teaspoon garlic powder (omit for strict AIP)
1 teaspoon turmeric or dried ginger (optional)
Lemon wedges or fresh parsley for garnish
[/ingredients]

💡Meal Planning Tip: Save this recipe to automatically create an organized shopping list with all your ingredients neatly sorted by store section—making grocery trips quick and meal planning stress-free.

CookifyAI meal planning interface

Instructions

  1. Preheat oven to 425°F. Line one or two large baking sheets with parchment paper for easy cleanup.
  2. Chop all vegetables into even pieces for uniform roasting. Pat the protein dry with paper towels.
  3. Arrange vegetables and protein evenly across the sheet pan(s).
  4. Drizzle everything with oil and sprinkle with herbs, salt, and seasonings. Toss to coat well.
  5. Roast for 20–30 minutes, depending on protein and vegetable size. Halfway through, flip the protein and toss the veggies for even browning.
  6. Check for doneness: Chicken should reach an internal temp of 165°F, salmon 145°F. Veggies should be tender and slightly caramelized.
  7. Remove from the oven, garnish as desired, and serve hot.

Weekly Meal Planning

Sheet pan dinners are tailor-made for meal prepping and busy weeks. Save and schedule these recipes to automatically generate smart shopping lists that combine ingredients from all planned meals and keep your kitchen stocked with just what you need.

Planning Benefits:

– Automatically calculates total ingredient quantities for all selected dinners
– Organizes shopping lists by grocery store aisle
– Eliminates duplicate purchases and forgotten ingredients
– Empowers you to batch-prep sheet pan meals with maximum efficiency

Pro tip: When planning several dinners, batch schedule your recipes to consolidate overlapping ingredients—like herbs and proteins—minimizing waste and optimizing your prep time.

Cook and Prep Times

Prep Time: 15 minutes
Cook Time: 25 minutes
Total Time: 40 minutes

Enjoy fuss-free, nourishing meals every night with these 30+ AIP and Paleo Easy Sheet Pan Dinners—a flavorful, wholesome solution for anyone aiming to eat healthy, delicious food without extra stress.

Ultimate Game Day Indulgence: Loaded Venison Queso Dip Masterpiece

Loaded Venison Queso Dip

Introduction

Loaded Venison Queso Dip is the ultimate appetizer for gatherings, game days, and festive nights with friends. Combining the robust flavor of ground venison with melty, seasoned cheese and a variety of vibrant add-ins, this dip delivers satisfying flavor in every scoop. Crafted for easy prep and irresistibly smooth texture, this one is sure to disappear fast.

Why Loaded Venison Queso Dip Steals the Show

What makes this queso truly special is its depth of flavor: hearty venison stands up beautifully to spicy peppers, tangy tomatoes, and creamy cheese. It’s bold, comforting, and packed with protein–making it a crowd pleaser that also keeps you full. Plus, it takes just minutes to prepare yet tastes like it simmered all day.

Perfecting a Creamy, Flavorful Queso Base

For a perfectly smooth queso, combine cubed Velveeta or your favorite melting cheese with a splash of milk or heavy cream. Melting over low heat and stirring frequently keeps the cheese velvety–no lumpy dips here. Stir in your favorite salsa or a can of tomatoes with green chilies for layered, zesty flavor.

Building the Ultimate Loaded Queso

Brown the ground venison with onion, garlic, and taco spices, then fold it into the cheesy base. Finish by mixing in black beans, jalapeños, and corn for texture and color. Top it all with fresh cilantro, scallions, and a sprinkle of diced fresh tomatoes for an irresistible finish.

Serving Suggestions for Serious Queso Lovers

Serve this dip piping hot with sturdy tortilla chips or warm flour tortillas. For a party platter, offer assorted dippers: carrot sticks, celery, pretzel bites, or crisp bell pepper strips. As a bonus, the leftovers transform into a killer nacho topping or filling for quesadillas.

Nutritional Information and Serving Size

This recipe yields about 10 generous servings. One serving (about 1/2 cup) typically contains 240-280 calories, depending on cheese and add-ins used. With plenty of protein and balanced richness, it’s a hearty treat best enjoyed with friends and family.

Loaded Venison Queso Dip (Recap)

This dip melds bold venison with a medley of cheeses, beans, and vegetables for a flavor-packed, comforting masterpiece. Whether you’re hosting a party or looking to elevate your snack game, this Loaded Venison Queso Dip belongs on your table.

[ingredients]
1 lb ground venison
1 tbsp olive oil
1/2 cup onion, diced
2 garlic cloves, minced
1 tbsp taco seasoning (or chili powder, cumin, paprika mix)
16 oz processed cheese (Velveeta, cubed) or 2 cups shredded cheddar/jack blend
1 cup milk or heavy cream
1 (10-oz) can diced tomatoes with green chilies, drained
1/2 cup salsa or more to taste
1/2 cup black beans, rinsed and drained
1/2 cup corn (fresh, canned, or thawed from frozen)
1/4 cup pickled jalapeños, chopped (adjust to heat preference)
Salt and pepper, to taste
Garnishes: diced fresh tomatoes, cilantro, sliced green onions
Tortilla chips or assorted dippers, for serving
[/ingredients]

💡Meal Planning Tip: Save this recipe to automatically generate an organized shopping list with all ingredients sorted by store section—perfect for efficient grocery trips and meal planning.

CookifyAI meal planning interface

Instructions

  1. Heat olive oil in a large skillet over medium heat. Add diced onion and sauté until translucent, about 3 minutes. Stir in minced garlic and cook until fragrant, about 30 seconds.
  2. Add ground venison to the skillet. Cook, breaking up with a spoon, until no longer pink. Drain any excess fat. Stir in taco seasoning, salt, and pepper to taste.
  3. In a large saucepan or slow cooker, combine cubed processed cheese (or shredded cheese) and milk. Heat over low, stirring frequently, until completely melted and smooth.
  4. Mix in the cooked venison mixture, drained diced tomatoes with green chilies, salsa, black beans, corn, and chopped jalapeños. Stir gently to combine.
  5. Cook on low, stirring occasionally, for 10-15 minutes, or until the dip is heated through and all flavors are combined. Adjust seasoning and salsa for heat and taste.
  6. Pour queso into a serving dish. Garnish with diced tomatoes, cilantro, and sliced green onions as desired. Serve warm with chips and dippers.

Weekly Meal Planning

This Loaded Venison Queso Dip adapts beautifully to weekly meal prep and event planning. Save and schedule this recipe to organize when you’ll serve it, and generate smart shopping lists that combine all needed ingredients across your week’s meals.

Planning Benefits:

  • Automatically totals ingredient needs, even across multiple batches.
  • Smart shopping lists are sorted by grocery aisle for fast trips.
  • Prevents forgetting crucial dip add-ins or chips—no last-minute store runs!
  • Reduces ingredient waste by calculating overlapping ingredients in multiple recipes.

Pro tip: When prepping for game day or party spreads, schedule your recipes in CookifyAI for an at-a-glance look at quantities—especially helpful if doubling recipes or serving a larger group.

Cook and Prep Times

Prep Time: 15 minutes
Cook Time: 20 minutes
Total Time: 35 minutes

Whole30 Mississippi Pot Roast: A Bold, Clean Twist on a Classic Comfort Dish

Whole30 Mississippi Pot Roast

Introduction

Whole30 Mississippi Pot Roast is a game-changer for anyone craving bold, savory flavors while sticking to clean eating guidelines. This recipe delivers fall-apart tender beef infused with the zesty, tangy notes of Mississippi-style pot roast—without any processed ingredients, dairy, or sugar. It’s an ideal dinner for busy weeknights, slow weekend meals, or serving a crowd with minimal effort, and it’s guaranteed to satisfy everyone at the table.

Why You’ll Love Whole30 Mississippi Pot Roast

Traditional Mississippi Pot Roast gets a Whole30 makeover with simple swaps: homemade ranch seasoning, compliant pepperoncini peppers, and clean broth. What makes this dish special is how effortlessly the slow cooker transforms an inexpensive cut of beef into juicy, flavorful goodness—making every bite rich and satisfying without time-consuming work.

How to Make Perfect Whole30 Pot Roast Every Time

Start by searing the chuck roast for maximum flavor, then let it simmer low and slow with Whole30-approved ranch seasoning, beef broth, and tangy pepperoncini. The slow cooker method keeps prep simple—just combine ingredients and walk away until dinner is done! For a truly compliant experience, make sure your broths and condiments have no hidden sugars or additives.

The Secret Ranch Seasoning Blend

A homemade ranch seasoning brings this roast to life without packaged mixes. Blend dried parsley, dill, chives, onion powder, garlic powder, salt, and black pepper for a flavor-packed rub that’s both Whole30-friendly and delicious. Prep a large batch to use in other meal prep recipes throughout the week.

Serving Suggestions for Your Whole30 Mississippi Pot Roast

Serve the pot roast with a side of roasted potatoes, sautéed green beans, or a fresh cauliflower mash to create a full Whole30 meal. Spoon extra juices over everything for maximum flavor—no gravy required! The leftovers are perfect for meal prep bowls, lettuce wraps, or sandwiches after your Whole30 round.

Nutritional Information and Serving Size

This recipe yields about 6 hearty servings. Each serving delivers a balance of protein, healthy fats, and veggies, and—thanks to the clean ingredient list—it fits seamlessly into your Whole30 meal plan.

Whole30 Mississippi Pot Roast Ingredients

[ingredients]
3–4 lbs beef chuck roast
1 tablespoon avocado oil or olive oil
1 cup Whole30-compliant beef broth
6–8 Whole30-compliant pepperoncini peppers (plus 2 tablespoons brine)
1/4 cup ghee, clarified butter, or coconut oil
1 small yellow onion, sliced
3 cloves garlic, minced

Homemade Ranch Seasoning:
1 teaspoon sea salt
1 teaspoon dried dill
1 teaspoon dried parsley
1 teaspoon garlic powder
1 teaspoon onion powder
1/2 teaspoon dried chives
1/2 teaspoon black pepper

Optional: Additional carrots, potatoes, or other root vegetables
[/ingredients]

💡Meal Planning Tip: Save this recipe to instantly generate a categorized shopping list—organized by each store section, so you never miss an ingredient and your Whole30 planning is always stress-free.

CookifyAI meal planning interface

Instructions

  1. Pat the chuck roast dry. Season generously with ranch seasoning on all sides.
  2. In a large skillet, heat oil over medium-high heat. Sear the roast on all sides (about 2–3 minutes per side) to develop flavor.
  3. Place sliced onions on the bottom of the slow cooker. Add seared roast on top.
  4. Sprinkle minced garlic, pepperoncini peppers, and brine over the roast. Pour in beef broth. Dot the top of the roast with ghee (or your choice of Whole30 cooking fat).
  5. Cover and cook on LOW for 8 hours (or HIGH for 4–5 hours) until the roast pulls apart easily with a fork.
  6. Taste and adjust salt or pepper if needed. Shred the meat and mix into the juices. Serve hot with your favorite Whole30 sides!

Weekly Meal Planning

This meal is ideal for prepping in advance and enjoying leftovers throughout the week. Save and schedule this recipe to mix and match with other Whole30 dishes, automatically combine all your ingredients into one smart shopping list, and streamline grocery trips.

Planning Benefits:

  • Automatically calculates ingredient totals across all your planned meals
  • Sorts shopping lists by aisle to save time
  • Prevents repeat purchases and forgotten items
  • Makes Whole30 meal prepping seamless and organized

Pro tip: Schedule multiple meals to see ingredient overlap (e.g., if you use garlic in several recipes, the app totals it for you), making meal prep more efficient and helping you stick to your Whole30 goals.

Cook and Prep Times

Prep Time: 15 minutes
Cook Time: 8 hours (slow cooker, hands-off!)
Total Time: 8 hours 15 minutes

Whole30 Mississippi Pot Roast (Recap)

With its melt-in-your-mouth tender beef and tangy, herby flavors, this Whole30 Mississippi Pot Roast is bold, crave-worthy, and perfect for anyone looking to eat clean without sacrificing comfort and taste. Your family and your weekly meal plan will thank you!

15 Hearty AIP Dinner Recipes: Flavorful Healing Made Easy

15 Easy Autoimmune Protocol (AIP) Dinner Recipes • Heal Me Delicious

Introduction

Embracing the Autoimmune Protocol (AIP) diet doesn’t have to mean giving up flavor or simplicity. These 15 easy AIP dinner recipes from Heal Me Delicious bring together nutrient-rich ingredients and approachable techniques, offering satisfying, wholesome meals that keep both food sensitivity and delight in mind. Whether you’re managing an autoimmune condition or simply looking for smart, paleo-friendly dinner ideas, these recipes make balancing nourishment and taste easier than ever.

Diverse and Flavorful AIP Dinner Ideas

What sets these recipes apart is their ability to transform simple paleo ingredients into crowd-pleasing meals that don’t feel restrictive. Each dish balances savory, sweet, and herbaceous flavors—think comforting broths, perfectly roasted proteins, and creative veggie-packed mains. With clear steps and readily available ingredients, even beginners can enjoy a delicious, healing dinner every night.

Why These Meals Are Perfect for AIP and Paleo Lifestyles

Autoimmune Protocol recipes prioritize gut health by excluding common allergens like grains, dairy, nuts, seeds, eggs, and nightshades. But instead of focusing on what’s excluded, these dishes highlight all the vibrant flavors you can add with herbs, coconut, quality proteins, and a rainbow of vegetables. Each meal supports healing without sacrificing comfort or variety.

Weekly Dinner Lineup: AIP-Approved Inspiration

From one-pot meals to satisfying bowls to family-friendly favorites, here are a few ideas from Heal Me Delicious’s collection to spark your meal rotation:

  • AIP Chicken and Bacon “Ranch” Casserole – Creamy, hearty, and loaded with veggies.
  • Sweet Potato Shepherd’s Pie – A comforting classic with an AIP twist.
  • Ginger-Garlic Salmon – Zesty and quick for weeknights.
  • Tender Slow-Cooked Beef Stew – Richly flavored, perfect for make-ahead.
  • Lemon-Herb Turkey Meatballs – Juicy and adaptable for meal prep.

Nourishing Ingredients for Healing Dinners

[ingredients]
– Chicken breasts or thighs
– Fresh wild-caught salmon fillets
– Lean ground turkey or beef
– Uncured AIP-compliant bacon
– Sweet potatoes and Japanese yams
– Fresh leafy greens (kale, spinach, arugula)
– Cruciferous veggies (broccoli, cauliflower)
– Zucchini and carrots
– Coconut cream, coconut aminos
– Bone broth (homemade or AIP-compliant)
– Garlic, ginger, fresh herbs (rosemary, thyme, basil)
– Avocado oil, olive oil
– Lemons and limes
– Sea salt and AIP-friendly seasonings
[/ingredients]

💡Meal Planning Tip: Save this recipe collection to instantly generate an organized shopping list, sorted by grocery store section—making AIP meal planning and shopping seamless and stress-free.

CookifyAI meal planning interface

Instructions (General Process for Stress-Free AIP Dinners)

  1. Pick your proteins (such as chicken, salmon, turkey, or beef) and select your favorite AIP recipe from the list above.
  2. Prep vegetables and herbs, dicing, slicing, and washing as needed. Many recipes are one-pan or sheet pan for quick assembly and cleanup.
  3. Prepare healing flavor bases: Sauté garlic, ginger, and fresh herbs in olive or avocado oil before adding proteins or liquids.
  4. Follow the recipe instructions for combining proteins, vegetables, bone broth, and coconut-based sauces. Season generously with sea salt and herbs.
  5. Simmer, roast, bake, or slow cook until flavors meld and proteins are cooked through. Most recipes are complete in 30–45 minutes.
  6. Serve garnished with fresh herbs or a squeeze of lemon for brightness.

Serving Suggestions & Pairings

Pair protein mains with simple sides like roasted root veggies, fresh sautéed greens, or a crisp salad with olive oil. For an extra boost of flavor, offer homemade AIP “ranch” or coconut yogurt sauces. These dinners are versatile—double recipes for leftovers or freeze for easy future meals.

Nutritional Information and Serving Size

Serving sizes vary—most recipes provide 3–4 portions with generous amounts of vegetables and protein. Each dish is macronutrient-balanced, free from grains and dairy, and tailored to support gut health, making them ideal for those on an AIP or paleo meal plan.

Diverse and Flavorful AIP Dinners (Recap)

These 15 easy Autoimmune Protocol dinner recipes prove that eating for healing can be just as satisfying as any other dinner routine. Bold flavors, nutrient-dense produce, and flexible prep make them perfect for anyone seeking wholesome and delicious meals.

Weekly Meal Planning

Take the guesswork out of healthy eating with smart weekly meal planning. Save and schedule these AIP recipes to your meal plan for effortless shopping and dinner prep.

Planning Benefits:

  • Automatically tallies ingredient totals for all meals on your plan
  • Sorts your shopping list by store sections (produce, meat, pantry)
  • Reduces duplicate purchases and forgotten items
  • Streamlines meal prep—prep batch ingredients and cook once, eat twice

Pro tip: When you schedule multiple AIP recipes, see exactly how many sweet potatoes or proteins you’ll need across your week, saving money and minimizing food waste.

Cook and Prep Times

Prep Time: 15–20 minutes per dish
Cook Time: 25–40 minutes per dish
Total Time: 40–60 minutes per meal (many dishes scale up or freeze for easy future dinners)

Enjoy discovering new favorites and nutritious comfort with these easy AIP-friendly dinners!

Sizzling Paleo Carne Asada Bowl: A Whole30 & AIP-Friendly Meal Prep Marvel

Paleo Carne Asada Bowl (Whole30, AIP-friendly)

Introduction

The Paleo Carne Asada Bowl offers all the bold, zesty flavors of traditional steak bowls, but in a way that’s cleaner, allergen-friendly, and perfect for anyone following a Paleo, Whole30, or AIP (Autoimmune Protocol) lifestyle. With marinated steak, vibrant veggies, and wholesome toppings, it’s a satisfying, nutrient-dense meal you can whip up for quick weeknight dinners or make ahead for lunch.

Why Try This Paleo Carne Asada Bowl?

This recipe sets itself apart with a punchy citrus-garlic marinade for the beef and a customizable, colorful base. It’s completely grain-free and dairy-free without compromising on taste—making it a crowd pleaser for family dinners and gatherings, whether your guests are following special diets or not.

How to Make the Perfect Carne Asada Marinade

The secret’s in the marinade: fresh lime and orange juices mingle with garlic, olive oil, and smoky spices (or AIP-friendly substitutes), infusing flank or skirt steak with irresistible flavor. For AIP compliance, simply omit or swap out nightshades (like chili powder) and any non-compliant spices. Marinate the steak for at least 2 hours, or overnight for more depth.

Bowls Built for Flavor and Flexibility

Build a base with cauliflower rice or mixed greens, then top with juicy, grilled steak and fresh veggies—think sliced radishes, avocado, and cilantro. Add pickled onions or simple guacamole for extra punch, and you’ll have a meal that’s as nutritious as it is delicious.

Serving Ideas for Your Carne Asada Bowls

Serve your bowls with a squeeze of lime, a drizzle of compliant avocado oil crema, and extra herbs. For crunch, sprinkle with pumpkin seeds or toasted coconut flakes if AIP nuts are off-limits. This dish works well for a hearty lunch, a crowd-pleasing dinner, or layered into meal prep containers.

Nutritional Information and Serving Size

This recipe makes about 4 filling bowls. Each serving contains high-quality protein, plentiful fiber, and healthy fats, generally around 400–500 calories depending on your toppings. With no added sugar or grains, it fuels your body while keeping energy levels steady.

Paleo Carne Asada Bowl Recap

This bowl brings together zesty marinated steak, clean ingredients, and a satisfying mix of textures—making it a winner for anyone seeking bold flavor and wellness on one plate.

[ingredients]
For the Steak:
1.5 lbs flank or skirt steak
1/4 cup olive oil or avocado oil
Juice of 1 large orange
Juice of 2 limes
3 cloves garlic, minced
1 tsp dried oregano
1 tsp cumin (omit for AIP)
1/2 tsp chili powder or smoked paprika (omit for AIP)
1/2 tsp sea salt
1/4 tsp black pepper (omit for AIP)

For the Bowls:
4 cups cauliflower rice (or mixed salad greens)
1 cup cherry tomatoes, halved (omit for AIP)
1 avocado, sliced
1/4 cup fresh cilantro, chopped
1/3 cup pickled red onions (optional)
1/2 cup radishes, sliced
Lime wedges
Optional toppers: compliant guacamole, pumpkin seeds, or toasted coconut flakes
[/ingredients]

💡Meal Planning Tip: Save this recipe to automatically generate an organized shopping list with all ingredients sorted by store section—perfect for efficient grocery trips and seamless Paleo meal planning.

CookifyAI meal planning interface

Instructions

  1. In a bowl or zip-top bag, whisk together oil, orange juice, lime juice, garlic, oregano, and all spices. Adjust for AIP compliance by omitting or swapping out non-compliant seasonings.
  2. Add steak, coat thoroughly, and marinate at least 2 hours (overnight for best flavor).
  3. Heat grill or grill pan over medium-high. Remove steak from marinade, pat dry, and grill 3–5 minutes per side for medium-rare. Let rest for 5 minutes, then slice thinly across the grain.
  4. If using, sauté riced cauliflower until tender or prep salad greens for the bowl base.
  5. Assemble bowls: spoon cauliflower rice or greens into each bowl and top with sliced steak, avocado, pickled onions, cherry tomatoes, radishes, and cilantro. Add extra toppings as desired.
  6. Finish with a squeeze of lime and serve immediately, or store components separately for meal prep.

Weekly Meal Planning

This Paleo Carne Asada Bowl is a meal prep MVP. Save and schedule this recipe to your CookifyAI meal plan to automatically calculate total ingredient needs and consolidate your shopping list—especially useful when pairing with other Paleo or Whole30 recipes!

Planning Benefits:

– Consolidates ingredients across recipes for streamlined shopping
– Organizes your grocery list by store section for faster trips
– Minimizes food waste and prevents accidental duplicate buys
– Makes sticking to health goals with specific dietary needs simpler than ever

Pro tip: Schedule your recipes to easily see which ingredients overlap with other planned meals, ensuring you only buy what you need—perfect for batch prepping flavorful, nourishing bowls all week long.

Cook and Prep Times

Prep Time: 15 minutes (plus at least 2 hours marinating)
Cook Time: 15 minutes
Total Time: 30 minutes (plus marinating time)

Paleo Perfection: Creamy Maple Dijon Chicken with Bacon Delight

Creamy Maple Dijon Chicken with Bacon (Paleo)

Introduction

Creamy Maple Dijon Chicken with Bacon (Paleo) merges savory, smoky, and subtly sweet flavors for a dish that’s as sophisticated as it is satisfying. This recipe is a go-to for anyone wanting a crowd-pleasing main that’s naturally gluten and dairy-free. With crisp bacon, tender chicken, and a luscious sauce, this dish makes weeknight dinners both delicious and memorable.

Flavorful, Easy Creamy Maple Dijon Chicken with Bacon

The reason this recipe shines is its harmonious blend of creamy coconut milk, tangy Dijon mustard, and a touch of pure maple syrup, all tied together with the umami punch of bacon. It’s a simple skillet meal that comes together quickly, yet feels restaurant-worthy—making it perfect for both family meals and special gatherings.

The Ultimate Paleo Cream Sauce

Skip the dairy and opt for coconut milk, which delivers a rich, silky sauce. The addition of Dijon mustard brings depth and zing, while maple syrup lends warmth without overpowering sweetness. This balance lets the chicken and bacon take center stage, creating a dish that hits all the right notes without any processed ingredients.

How to Bring It All Together

Start by crisping your bacon, then use the rendered fat to sear the chicken. After a quick sauté, deglaze the pan with broth and scrape up flavorful bits. Whisk together your creamy sauce, pour it in, and simmer gently—infusing the chicken with flavor while naturally thickening the sauce. Serve garnished with fresh herbs for a truly impressive finish.

Serving Suggestions for Maximum Impact

Pair this Creamy Maple Dijon Chicken with Bacon with cauliflower rice, roasted root vegetables, or a crisp green salad for a complete Paleo meal. The velvety sauce doubles as a great drizzle for veggies, and leftovers are even tastier the next day—making it a perfect option for meal prepping.

Nutritional Information and Serving Size

This recipe yields 4 hearty servings. Each serving is approximately 400-450 calories, with healthy fats, quality protein, and minimal carbs, aligning well with Paleo principles. The sauce is rich but clean, ensuring you stay on track without sacrificing flavor.

Flavorful, Easy Creamy Maple Dijon Chicken with Bacon (Recap)

Enjoy a skillet meal that tastes indulgent but fits perfectly in a Paleo meal plan. The blend of bacon, maple, and Dijon elevates simple ingredients into something crowd-pleasing and inspiring—no dairy, no gluten, just pure comfort and taste.

[ingredients]
4 boneless, skinless chicken breasts (or thighs)
6 slices Paleo-friendly bacon
1 cup full-fat coconut milk (from a can, well stirred)
3 tablespoons Dijon mustard
2 tablespoons pure maple syrup
1/2 cup chicken broth (look for Paleo-compliant)
1 tablespoon olive oil or avocado oil
1 teaspoon garlic powder
1/2 teaspoon onion powder
Salt and pepper, to taste
Fresh parsley or chives, for garnish
[/ingredients]

💡Meal Planning Tip: Save this recipe to automatically generate an organized shopping list with all ingredients sorted by store section—perfect for efficient grocery trips and meal planning.

CookifyAI meal planning interface

Instructions

  1. In a large skillet, cook bacon over medium heat until crispy. Transfer bacon to a plate lined with paper towels and set aside. Reserve about 1 tablespoon of bacon fat in the skillet.
  2. Season chicken breasts (or thighs) with garlic powder, onion powder, salt, and pepper.
  3. Add the oil to the skillet. Sear chicken on both sides until golden (about 3-4 minutes per side) and cooked through. Remove chicken and set aside with the bacon.
  4. Pour chicken broth into the pan and scrape up any browned bits. Stir in the coconut milk, Dijon mustard, and maple syrup. Bring to a simmer, whisking until smooth and slightly thickened (about 3-4 minutes).
  5. Return chicken to skillet, nestling in the sauce. Crumble bacon over top. Simmer another 2-3 minutes, spooning sauce over chicken to infuse flavor.
  6. Garnish generously with chopped parsley or chives, and serve hot with extra sauce.

Weekly Meal Planning

Pulled together in a single skillet, this savory-sweet dish is meal prep magic and holds up beautifully for leftovers. Save and schedule this recipe to plan your week and let CookifyAI calculate total ingredient needs—no more guessing or forgetting what to buy.

Planning Benefits:

– Adds up total ingredient amounts across recipes for your week
– Automatically sorts your shopping list by store section
– Eliminates duplicate purchases and helps avoid kitchen waste
– Streamlines shopping and batch cooking for your Paleo lifestyle

Pro tip: Planning this alongside other Paleo dishes in CookifyAI means your shopping list is smart—so if you need coconut milk or chicken in other recipes, the list consolidates for you. Perfect for prepping ahead and sticking to your healthy eating goals.

Cook and Prep Times

Prep Time: 10 minutes
Cook Time: 25 minutes
Total Time: 35 minutes

Whole30 Enchiladas: A Wholesome Twist on a Tex-Mex Classic

Best Whole30 Enchiladas

Introduction

Whole30 doesn’t mean sacrificing the comfort of your favorite classic recipes. These Best Whole30 Enchiladas bring the bold, satisfying flavors of traditional enchiladas with a wholesome twist that skips dairy, grains, and added sugars. With a rich homemade sauce and a hearty filling, this meal is a weeknight winner that’s as nourishing as it is crave-worthy.

Why These Are the Best Whole30 Enchiladas

What sets this recipe apart is its ability to deliver all the spicy, saucy goodness of enchiladas—without any non-compliant ingredients. By using naturally grain-free tortillas and fresh, high-quality protein, you get a vibrant dish that’s deeply comforting and crowd-pleasing. The savory homemade enchilada sauce ensures you’re getting all the flavor with none of the additives.

The Perfect Whole30 Enchilada Filling

The secret to a truly great enchilada is a flavorful, moist filling. Here, juicy shredded chicken pairs with sautéed bell peppers and onions, while a touch of homemade Whole30 enchilada sauce brings it all together. If you prefer, swap chicken for ground turkey, beef, or even roasted vegetables for a delicious plant-based version.

How to Assemble Grain-Free Enchiladas

Once your tortillas are warmed and pliable, arrange them on a counter and fill each with the savory mixture. Carefully roll them up, lay them seam-side down in a baking dish, and generously spoon over more homemade enchilada sauce. A quick bake in the oven melds all the flavors and ensures bubbly, delicious results every time.

Serving Suggestions for a Show-Stopping Whole30 Enchilada Dinner

Top your enchiladas with avocado slices, fresh cilantro, and a squeeze of lime for the perfect finishing touch. Serve alongside cauliflower rice or a crisp green salad for a balanced, Whole30-compliant meal that will keep everyone at the table coming back for seconds.

Nutritional Information and Serving Size

This recipe yields approximately 4 generous servings of enchiladas. Each serving is high in protein, full of fiber from veggies, and completely free of grains, dairy, and added sugars, making it perfect for your Whole30 journey.

Best Whole30 Enchiladas (Recap)

These enchiladas offer all your favorite flavors—adapted for Whole30. They’re perfect for meal prep, family dinners, or casual entertaining, and guaranteed to satisfy any Tex-Mex craving in a healthier, cleaner way.

[ingredients]
For the enchiladas:
– 2 cups cooked shredded chicken (rotisserie or poached)
– 1 medium yellow onion, chopped
– 1 bell pepper, thinly sliced
– 2 cloves garlic, minced
– 1 tablespoon olive oil or avocado oil
– 1/2 teaspoon smoked paprika
– 1/2 teaspoon cumin
– Salt and pepper, to taste
– 8 Whole30-compliant tortillas (such as Siete or homemade almond flour)
– 1/4 cup fresh cilantro, chopped (plus more for serving)
– 1 avocado, for topping
– 1 lime, cut into wedges

For the Whole30 enchilada sauce:
– 1 (14 oz) can tomato sauce (unsweetened, no added sugars)
– 1/2 cup chicken broth (no sugar or additives)
– 2 tablespoons olive oil or avocado oil
– 2 tablespoons chili powder
– 1 teaspoon garlic powder
– 1 teaspoon onion powder
– 1 teaspoon cumin
– 1/2 teaspoon smoked paprika
– 1/2 teaspoon sea salt
– 1/4 teaspoon black pepper
[/ingredients]

💡Meal Planning Tip: Save this recipe to automatically generate an organized shopping list with all ingredients sorted by store section—perfect for efficient grocery trips and streamlined Whole30 meal planning.

CookifyAI meal planning interface

Instructions

  1. Preheat your oven to 375°F. Lightly grease a 9×13-inch baking dish.
  2. Heat olive oil in a large skillet over medium heat. Add onions and bell peppers, sautéing until softened (about 5 minutes). Stir in garlic, paprika, cumin, salt, and pepper. Cook for another minute until fragrant.
  3. Add shredded chicken to the pan, tossing until evenly combined with vegetables. Remove from heat and stir in half the fresh cilantro.
  4. For the enchilada sauce, combine all sauce ingredients in a saucepan. Bring to a simmer over medium heat and cook for 5–7 minutes, stirring occasionally, until slightly thickened. Taste and adjust seasoning as desired.
  5. Warm tortillas according to package instructions until pliable. Spread 1/2 cup enchilada sauce in the bottom of your prepared baking dish.
  6. Place about 1/4 cup of chicken filling on each tortilla. Roll up and place seam-side down in the baking dish. Repeat with all tortillas.
  7. Pour remaining enchilada sauce evenly over the top of the enchiladas.
  8. Bake uncovered for 18–20 minutes, until sauce is bubbling. Remove from oven and let cool for 5 minutes.
  9. Top with avocado, extra cilantro, and a squeeze of lime before serving.

Weekly Meal Planning

This recipe is perfect for meal prepping and planning a satisfying, Whole30 week. Save and schedule this recipe in your meal plan to automatically create consolidated shopping lists, ensuring you won’t forget a single compliant ingredient.

Planning Benefits:

  • Automatic calculation of total ingredient amounts across all planned recipes
  • Shopping lists organized by grocery section for faster trips
  • Avoids duplicate purchases and food waste
  • Makes sticking to your Whole30 plan easy and organized

Pro tip: Planning several Whole30 recipes? Schedule your week’s meals and get one streamlined, combined shopping list—no guesswork, no missing items!

Cook and Prep Times

Prep Time: 20 minutes
Cook Time: 25 minutes
Total Time: 45 minutes

Quick Paleo Dinner Delight: Garlic-Lime Chicken & Roasted Veggies in 30 Minutes

Quick Paleo Dinner Recipes

Introduction

When you’re short on time but big on flavor, quick Paleo dinner recipes offer the perfect solution for a wholesome, satisfying meal that stays true to your clean-eating goals. With nourishing ingredients and straightforward steps, these recipes bring convenience and variety to your weeknight table—no need for compromise, just great taste and balanced nutrition.

Why Quick Paleo Dinner Recipes Win Every Time

The beauty of quick Paleo dinners is how they capture natural flavors with minimal fuss. Lean proteins, hearty vegetables, and healthy fats harmonize in vibrant dishes that deliver on taste. What’s more, these meals can easily be scaled up or down, making them ideal for solo dinners or family feasts. Versatile and crowd-pleasing, they’re a surefire way to keep dinner exciting and stress-free.

Featured Recipe: Paleo Garlic-Lime Chicken with Roasted Veggies

Succulent chicken thighs or breasts are bathed in a zesty garlic-lime marinade, then roasted atop a rainbow of seasonal veggies. This one-pan meal means less cleanup and more time enjoying your flavorful, nutrient-rich dinner. Tangy, bright, and ready in about 30 minutes—it’s the kind of meal that makes healthy eating feel effortless.

Prepping Your Paleo Ingredients for Success

A key to speedy Paleo dinners is keeping pantry staples like olive oil, coconut aminos, and spices on hand. For this recipe, you’ll need juicy chicken, fresh lime, garlic, and your favorite selection of Paleo-approved vegetables (think bell peppers, zucchini, or broccoli). A quick chop and toss are all it takes for a vibrant, stress-free meal.

[ingredients]
4 boneless, skinless chicken thighs (or breasts)
2 tablespoons olive oil
3 cloves garlic, minced
Juice and zest of 2 limes
1 teaspoon paprika
Sea salt and freshly ground black pepper, to taste
4 cups assorted vegetables (zucchini, bell peppers, broccoli)
Fresh cilantro or parsley, for garnish
[/ingredients]

💡Meal Planning Tip: Save this recipe to automatically generate an organized shopping list sorted by store section—perfect for efficient Paleo grocery trips and seamless weekly planning.

CookifyAI meal planning interface

Instructions

  1. Preheat your oven to 425°F (220°C). Line a large baking sheet with parchment paper.
  2. In a large bowl, whisk together olive oil, lime juice and zest, minced garlic, paprika, salt, and pepper.
  3. Add chicken to the bowl, tossing to thoroughly coat. Let marinate while prepping vegetables, or up to 15 minutes for more intense flavor.
  4. Spread chopped vegetables evenly over the baking sheet. Drizzle with a bit more olive oil, and season with salt and pepper.
  5. Nestle chicken pieces on top of the veggies. Roast for 20–25 minutes, or until chicken is cooked through and vegetables are tender.
  6. Garnish with fresh cilantro or parsley before serving. Enjoy hot, straight from the oven!

Serving Suggestions for Quick Paleo Dinner Recipes

Pair your garlic-lime chicken and veggies with a fresh side salad, cauliflower rice, or a crisp cabbage slaw for a complete Paleo meal. Leftovers make an excellent next-day lunch—just reheat or enjoy at room temperature for a nourishing, portable option.

Nutritional Information and Serving Size

This recipe yields 4 servings. Each serving contains approximately 320–380 calories, depending on the vegetables and chicken parts used. You get a balanced mix of lean protein, healthy fats, and fiber-rich veggies—all while keeping your dinner light and energizing.

Quick Paleo Dinner Recipes (Recap)

Whipping up a delicious, Paleo-friendly dinner in just 30 minutes is totally doable with this garlic-lime chicken recipe. It’s flavorful, flexible, and perfect for busy nights when you want to nourish yourself and your family without sacrificing taste or wholesomeness.

Weekly Meal Planning

This recipe is a fantastic addition to your weekly meal rotation. Save and schedule this recipe within a personalized plan to keep dinner decisions effortless—and ingredient prep on track.

Planning Benefits:

  • Automatically calculates total ingredient needs across multiple Paleo recipes
  • Organizes shopping lists by grocery aisles for quick, stress-free trips
  • Prevents duplicates and ensures nothing gets forgotten
  • Makes it easy to stick to your Paleo goals, even during busy weeks

Pro tip: When you’re prepping for the week, schedule more Paleo recipes to see overlapping ingredients like herbs, oils, and proteins, eliminating guesswork and minimizing food waste.

Cook and Prep Times

Prep Time: 10 minutes
Cook Time: 20–25 minutes
Total Time: 30–35 minutes

Whole30 Marry Me Chicken: A Creamy, Dairy-Free Delight for Weeknights

Whole30 Marry Me Chicken

Introduction

Whole30 Marry Me Chicken is the answer when you want maximum flavor without sacrificing wholesome ingredients. This naturally dairy-free, grain-free take on the classic “Marry Me Chicken” delivers juicy chicken bathed in a creamy, luscious sauce—minus the cream. It’s the perfect family dinner for busy weeknights or impressive enough for guests, inviting everyone to the table for seconds.

Irresistible Flavor, Whole30 Approved

What sets this dish apart is its ability to capture the rich, tangy, and sweet flavors of the classic recipe without any off-limits Whole30 ingredients. By using coconut milk, sun-dried tomatoes, and fresh herbs, you achieve creamy texture and depth that’s satisfying and nutritious. Each bite is a harmonious blend of savory chicken, a hint of garlic, and the mild sweetness from sun-dried tomatoes.

Making the Creamy Sauce—Whole30 Style

Start with a base of full-fat coconut milk to mimic classic creaminess. Sauté minced garlic and onions, then stir in broth, Dijon mustard, and nutritional yeast (for a cheesy undertone). Simmer with sun-dried tomatoes, then finish with a handful of fresh basil for a bright pop of flavor. This smarter sauce keeps the meal compliant, comforting, and crave-worthy.

How to Serve Whole30 Marry Me Chicken

Serve your chicken atop cauliflower rice, zucchini noodles, or roasted vegetables to keep things Whole30-friendly. The saucy chicken is also excellent alongside a simple green salad. Garnish with torn fresh basil and an optional sprinkle of crushed red pepper for a little extra heat. Every element comes together to create a colorful, delicious plate.

Nutritional Information and Serving Size

This recipe makes approximately 4 servings. Each portion includes lean protein and healthy fats, with modest calories (about 350–400 per serving). Since no grains or dairy are used, it’s ideal for anyone seeking whole-food, allergy-friendly meals.

Whole30 Marry Me Chicken (Recap)

With restaurant-quality flavor and weeknight-friendly prep, this dish will convert even picky eaters to Whole30 fans. The creamy, tangy sauce and tender chicken make it a recipe you’ll want on regular rotation.

[ingredients]
4 boneless, skinless chicken breasts (about 1.5 lbs)
1 teaspoon salt
1/2 teaspoon black pepper
1 tablespoon olive oil or ghee (Whole30 compliant)
3 garlic cloves, minced
1 small yellow onion, diced
1/2 cup drained sun-dried tomatoes, chopped (in oil, but patted dry)
1 teaspoon Italian seasoning
1 cup full-fat coconut milk (canned)
1/2 cup chicken broth (Whole30 compliant)
1 tablespoon Dijon mustard (check label for compliant)
2 tablespoons nutritional yeast
Fresh basil, for garnish
Crushed red pepper, optional
[/ingredients]

💡Meal Planning Tip: Save this recipe to automatically generate an organized shopping list with all ingredients sorted by store section—perfect for efficient grocery trips and stress-free meal planning.

CookifyAI meal planning interface

Instructions

  1. Pat chicken breasts dry, then season with salt and pepper on both sides.
  2. Heat olive oil or ghee in a large skillet over medium heat. Once hot, sear chicken breasts 4–5 minutes per side until golden brown. Transfer to a plate.
  3. Add garlic and diced onion to the skillet. Sauté until onion softens, about 3 minutes.
  4. Stir in sun-dried tomatoes and Italian seasoning. Cook another minute to release flavors.
  5. Pour in coconut milk, chicken broth, Dijon mustard, and nutritional yeast. Stir well, scraping up brown bits from the pan.
  6. Return chicken to the pan. Spoon some sauce over the tops, then cover and simmer for 8–10 minutes, or until chicken is cooked through (internal temp 165°F).
  7. Uncover, let sauce thicken for 2–3 more minutes. Taste and adjust seasoning as needed.
  8. Top with fresh basil and optional crushed red pepper before serving.

Weekly Meal Planning

This Whole30 Marry Me Chicken is ideal for meal prep—it reheats wonderfully and pairs with plenty of compliant sides. Save and schedule this recipe for easy, planned dinners and benefit from streamlined ingredient lists.

Planning Benefits:

  • Automatically calculates total ingredient quantities for your weekly meals
  • Organizes shopping lists by store section for quick, efficient grocery trips
  • Eliminates forgotten items or duplicate purchases
  • Helps you plan balanced Whole30 weeks with no stress

Pro tip: Planning Whole30? Schedule this meal alongside all your week’s dinners—CookifyAI will merge similar ingredients and adjust quantities, so you only buy exactly what you need.

Cook and Prep Times

Prep Time: 10 minutes
Cook Time: 25 minutes
Total Time: 35 minutes

Enjoy crowd-pleasing comfort food with the healthy twist of Whole30—this Marry Me Chicken will win everyone over and make meal times a breeze!

Ancestral Comfort in a Bowl: The Ultimate Turkey Pot Pie Soup Recipe

Turkey Pot Pie Soup – Ancestral Nutrition

Introduction

Turkey Pot Pie Soup is the ultimate comfort food, combining the cozy flavors of traditional turkey pot pie with the simplicity and heartiness of a one-pot soup. Creamy, full of tender turkey and colorful vegetables, and finished with fragrant herbs, this recipe brings old-fashioned warmth that’s tailor-made for chilly nights or family gatherings. Its straightforward preparation and crowd-pleasing appeal make it a delightful weeknight staple or a clever way to use leftover holiday turkey.

A Crowd-Pleasing Comfort in Every Spoonful

What makes this Turkey Pot Pie Soup special is its rich, creamy base bursting with ancestral flavor, nourishing vegetables, and chunks of turkey in every bite. Blending the nostalgia of pot pie with an easier, lighter soup form, this dish is both satisfying and surprisingly easy to prepare. Whether craving classic flavors or seeking a wholesome lunch idea, this soup is sure to impress the whole family.

The Secret to a Creamy, Hearty Soup Base

For the most luscious soup, start by sautéing classic aromatics: onion, celery, and carrots. Then simmer with savory broth, potatoes, and plenty of turkey. A splash of milk or cream adds classic pot pie richness, while herbs like thyme and parsley boost the old-world flavor. For a grain-free, truly ancestral touch, thicken the soup naturally with a simple potato mash or arrowroot, rather than flour.

Adding Turkey and Wholesome Vegetables

Use either cooked turkey breast or leftover roasted turkey for convenience. Peas, carrots, and celery provide texture and a slight natural sweetness, while potatoes add body and silkiness. Feel free to toss in leafy greens like spinach for a nutritional boost. By simmering all ingredients together, the soup becomes infused with the flavors you love from traditional pot pie filling.

Finishing and Serving for Classic Pot Pie Flavors

To bring full pot pie nostalgia, serve your Turkey Pot Pie Soup with optional buttery drop biscuits, homemade grain-free crackers, or a scattering of fresh herbs. It’s wonderfully filling on its own but can be easily customized with your family’s favorite add-ins like corn or green beans. This soup only gets better as the flavors meld, making it ideal for leftovers.

Nutritional Information and Serving Size

This recipe makes about 6 hearty servings. Each bowl provides balanced protein from turkey, plenty of veggies, and creamy richness. Expect approximately 270-350 calories per serving, depending on the milk or cream used and any additions like biscuits.

Turkey Pot Pie Soup (Recap)

Turkey Pot Pie Soup is a comforting, ancestral-inspired dish combining all the cozy flavors of the classic casserole with the nourishing simplicity of homemade soup. It’s an easy, delicious crowd-pleaser—the perfect answer for leftover turkey or when you need a hug in a bowl!

[ingredients]
• 2 tablespoons butter or ghee
• 1 medium onion, diced
• 3 medium carrots, peeled and sliced
• 2 celery stalks, sliced
• 2 cloves garlic, minced
• 1 teaspoon dried thyme (or 1 tablespoon fresh)
• 3 cups cooked turkey, chopped or shredded
• 3 medium Yukon Gold potatoes, peeled and diced
• 5 cups chicken or turkey bone broth
• 3/4 cup frozen peas
• 1/2 cup heavy cream, whole milk, or coconut milk
• 1/4 cup fresh parsley, chopped
• 1-2 teaspoons sea salt, to taste
• 1/2 teaspoon black pepper
• Optional: 1-2 teaspoons arrowroot or tapioca starch (for extra thickening), biscuits or crackers for serving
[/ingredients]

💡 Meal Planning Tip: Save this recipe to automatically generate a streamlined shopping list organized by grocery section—great for efficient trips and seamless weekly meal planning!

CookifyAI meal planning interface

Instructions

  1. In a large soup pot over medium heat, melt the butter or ghee. Add onion, carrots, and celery, and sauté for 5-7 minutes until vegetables are softened and fragrant.
  2. Add garlic and thyme. Cook for 1 minute, stirring, until aromatic.
  3. Stir in potatoes and turkey, then pour in broth. Bring to a simmer and cook for 15-20 minutes, until potatoes are fork-tender.
  4. Using a potato masher, mash some of the potatoes directly in the pot to create a naturally creamy texture (leave most pieces whole for heartiness).
  5. Add frozen peas and cream (or milk of choice). If a thicker soup is desired, dissolve arrowroot in a tablespoon of cold water and stir into soup. Let simmer 5 more minutes.
  6. Season with salt and black pepper. Stir in chopped parsley.
  7. Serve hot, with optional biscuits or crackers, and garnish with extra fresh herbs if desired.

Weekly Meal Planning

This Turkey Pot Pie Soup is fantastic for prepping ahead—it reheats beautifully, making your weeknight dinners easy and stress-free. Save and schedule this recipe in your meal plan to automatically create organized, consolidated shopping lists for all your planned recipes.

Planning Benefits:

– Quickly calculates total ingredient needs for each week
– Eliminates duplicate ingredients across recipes
– Sorts your grocery list by store section for faster shopping
– Streamlines meal prep by keeping every detail organized

Pro tip: When planning your menu with CookifyAI, see how simple it is to reuse staples like carrots and broth across multiple dishes and avoid overbuying—saving time, money, and reducing food waste.

Cook and Prep Times

Prep Time: 15 minutes
Cook Time: 30 minutes
Total Time: 45 minutes

Enjoy this flavorful, nourishing Turkey Pot Pie Soup all winter long—your family will thank you, and your meal planning routine just got easier!

Whole30 Comfort Redefined: Creamy Beef Stroganoff Without the Guilt

Healthy Whole30 Beef Stroganoff

Introduction

Hearty, satisfying, and packed with flavor, this Healthy Whole30 Beef Stroganoff is a delicious spin on a classic comfort dish. By swapping out traditional dairy and gluten ingredients, you get all the creamy, savory flavors you love—completely compatible with Whole30 guidelines. Whether you’re feeding your family or meal-prepping for the week, this recipe brings wholesome ingredients together for a crowd-pleasing, weeknight-friendly dinner.

Why You’ll Love This Whole30 Beef Stroganoff

This recipe delivers all the classic stroganoff richness without the heaviness. Thanks to a creamy sauce made with coconut milk and earthy mushrooms, you get that luscious texture in a totally healthy, dairy-free way. It’s simple to make, easily customizable, and pairs beautifully with spiralized veggies, mashed cauliflower, or even a sweet potato mash.

Finding the Perfect Whole30 Sauce

The sauce is the heart of this beef stroganoff and getting it right is easier than you think. A combo of coconut milk, beef broth, and Dijon mustard offers creaminess and tang, while sautéed mushrooms and onions add depth. Arrowroot or tapioca flour thickens the sauce while remaining Whole30-compliant, giving it a luxurious texture without any guilt.

Assembly and Serving

Brown tender strips of beef, whip up the savory mushroom sauce, and simmer everything together until the flavors meld. Serve your beef stroganoff over a bed of zucchini noodles or cauliflower rice for a nutritious, cozy meal that doesn’t sacrifice taste—or your Whole30 commitments.

Satisfying Sides and Toppings

Crown your stroganoff with fresh parsley, a sprinkle of cracked black pepper, or a squeeze of fresh lemon. Toss together a simple side salad or serve with roasted veggies for a perfectly balanced meal. This dish is designed to please both Whole30 followers and anyone who loves a hearty, satisfying dinner.

Nutritional Information and Serving Size

This recipe yields 4 hearty servings, each packed with protein and nutritious veggies and averaging about 320-350 calories per serving (depending on sides). It’s gluten-free, dairy-free, and has no added sugars, making it a great fit for healthy eating routines.

[ingredients]
1 1/4 lbs beef sirloin or flank steak, thinly sliced
1 tbsp olive oil or avocado oil
1 medium onion, thinly sliced
2 cloves garlic, minced
8 oz cremini mushrooms, sliced
1 1/4 cups full-fat coconut milk (canned)
3/4 cup beef broth (Whole30 compliant)
2 tbsp Dijon mustard (check for Whole30 compliance)
1 tbsp coconut aminos
1 1/2 tbsp arrowroot or tapioca flour
1/2 tsp sea salt
1/2 tsp black pepper
Fresh parsley, for garnish
Optional: zucchini noodles, spaghetti squash, or cauliflower rice for serving
[/ingredients]

💡Meal Planning Tip: Save this recipe to automatically generate an organized shopping list with all ingredients sorted by store section—perfect for efficient grocery trips and stress-free meal planning!

CookifyAI meal planning interface

Instructions

  1. Heat oil in a large skillet over medium-high heat. Add the sliced beef and season with salt and pepper. Sear for 1–2 minutes per side until just browned, working in batches if needed. Transfer beef to a plate and set aside.
  2. In the same skillet, add onions and sauté for 2–3 minutes until softened. Add garlic and mushrooms, cooking for another 5–6 minutes until mushrooms are browned and onions are caramelized.
  3. Reduce heat to medium. Stir in coconut milk, beef broth, Dijon mustard, and coconut aminos. Bring to a simmer.
  4. Whisk arrowroot or tapioca flour with 2 tablespoons of cold water until dissolved. Slowly stir the slurry into the simmering sauce, whisking until the sauce thickens (about 1–2 minutes).
  5. Return the seared beef (and any juices) to the pan. Simmer on low for 3–4 minutes, just until beef is cooked through and the flavors have melded.
  6. Taste and adjust salt and pepper as needed. Serve hot over your favorite Whole30-compliant base, and garnish with fresh parsley.

Weekly Meal Planning

This Healthy Whole30 Beef Stroganoff is an excellent choice for meal prep! Save and schedule this recipe to plan which days to make it and generate smart shopping lists that consolidate ingredients across all your weekly meals.

Planning Benefits:

– Automatically totals ingredient quantities from multiple meals
– Organizes shopping lists by store department for faster shopping
– Reduces forgotten items and duplicate purchases
– Simplifies meal prepping and helps you stick to Whole30

Pro tip: Add all your planned recipes for the week and let CookifyAI handle ingredient overlaps so you only buy exactly what you need. This minimizes food waste and keeps you on track with your healthy eating goals.

Cook and Prep Times

Prep Time: 15 minutes
Cook Time: 25 minutes
Total Time: 40 minutes

Keto Comfort on a Skillet: Juicy Burger Steak with Luscious Mushroom Gravy

Burger Steak with Mushroom Gravy | Easy Keto Burger Skillet Dinner

Introduction

For comfort food lovers seeking a low-carb twist on a classic, this Burger Steak with Mushroom Gravy delivers flavor and satisfaction without the bun. It combines juicy, seared burger patties with a creamy, savory mushroom gravy—all made in a single skillet for a fast, fuss-free keto dinner. Perfect for busy weeknights or anyone craving a steakhouse experience at home, this easy recipe is sure to become a keto staple.

A Crowd-Pleasing Keto Dinner Made Simple

What makes this dish a standout is its universally loved flavors—the juicy burger steaks and the luscious umami of mushrooms mingled in a rich gravy. Packed with protein and healthy fats, it’s tailored for keto diets and leaves out any starchy fillers. Bonus: it’s made using everyday ingredients in one pan, streamlining cleanup and simplifying dinner prep.

The Secret to Irresistible Mushroom Gravy

The secret to a restaurant-quality mushroom gravy? Sauté the mushrooms until golden and caramelized before building the sauce. A bit of garlic, onion, and a splash of beef broth infuses the gravy with deep, meaty flavor—without the carbs. Finished with a splash of heavy cream, the sauce becomes decadently smooth, coating each patty in savory goodness.

How to Perfect the Burger Steaks

For tender, juicy burger steaks, use high-quality ground beef (80/20 for best flavor) and season generously with salt, pepper, and a pinch of Italian herbs. Form into thick patties for the ultimate sear, then cook over medium-high heat to develop a caramelized exterior while keeping the inside juicy. Rest briefly while preparing the gravy so they absorb maximum flavor when combined.

Serving Suggestions for a Satisfying Keto Skillet Meal

This skillet dinner pairs perfectly with cauliflower mash, sautéed green beans, or a simple side salad tossed in olive oil. Spoon extra mushroom gravy over the steaks and garnish with fresh parsley for a comforting, picture-perfect plate. The meal reheats well—making it an ideal prep-ahead option too!

Nutritional Information and Serving Size

This recipe yields about 4 hearty servings—each with approximately 450 to 500 calories, 32g fat, 35g protein, and just 5g net carbs (depending on gravy thickness and serving size). Gluten-free and keto-friendly, it keeps you full and satisfied while staying on track.

Burger Steak with Mushroom Gravy | Easy Keto Skillet (Recap)

This easy keto burger skillet dinner combines juicy burger steaks with a restaurant-worthy mushroom gravy—comfort food perfection, minus the carbs and the fuss.

[ingredients]
For the Burger Steaks:
1½ lbs ground beef (80/20 preferred)
1 teaspoon salt
½ teaspoon black pepper
½ teaspoon garlic powder
½ teaspoon onion powder
1 teaspoon Italian seasoning (or dried parsley)
1 tablespoon Worcestershire sauce

For the Mushroom Gravy:
2 tablespoons butter
8 oz mushrooms, sliced (cremini or button)
½ small onion, finely chopped
2 cloves garlic, minced
1 cup beef broth
¼ cup heavy cream
½ teaspoon xanthan gum (or 1 teaspoon cornstarch, optional for very rich gravy, note: cornstarch will add minimal carbs)
Salt and pepper, to taste
Chopped fresh parsley, for garnish
[/ingredients]

💡Meal Planning Tip: Save this recipe to automatically generate an organized shopping list with all ingredients sorted by store section—perfect for efficient keto meal planning and quick grocery trips.

CookifyAI meal planning interface

Instructions

  1. Prepare the burger steaks: In a large bowl, mix ground beef, salt, pepper, garlic powder, onion powder, Italian seasoning, and Worcestershire sauce. Form into 4 thick, even patties.
  2. Cook the burger steaks: Heat a large skillet over medium-high heat. Add a little oil and cook patties for 4–5 minutes per side until well browned and cooked through. Remove to a plate and keep warm.
  3. Make the mushroom gravy: Lower heat to medium. Melt butter in the skillet. Sauté onions and mushrooms until softened and golden (about 5–7 minutes). Add garlic; cook for 1 minute until fragrant.
  4. Deglaze the pan: Pour in beef broth, scraping up any browned bits. Simmer for 3–4 minutes to reduce slightly. Stir in heavy cream. If you want a thicker gravy, sprinkle xanthan gum or cornstarch and stir until thickened.
  5. Combine and serve: Return burger steaks to the skillet. Spoon mushroom gravy over each. Simmer 2–3 minutes to heat through. Taste and adjust seasoning. Garnish with chopped parsley and serve hot.

Weekly Meal Planning

Burger Steak with Mushroom Gravy is a fantastic addition to your weekly keto meal plan, offering rich flavors and meal prep ease. Save and schedule this recipe to automatically generate a consolidated shopping list, track what you’ll need, and plan your meals around busy schedules.

Planning Benefits:

  • Automatically totals all ingredient quantities across your planned keto meals
  • Sorts shopping lists by store section—reducing grocery trip time
  • Helps avoid missing ingredients or purchasing duplicates
  • Keeps your week’s meal choices organized and budget-friendly

Pro tip: Use CookifyAI to overlap meal ingredients (like ground beef or mushrooms) to cut costs and reduce food waste for meals like keto casseroles or breakfast skillets.

Cook and Prep Times

Prep Time: 10 minutes
Cook Time: 20 minutes
Total Time: 30 minutes

Enjoy a comforting keto meal—without the guilt or the guesswork!

Quick Paleo Dinner Delight: Garlic-Lime Chicken & Roasted Veggies in 30 Minutes

Quick Paleo Dinner Recipes

Introduction

When you’re short on time but big on flavor, quick Paleo dinner recipes offer the perfect solution for a wholesome, satisfying meal that stays true to your clean-eating goals. With nourishing ingredients and straightforward steps, these recipes bring convenience and variety to your weeknight table—no need for compromise, just great taste and balanced nutrition.

Why Quick Paleo Dinner Recipes Win Every Time

The beauty of quick Paleo dinners is how they capture natural flavors with minimal fuss. Lean proteins, hearty vegetables, and healthy fats harmonize in vibrant dishes that deliver on taste. What’s more, these meals can easily be scaled up or down, making them ideal for solo dinners or family feasts. Versatile and crowd-pleasing, they’re a surefire way to keep dinner exciting and stress-free.

Featured Recipe: Paleo Garlic-Lime Chicken with Roasted Veggies

Succulent chicken thighs or breasts are bathed in a zesty garlic-lime marinade, then roasted atop a rainbow of seasonal veggies. This one-pan meal means less cleanup and more time enjoying your flavorful, nutrient-rich dinner. Tangy, bright, and ready in about 30 minutes—it’s the kind of meal that makes healthy eating feel effortless.

Prepping Your Paleo Ingredients for Success

A key to speedy Paleo dinners is keeping pantry staples like olive oil, coconut aminos, and spices on hand. For this recipe, you’ll need juicy chicken, fresh lime, garlic, and your favorite selection of Paleo-approved vegetables (think bell peppers, zucchini, or broccoli). A quick chop and toss are all it takes for a vibrant, stress-free meal.

[ingredients]
4 boneless, skinless chicken thighs (or breasts)
2 tablespoons olive oil
3 cloves garlic, minced
Juice and zest of 2 limes
1 teaspoon paprika
Sea salt and freshly ground black pepper, to taste
4 cups assorted vegetables (zucchini, bell peppers, broccoli)
Fresh cilantro or parsley, for garnish
[/ingredients]

💡Meal Planning Tip: Save this recipe to automatically generate an organized shopping list sorted by store section—perfect for efficient Paleo grocery trips and seamless weekly planning.

CookifyAI meal planning interface

Instructions

  1. Preheat your oven to 425°F (220°C). Line a large baking sheet with parchment paper.
  2. In a large bowl, whisk together olive oil, lime juice and zest, minced garlic, paprika, salt, and pepper.
  3. Add chicken to the bowl, tossing to thoroughly coat. Let marinate while prepping vegetables, or up to 15 minutes for more intense flavor.
  4. Spread chopped vegetables evenly over the baking sheet. Drizzle with a bit more olive oil, and season with salt and pepper.
  5. Nestle chicken pieces on top of the veggies. Roast for 20–25 minutes, or until chicken is cooked through and vegetables are tender.
  6. Garnish with fresh cilantro or parsley before serving. Enjoy hot, straight from the oven!

Serving Suggestions for Quick Paleo Dinner Recipes

Pair your garlic-lime chicken and veggies with a fresh side salad, cauliflower rice, or a crisp cabbage slaw for a complete Paleo meal. Leftovers make an excellent next-day lunch—just reheat or enjoy at room temperature for a nourishing, portable option.

Nutritional Information and Serving Size

This recipe yields 4 servings. Each serving contains approximately 320–380 calories, depending on the vegetables and chicken parts used. You get a balanced mix of lean protein, healthy fats, and fiber-rich veggies—all while keeping your dinner light and energizing.

Quick Paleo Dinner Recipes (Recap)

Whipping up a delicious, Paleo-friendly dinner in just 30 minutes is totally doable with this garlic-lime chicken recipe. It’s flavorful, flexible, and perfect for busy nights when you want to nourish yourself and your family without sacrificing taste or wholesomeness.

Weekly Meal Planning

This recipe is a fantastic addition to your weekly meal rotation. Save and schedule this recipe within a personalized plan to keep dinner decisions effortless—and ingredient prep on track.

Planning Benefits:

  • Automatically calculates total ingredient needs across multiple Paleo recipes
  • Organizes shopping lists by grocery aisles for quick, stress-free trips
  • Prevents duplicates and ensures nothing gets forgotten
  • Makes it easy to stick to your Paleo goals, even during busy weeks

Pro tip: When you’re prepping for the week, schedule more Paleo recipes to see overlapping ingredients like herbs, oils, and proteins, eliminating guesswork and minimizing food waste.

Cook and Prep Times

Prep Time: 10 minutes
Cook Time: 20–25 minutes
Total Time: 30–35 minutes